
Overview Cloud Mobile: User's Guide
App Version: v2.4.0
Introduction
Purpose
This document is the user's manual for the Overview Cloud Mobile application. It explains the major views of the application.
Scope
The application has five major areas that are accessible either through the main page selection or from the Application Title Bar. This document displays screenshots of those areas and describes their functionality.
NOTE: While the screenshots in this manual are from the Android application, the iOS application has the same UI design. Some options shown in the screenshots will not be shown for all users.
Login
 |  |  |  |  |
NOTE: The staging label simply indicates being logged into the staging server vs. production server. Users need not worry about this.
User Credentials
On the login display, there are fields for user name and password. The Remember Me checkbox allows the system to store the last login details, eliminating the need to re-enter credentials every time.
The Login button is used to login to the Overview system. The Recover Password button provides a number to contact Overview Customer Support.
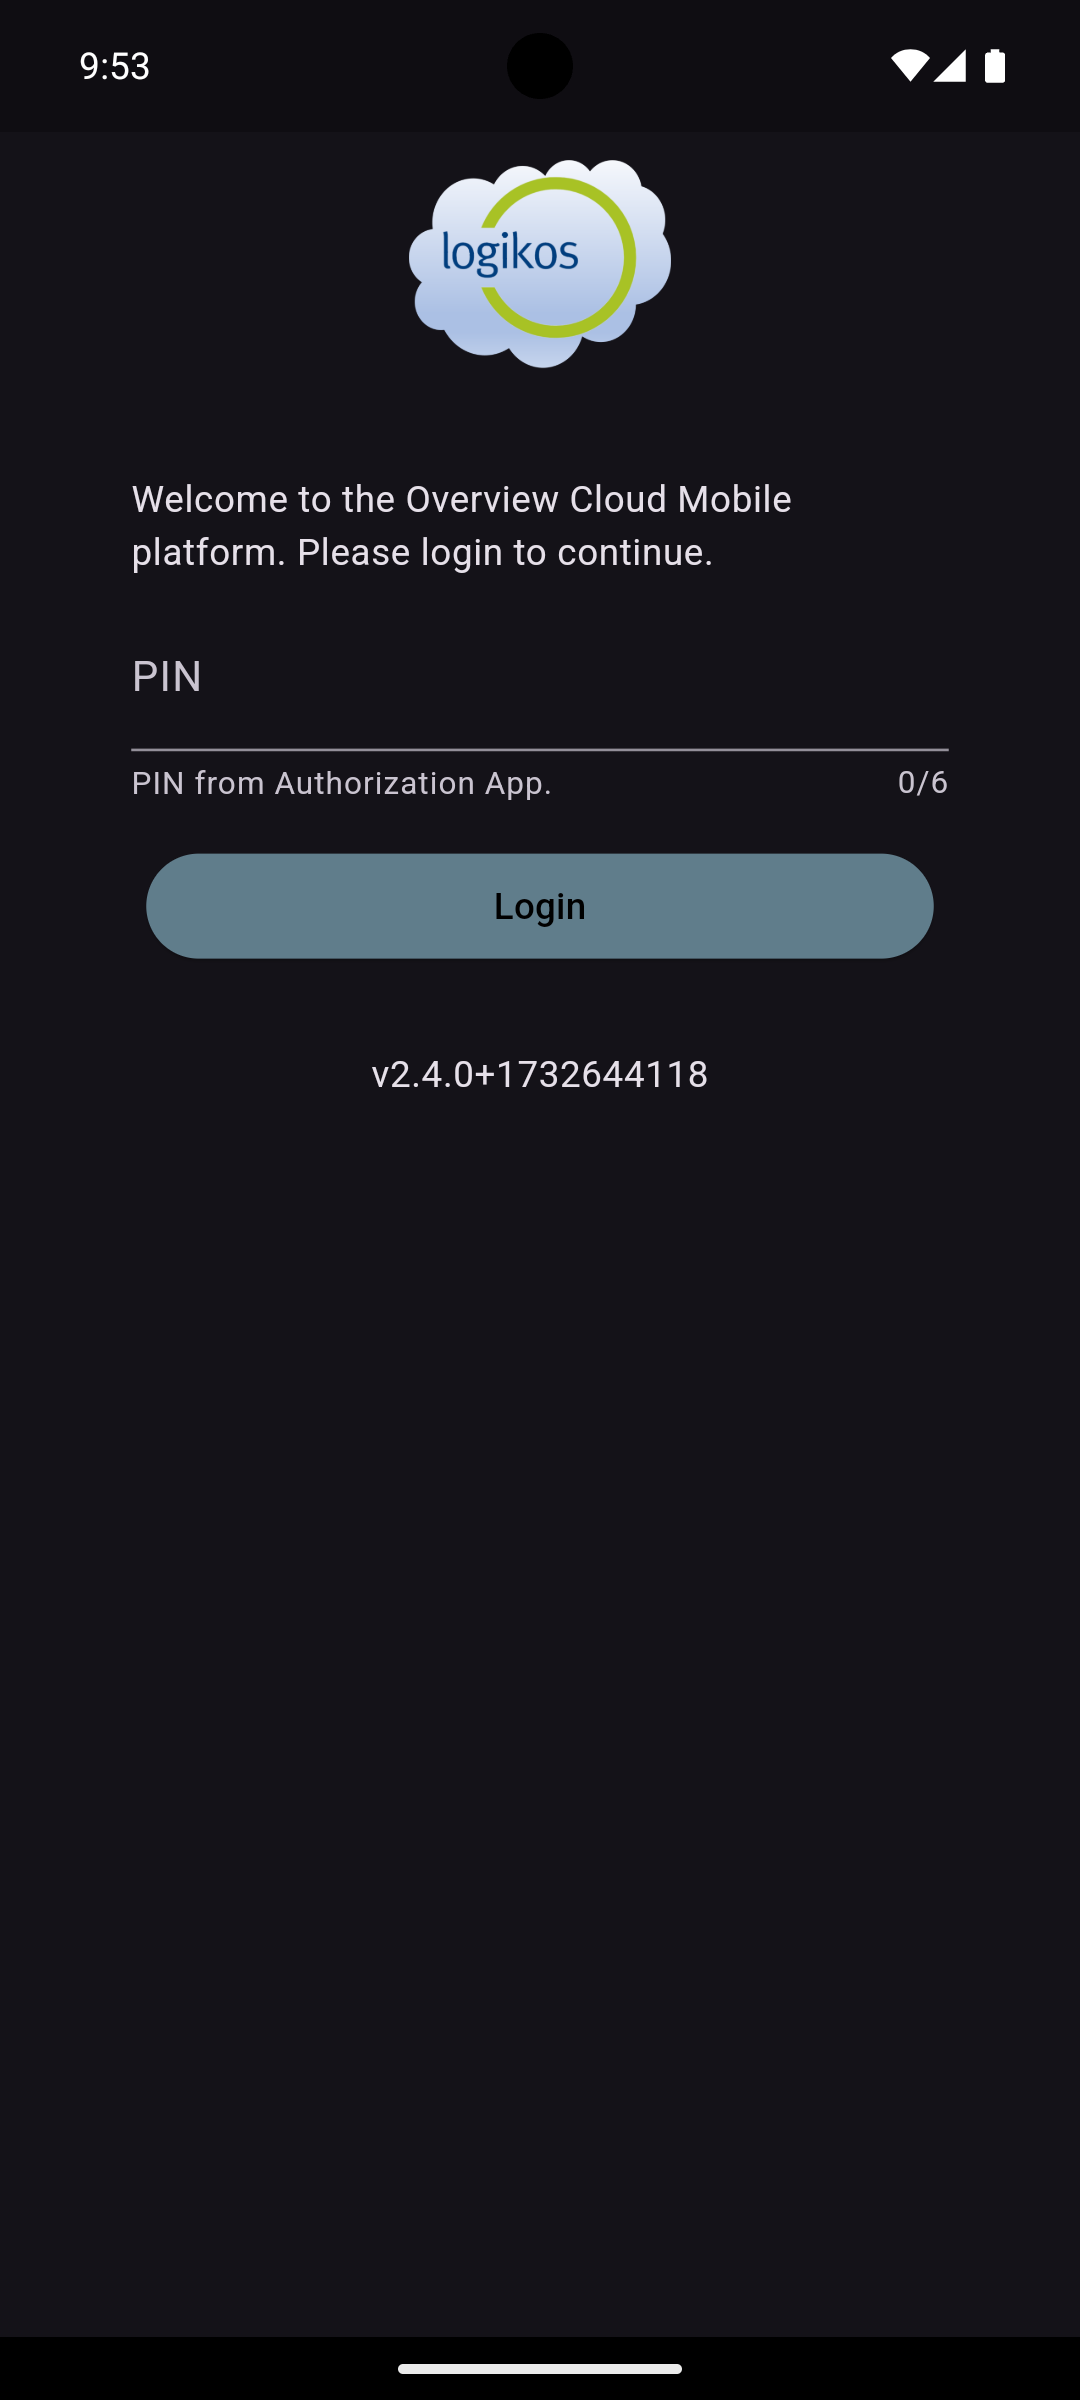
Two-Factor Authentication (2FA)
The Overview System supports 2FA. This is configured via the Overview Web Portal. When enabled, the mobile application will present a 2FA challenge requesting the PIN associated with the authenticator app. Launch the authenticator app to find the PIN. Enter it into the PIN text field, and then press the Login button.
NOTE: If the Remember Me checkbox is selected on the initial login screen, then this challenge will only occur on the first login. It will only occur again when the login token has expired.
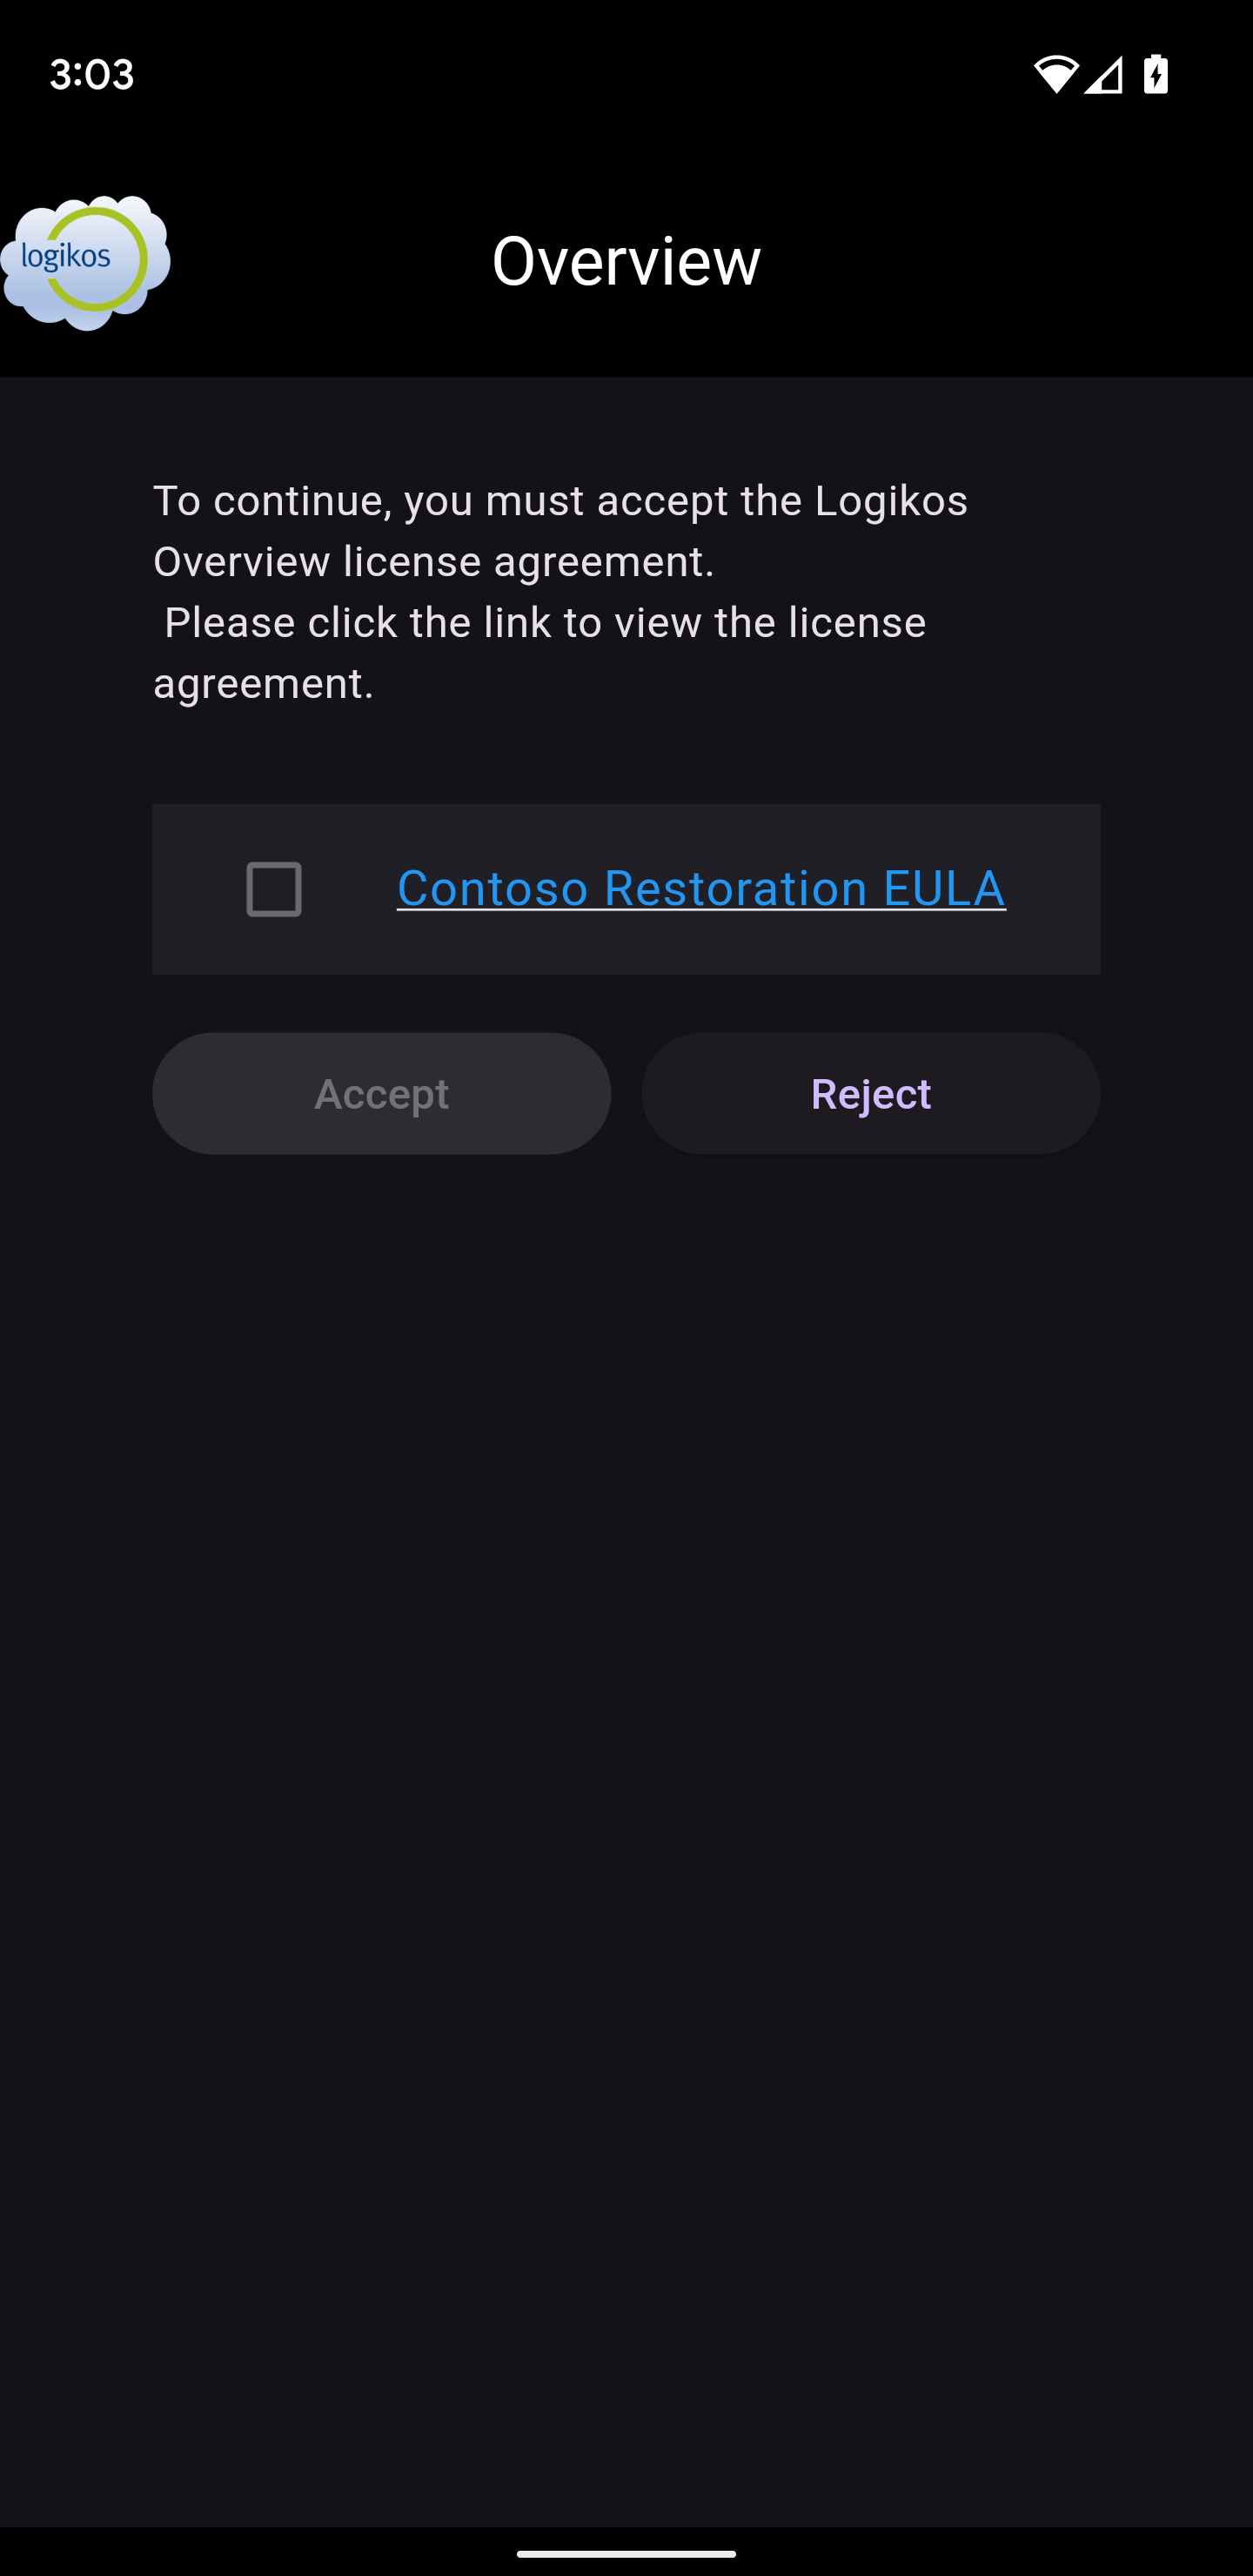
EULA Acceptance
If a customer has an End User License Agreement (EULA), logging in for the first time will navigate to the EULA Acceptance screen. This screen will list the EULA(s) that need to be accepted. Each EULA must be viewed before accepting. Once the EULA(s) have been accepted, the app will navigate to the main application screen. If the EULA(s) are not accepted, the app will navigate back to the login screen.
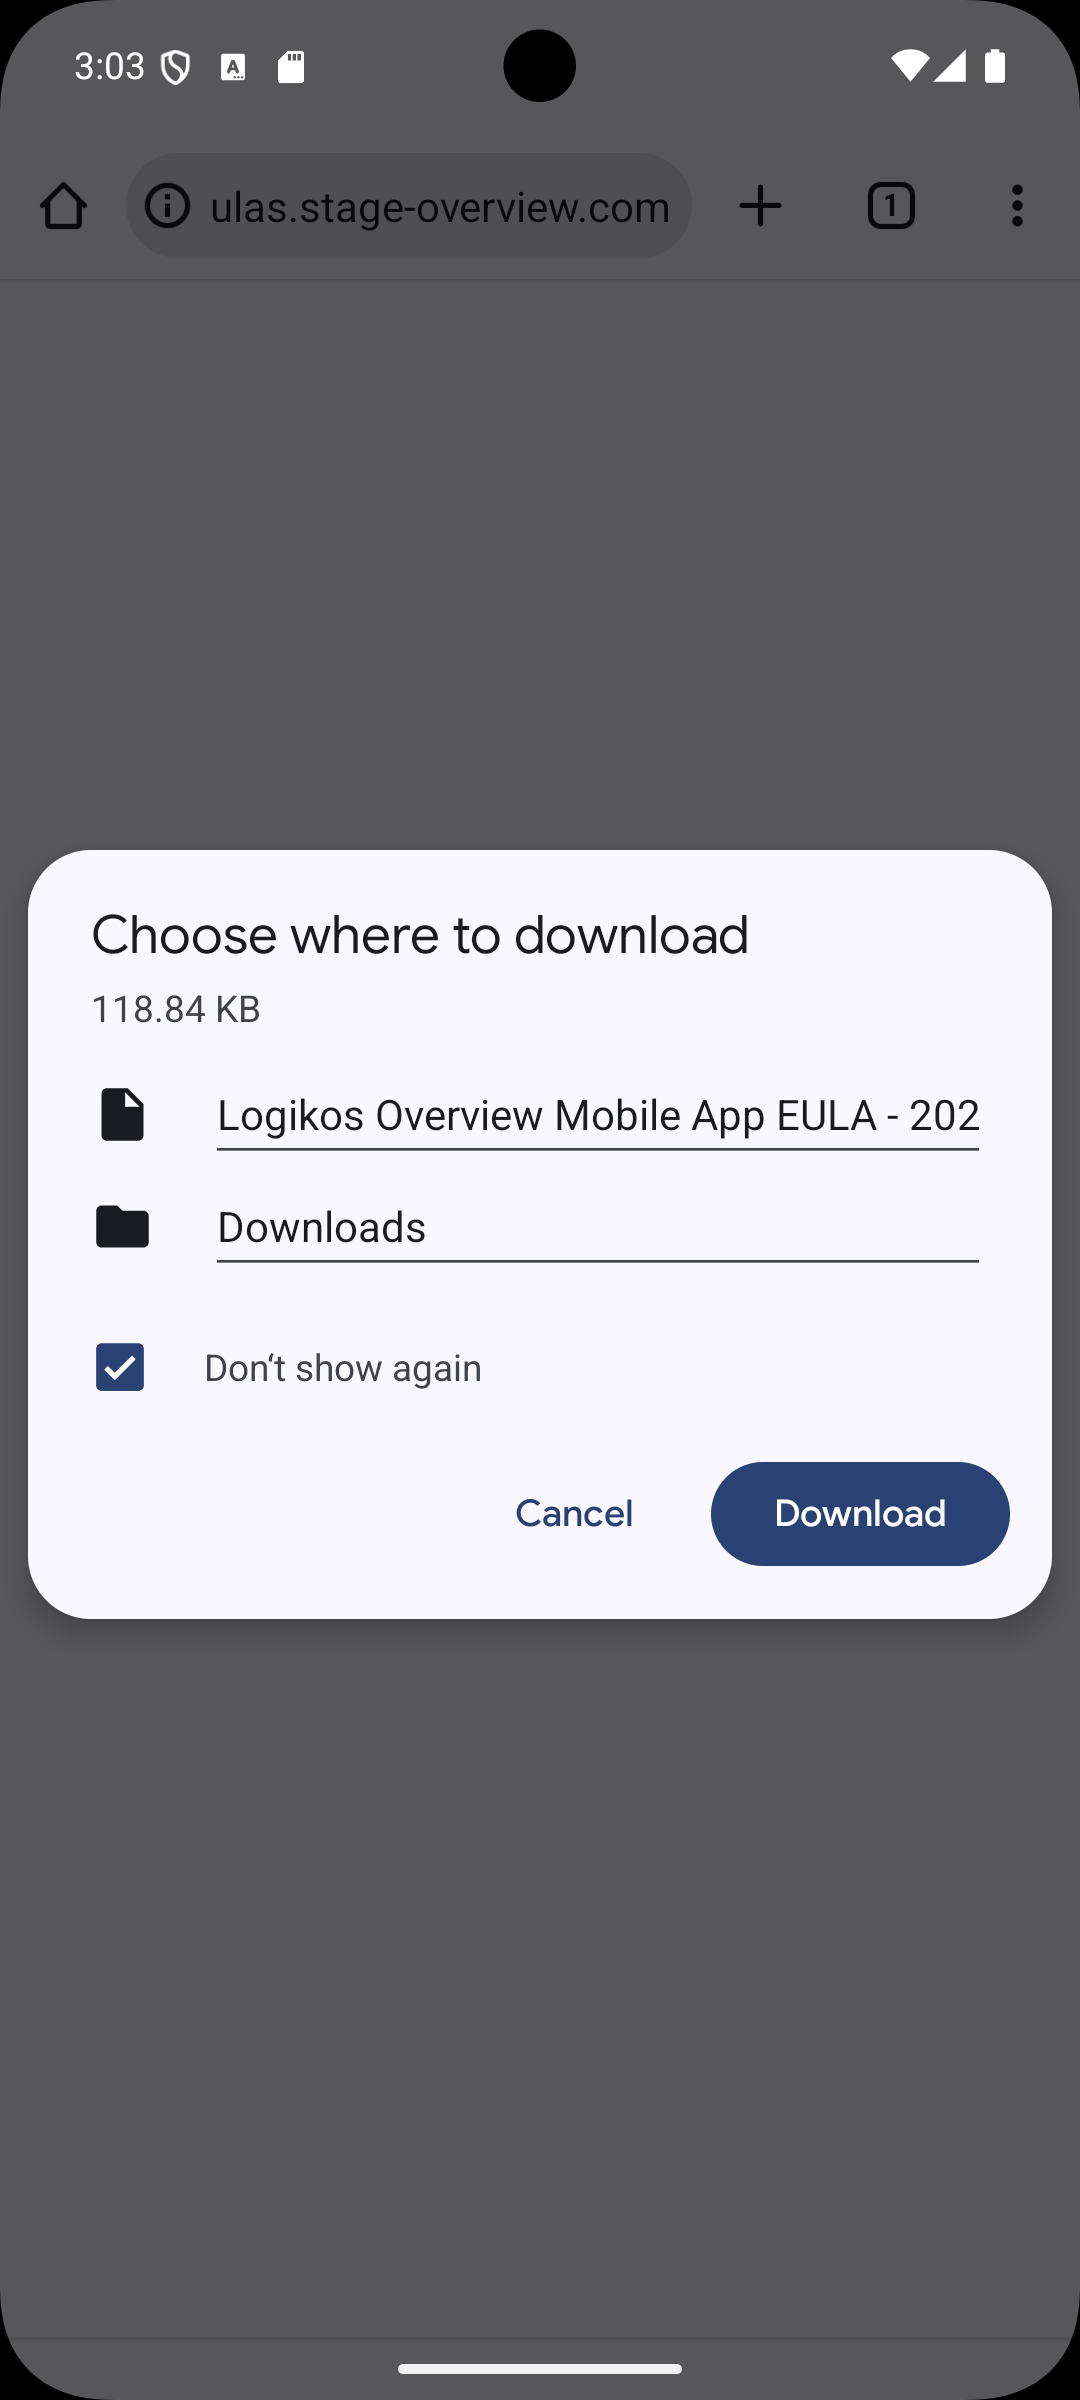
NOTE: Tapping on a EULA will open it in a browser window. If the device being used cannot open a browser window, the device will prompt for a save location and the EULA will be downloaded to the device. The EULA can then be viewed in a PDF viewer.
Main Screen
 | 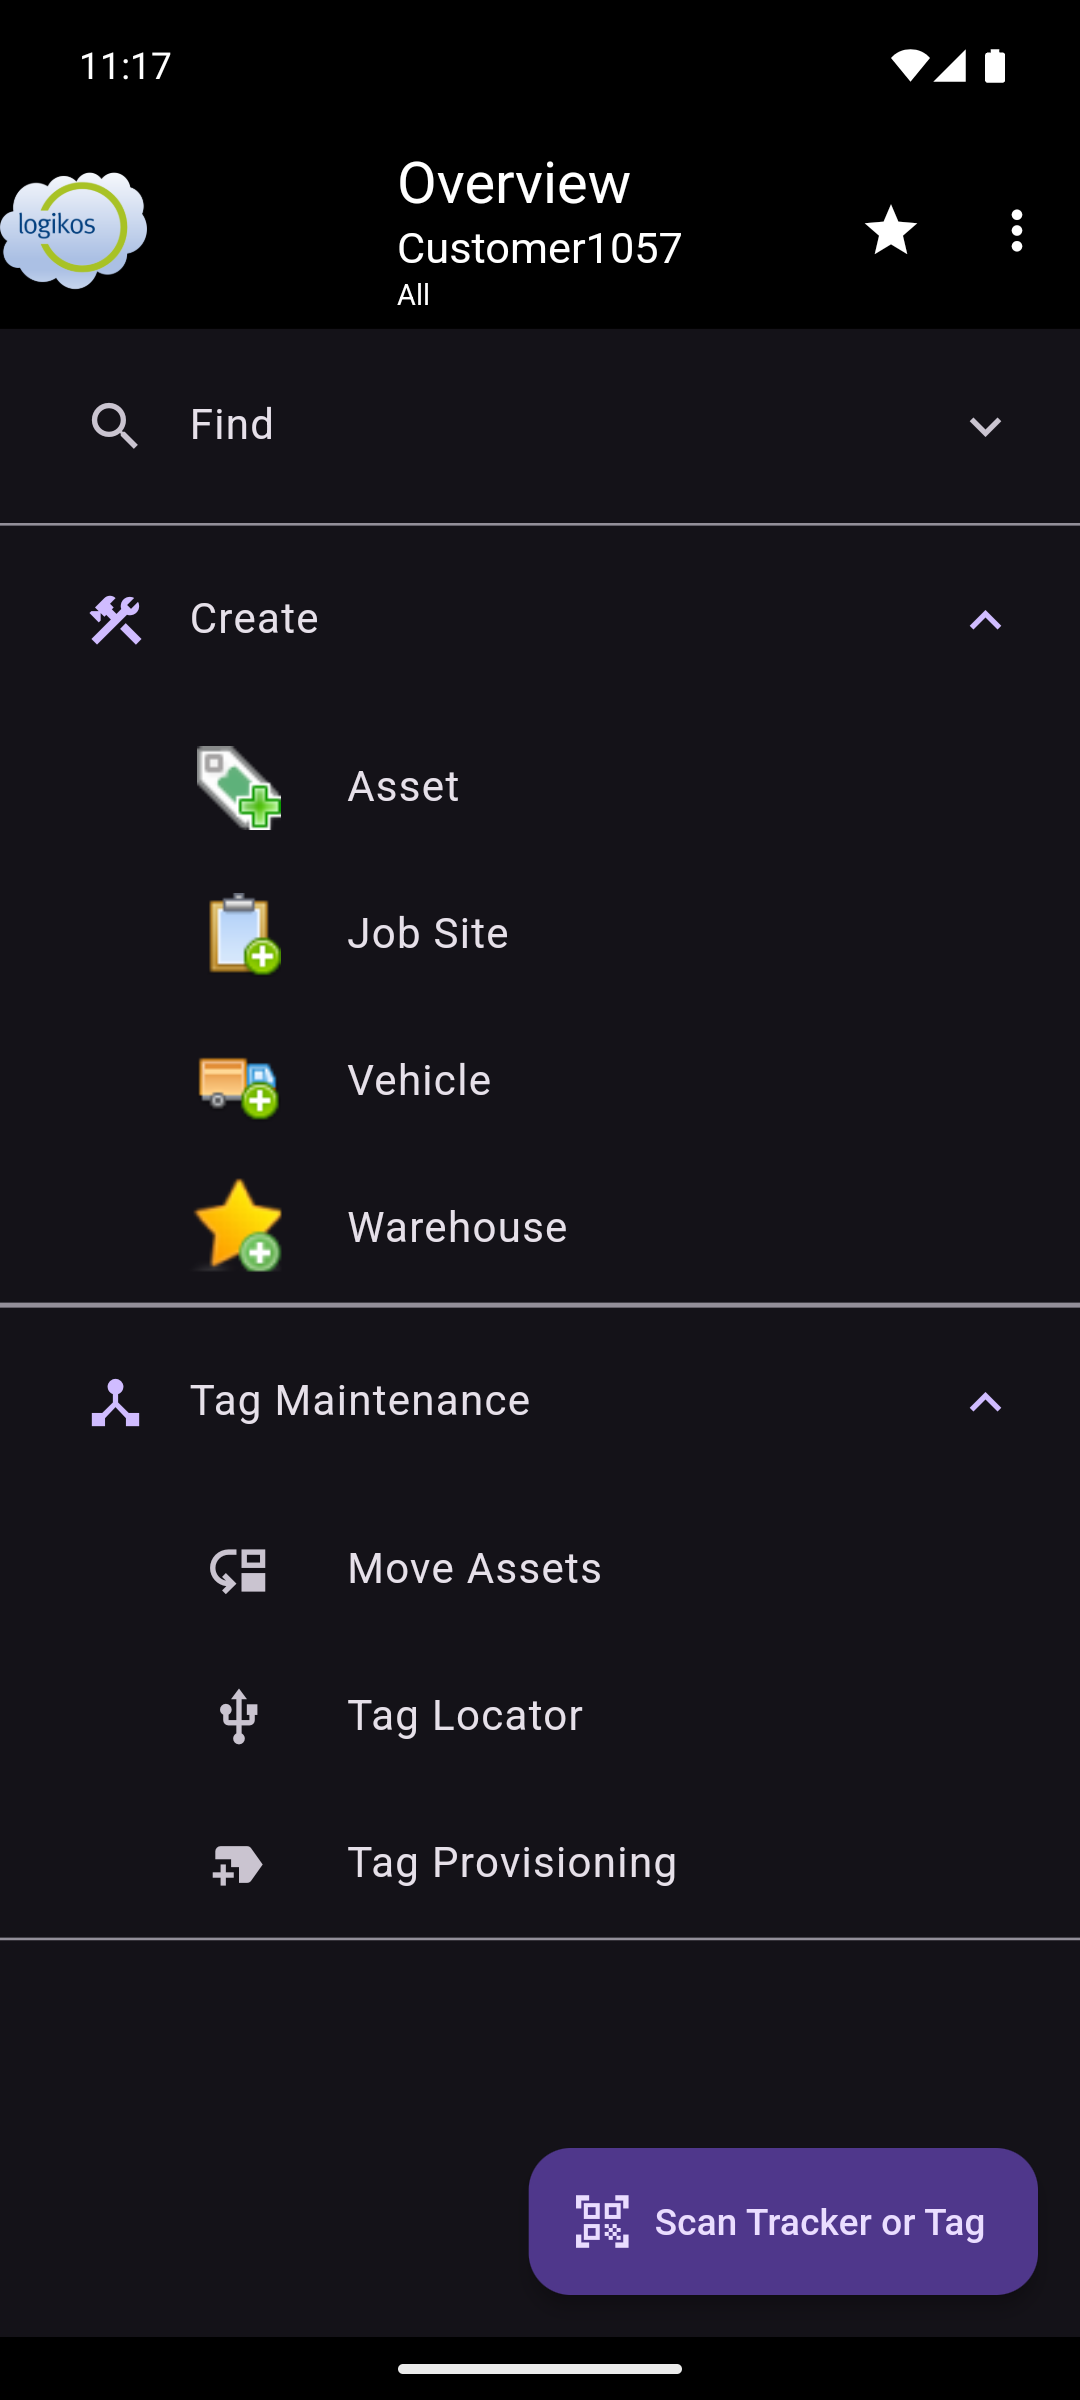 |  |
NOTE: The screens will animate to signify one-off tools (animating bottom-to-top) vs. progressive views (animating right-to-left). When selecting to move back from these selections, the animation will be the opposite direction.
Application Title Bar
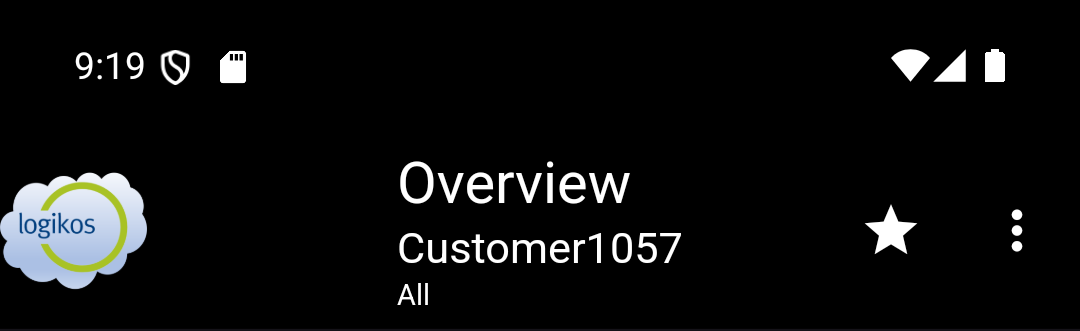
The Application Title Bar displays the user's currently selected customer and group (if applicable). It also has a star icon that is used to access the user's saved Favorites searches. The three vertical dots open the Action Menu.
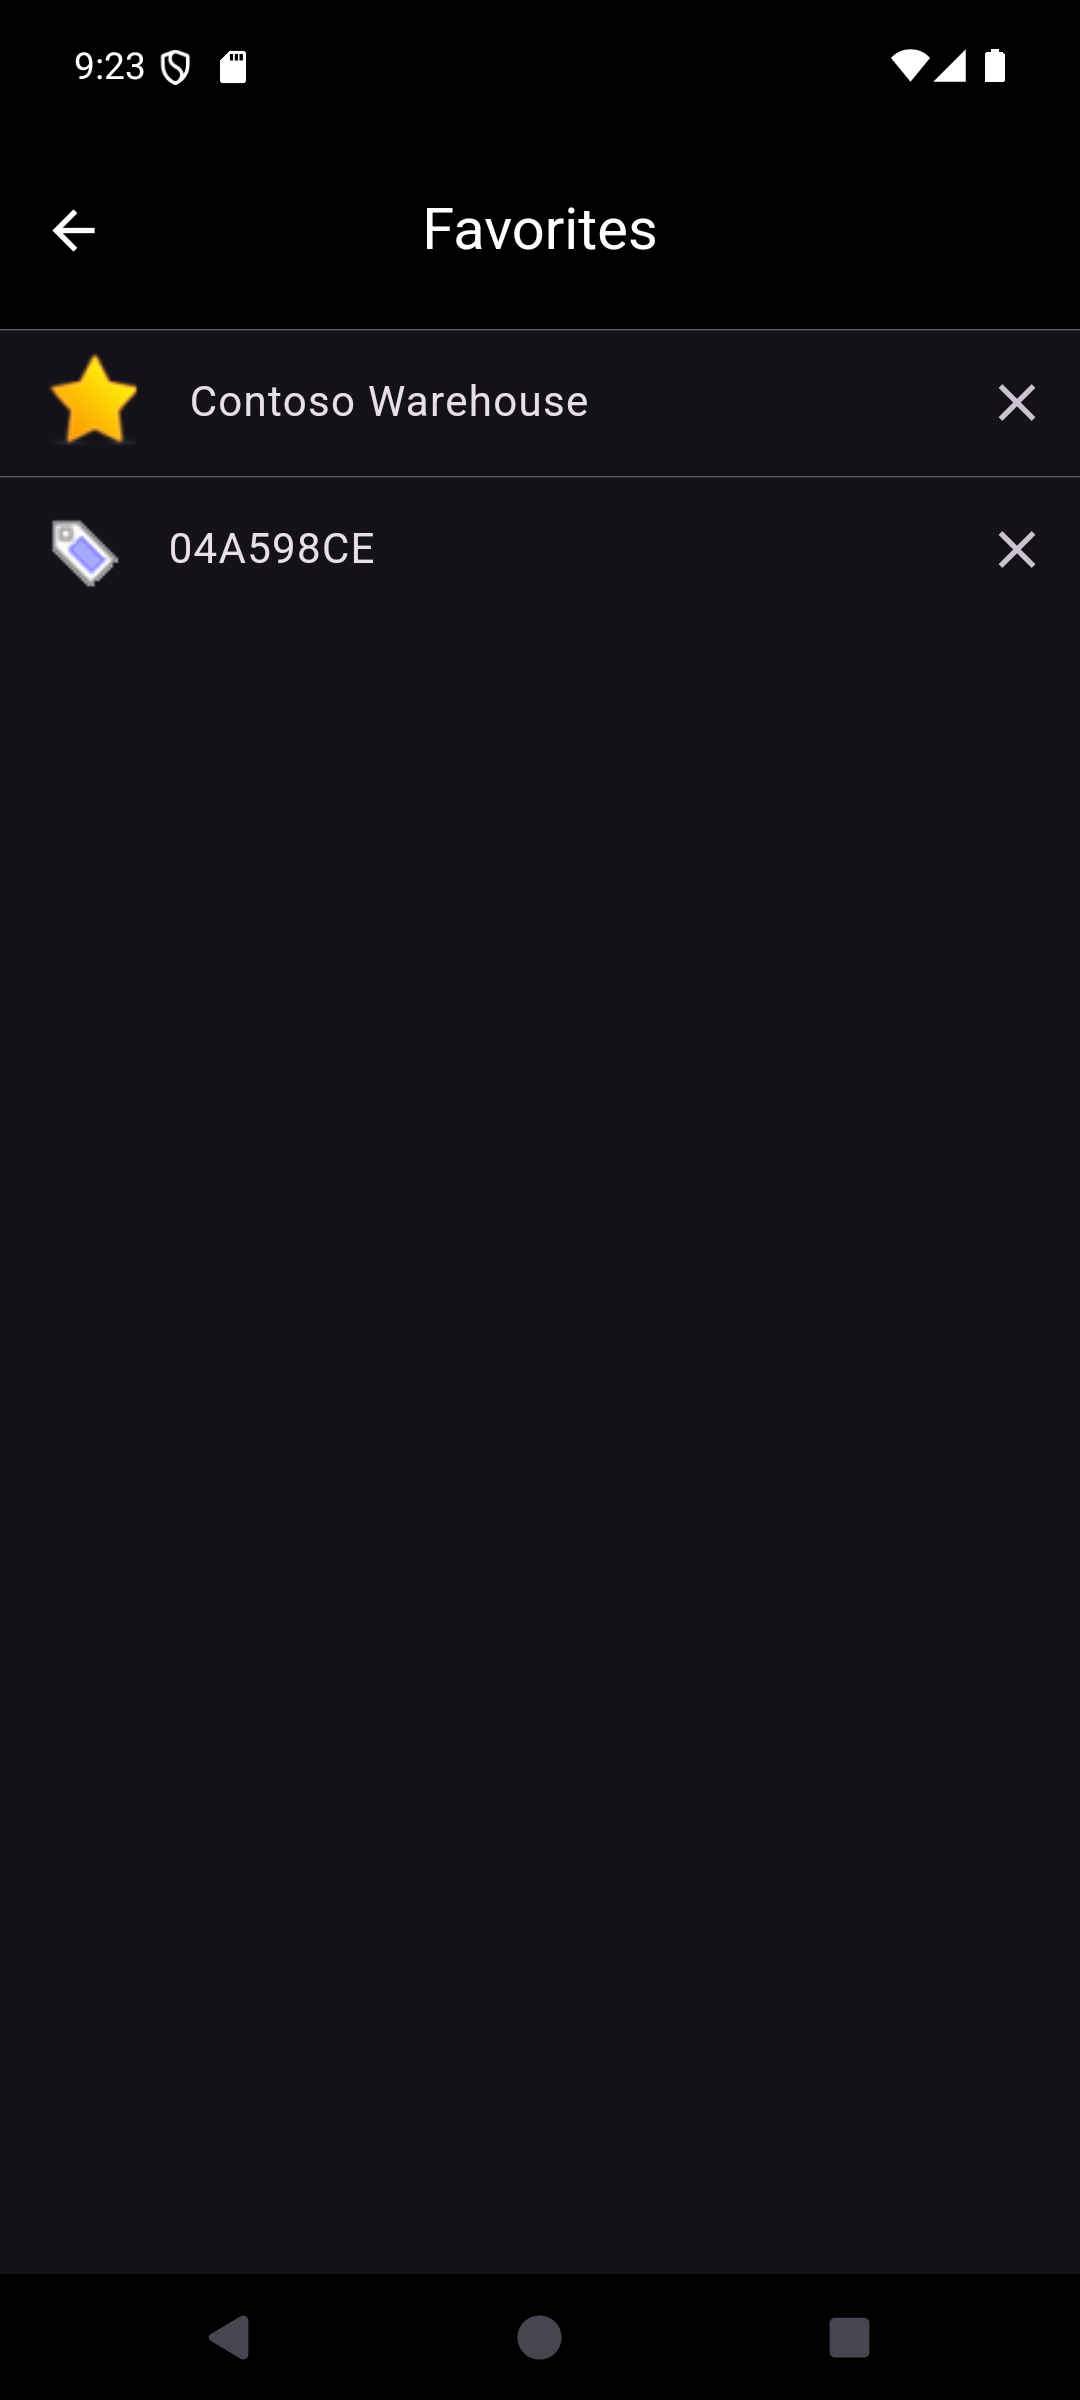
Favorites
 |  |  |
Action Menu
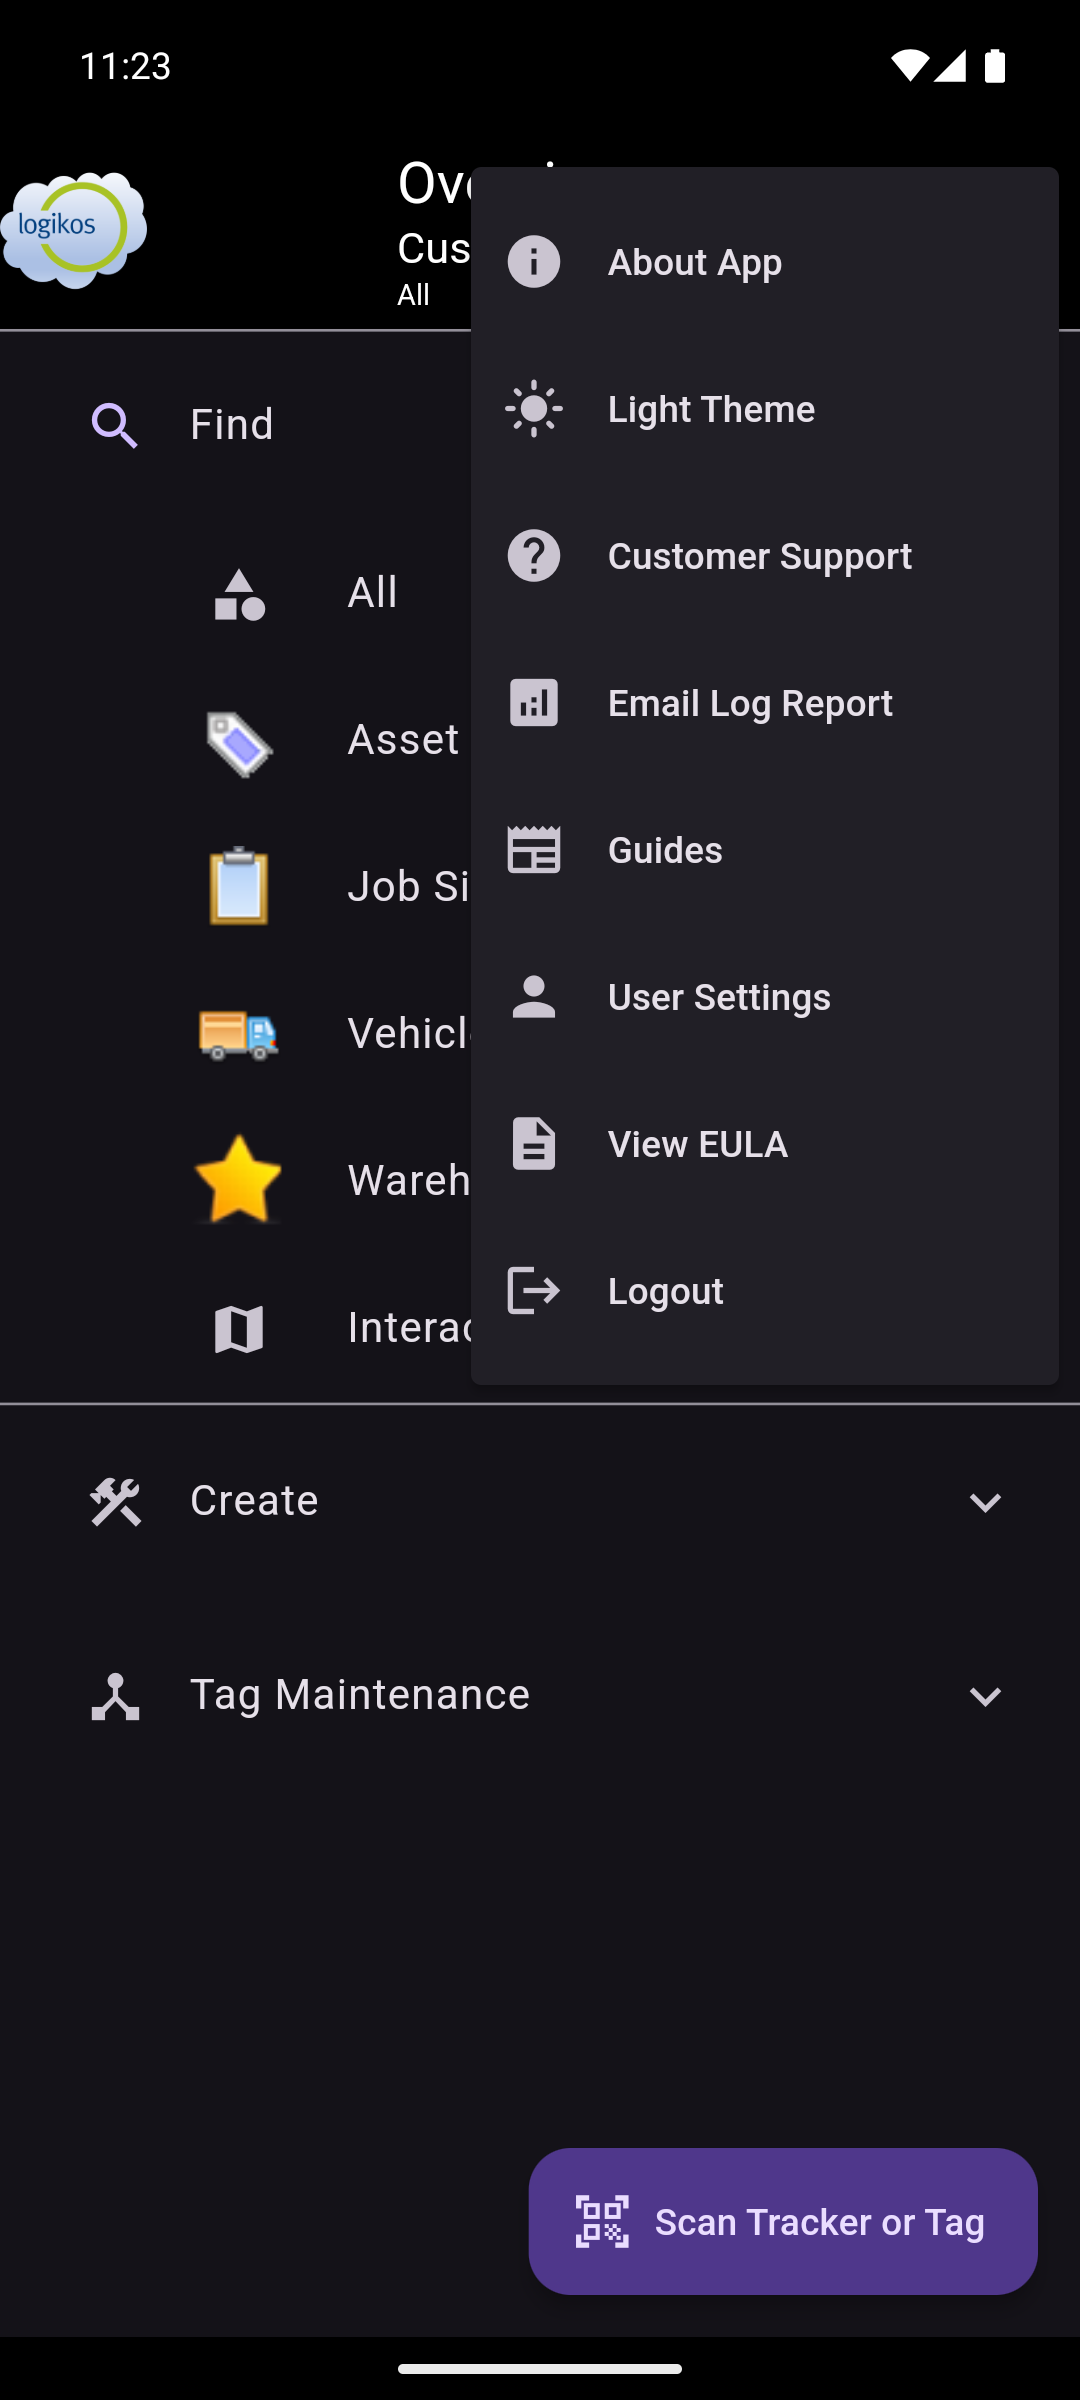 | 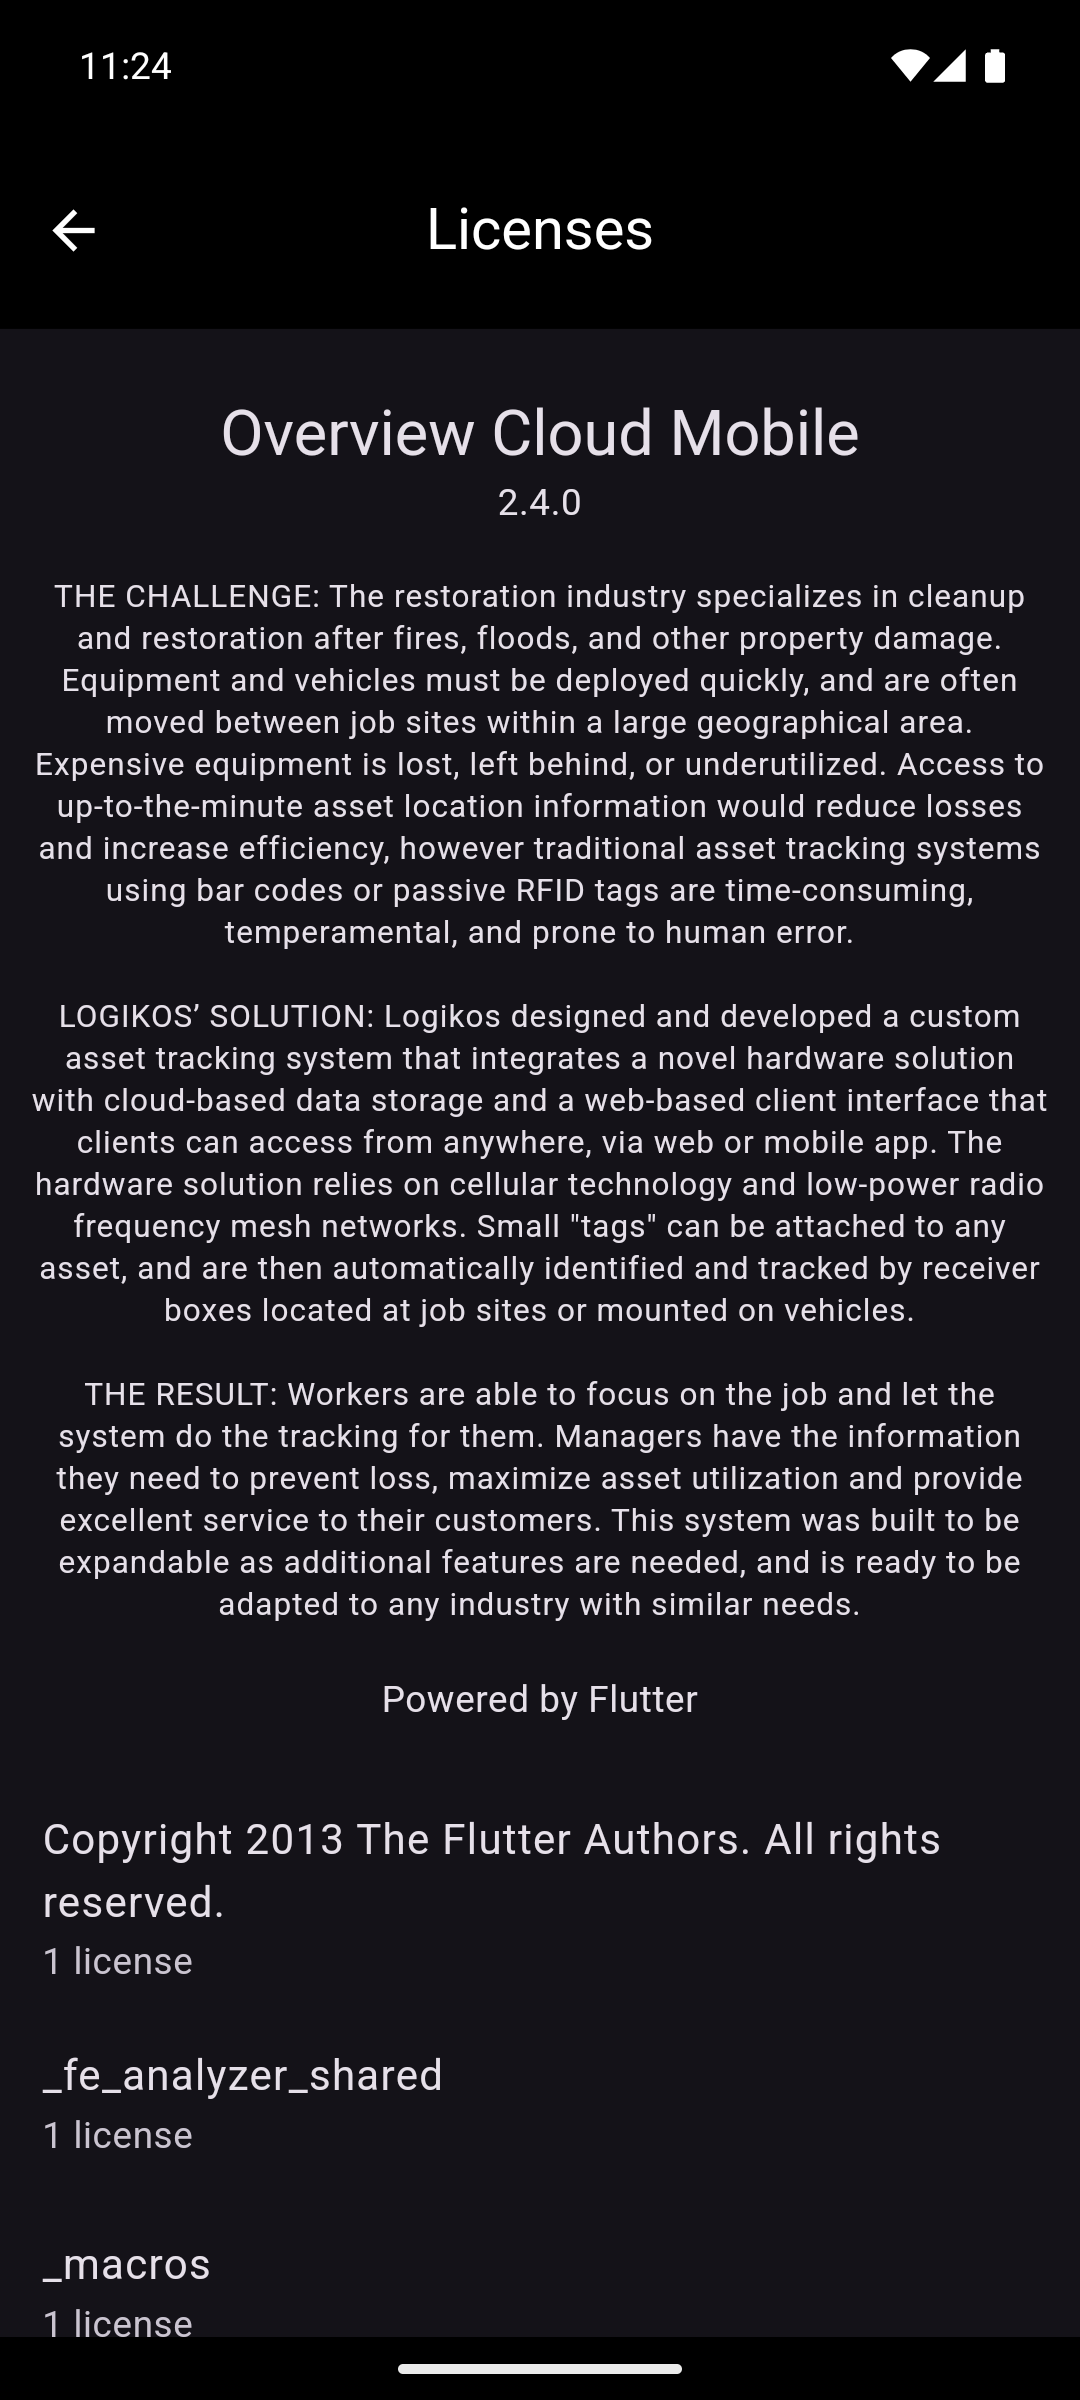 | 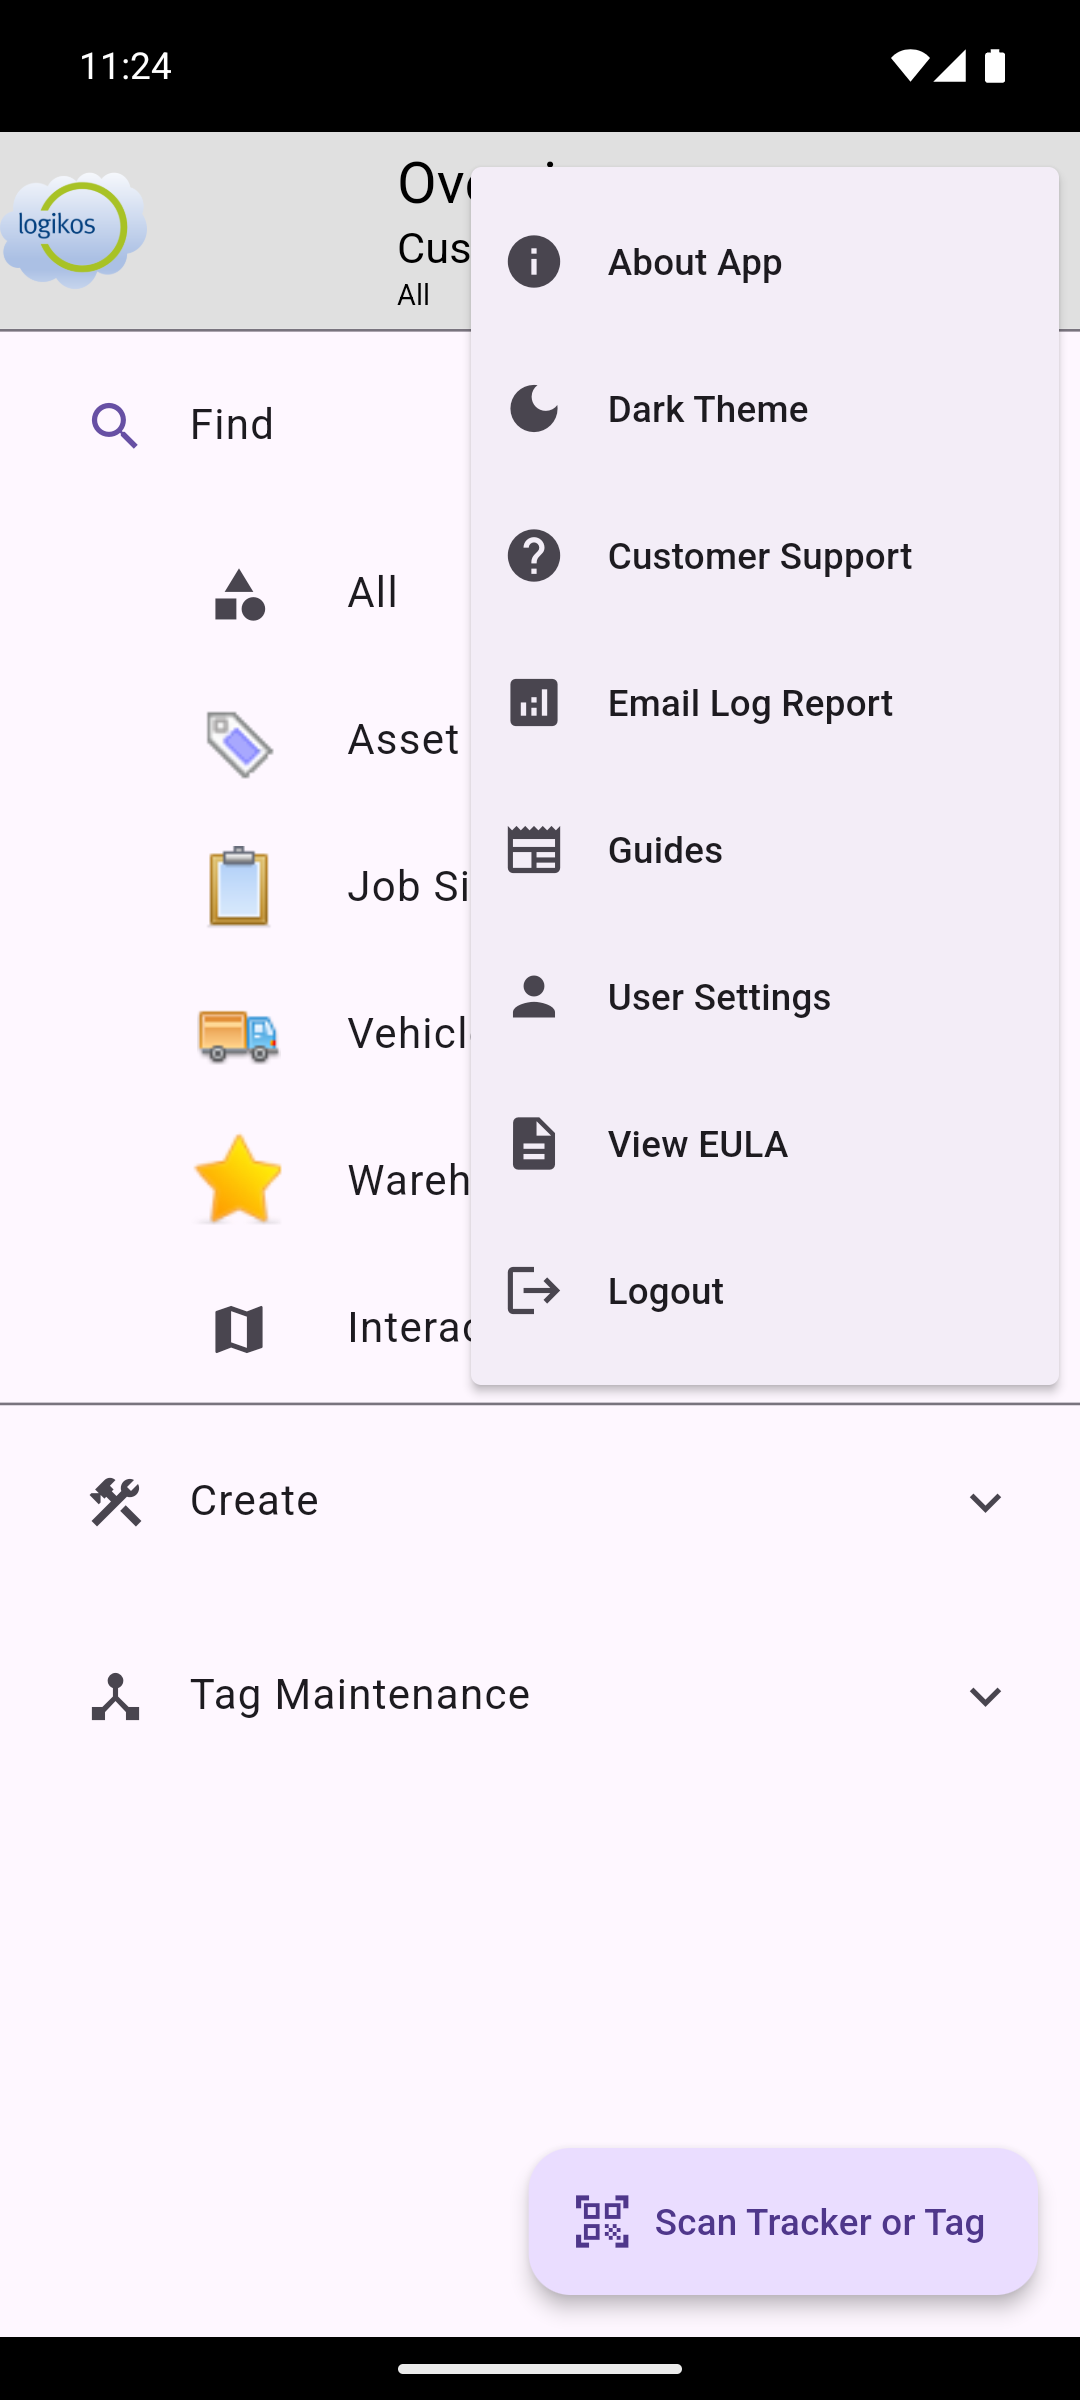 |  |  |  |
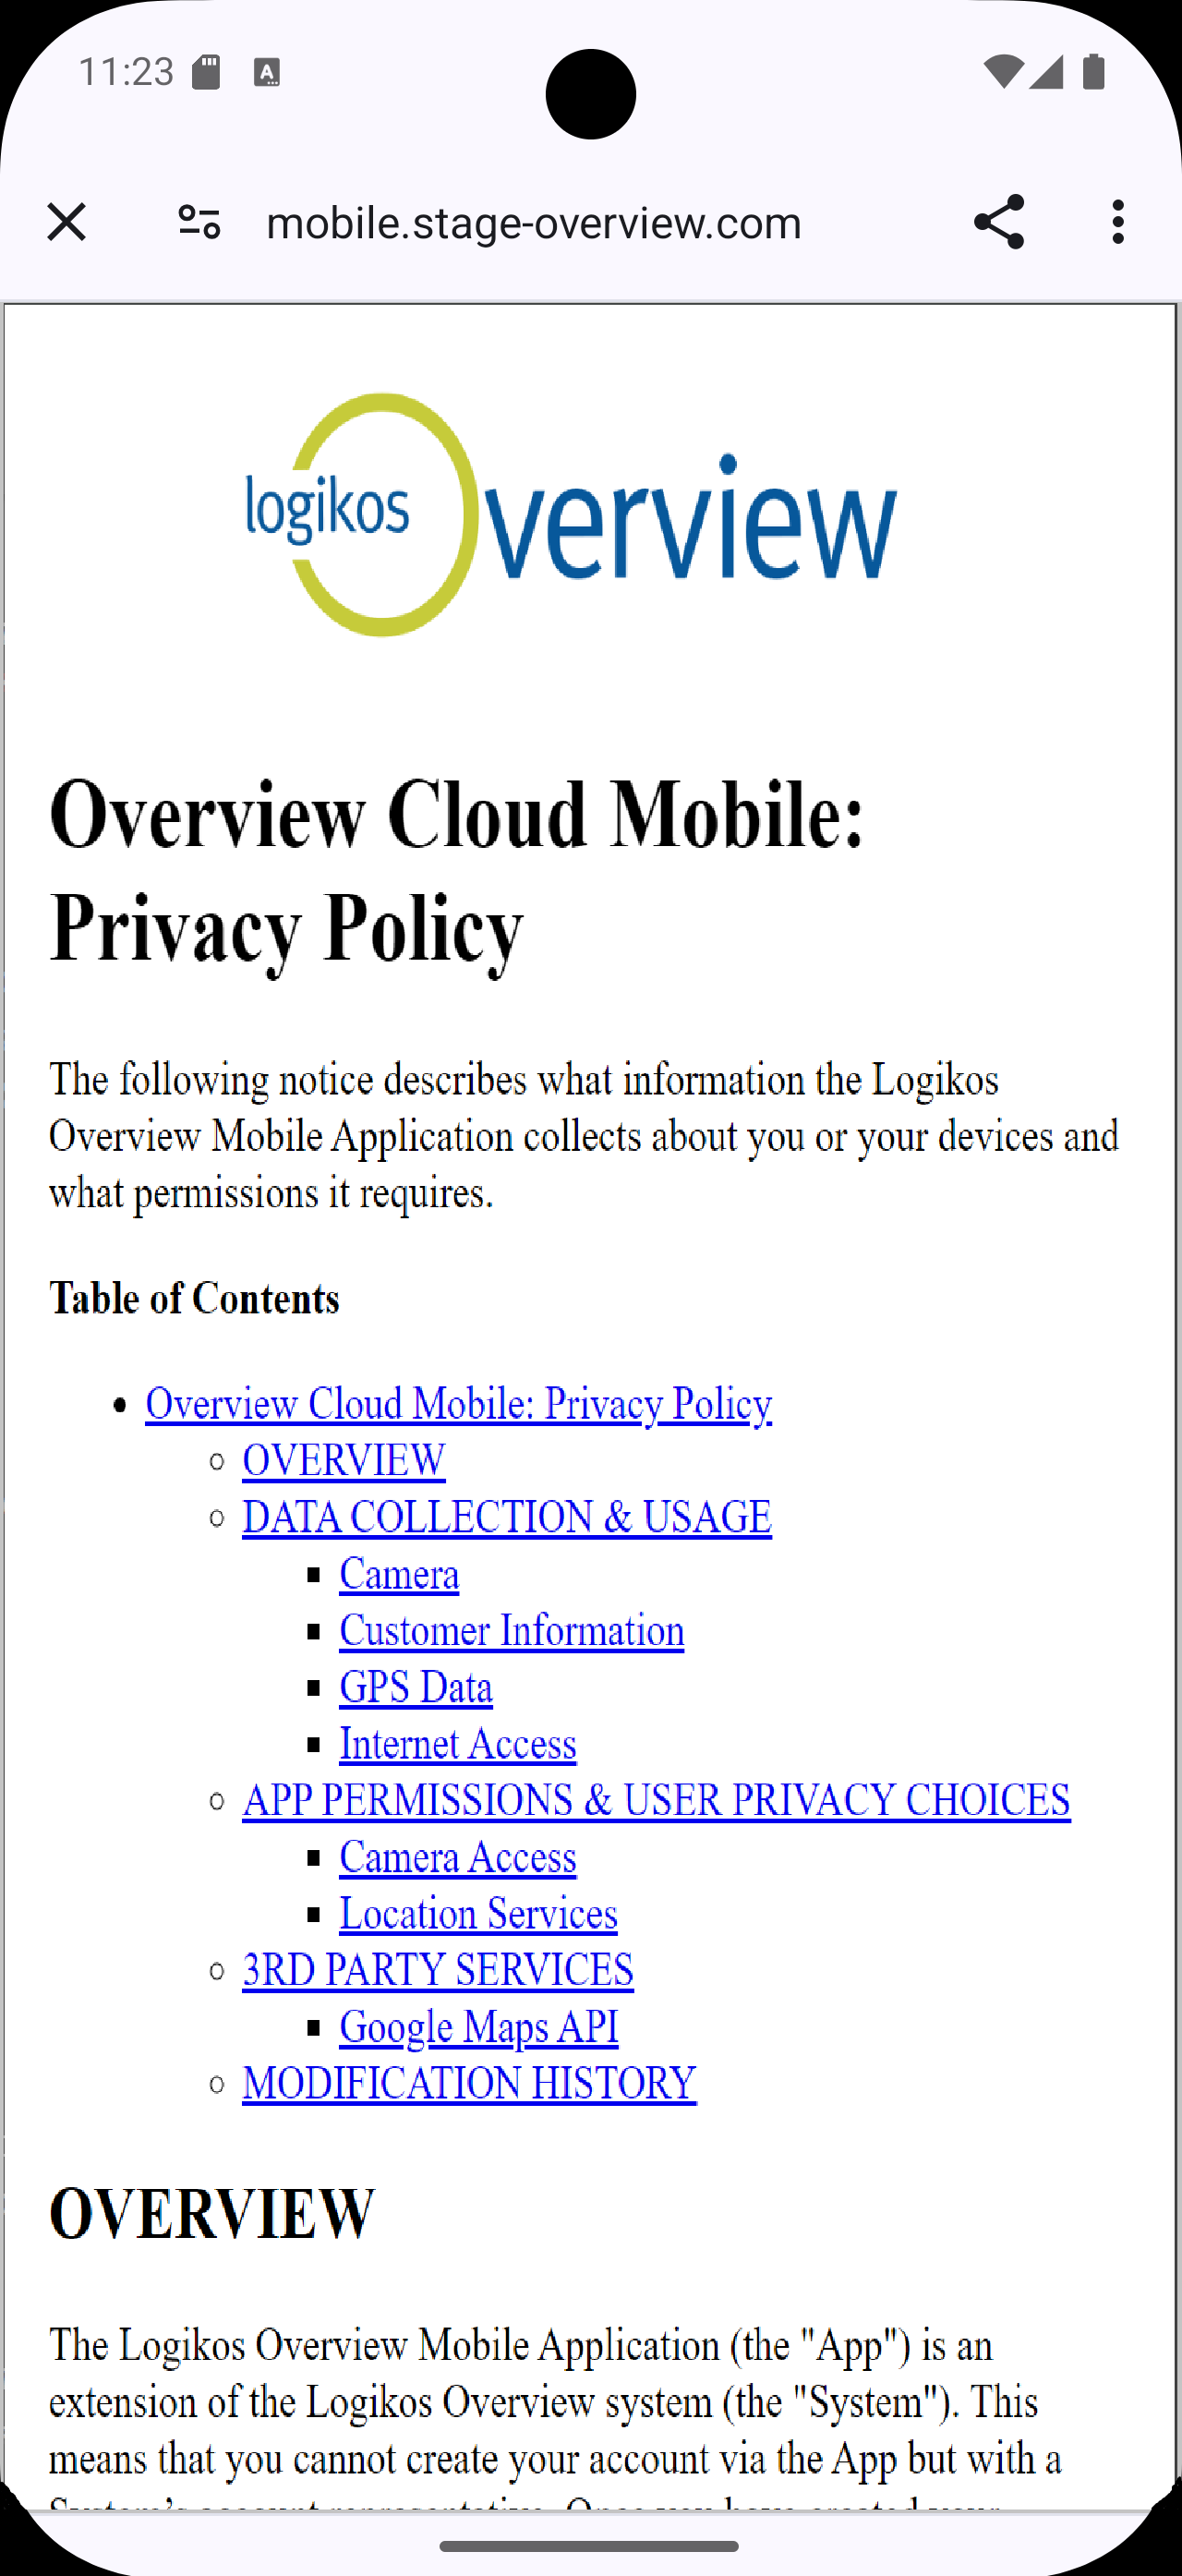
- The About App option displays the mobile app version, information about what it does, and provides access to the EULAs of frameworks the app utilizes.
- The Light/Dark Theme option changes the application theme. The icon changes to display which theme will be switched to when tapped. This selection is remembered.
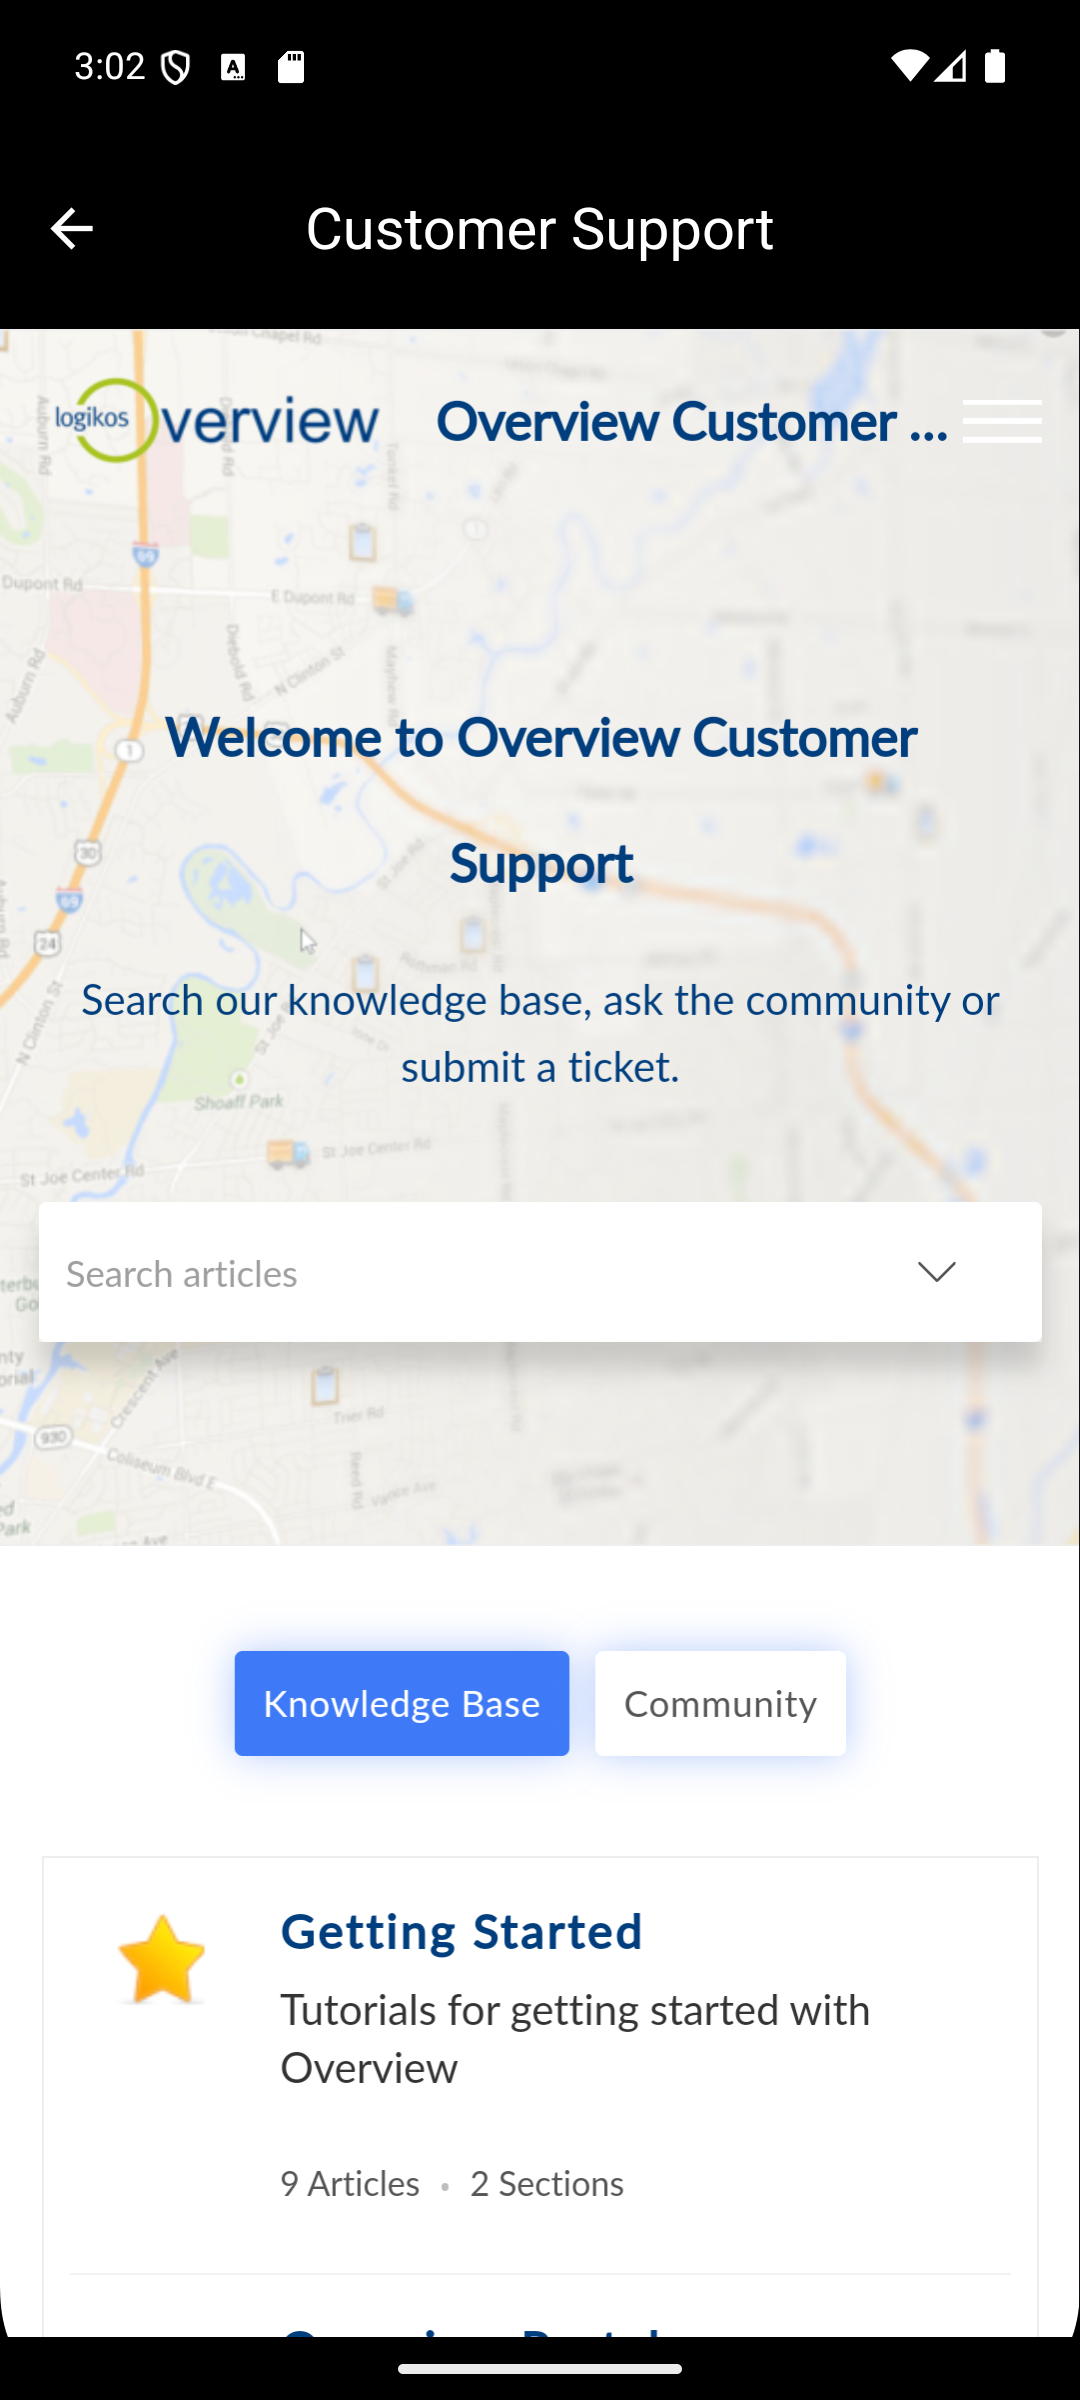
- The Customer Support option will open up the Overview Customer Support website. Here you can find resources related to not only the mobile application, but the Overview system as a whole.
- The Email Log Report option will generate an email to the Overview Mobile Development team of the current captured events within the mobile application. This is to aid in troubleshooting the mobile application.
- The View EULA option will display the selected customer's latest user accepted End User License Agreement for utilizing the Overview System.
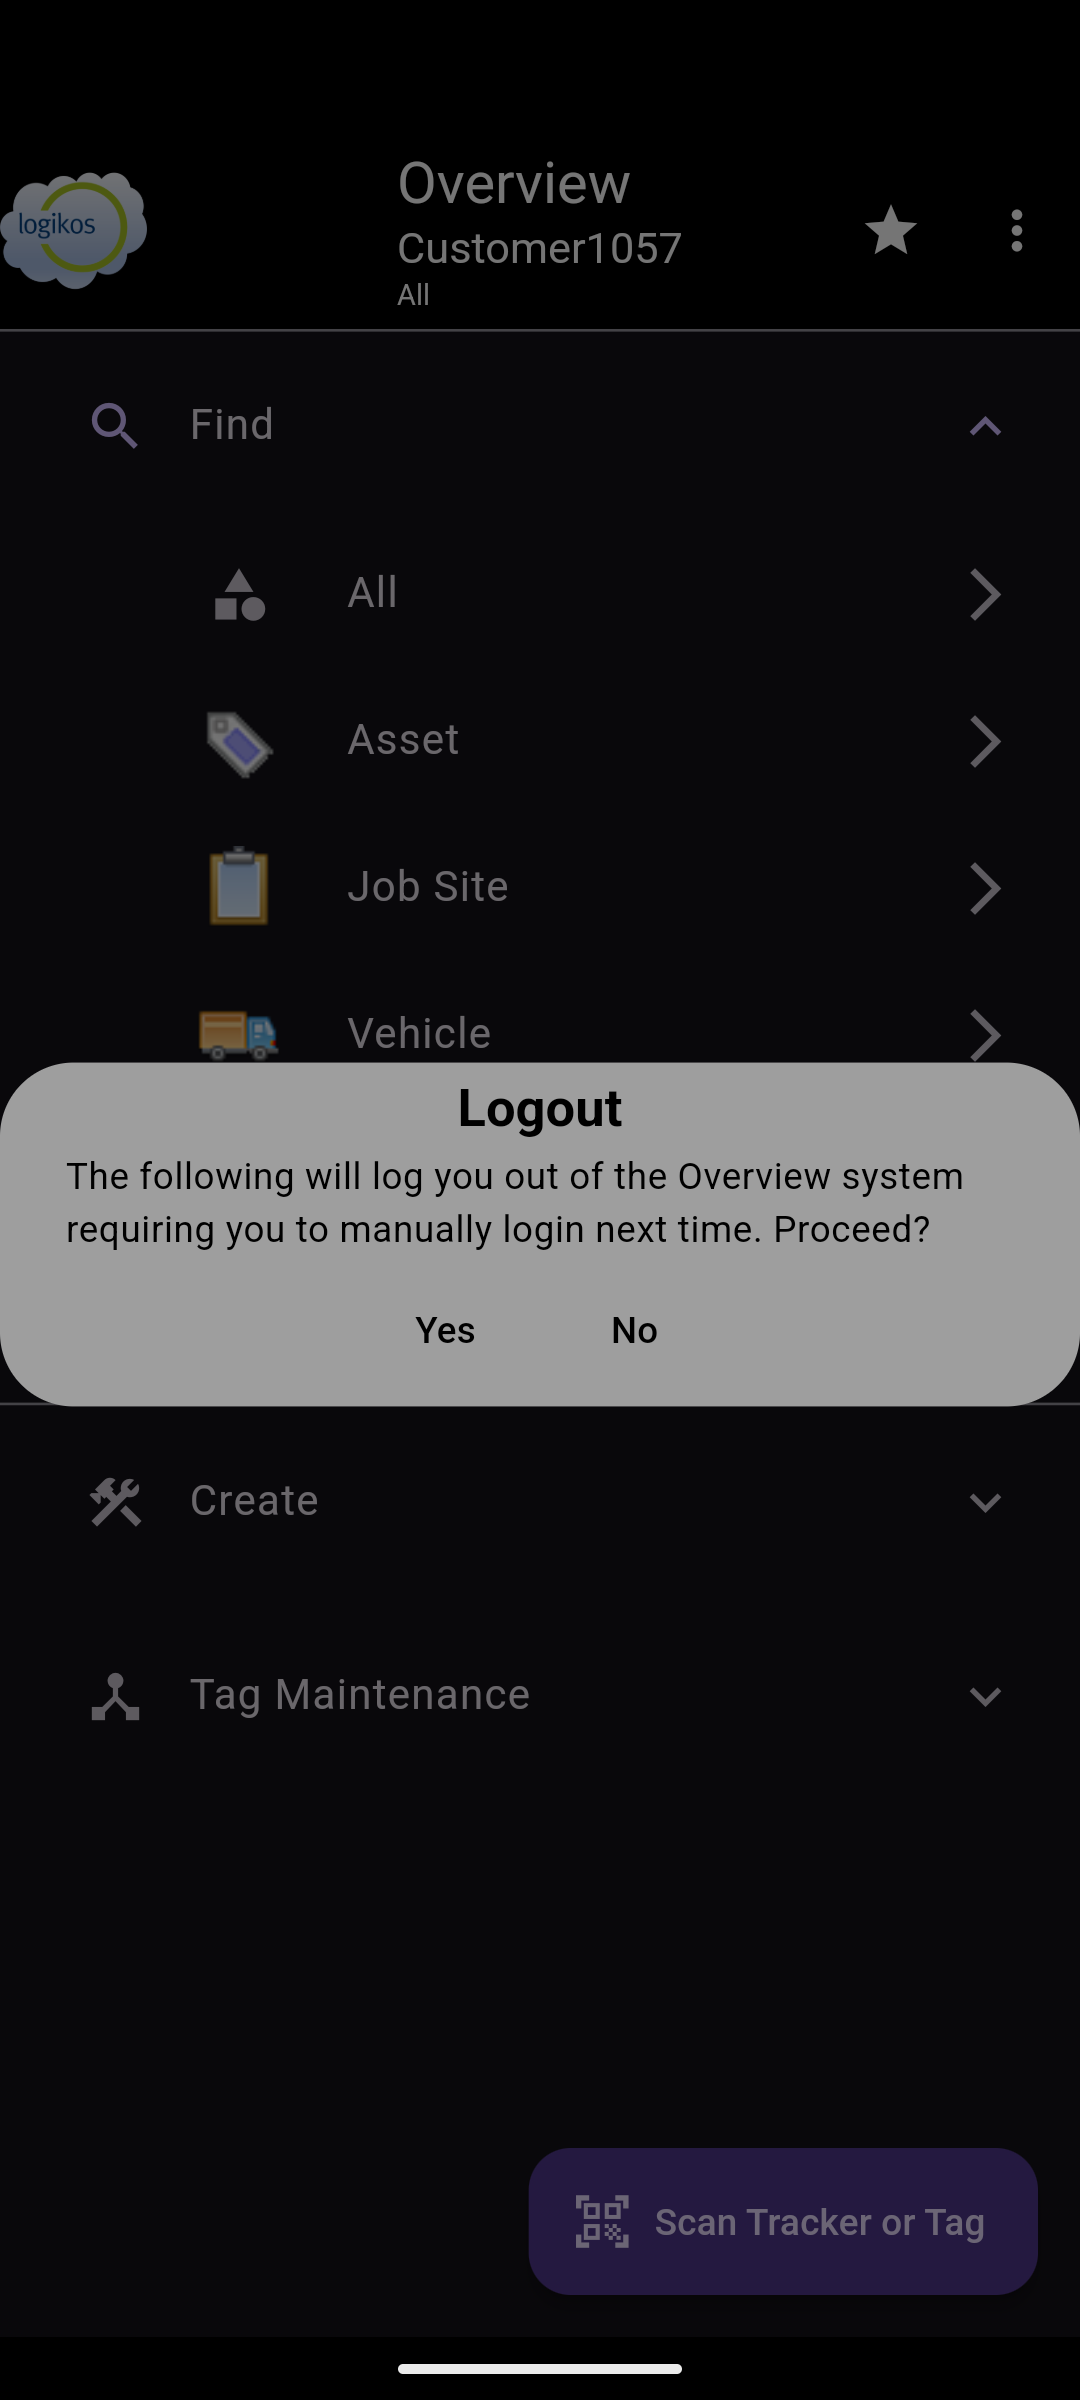
- The Log Out option provides the ability to log out of the application.
- The Guides and User Settings options are further described below.
NOTE: Viewing a EULA will open it in a browser window. If the device being used cannot open a browser window, the device will prompt for a save location and the EULA will be downloaded to the device. The EULA can then be viewed in a PDF viewer.
Guides
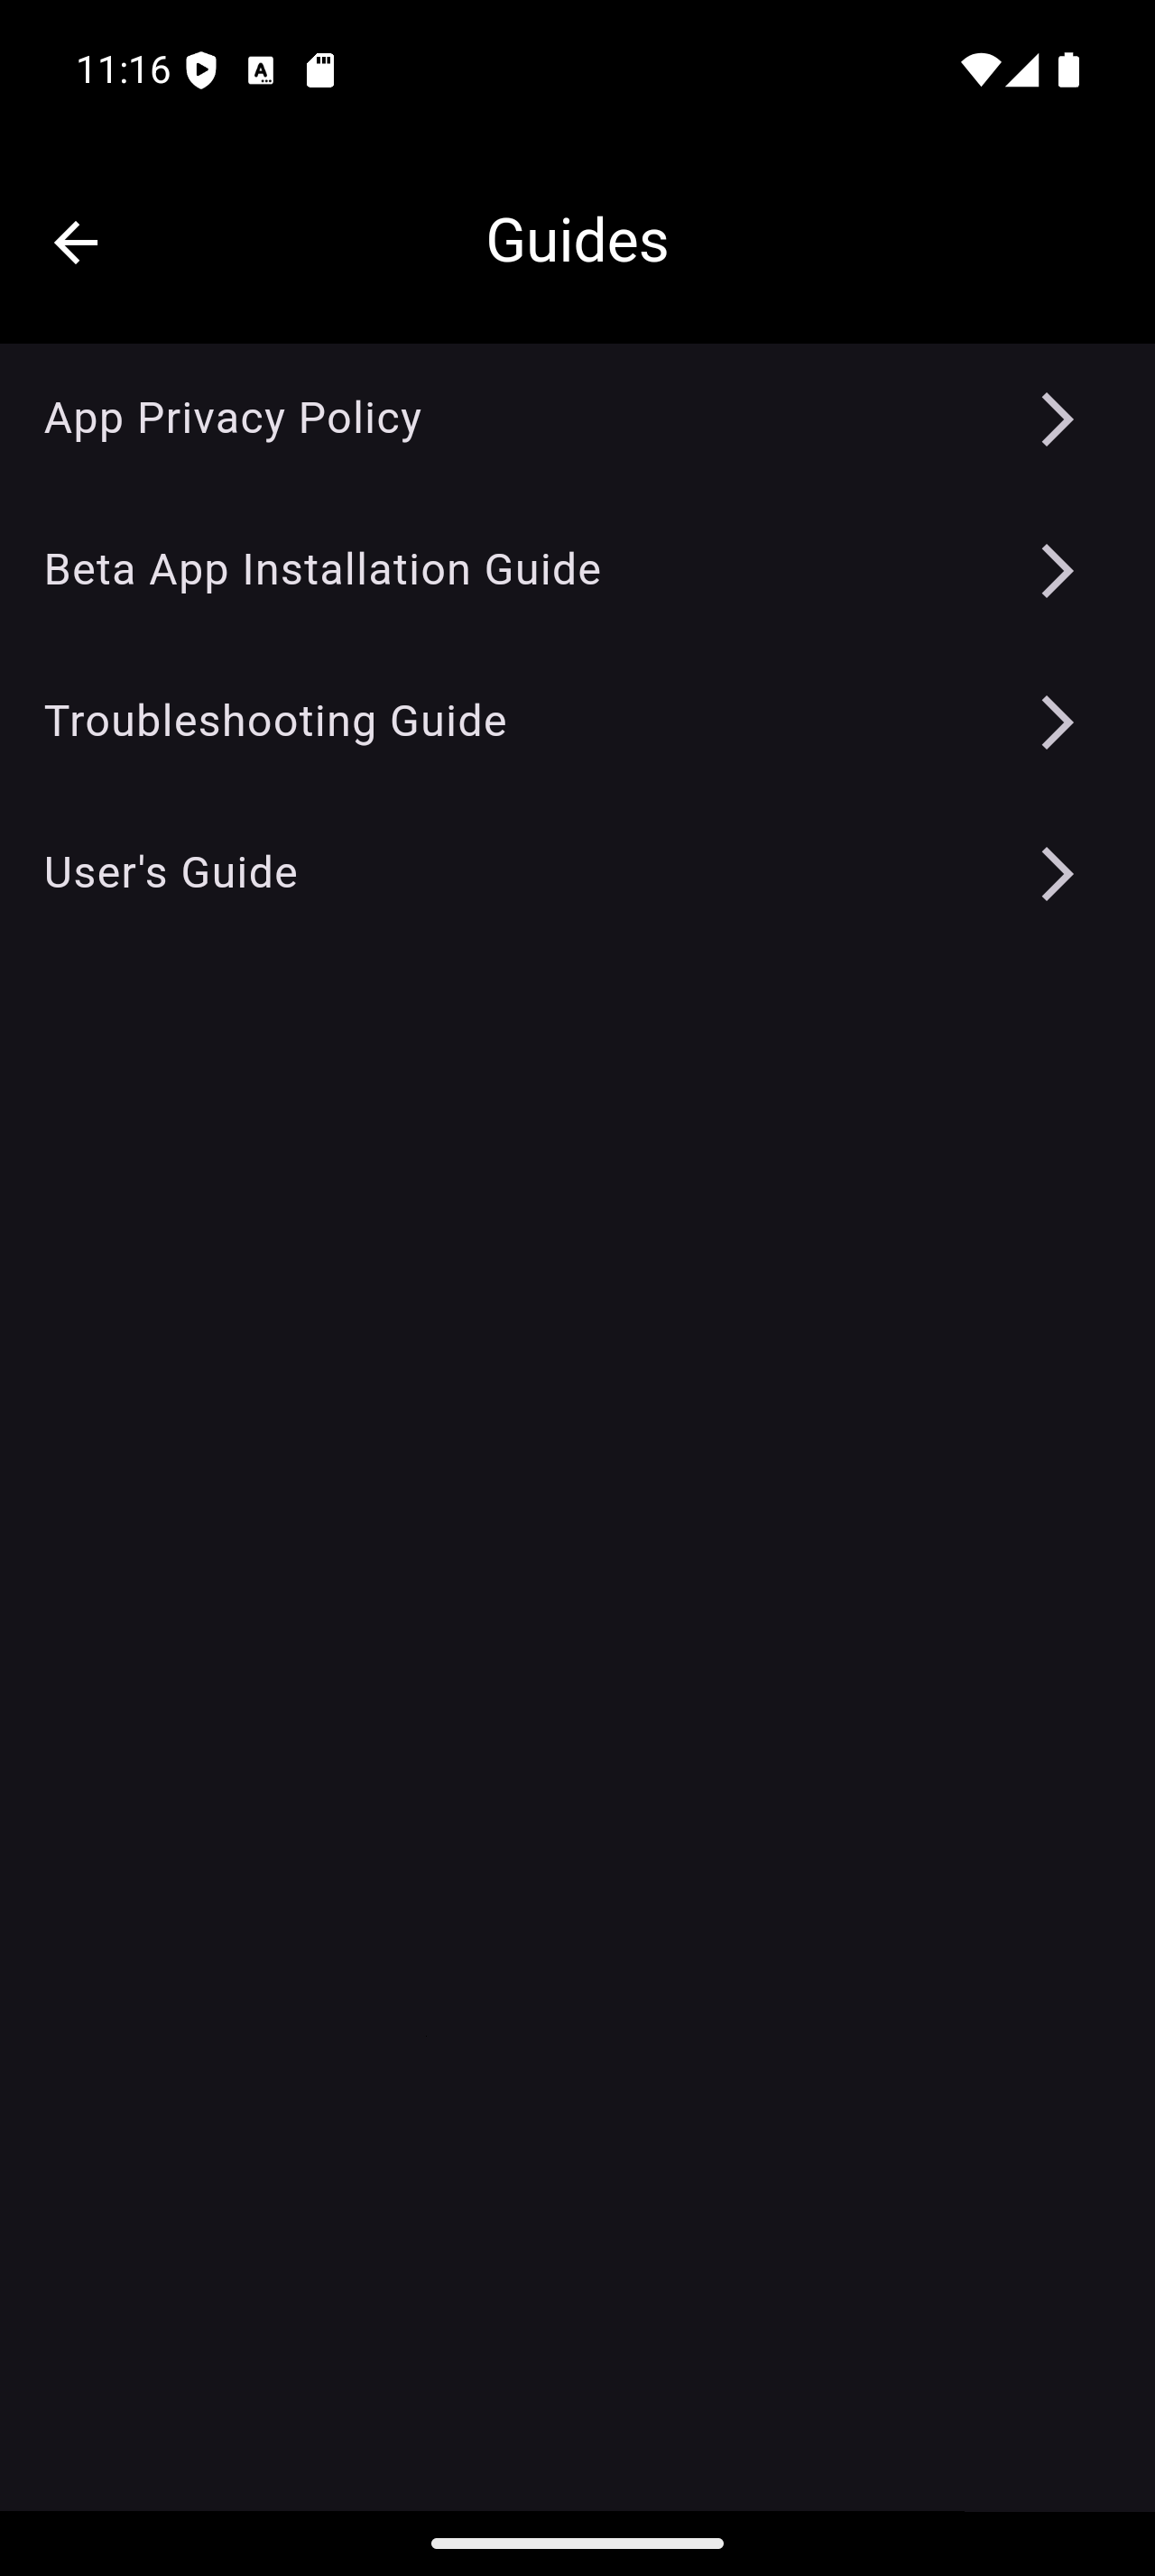
The Guides option displays a list of manuals that support the application. Selecting a guide displays it on the mobile device where it can be printed.
User Settings
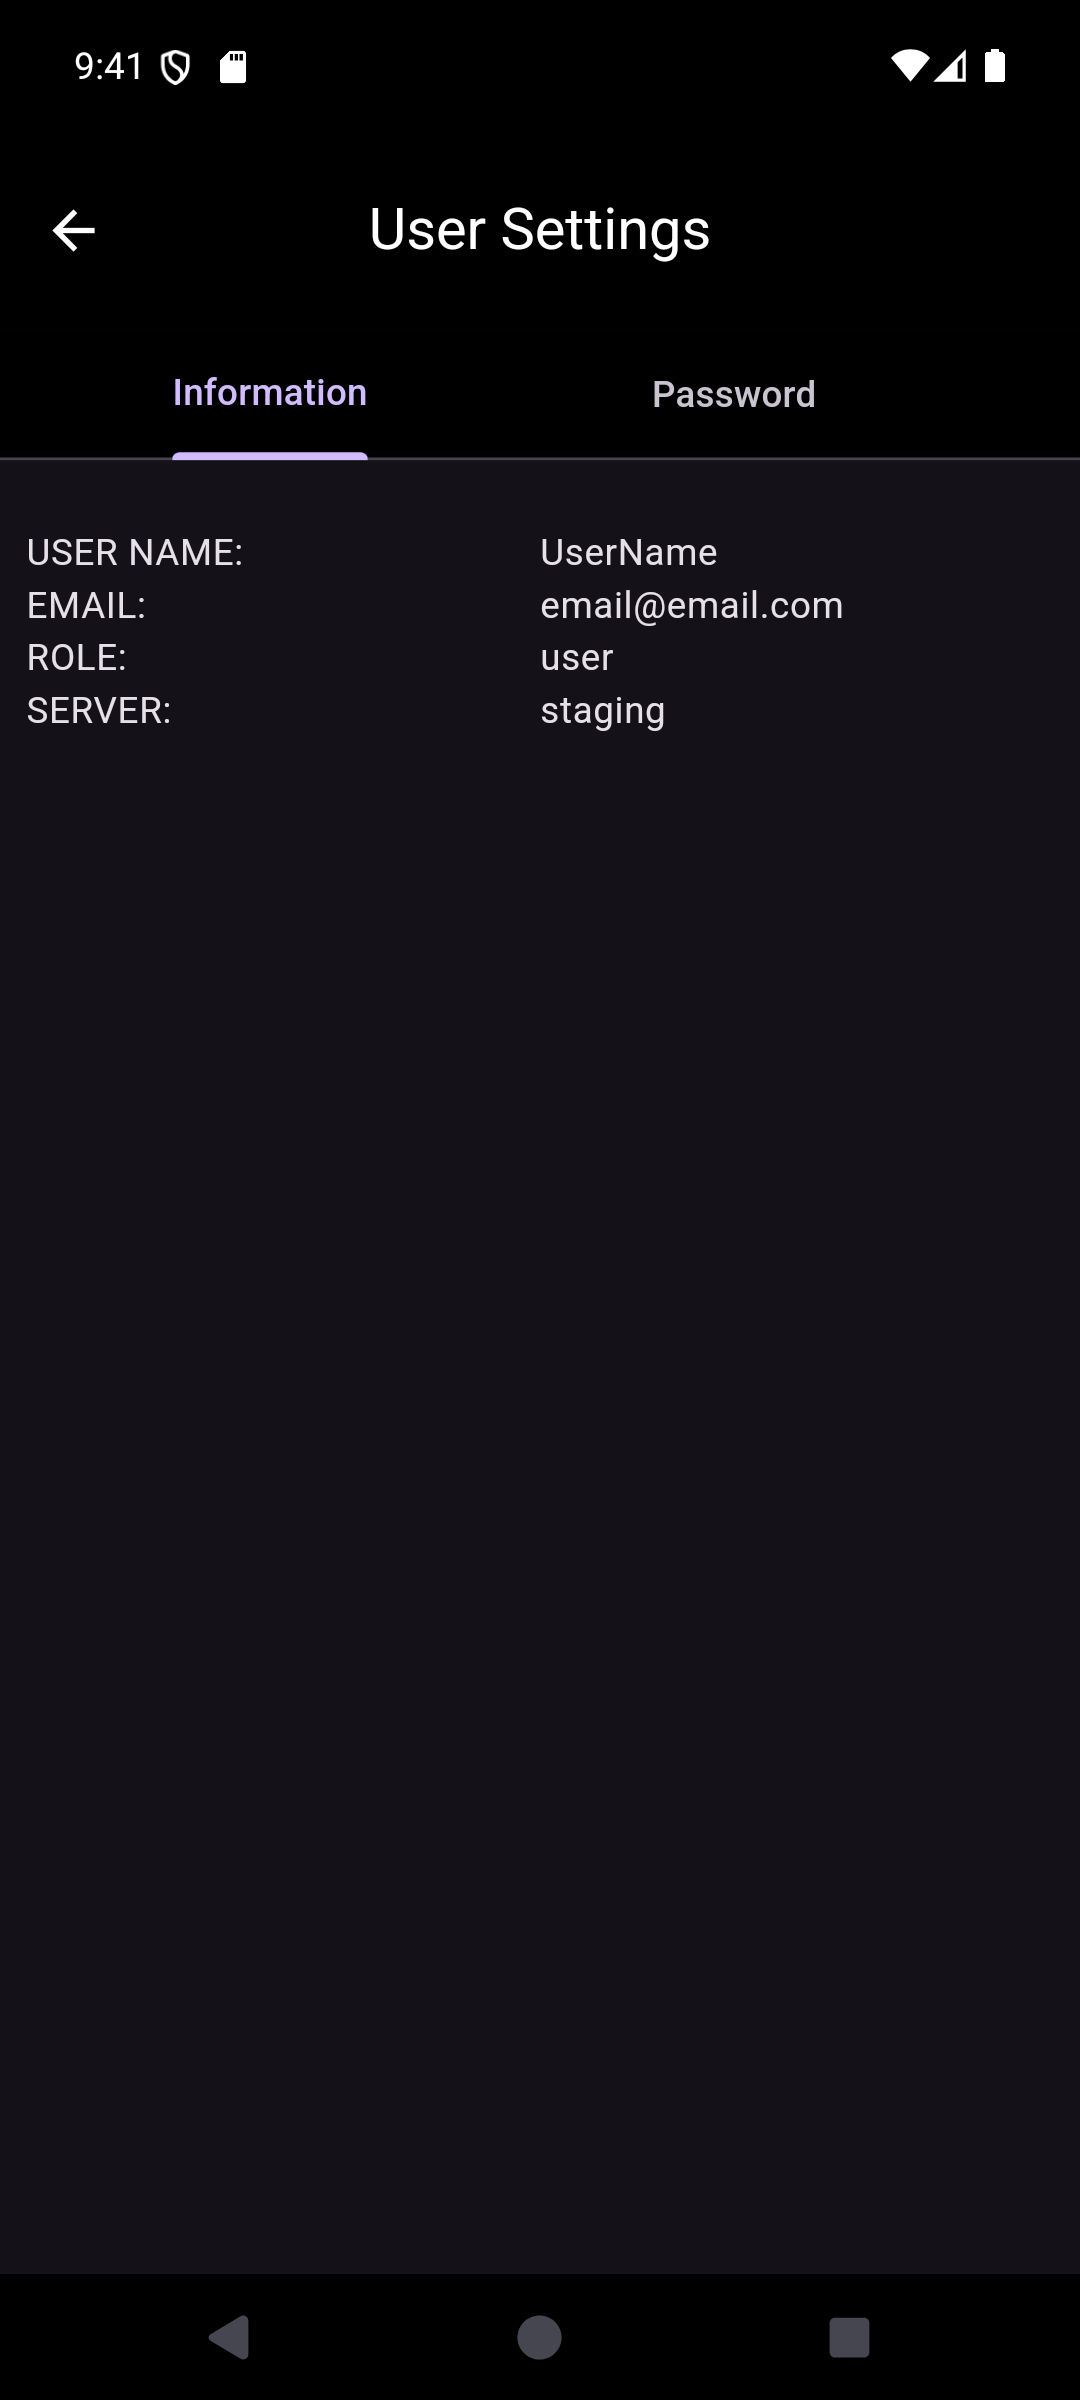
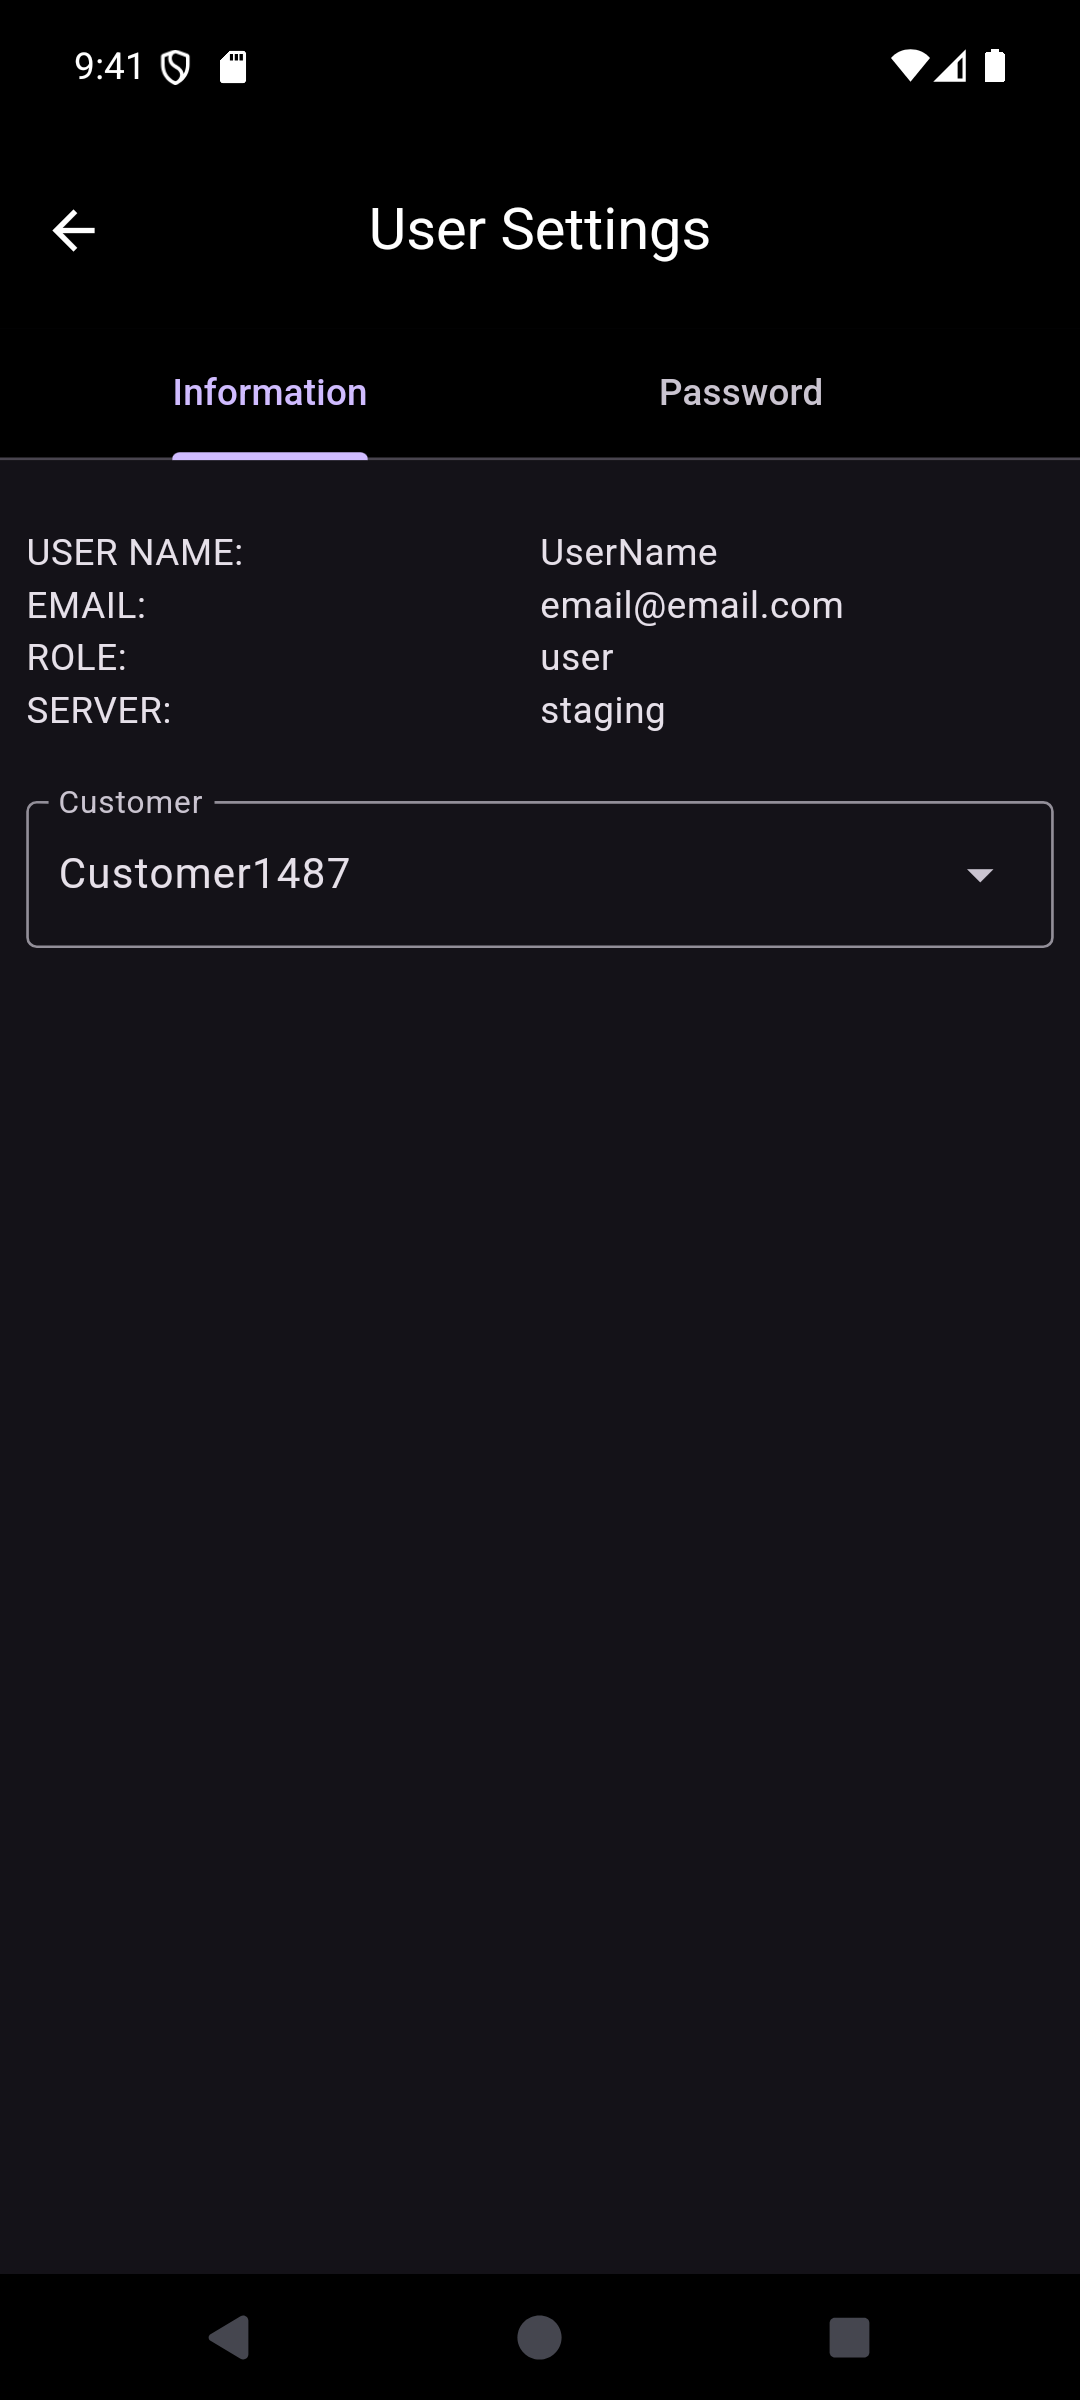
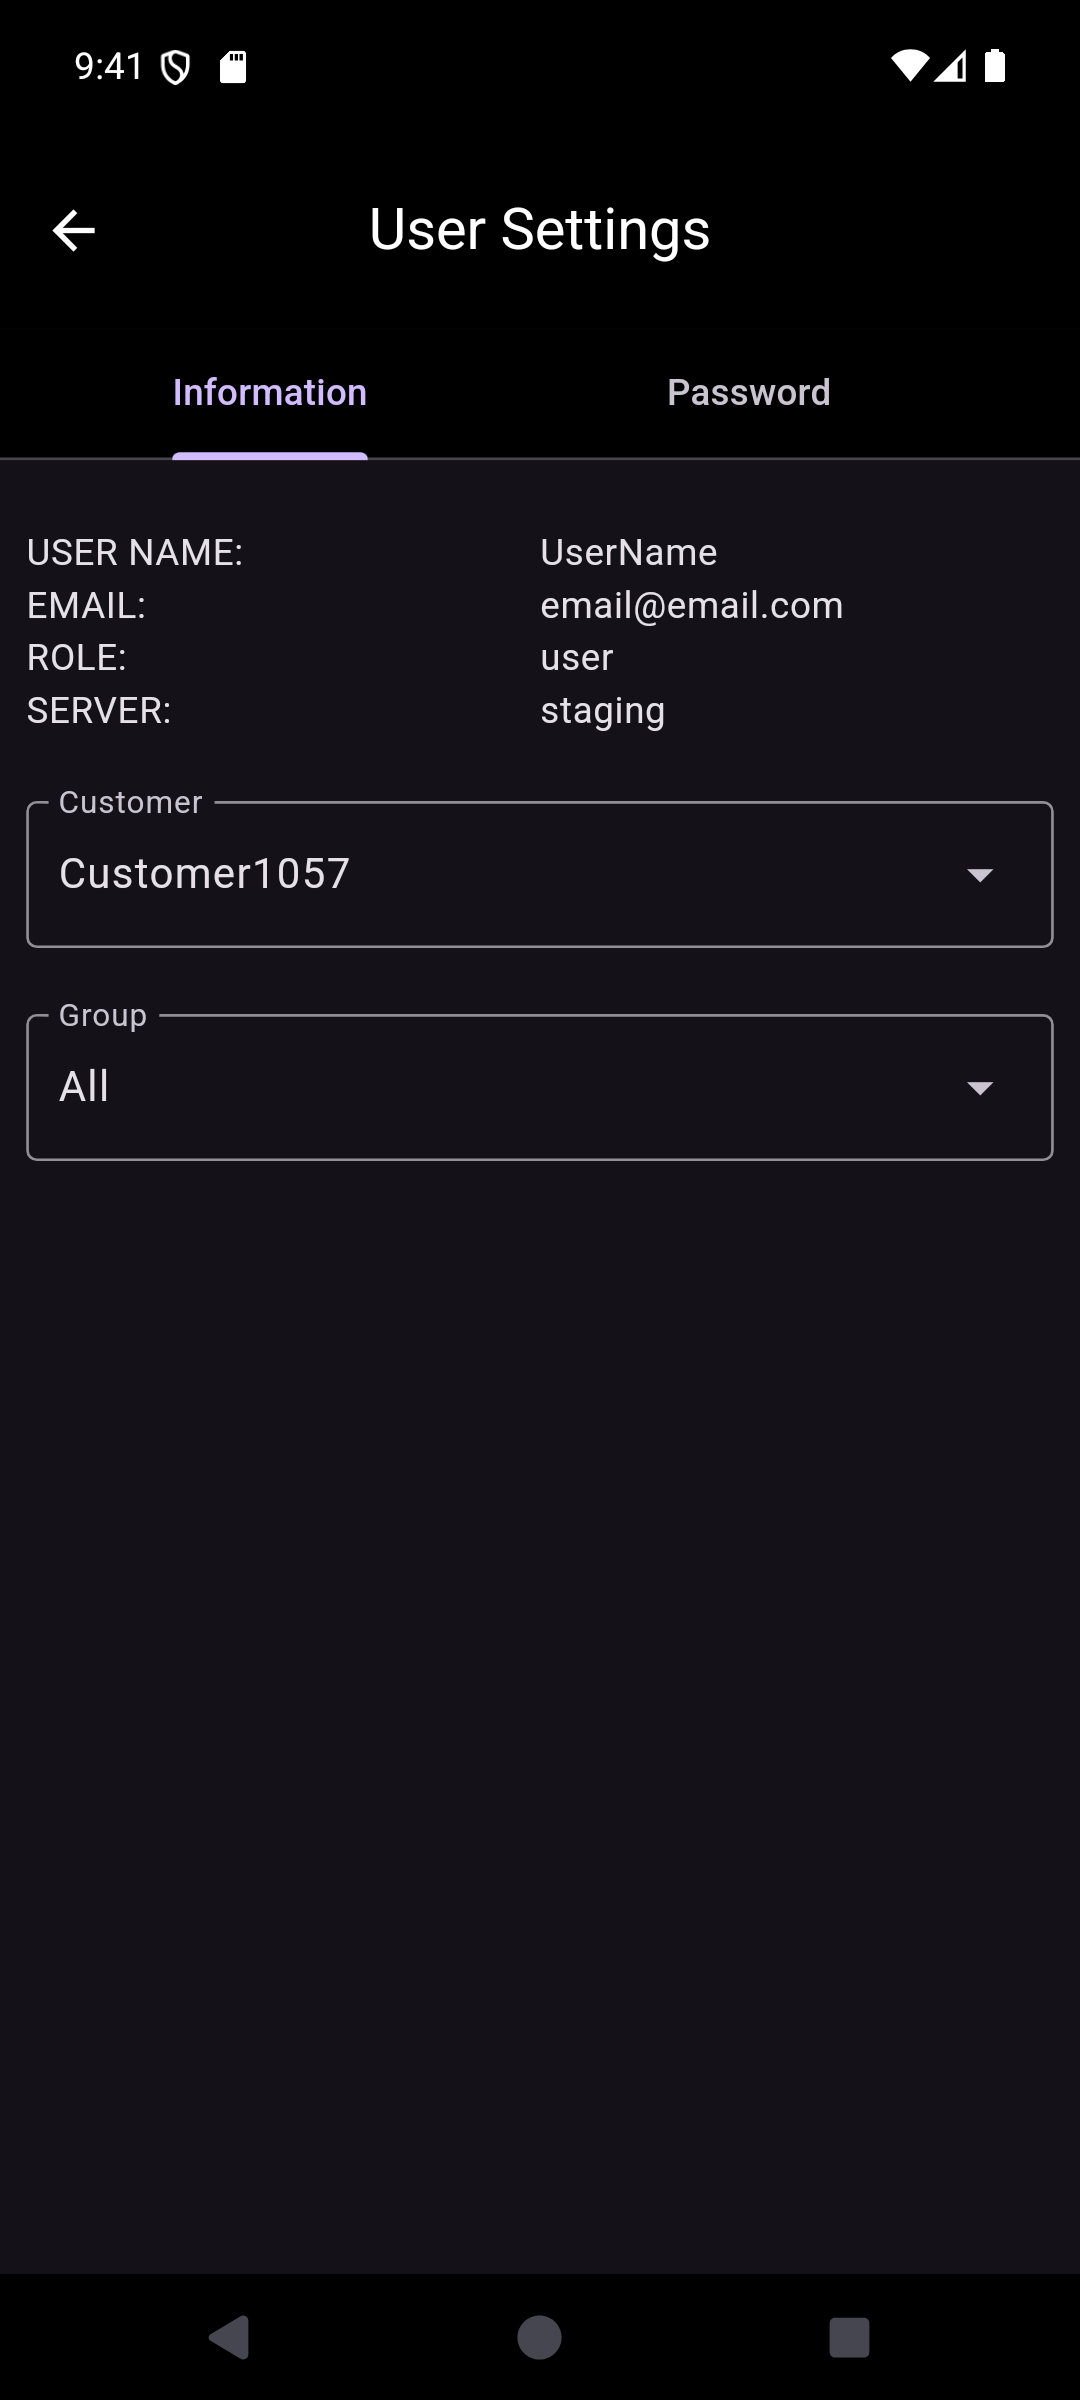
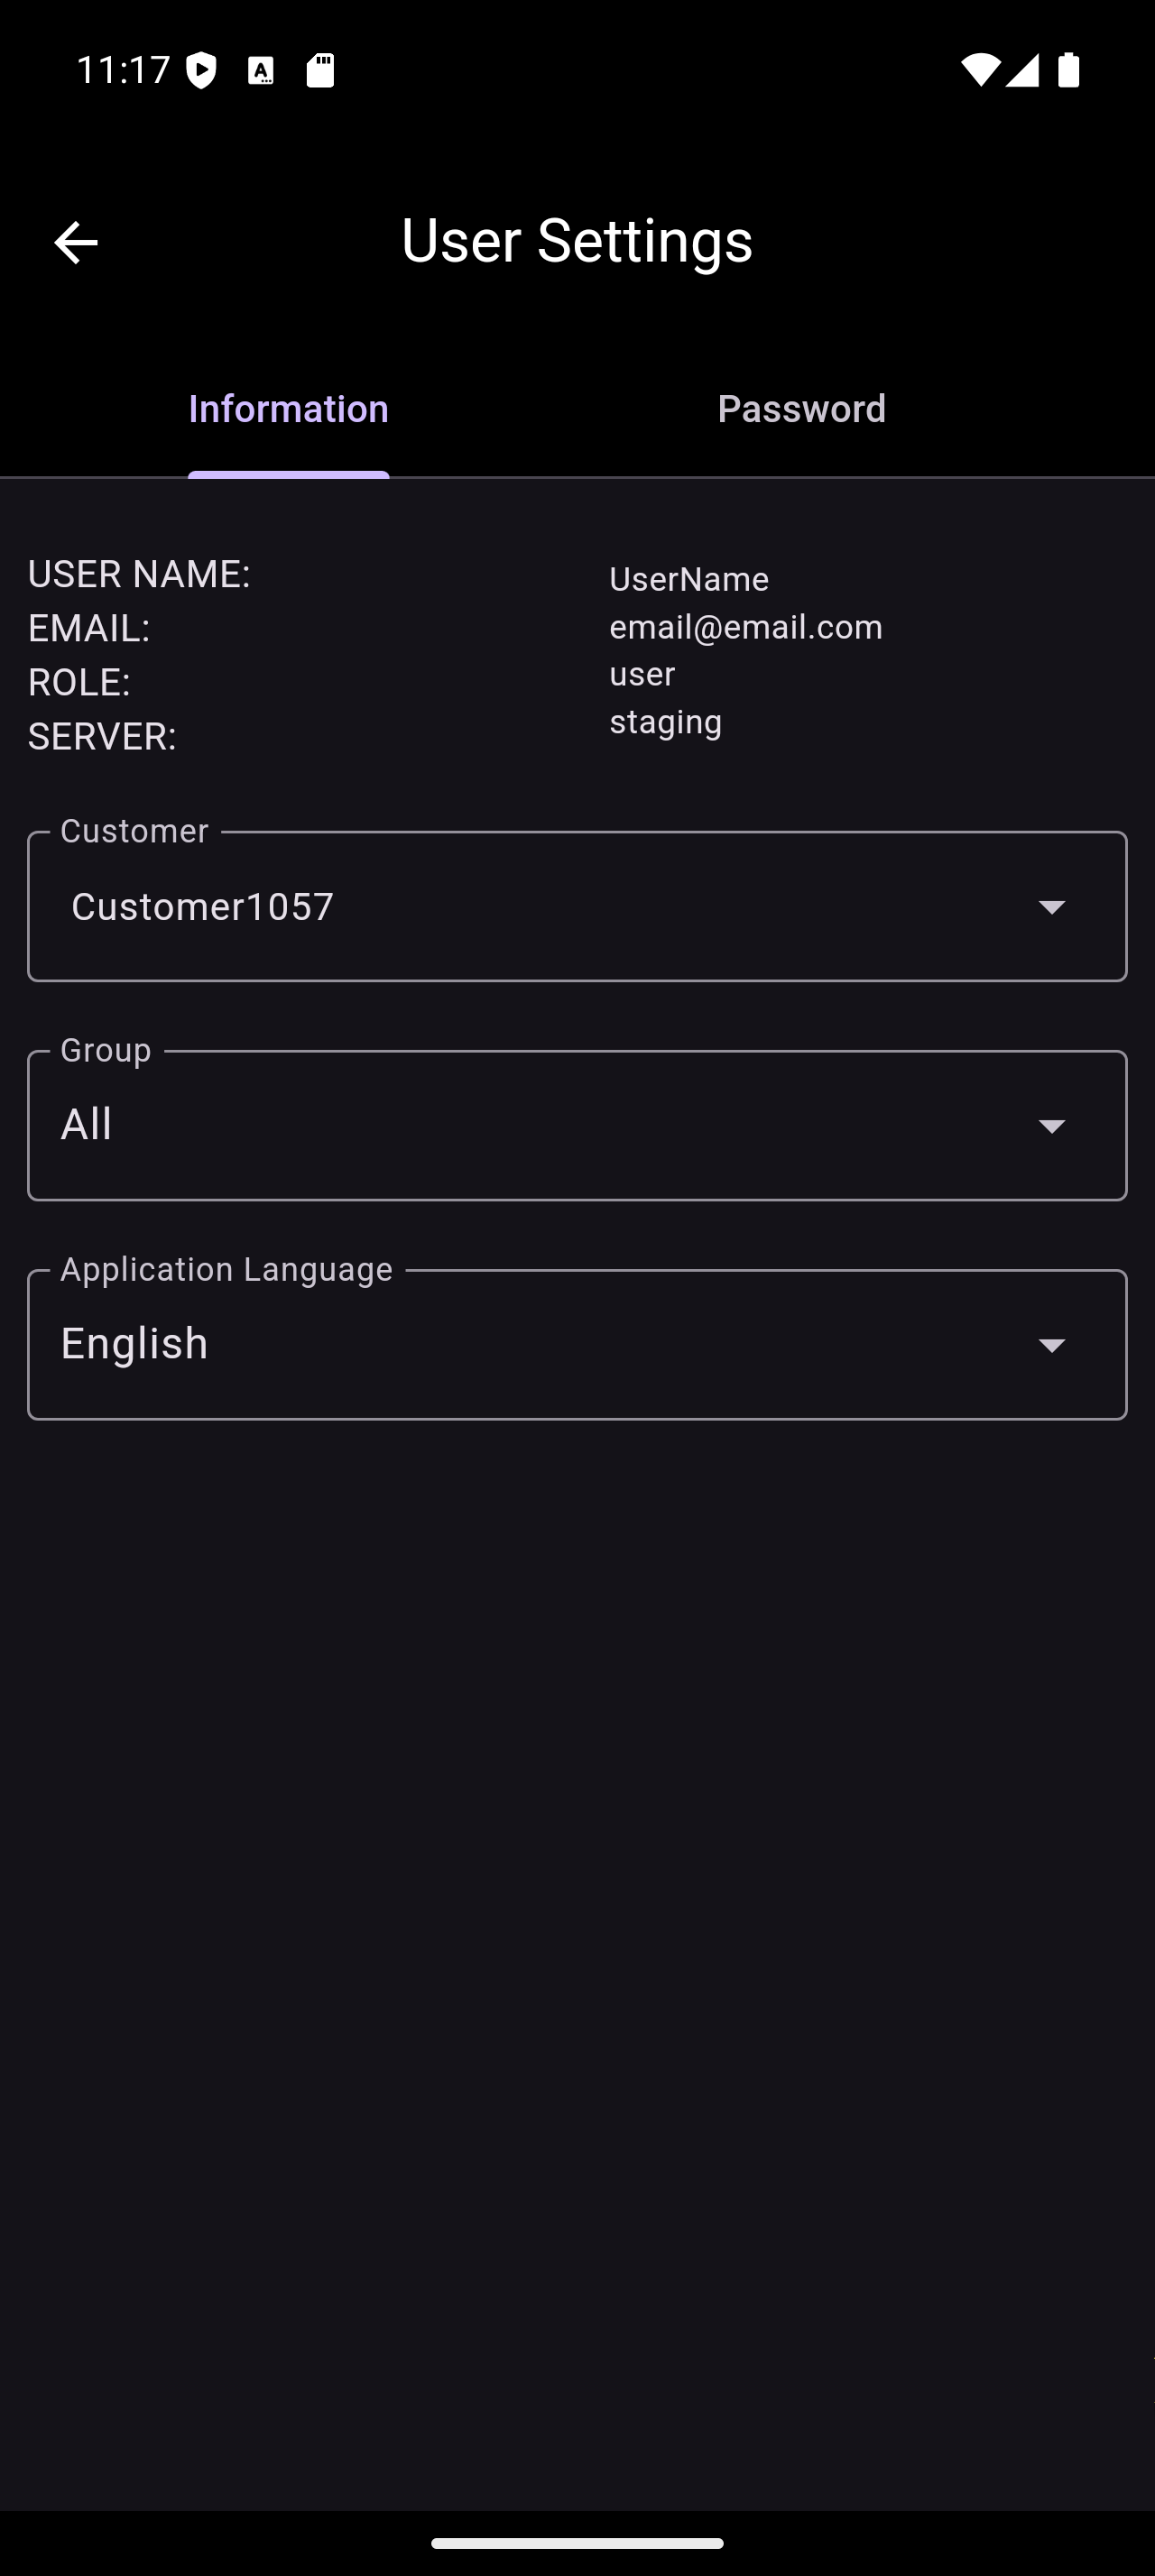
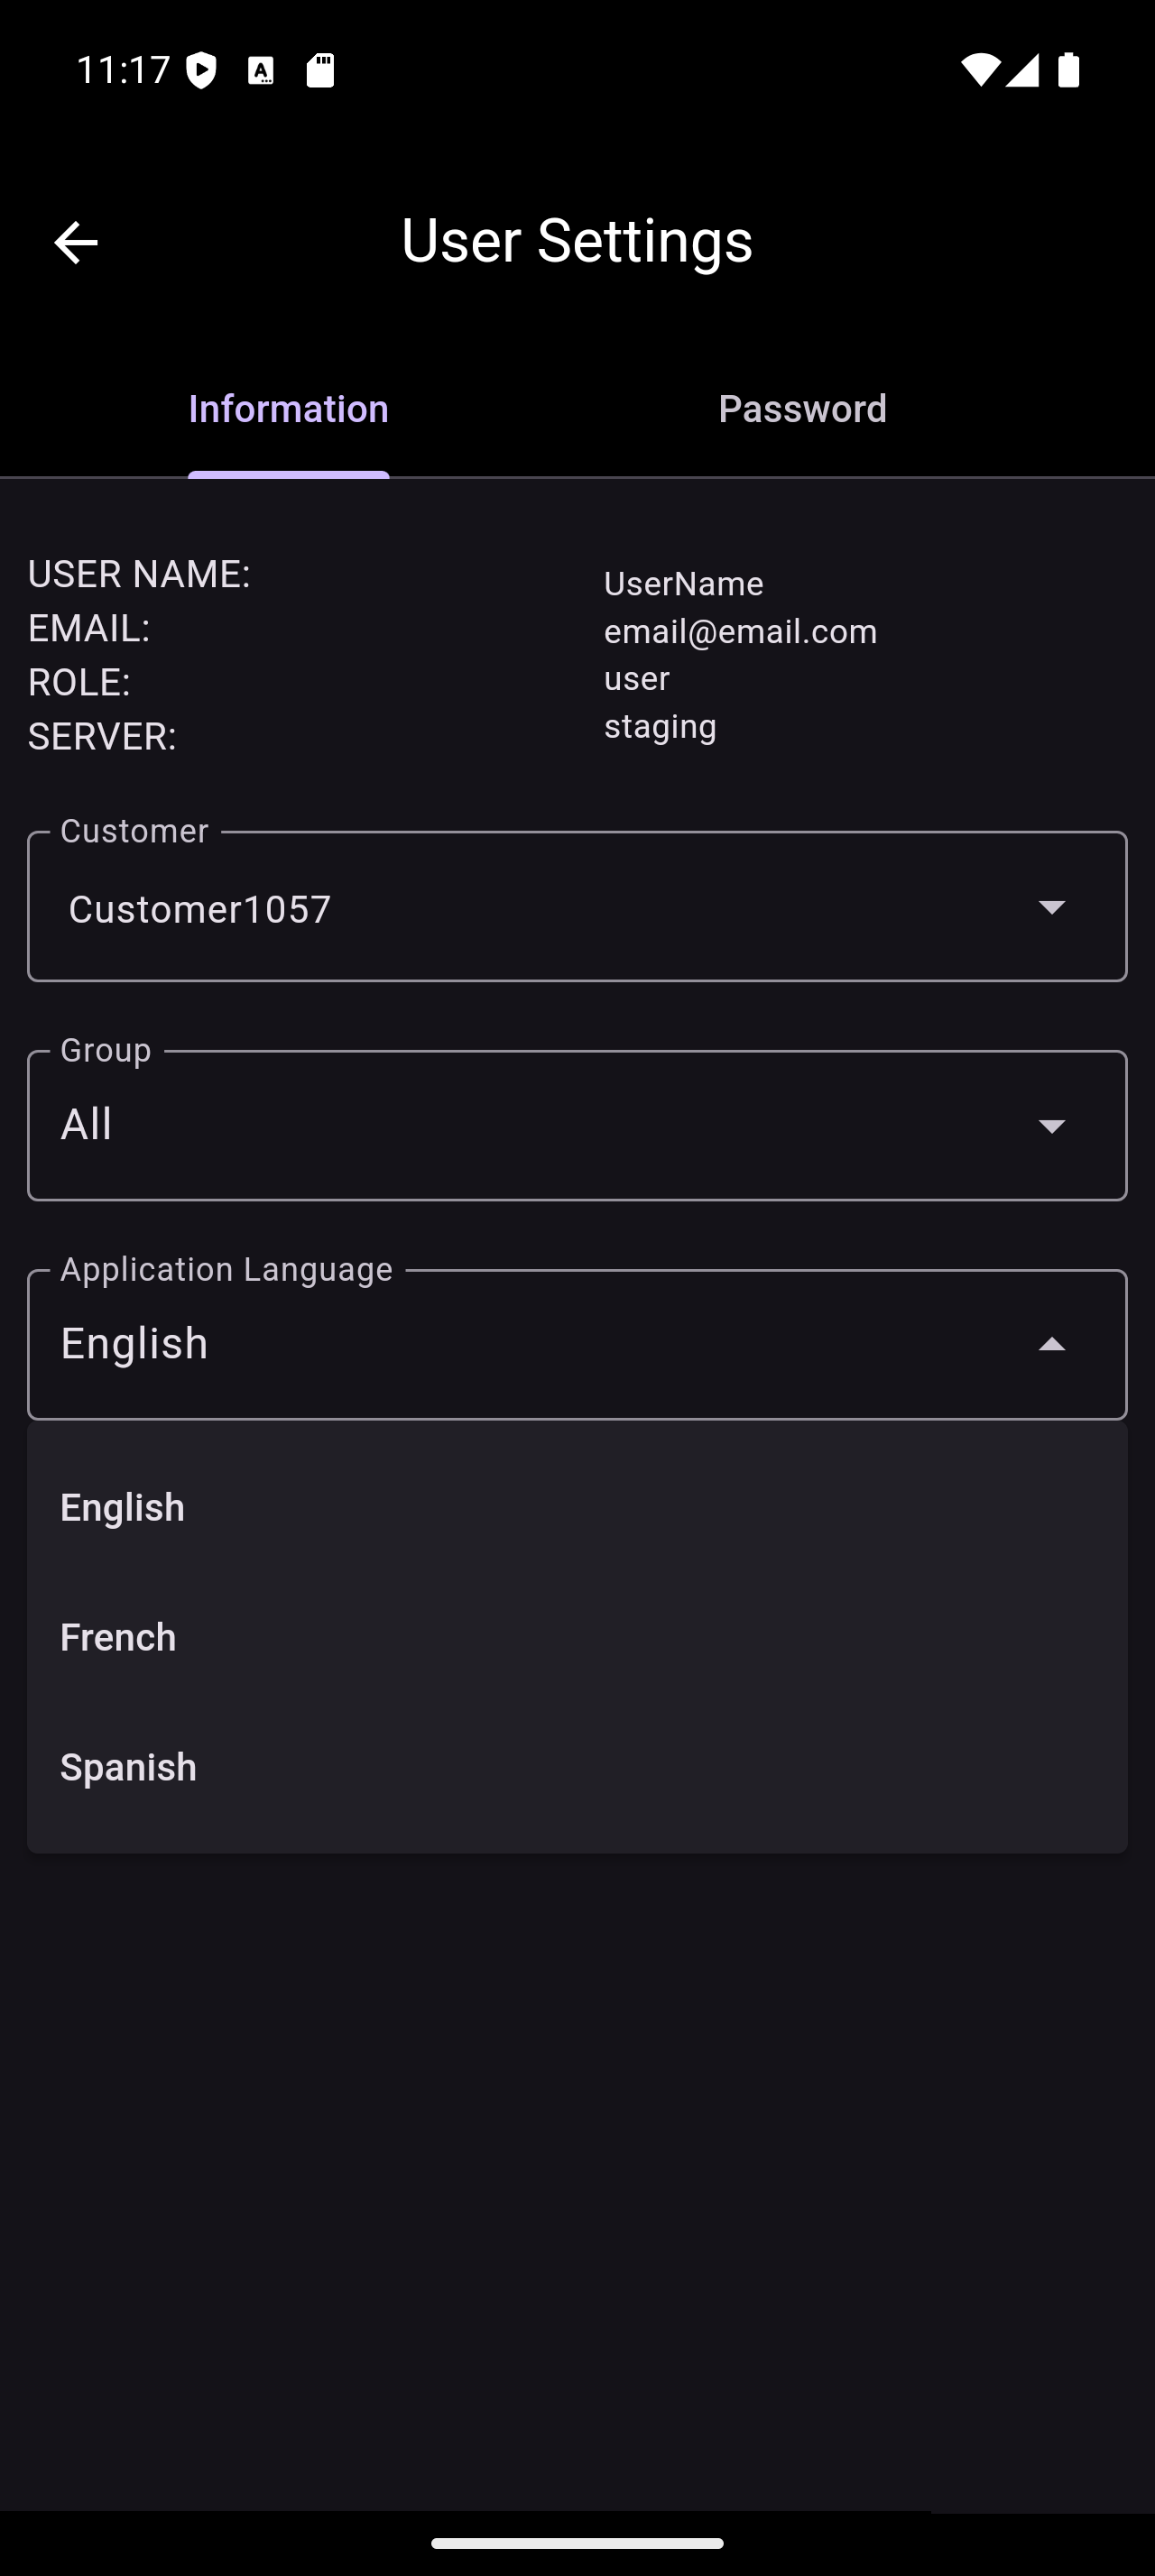
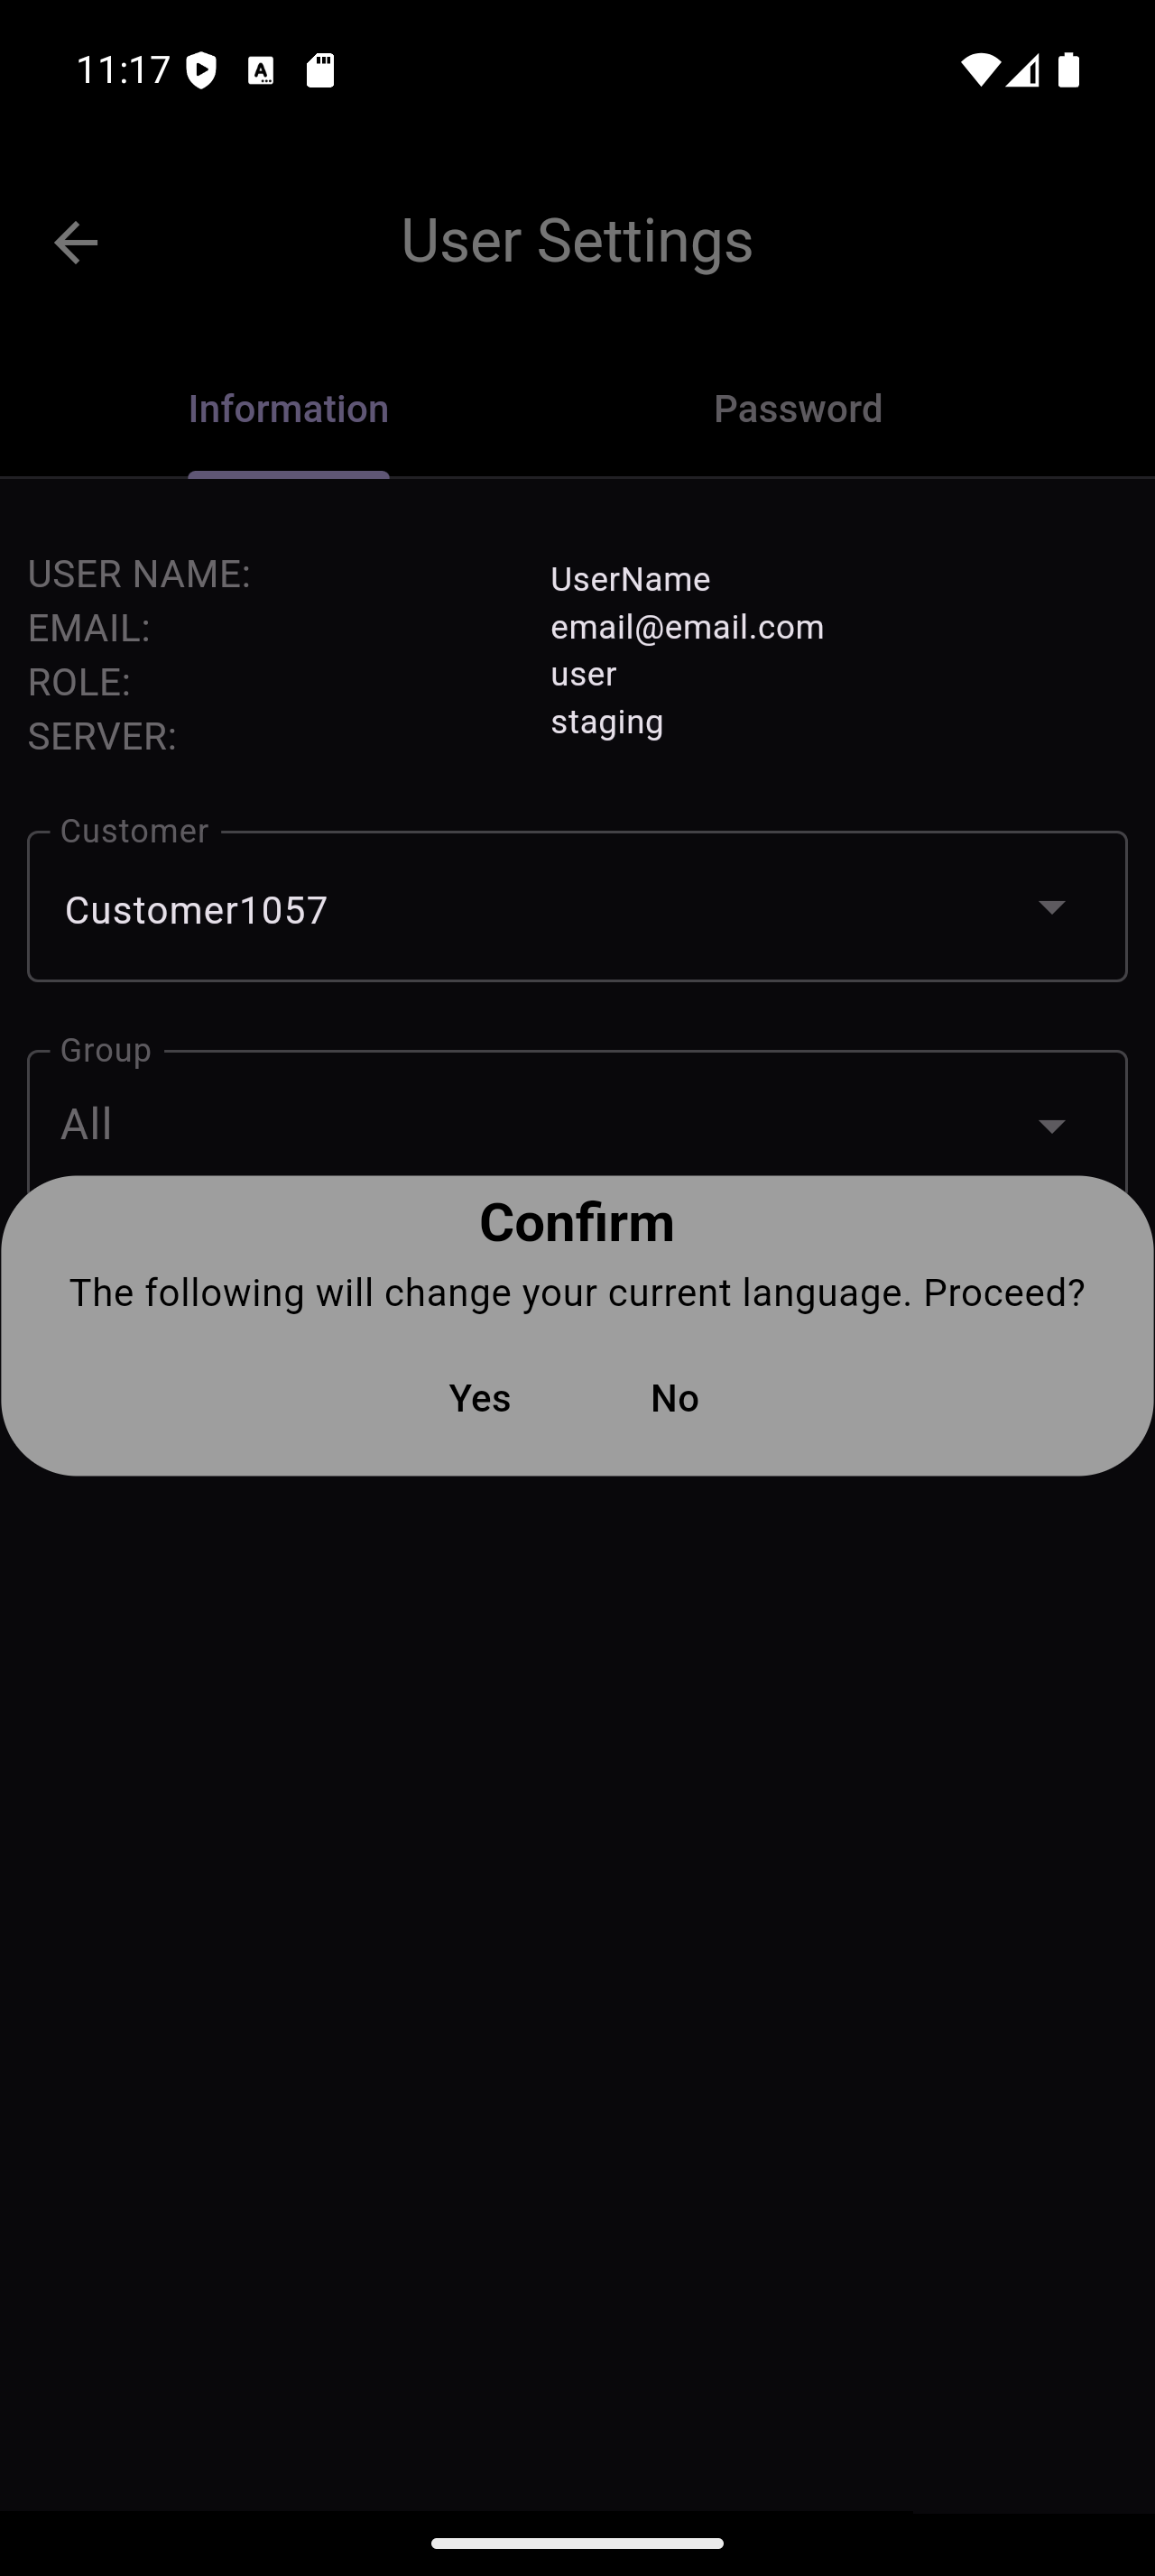
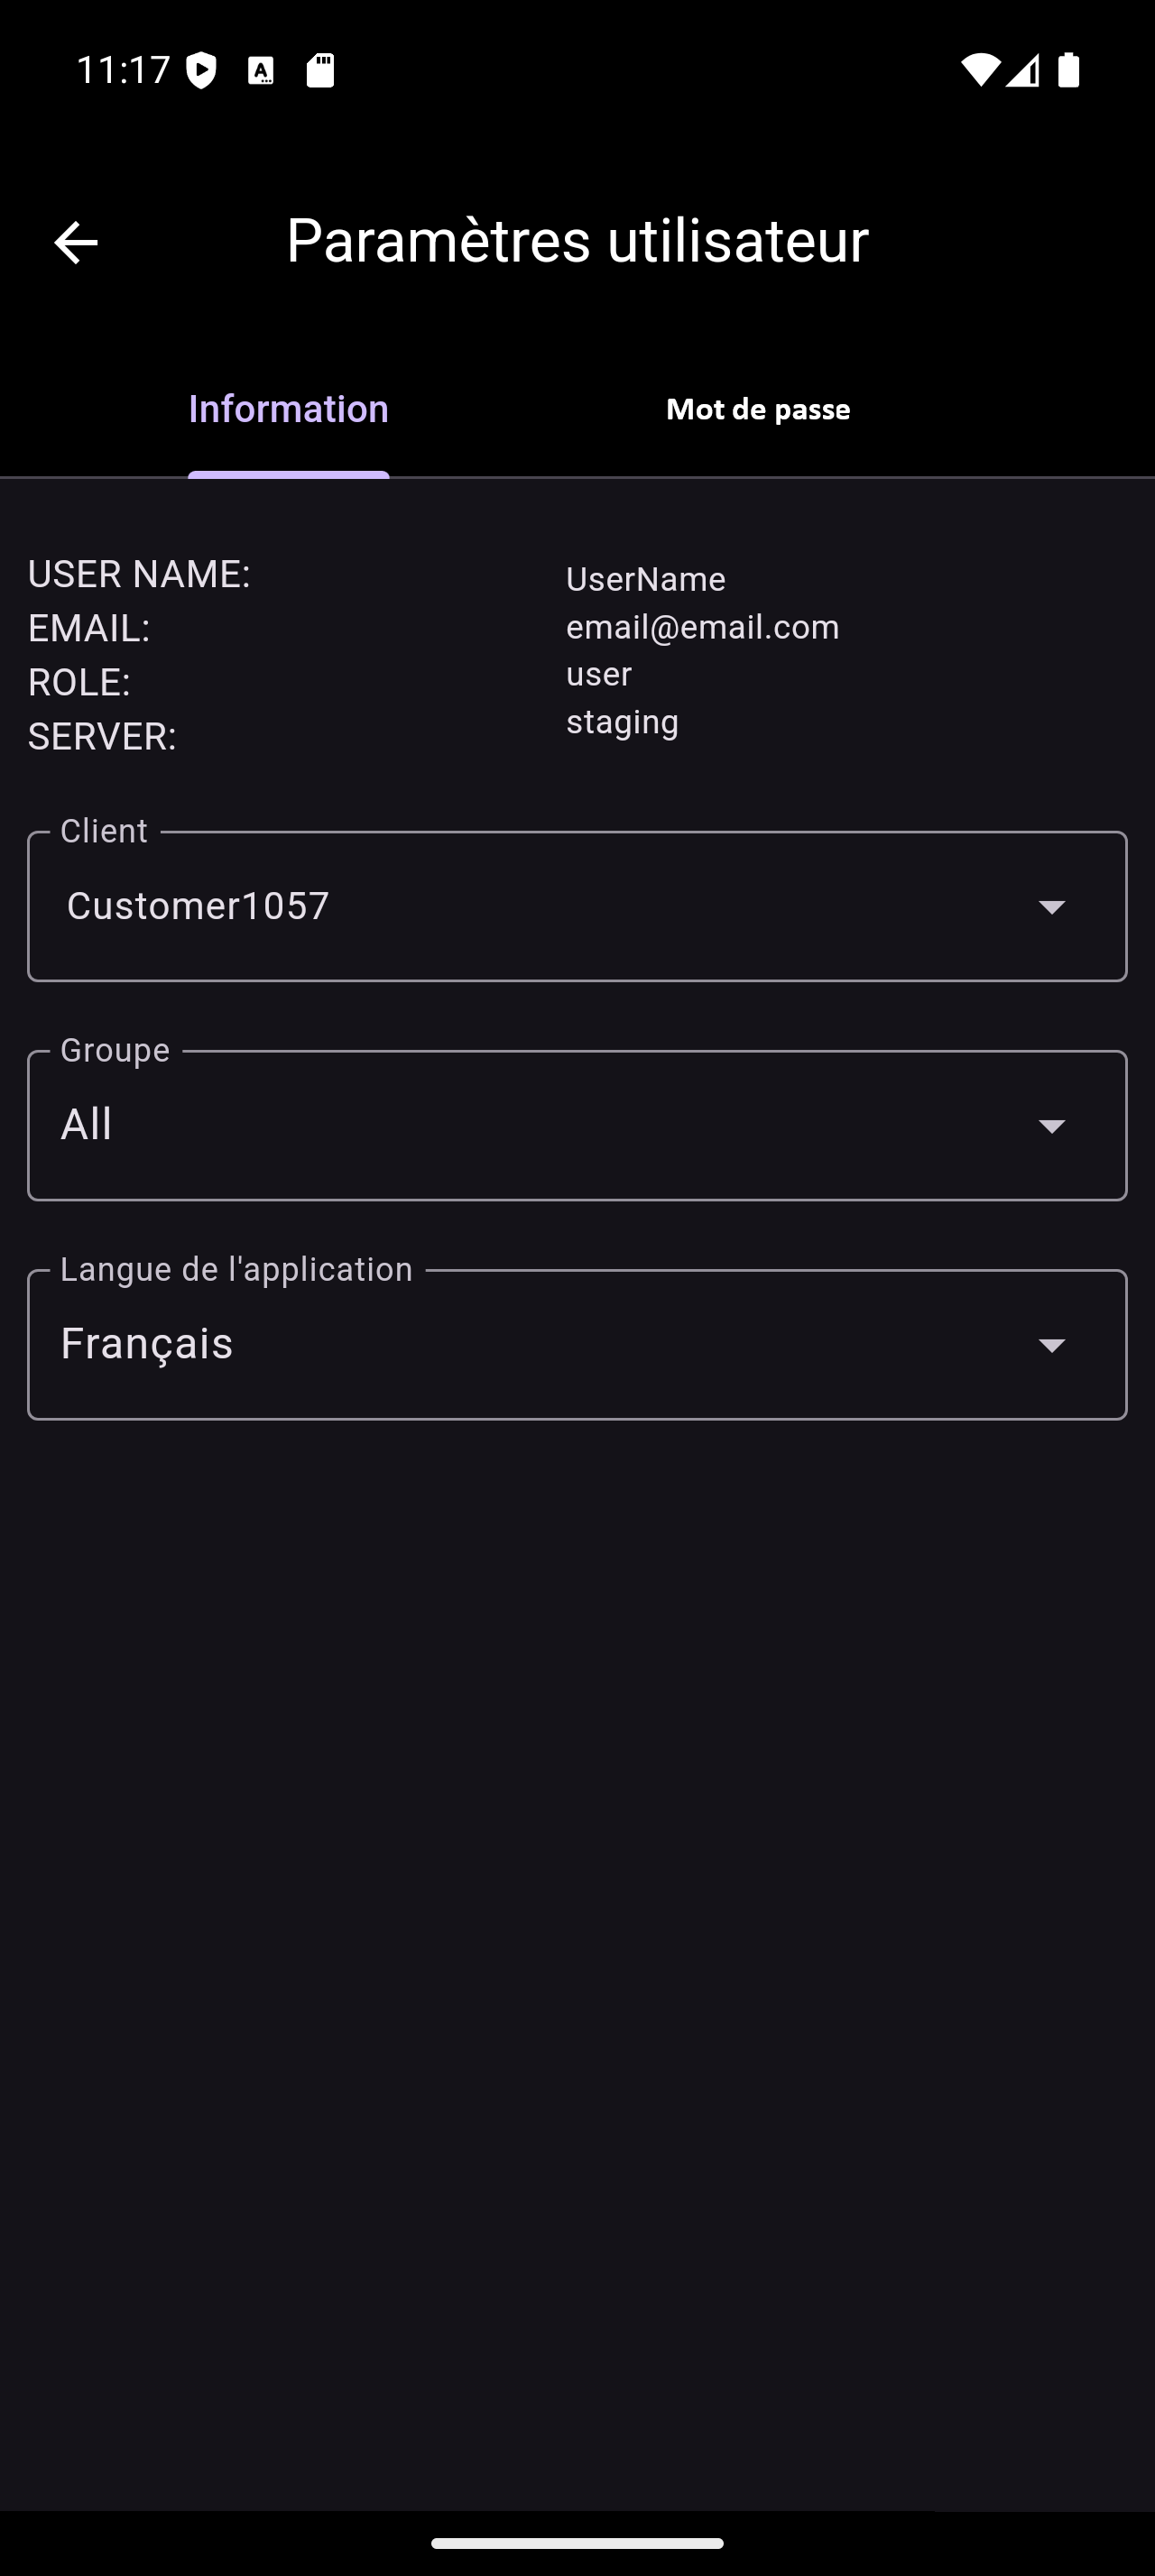
The User option brings up the settings for the user. It is a tabbed interface with the following options:
- The Information tab displays user's information. This tab also allows changing customers (if applicable), groups within the current customer (if applicable), and the language within the application. The supported languages are English, French, and Spanish.
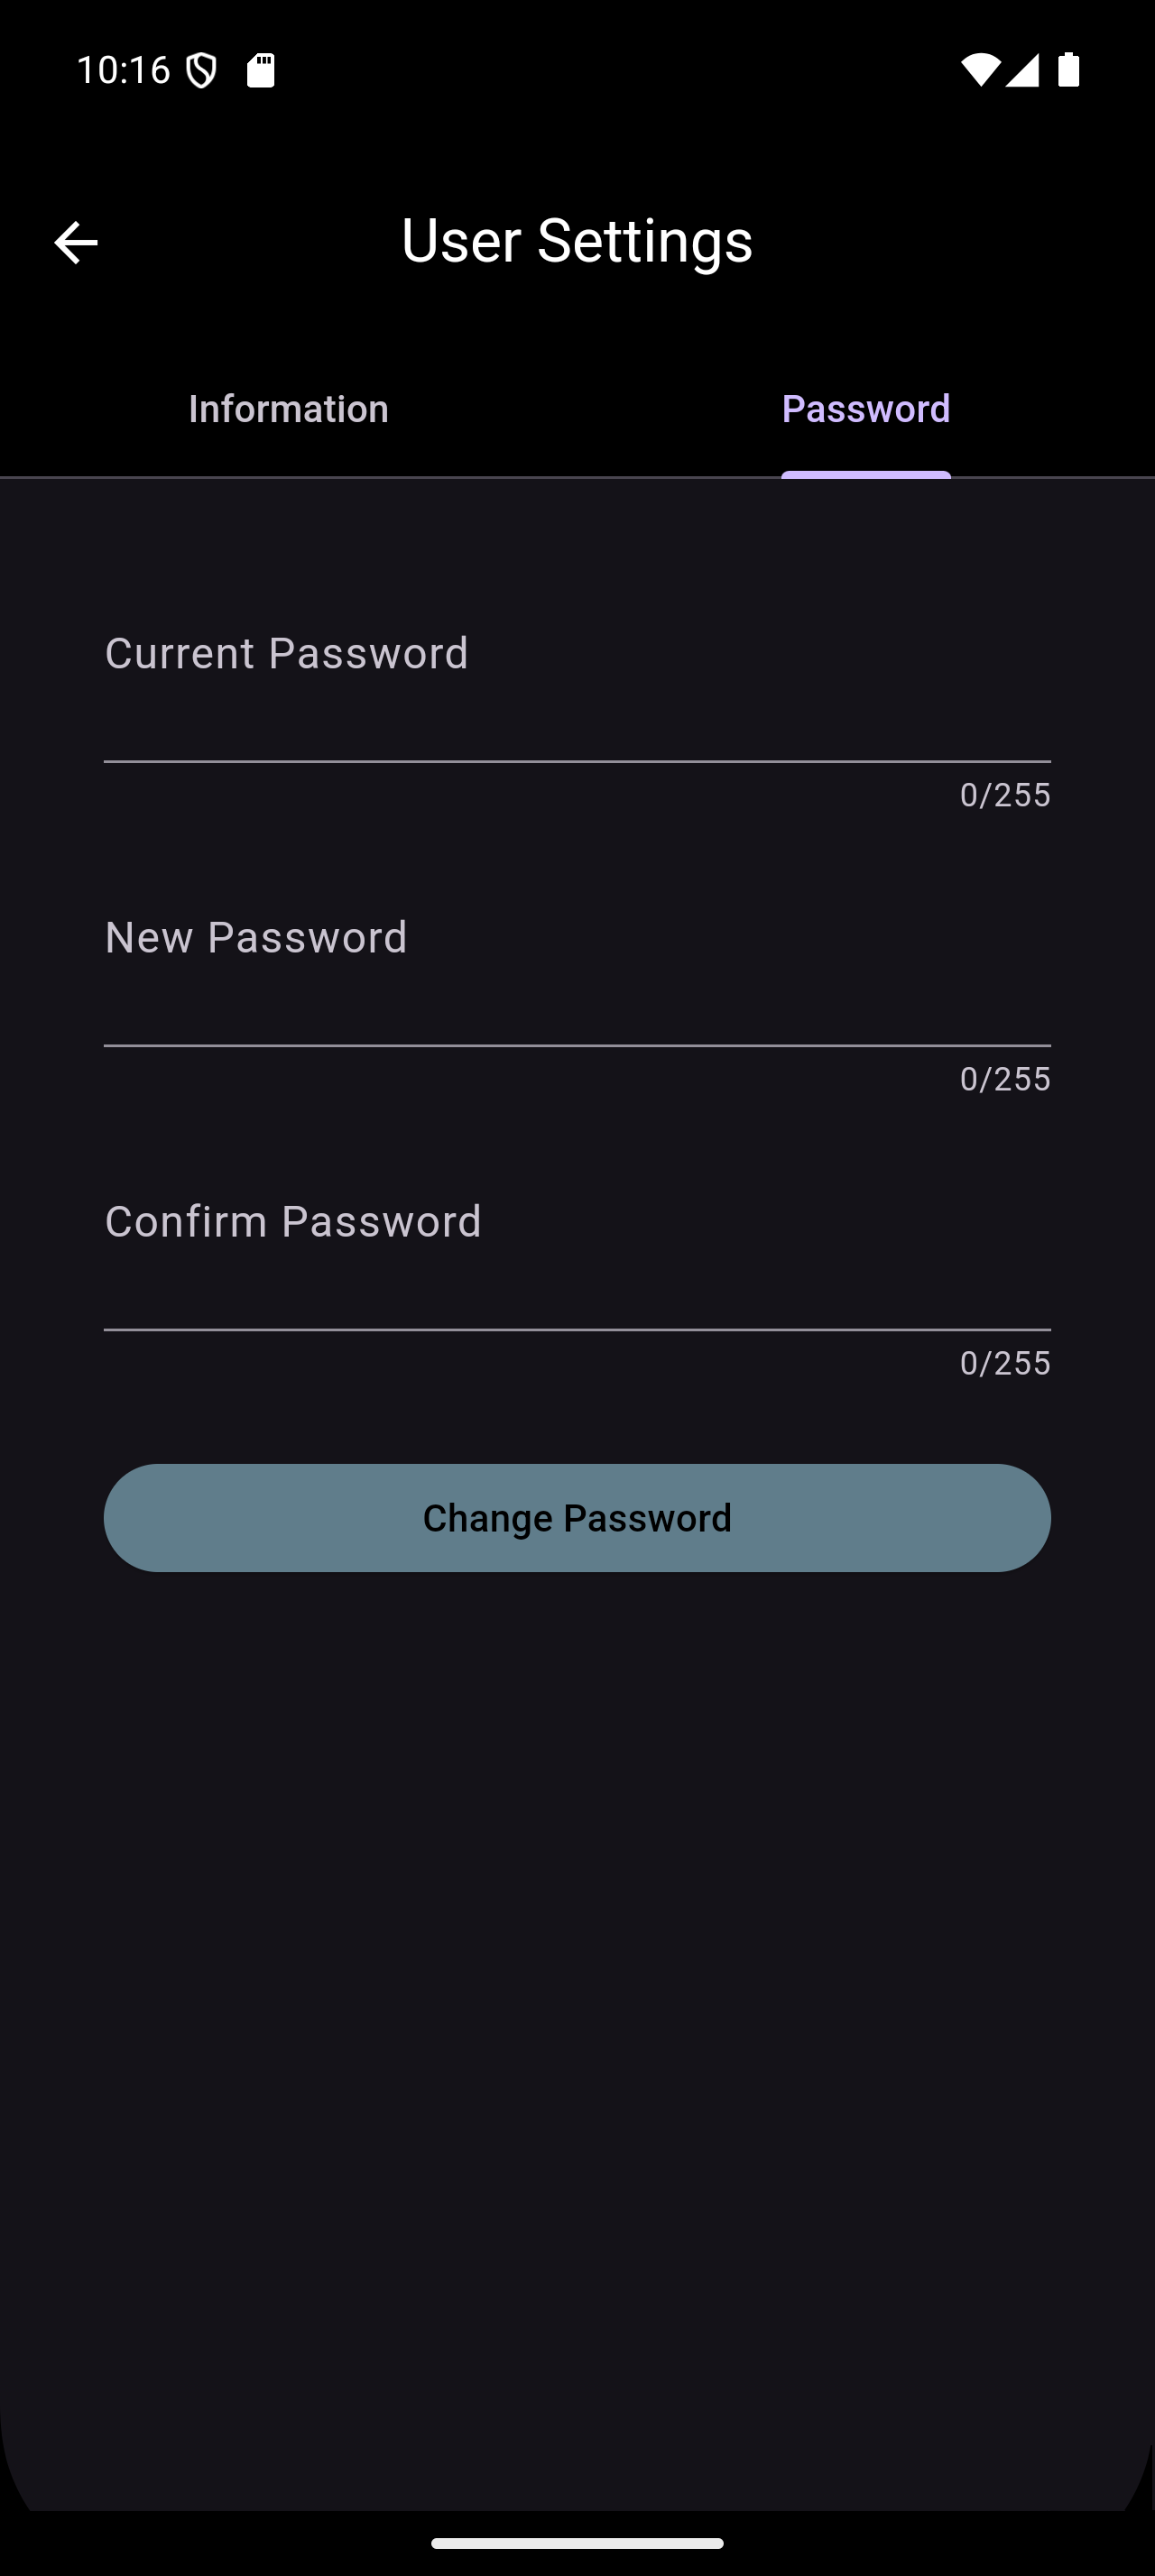
- The Change Password tab provides the ability to change your password.
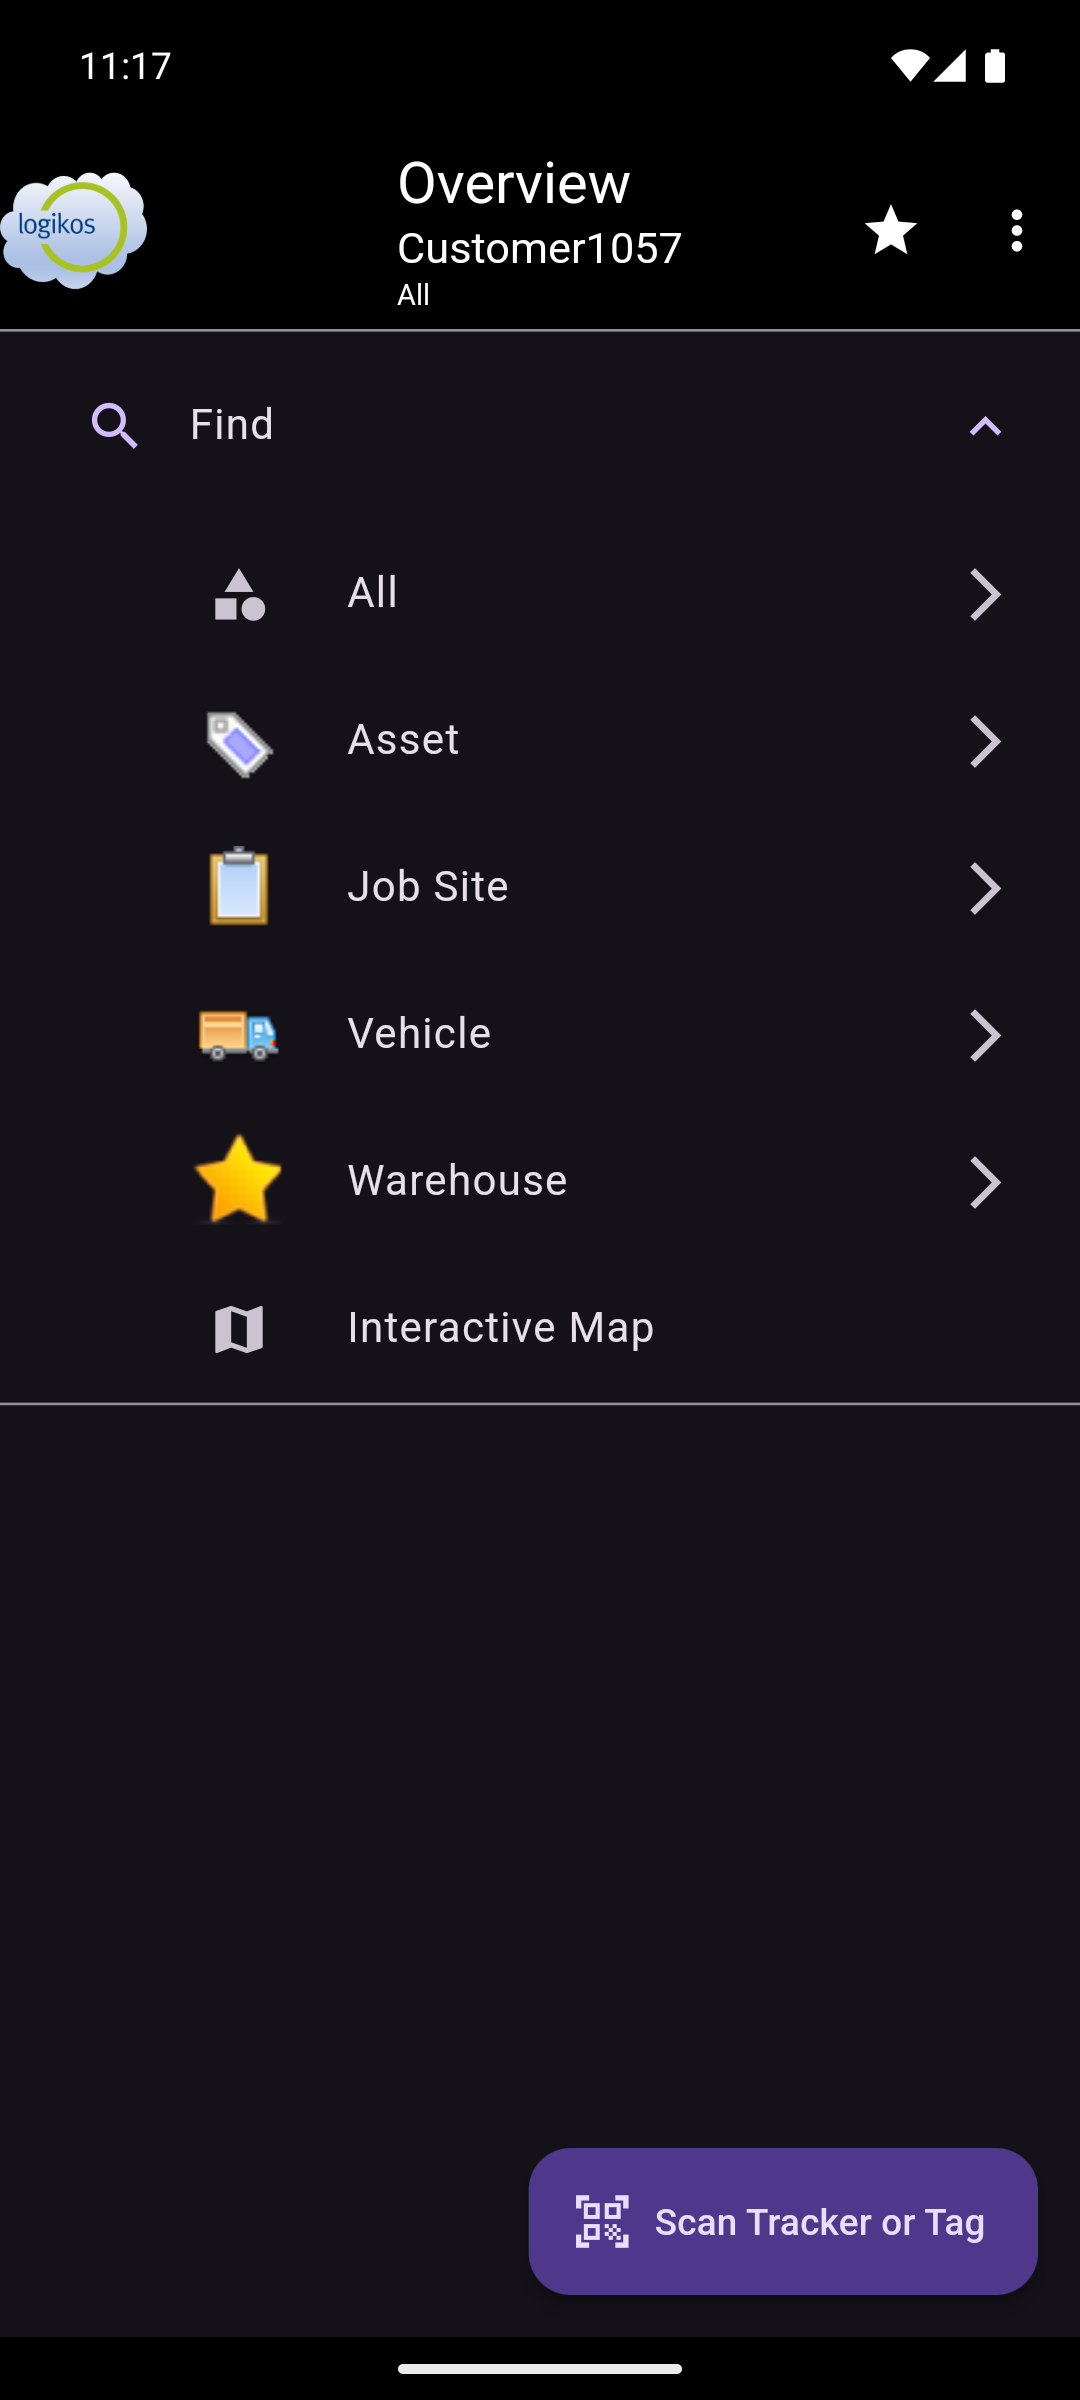
Quick Scan
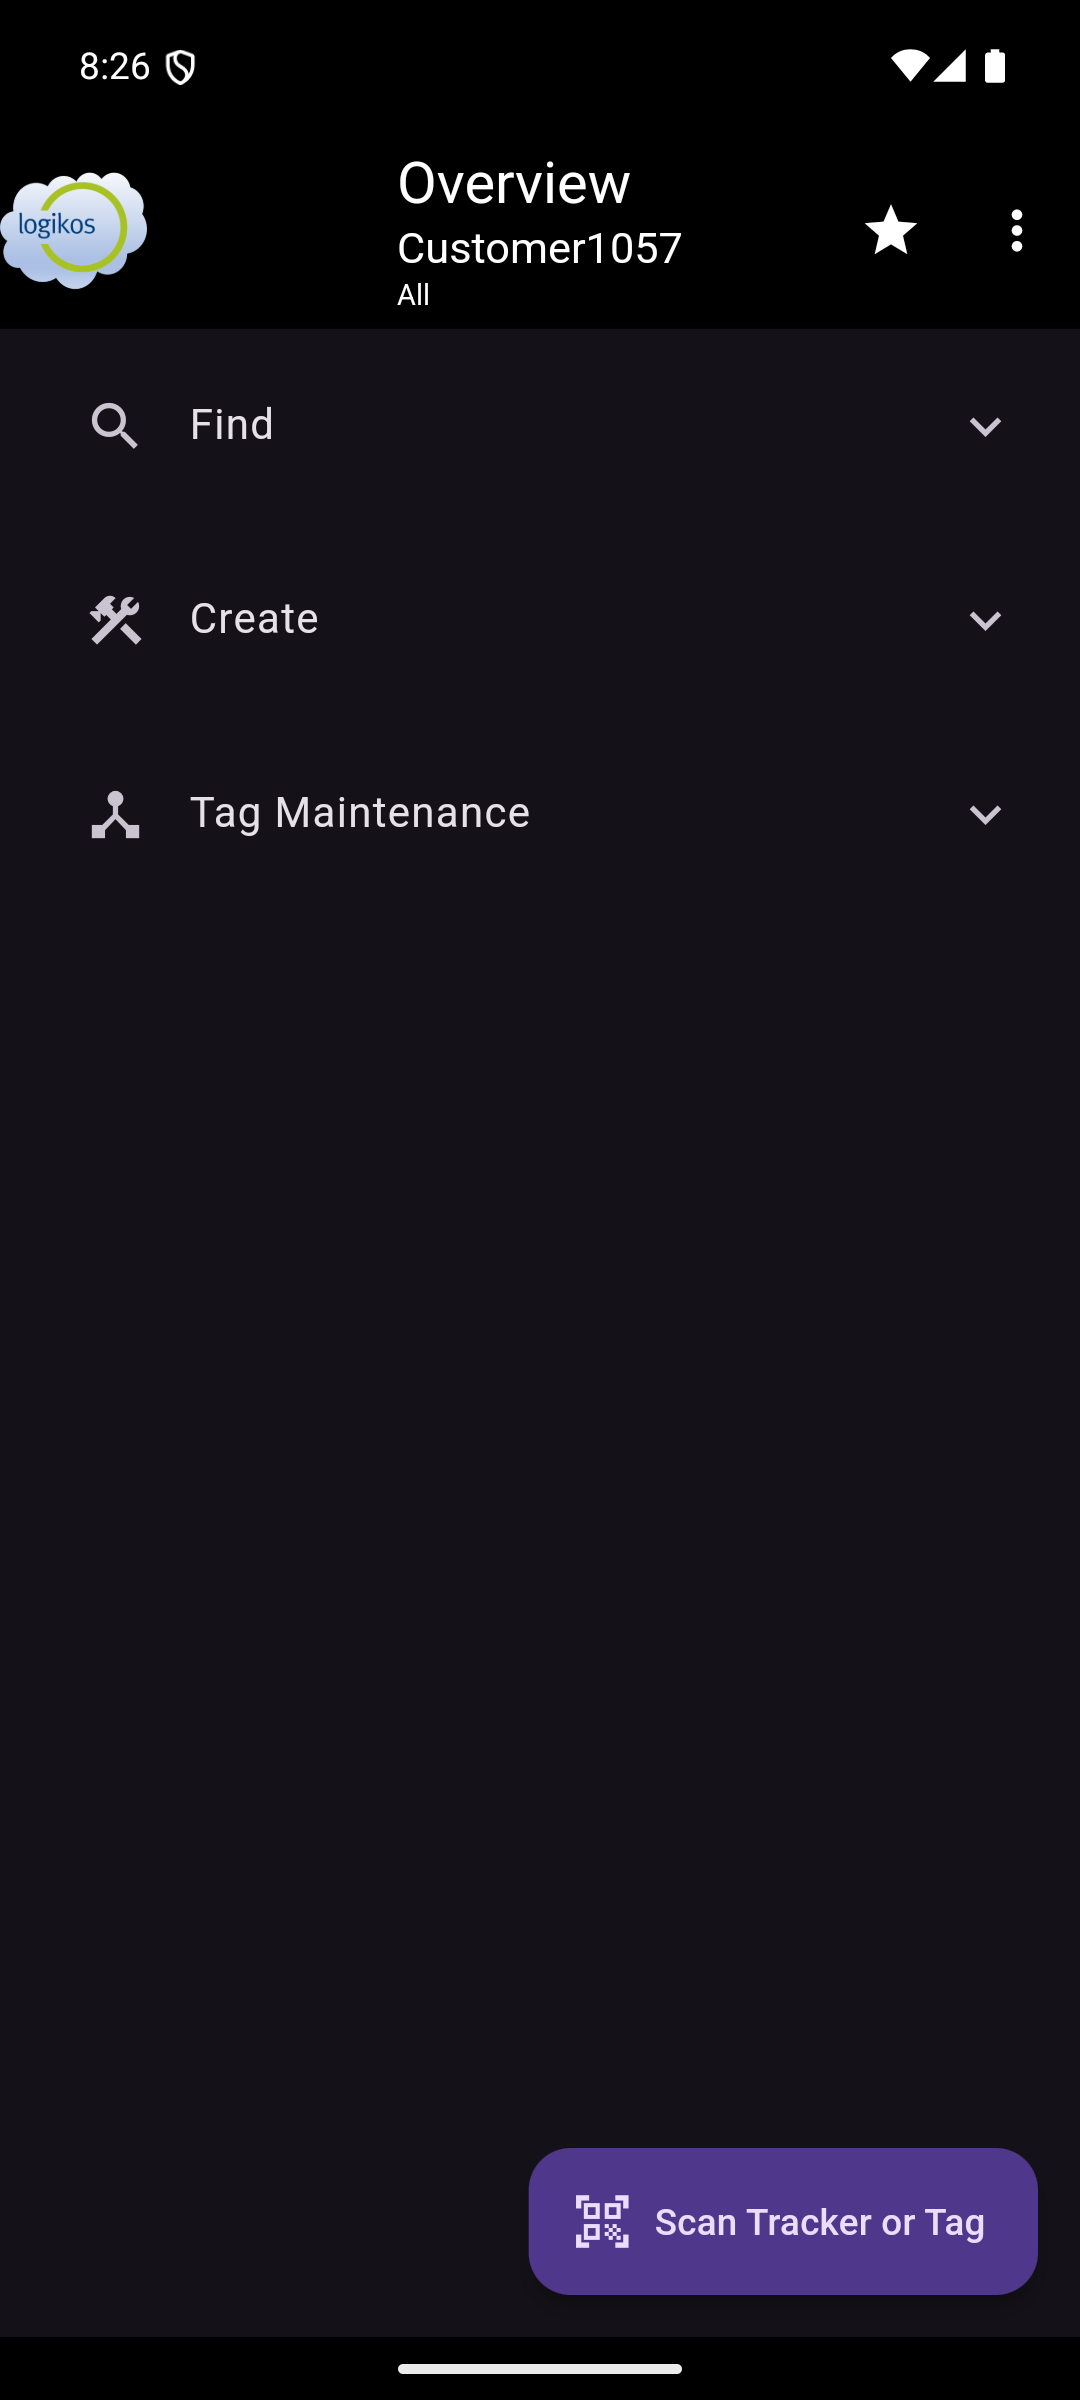
The Quick Scan button is located at the bottom of the Main Screen. It is used to scan the barcodes or QR codes on trackers and tags for quick searching and provisioning. After scanning a tracker or tag, the Asset Details page will open showing information for the asset the tracker or tag is associated with. If the tracker or tag does not have an asset associated with it, it can be provisioned immediately, either to associate it with an existing asset or create a new asset for it.
NOTE: Only users with the appropriate permissions can provision trackers/tags. Other users will receive a message stating the tracker/tag is unassigned, and to see an admin to use it.
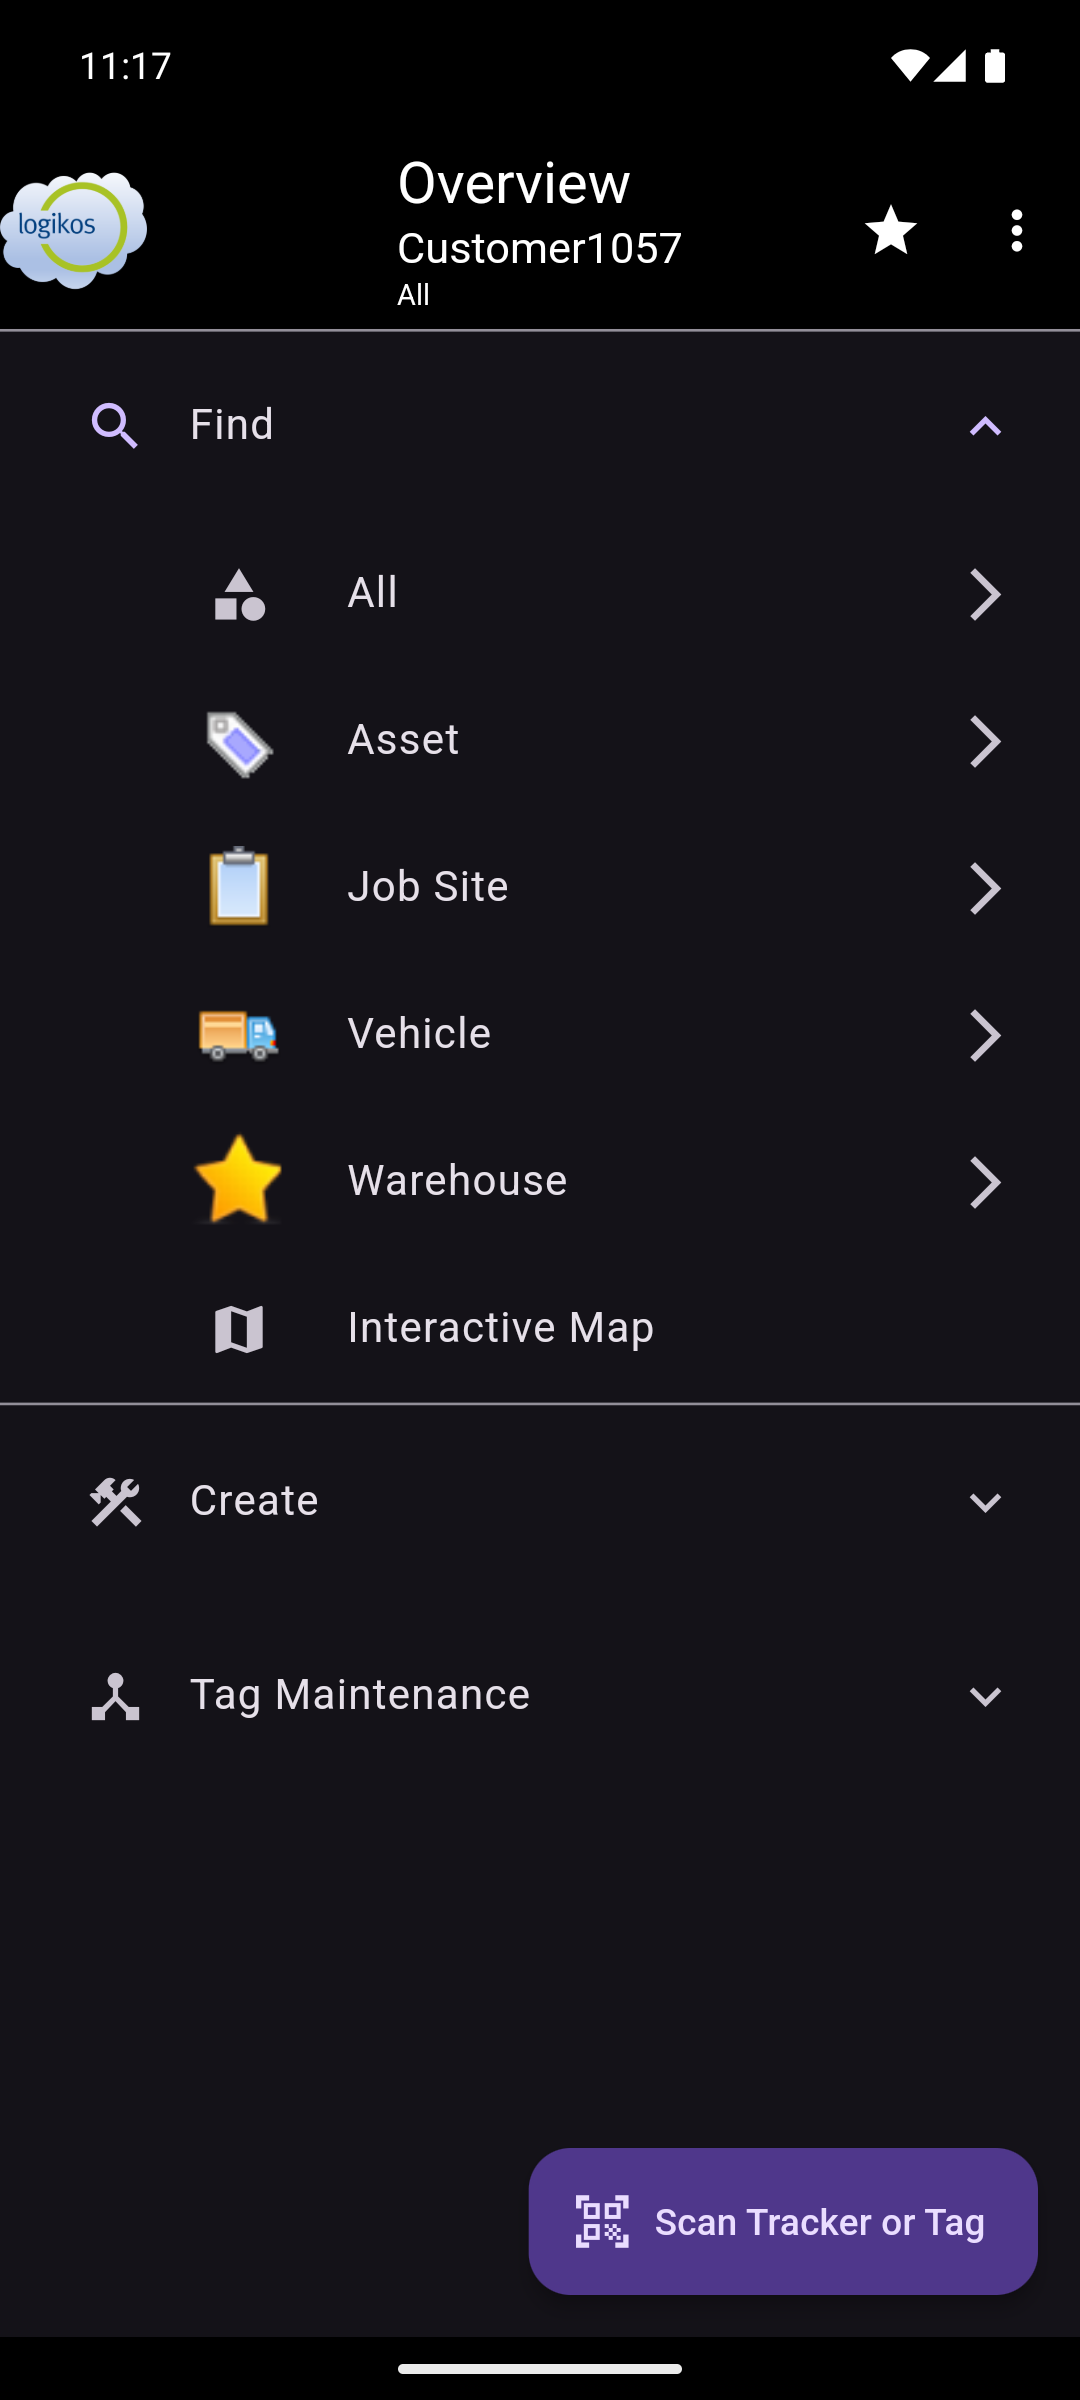
Find
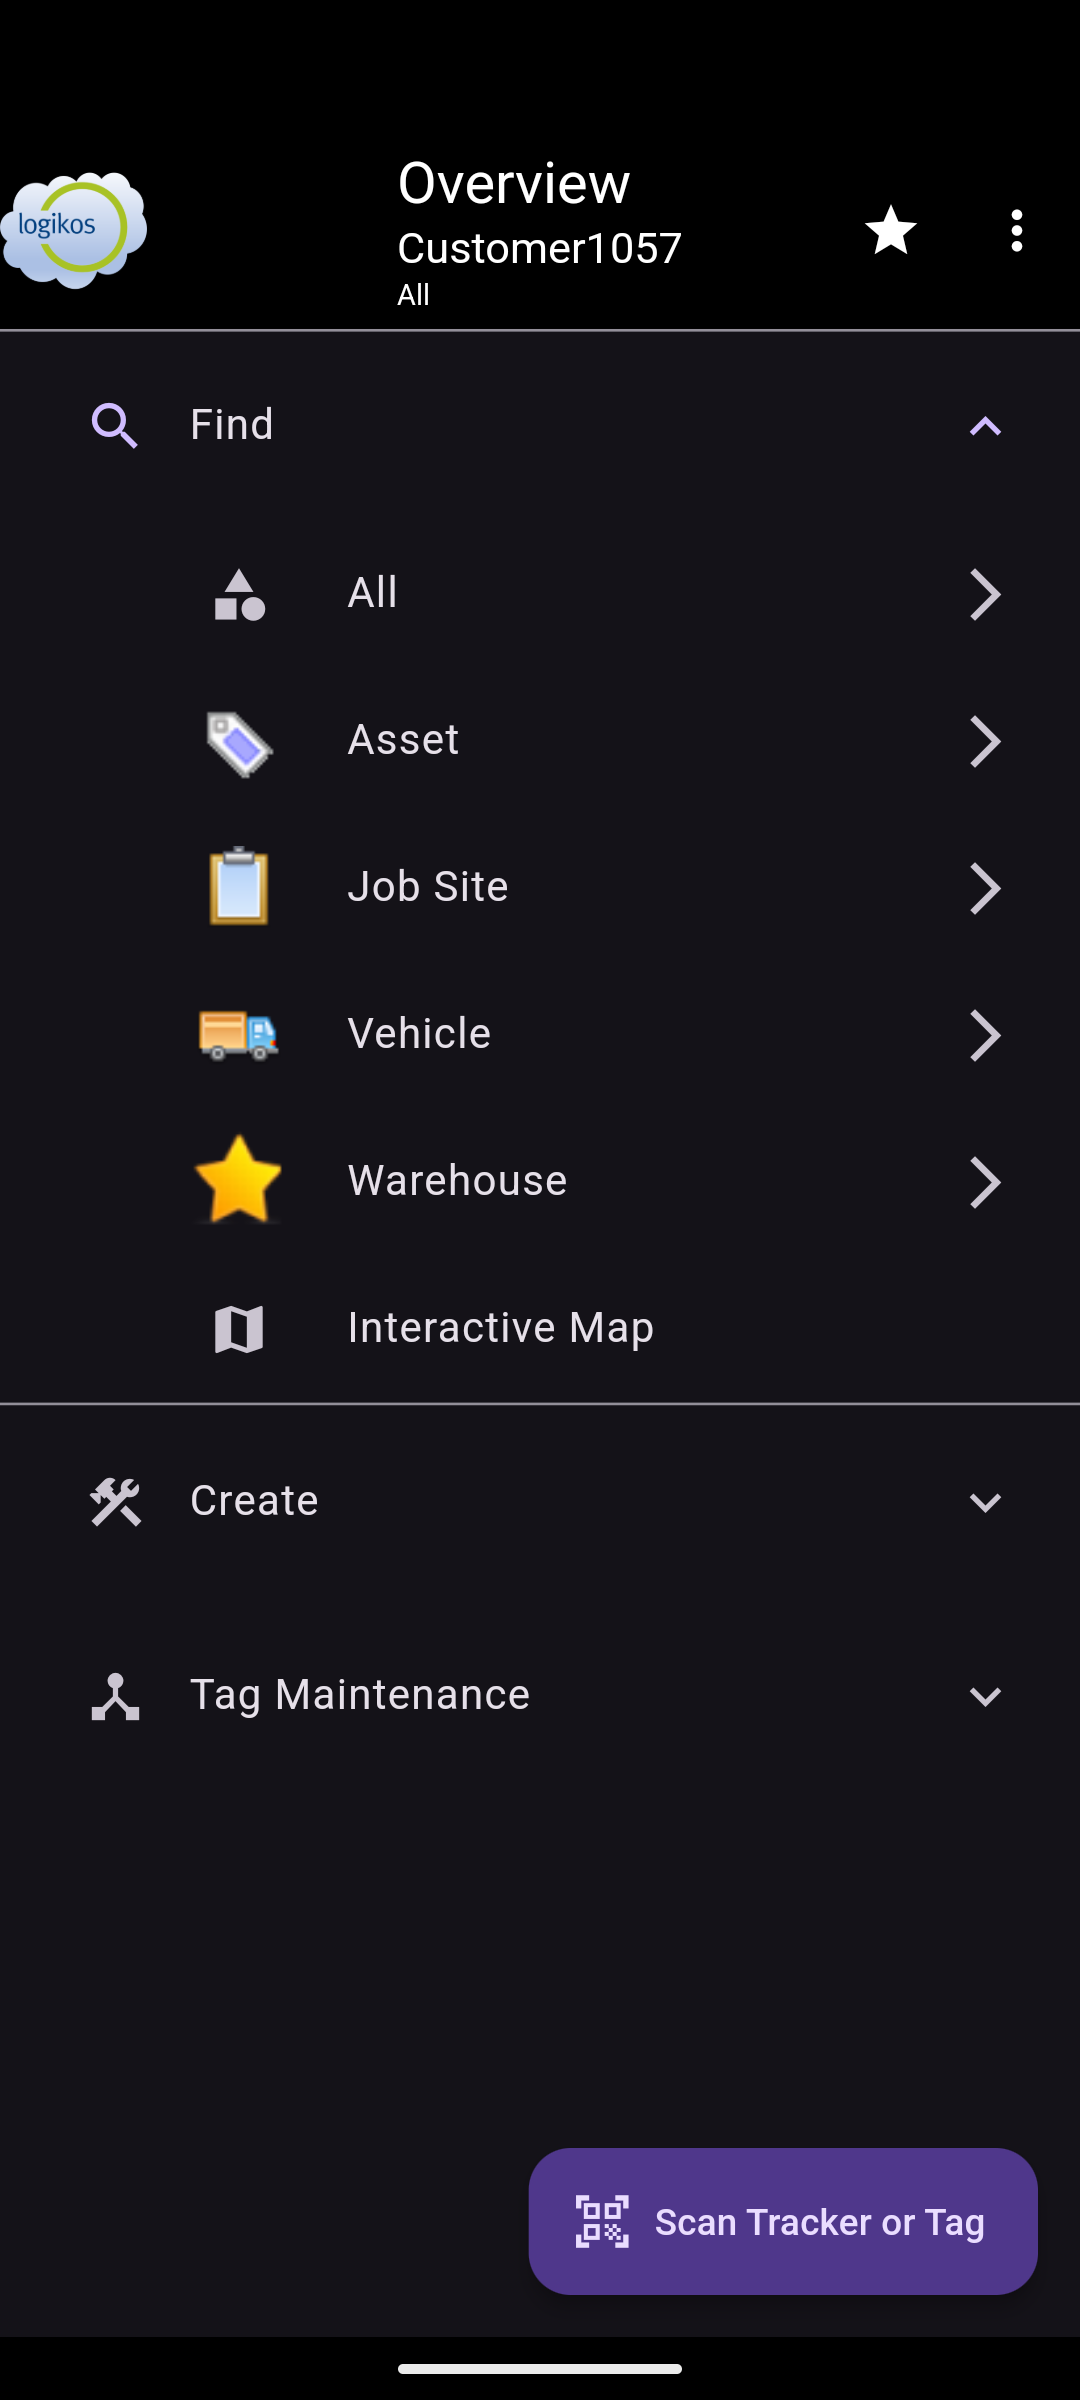
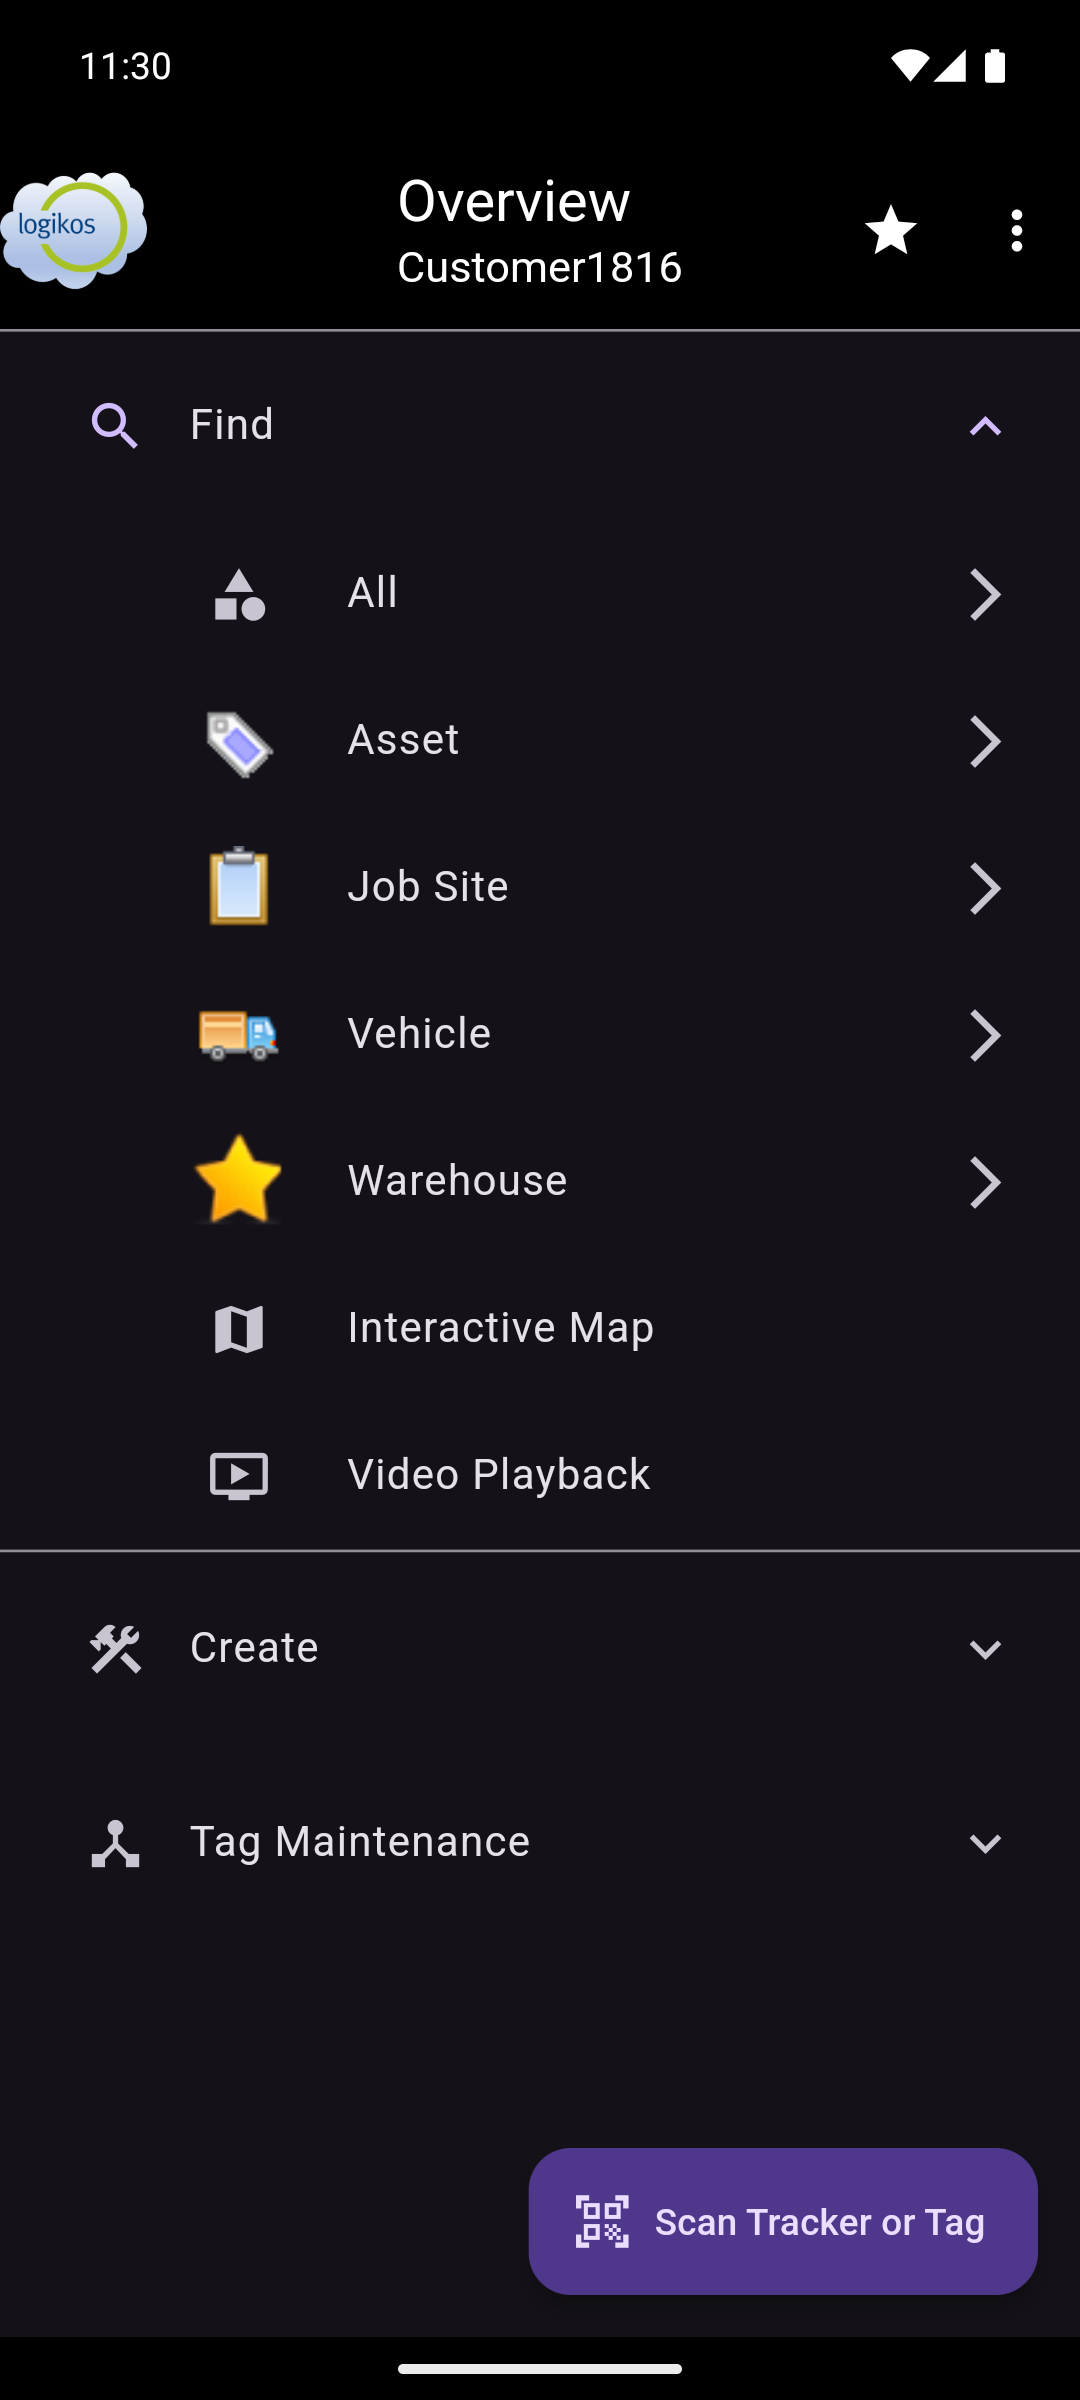
There are four main asset types within the Overview System. These are Asset, Job Site, Vehicle, and Warehouse. Selecting one of these asset types allows for searching for assets of that type. There is also an All option for searching all asset types.
The Interactive Map and Video Playback options are also shown here. Interactive Map provides the ability to view a map with the assets displayed on it. Video Playback is shown if the customer has videos on the Overview System. It provides the ability to find and view those videos.
The sub-sections below breakdown the different options in more detail.
Query Selection
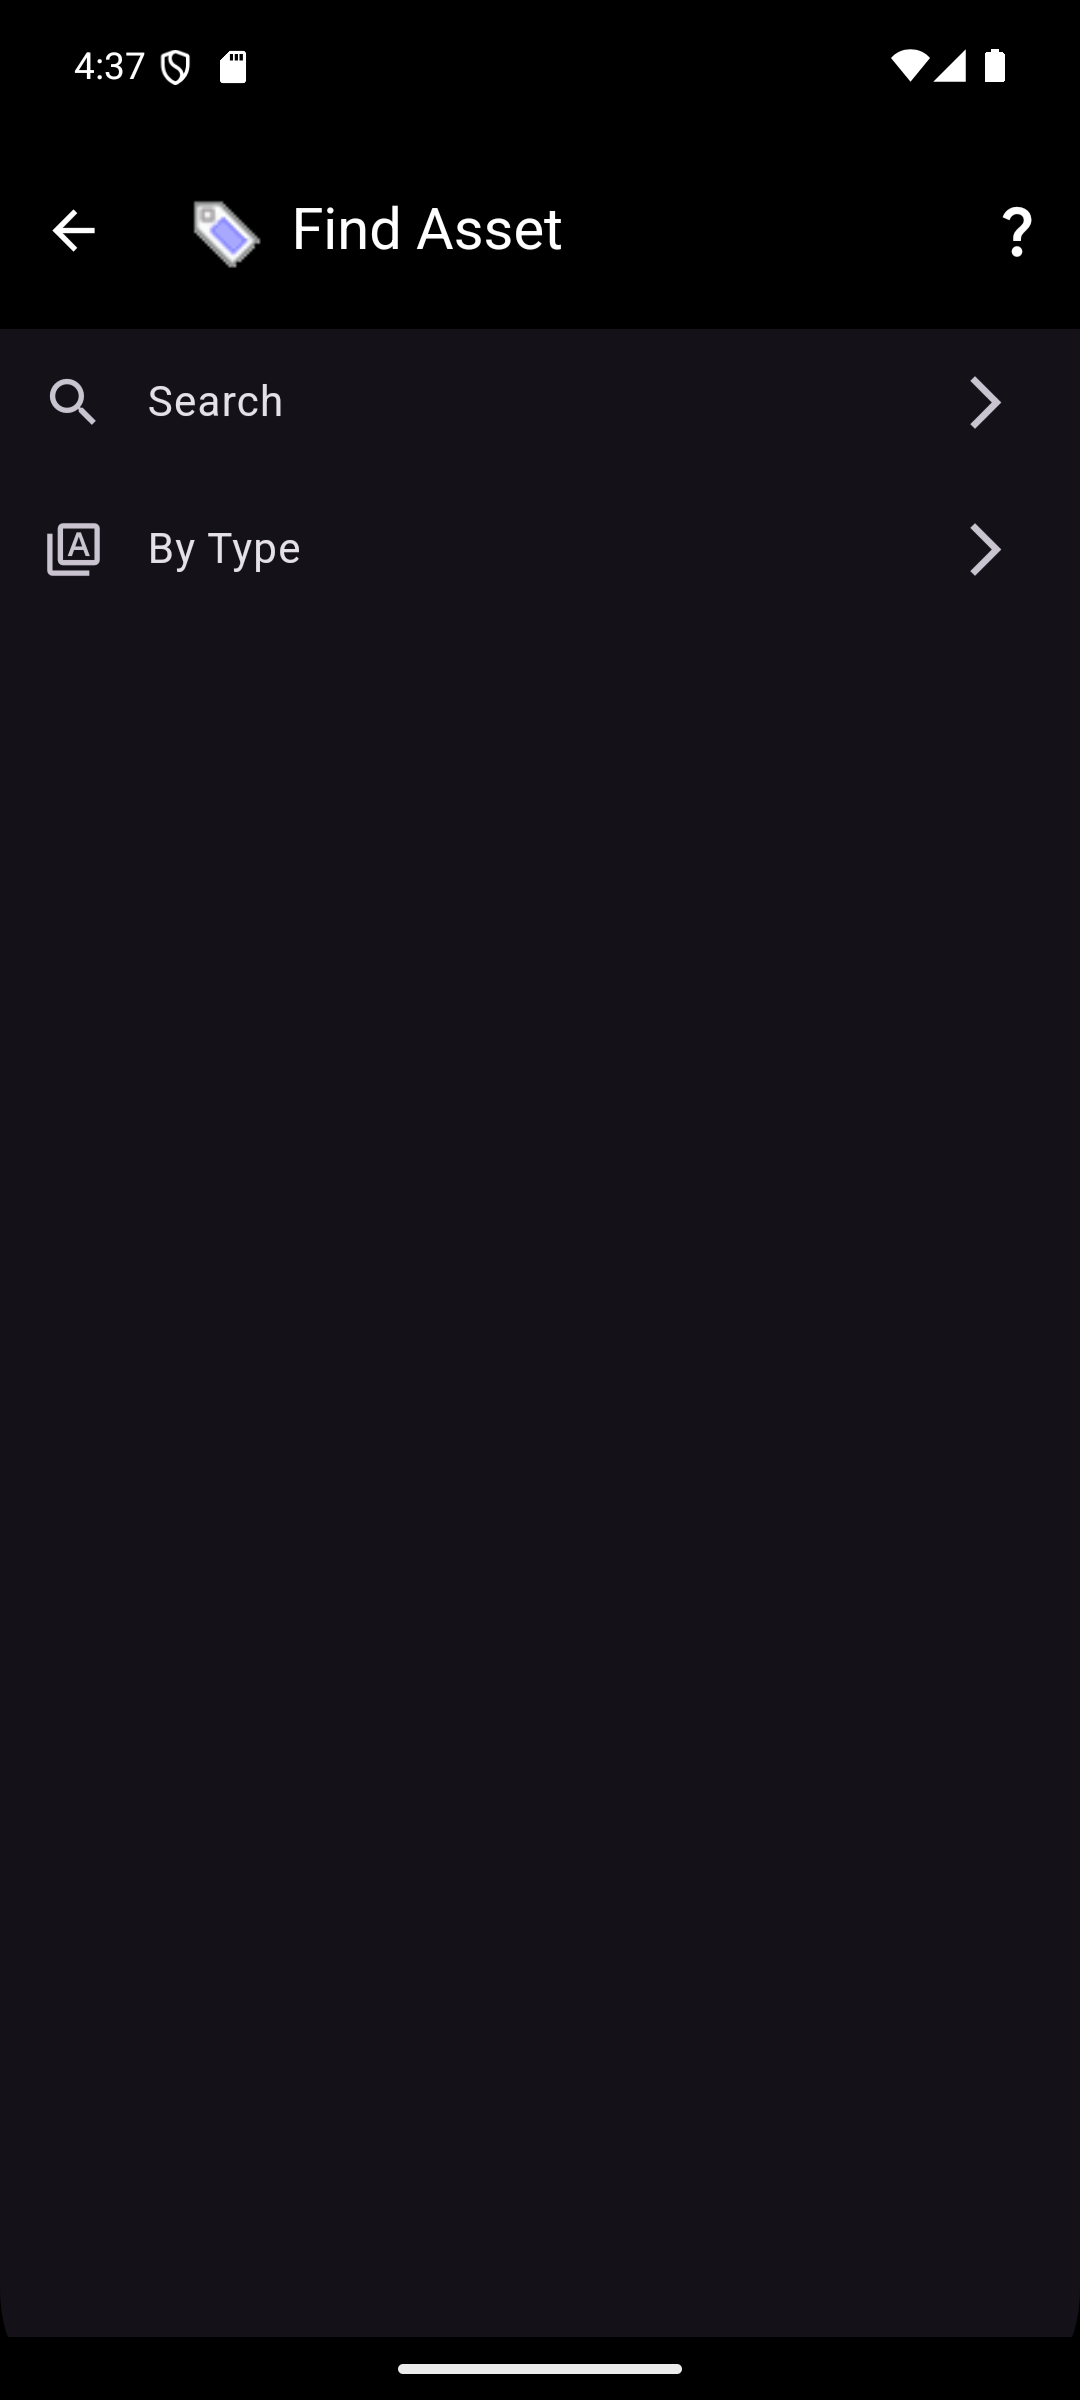
After selecting an asset type (Asset, Job Site, Vehicle, or Warehouse) or All, there are two options presented to query by: Search and By Type.
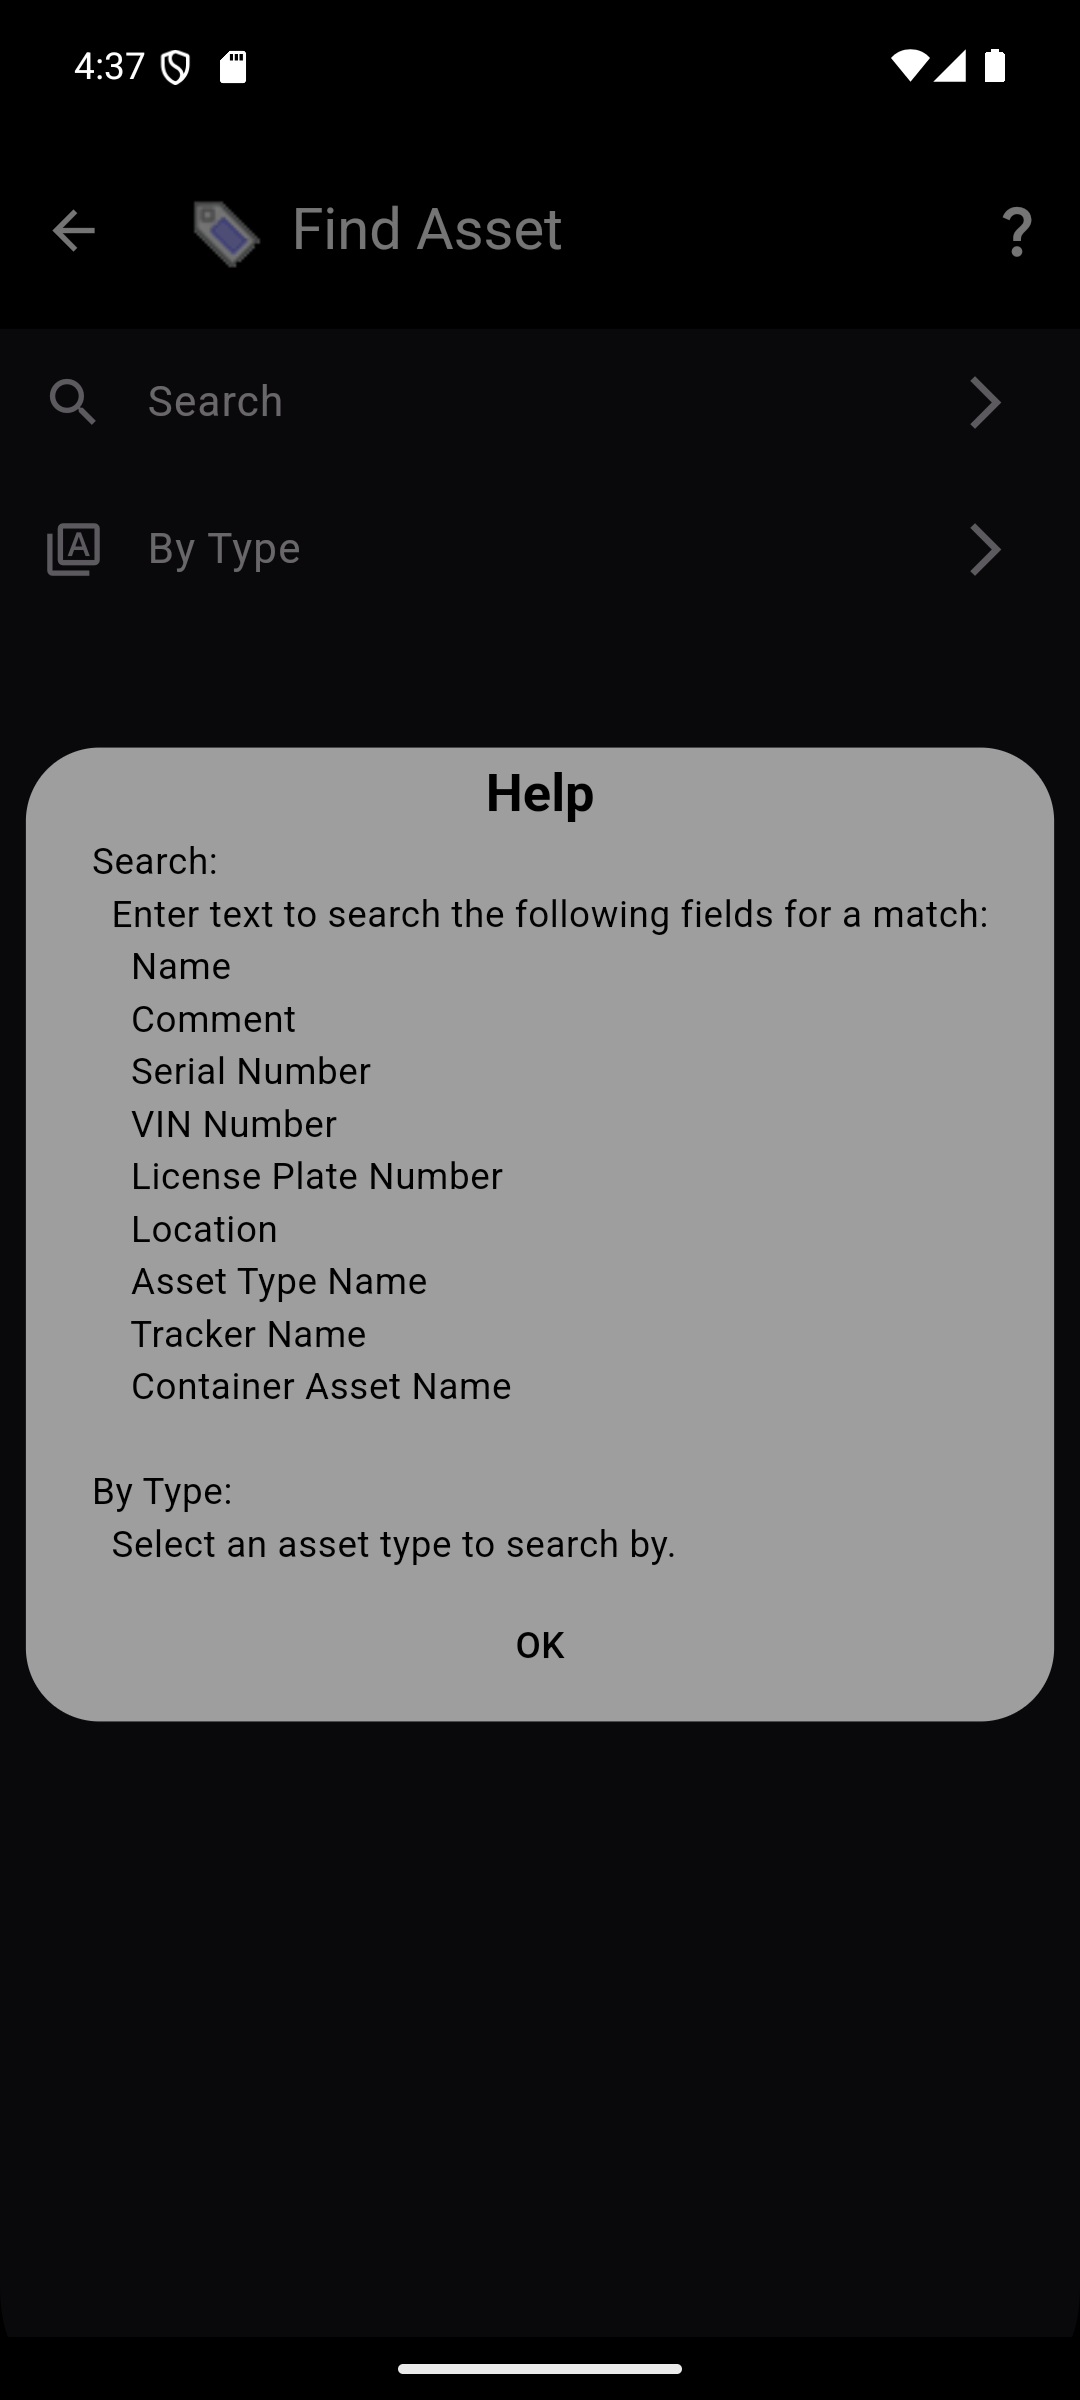
- Search allows entering text to search the following fields of an asset for a match:
- Name
- Comment
- Serial Number
- VIN Number
- License Plate Number
- Location
- Asset Type Name
- Tracker Name
- Container Asset Name
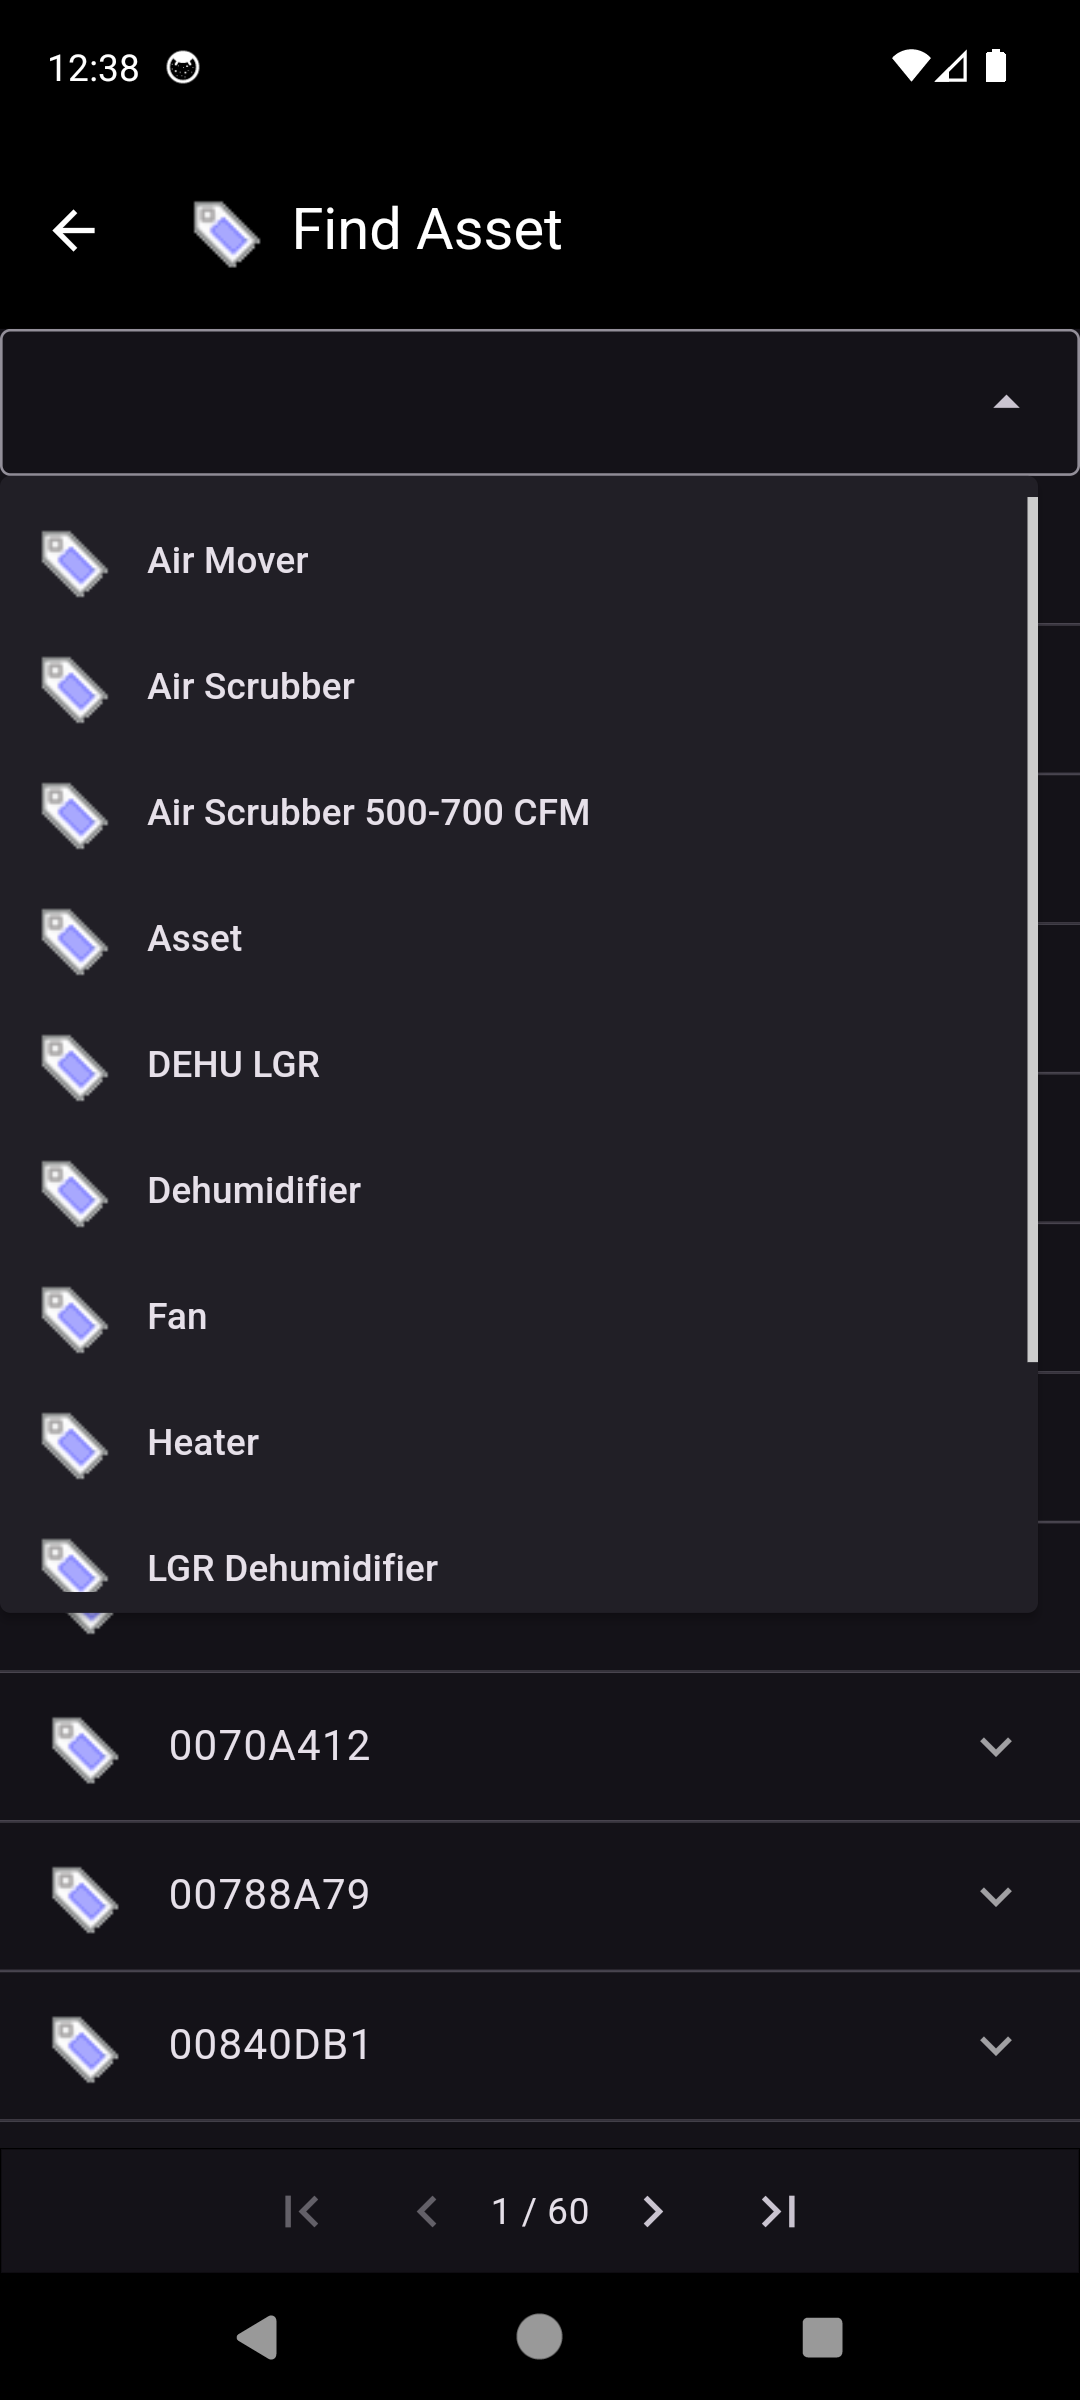
- By Type allows selecting a specific asset type from a drop down list. This will filter the assets to only those of the selected asset type.
NOTE: This information is also available in the app on the Query Selection screen by selecting the "?" icon.
Asset Selection
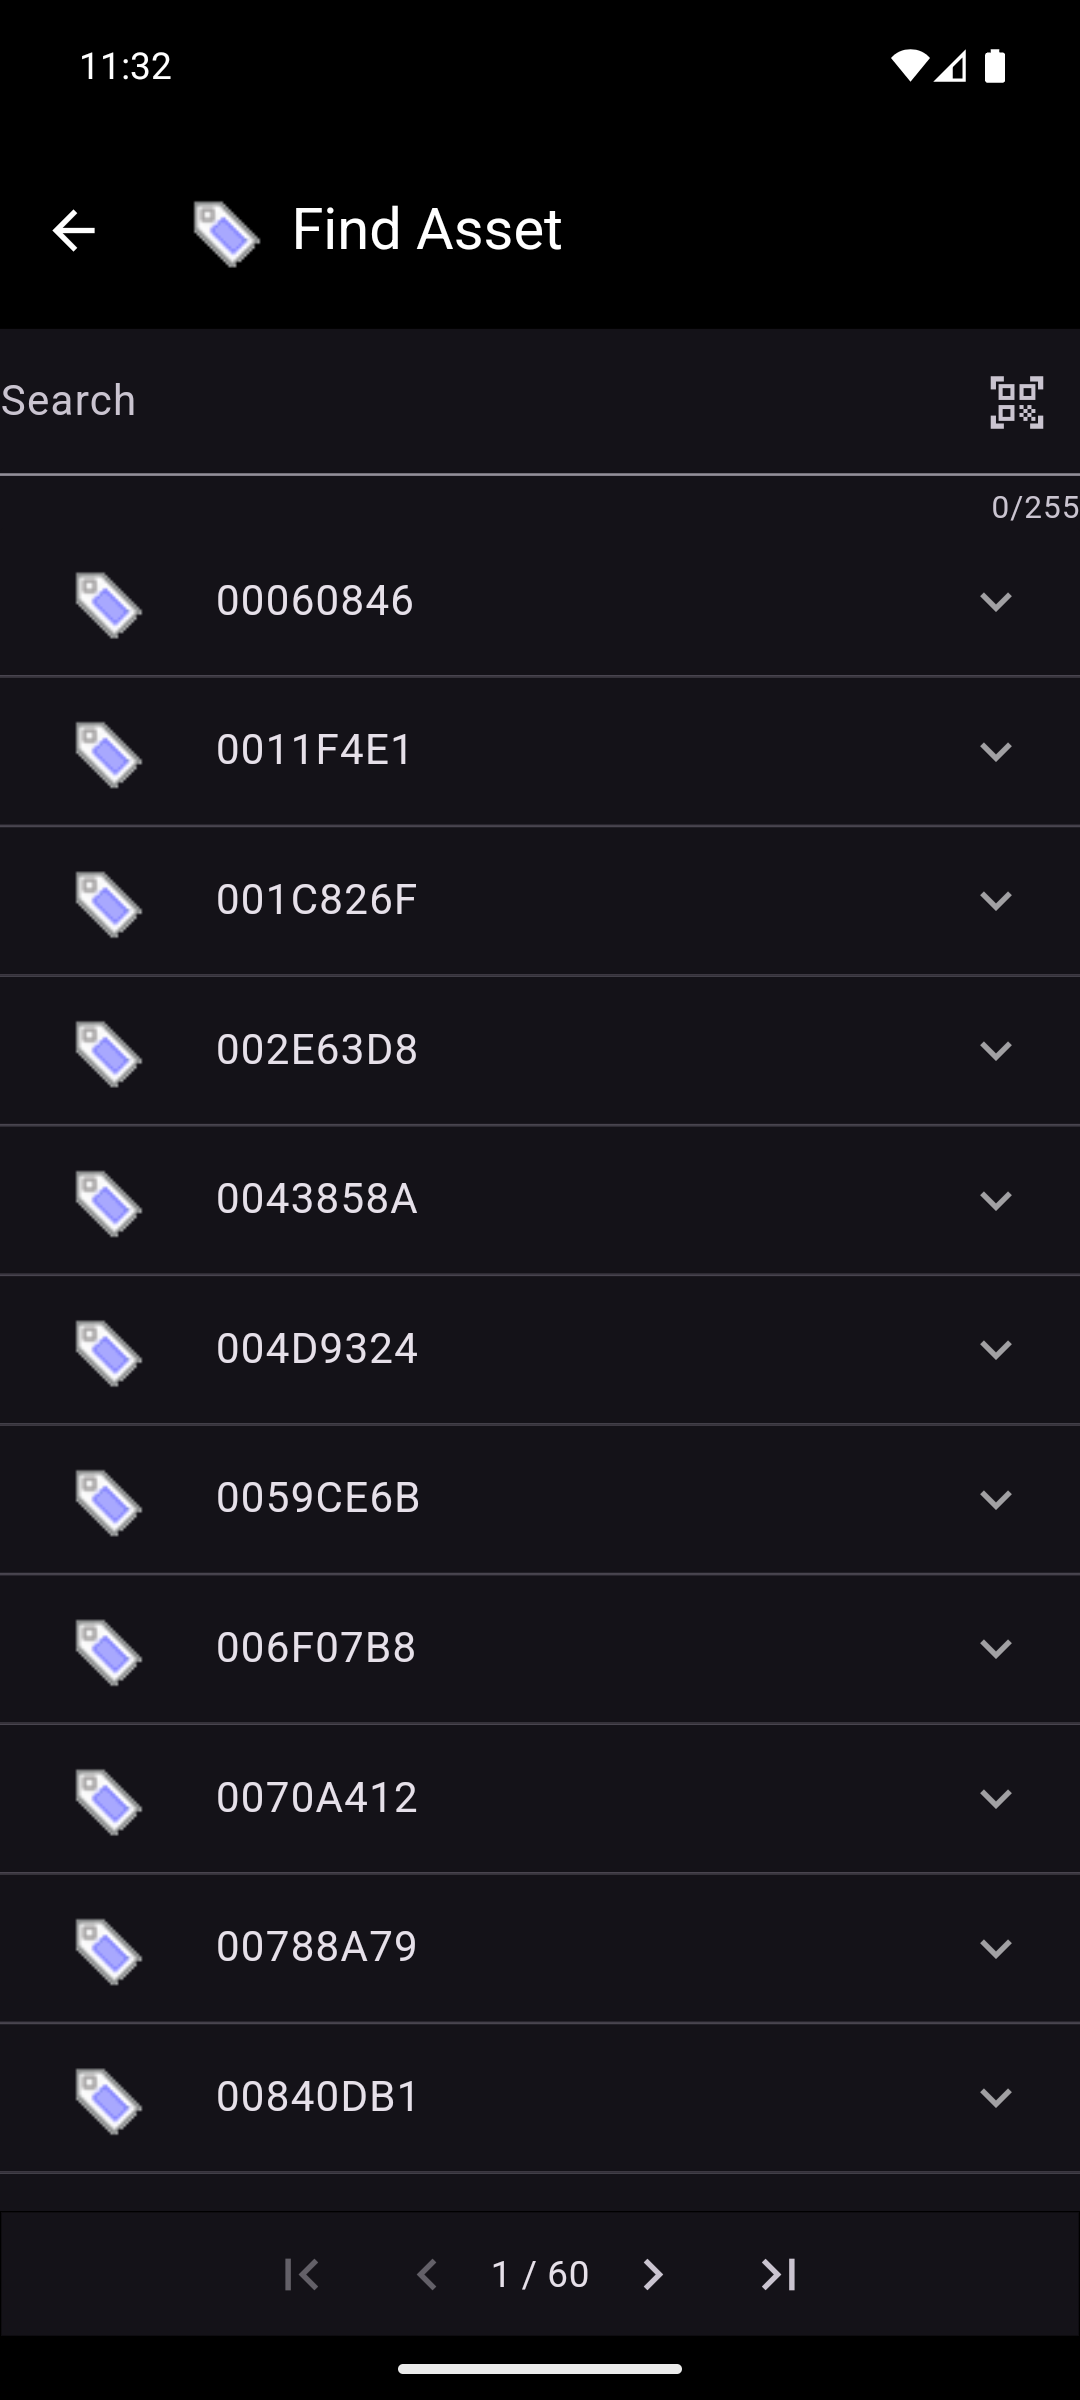
Selecting a query type will navigate to the asset selection screen.
The asset selection screen displays a list of assets sorted by name. The assets shown are of the type that was selected from the main menu: Asset, Job Site, Vehicle, or Warehouse.
If there are more than 50 assets in the list, page controls will appear on the bottom of the screen. There are a maximum of 50 assets on each page. The forward, back, first page, and last page buttons navigate between the pages. To go to a specific page, tap on the page number and enter the desired page number in the field.
Depending on the query type selected, a search field or a drop down will be shown above the list.
- If the Search query was selected, the assets will be filtered based on the text entered in the search field, which is matched against the following asset fields:
- Name
- Comment
- Serial Number
- VIN Number
- License Plate Number
- Location
- Asset Type Name
- Tracker Name
- Container Asset Name
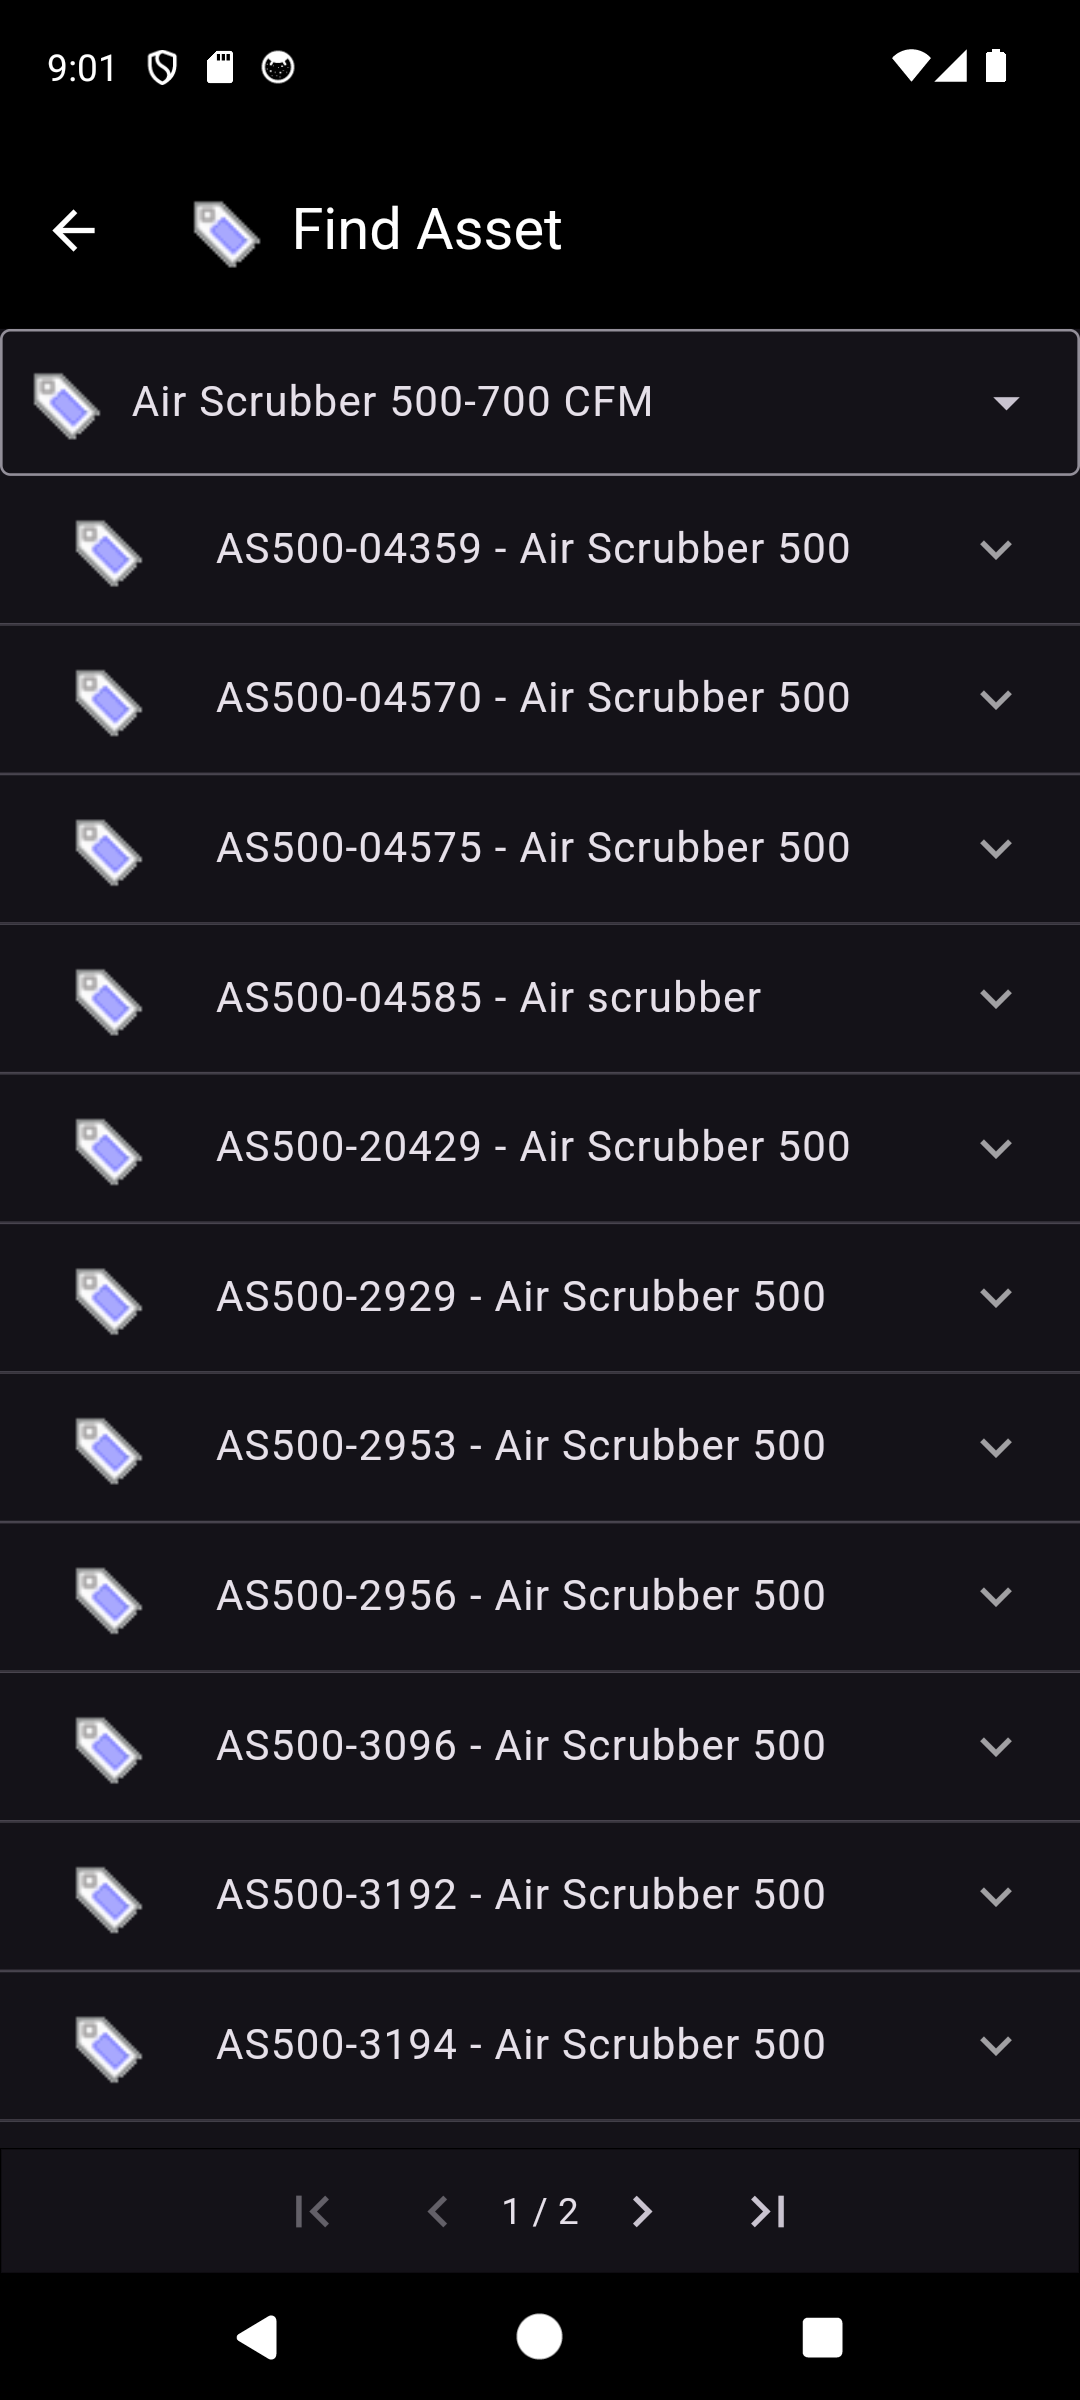
- If the By Type query was selected, the assets will be filtered based on the asset type selected.
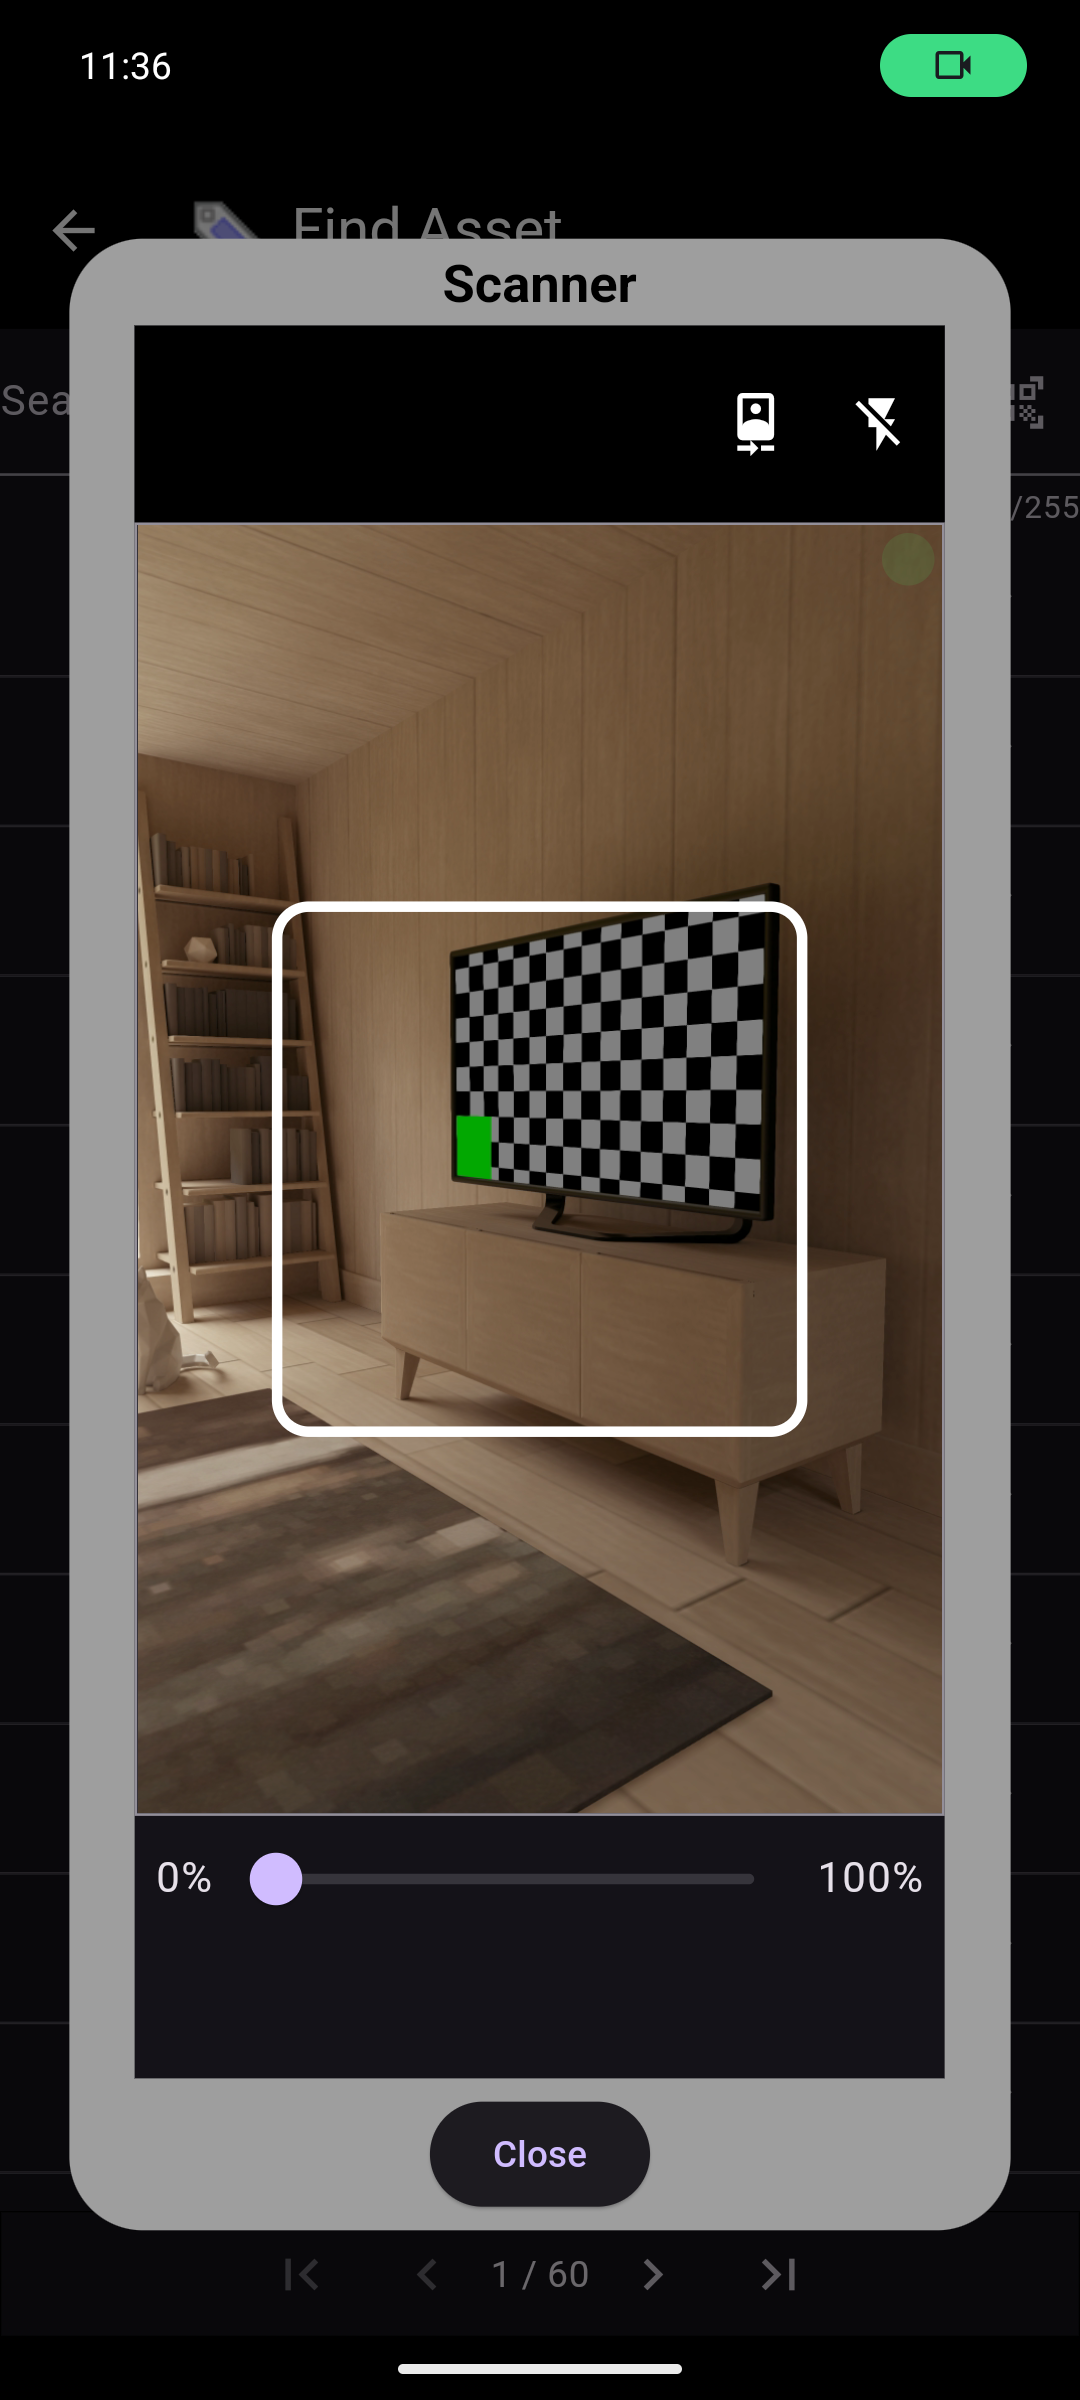
When the Search query is selected, there is also the option of scanning a tag/tracker to search for the asset associated with it.
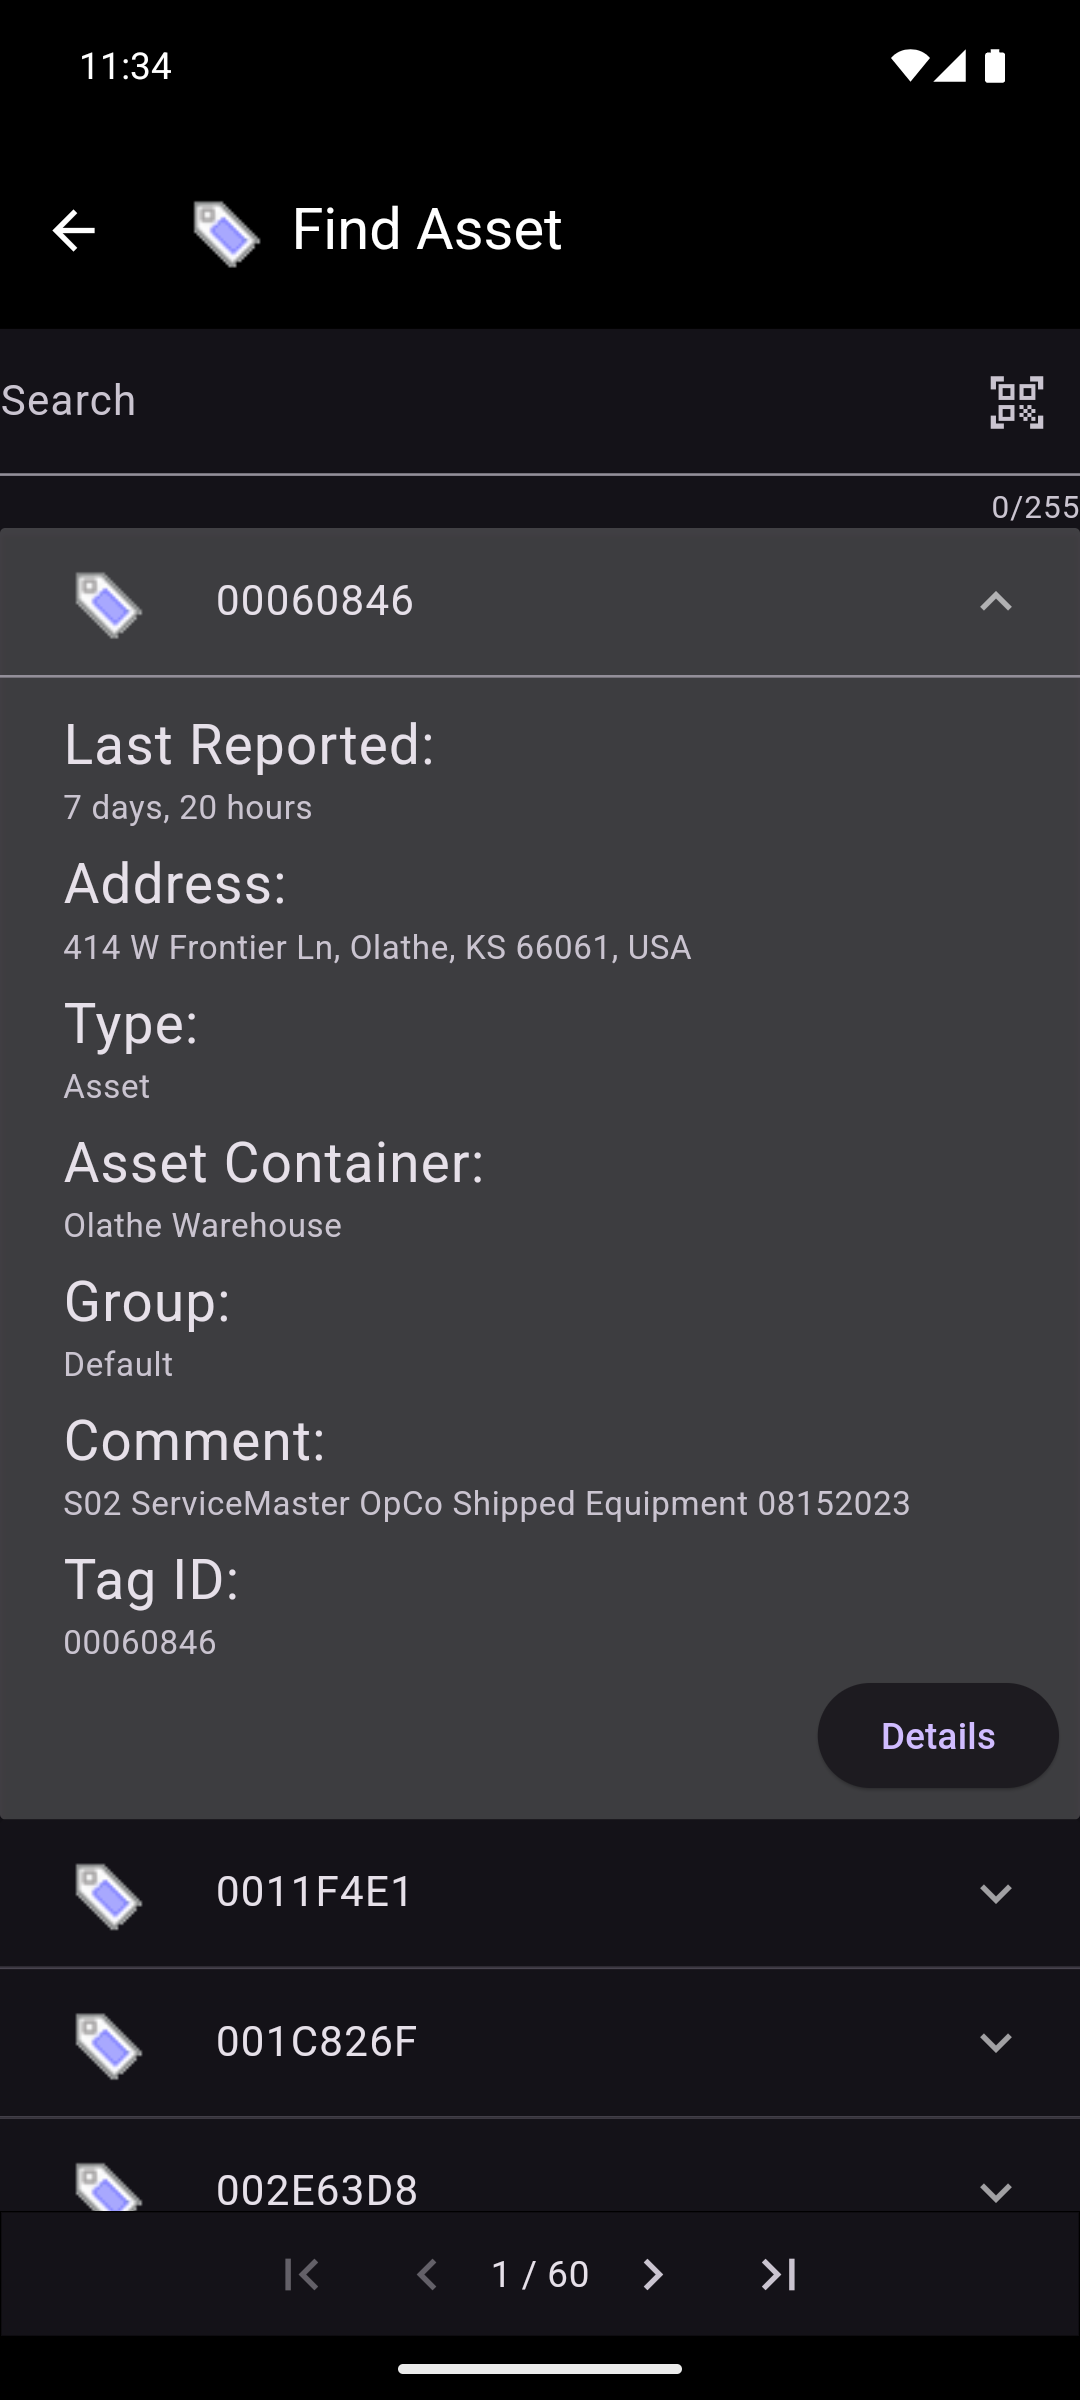
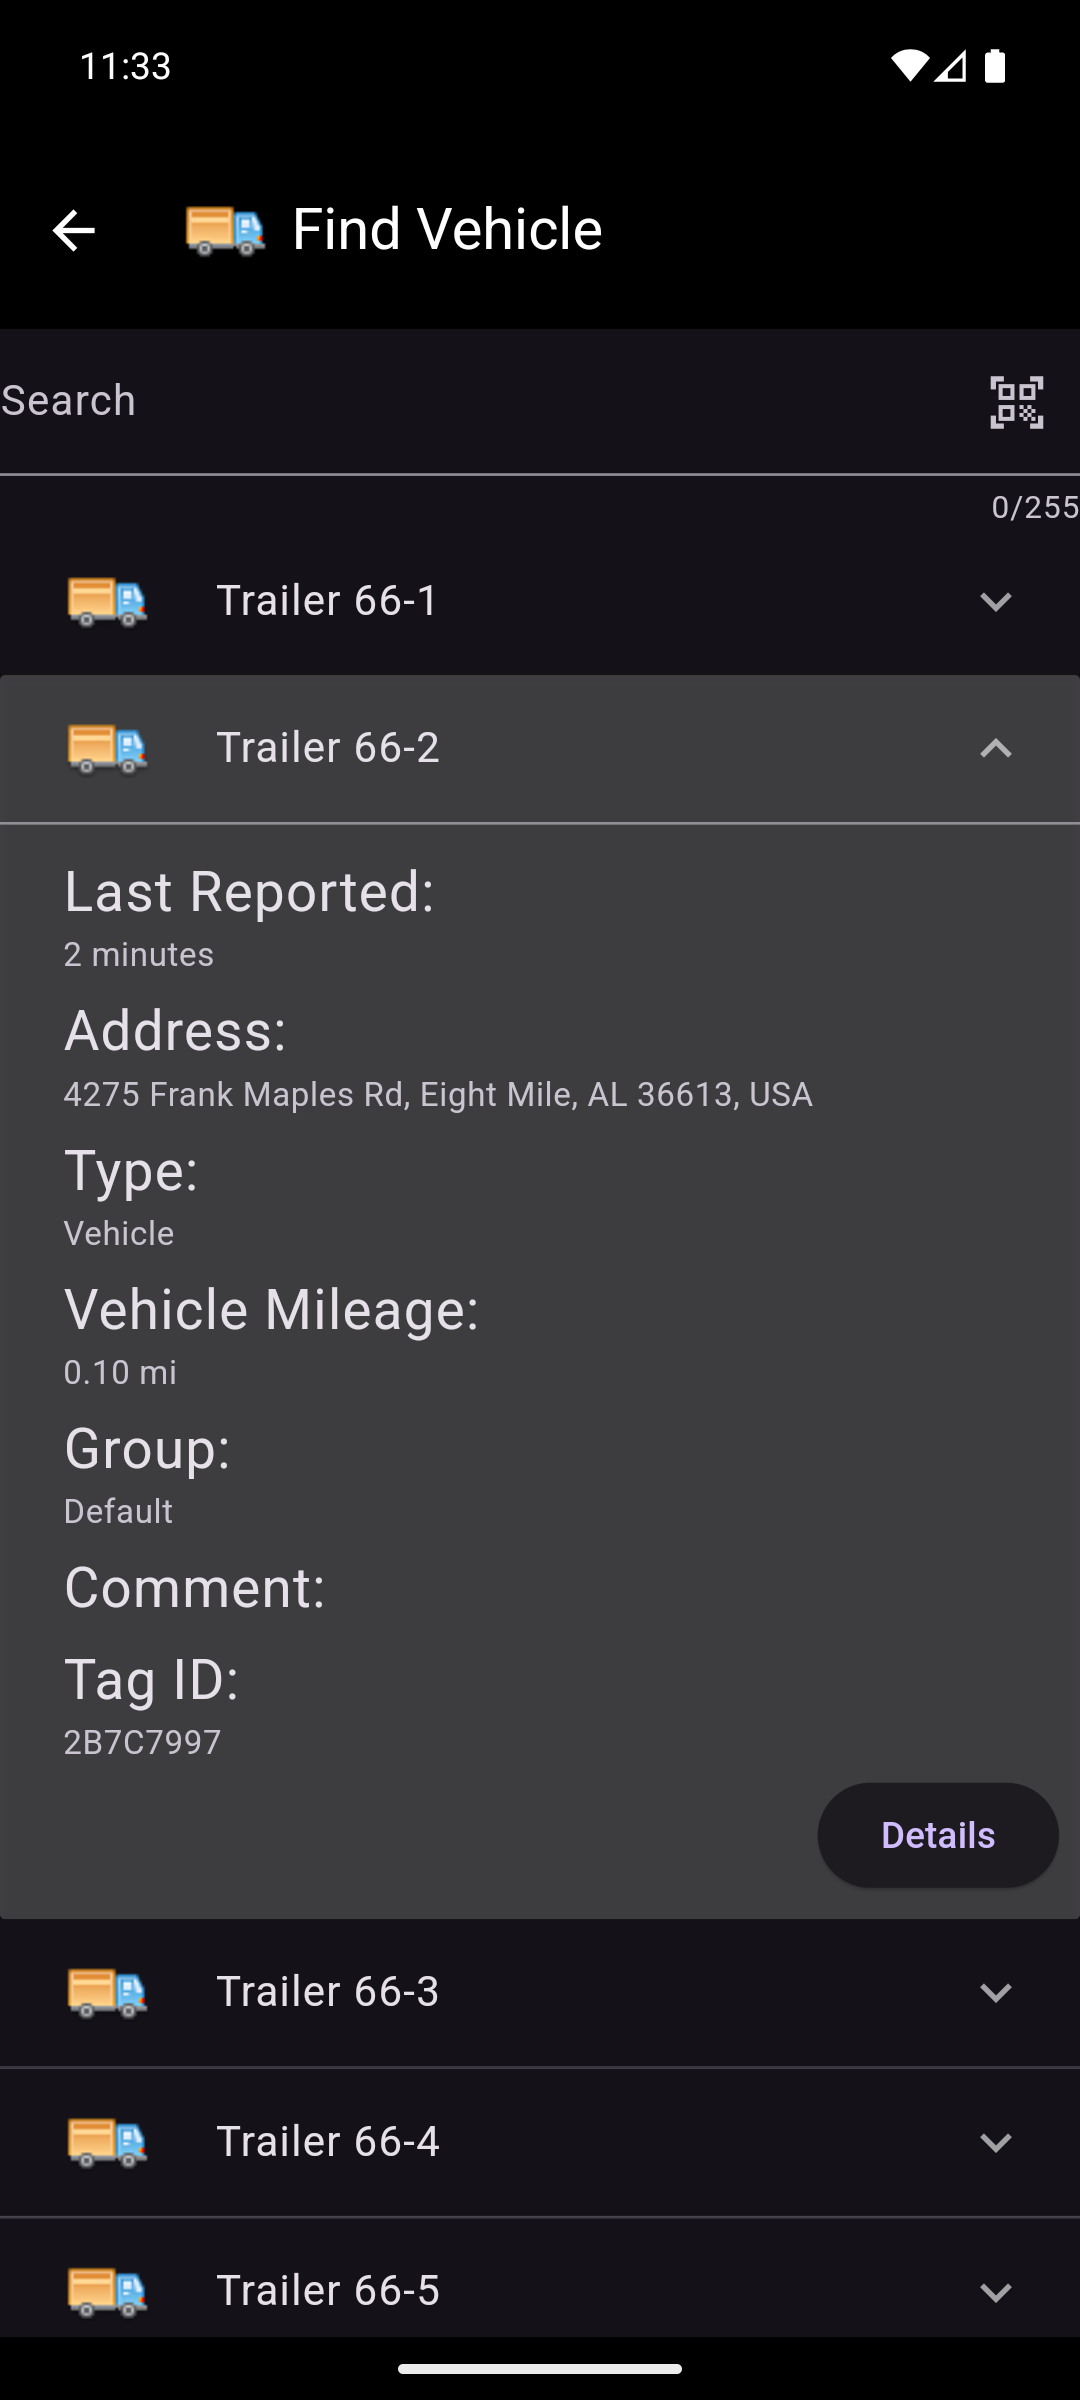
The asset details can be previewed from this screen by tapping on the expansion arrow on the right side of the asset. This will expand the asset to show a preview of the asset details that includes the following information:
- Last Reported: The last time the asset reported its location.
- Address: The address of the asset's reported location.
- Type: The asset type.
- Asset Container: The name of the container asset the asset is currently in (if applicable).
- Vehicle Mileage: The current mileage of the vehicle (if applicable).
- Group: The group the asset is in (if applicable).
- Comment: Any comments associated with the asset.
- Tag ID: The id of the tag associated with the asset.
Information on this screen can be copied by long pressing on the information. This includes the asset name and the information in the asset details preview.
The asset's information can be viewed in more detail by tapping on the asset or by tapping on the Details button in the asset details preview. This will bring up the Asset Details screen.
Asset Details
This section is broken down into three sub-sections: Asset, Container Asset, and Unassigned Tracker/Tag. A container asset differs from a regular asset in that it can contain other assets. Container Assets include Job Sites, Vehicles, and Warehouses. Unassigned Trackers and Unassigned Tags are trackers and tags that do not have an asset associated with them.
Asset

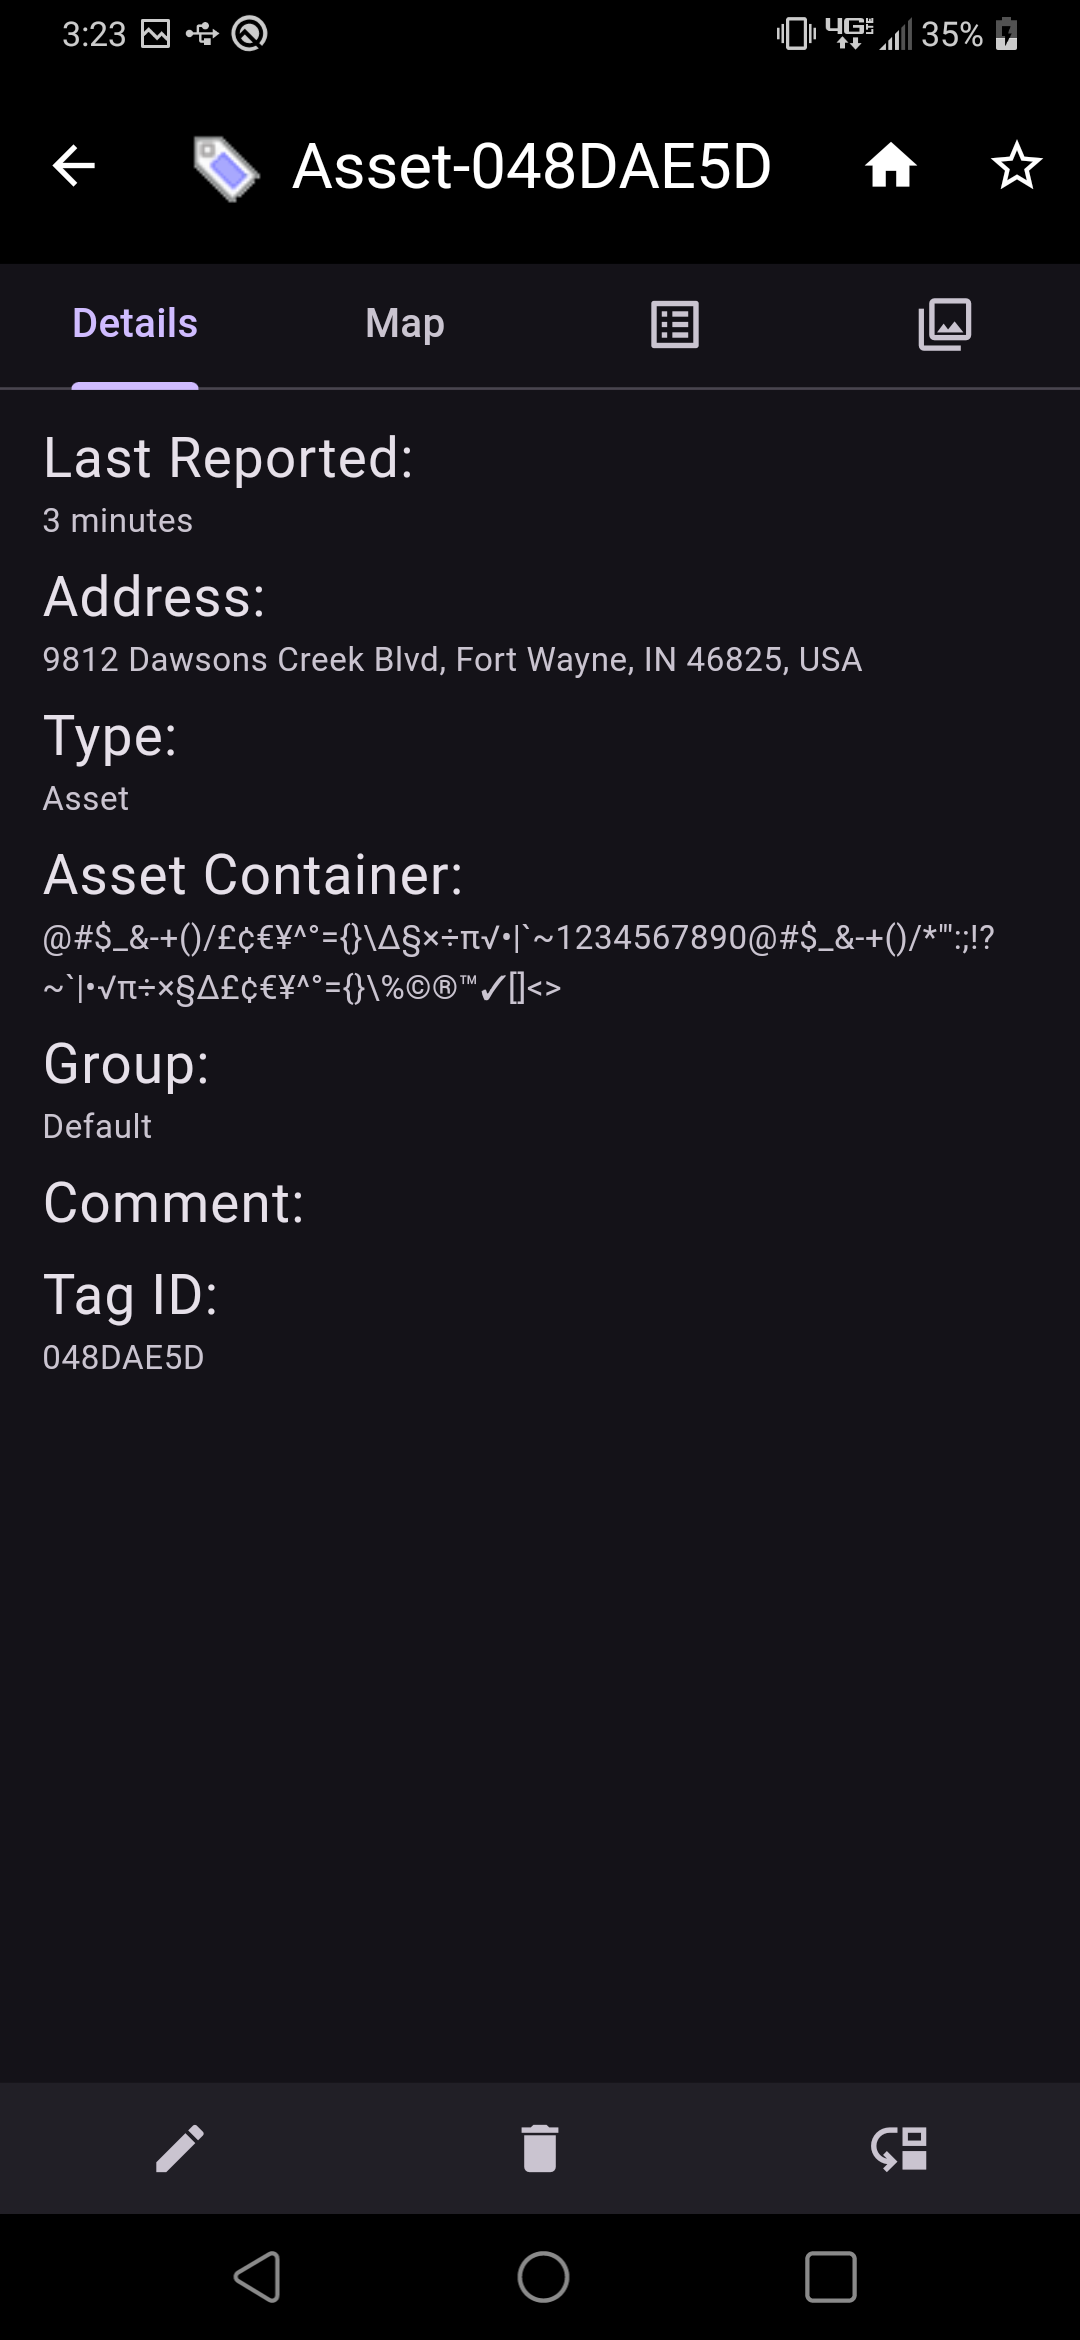
On the asset details screen, the asset's information is displayed. In the header, there is an icon showing the asset's type as well as the name of the asset. If the name is too long, it will be truncated. The full name can be viewed by long pressing on the asset's name.
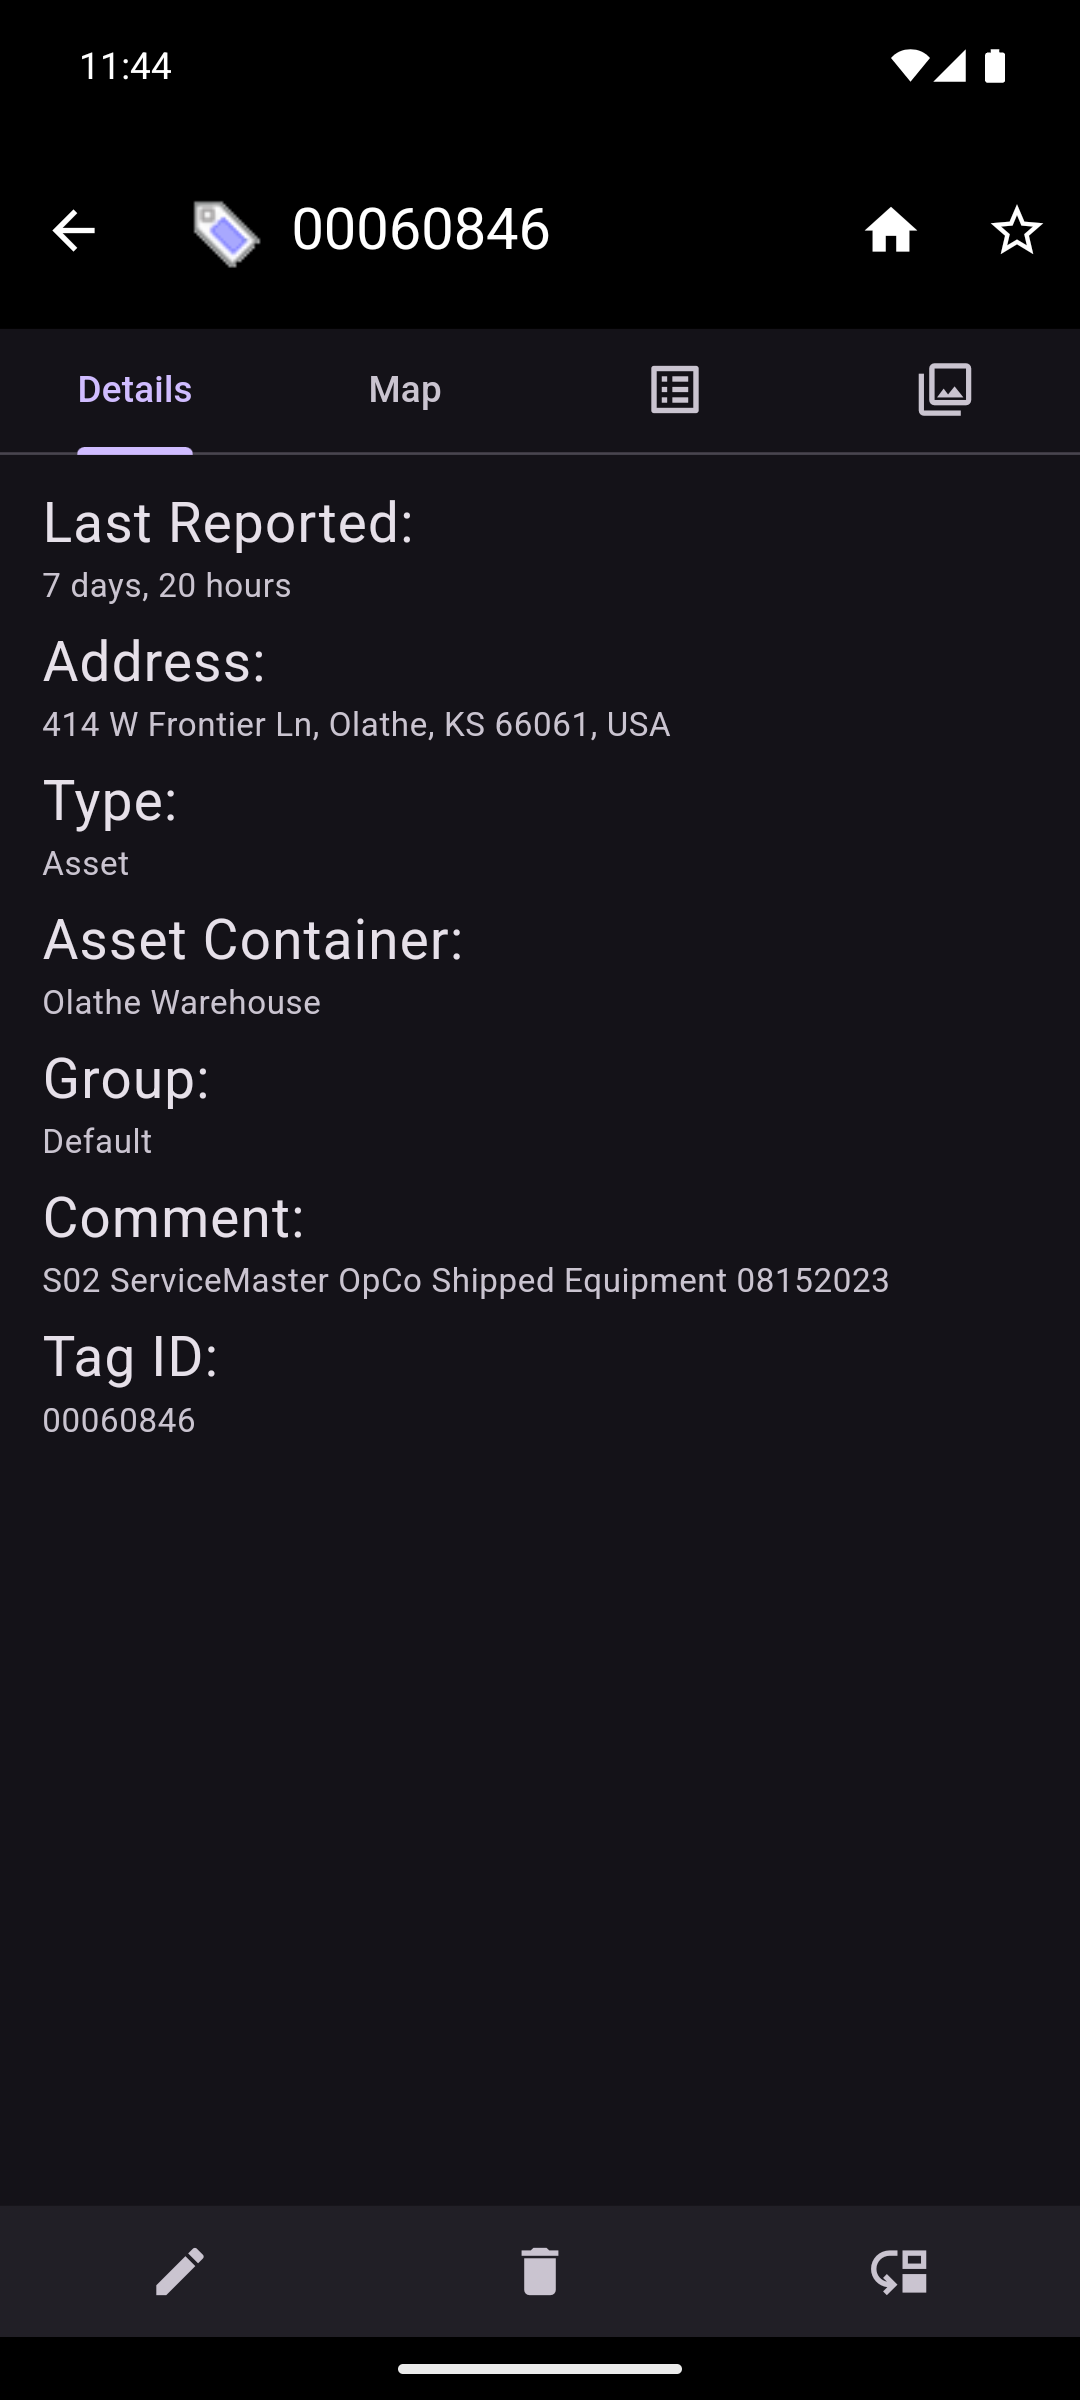
Just below the header, there is a tabbed interface that allows switching between the Asset Details, Asset Map, Asset Notes, and Asset Images.
The Asset Details tab displays the following information:
- Last Reported: The last time the asset reported its location.
- Address: The address of the asset's reported location.
- Type: The asset type.
- Asset Container: The asset's container (if applicable).
- Group: The group the asset is in (if applicable).
- Comment: Any comments associated with the asset.
- Tag ID: The id of the tag associated with the asset.
Information on this tab can be copied by long pressing on the information.
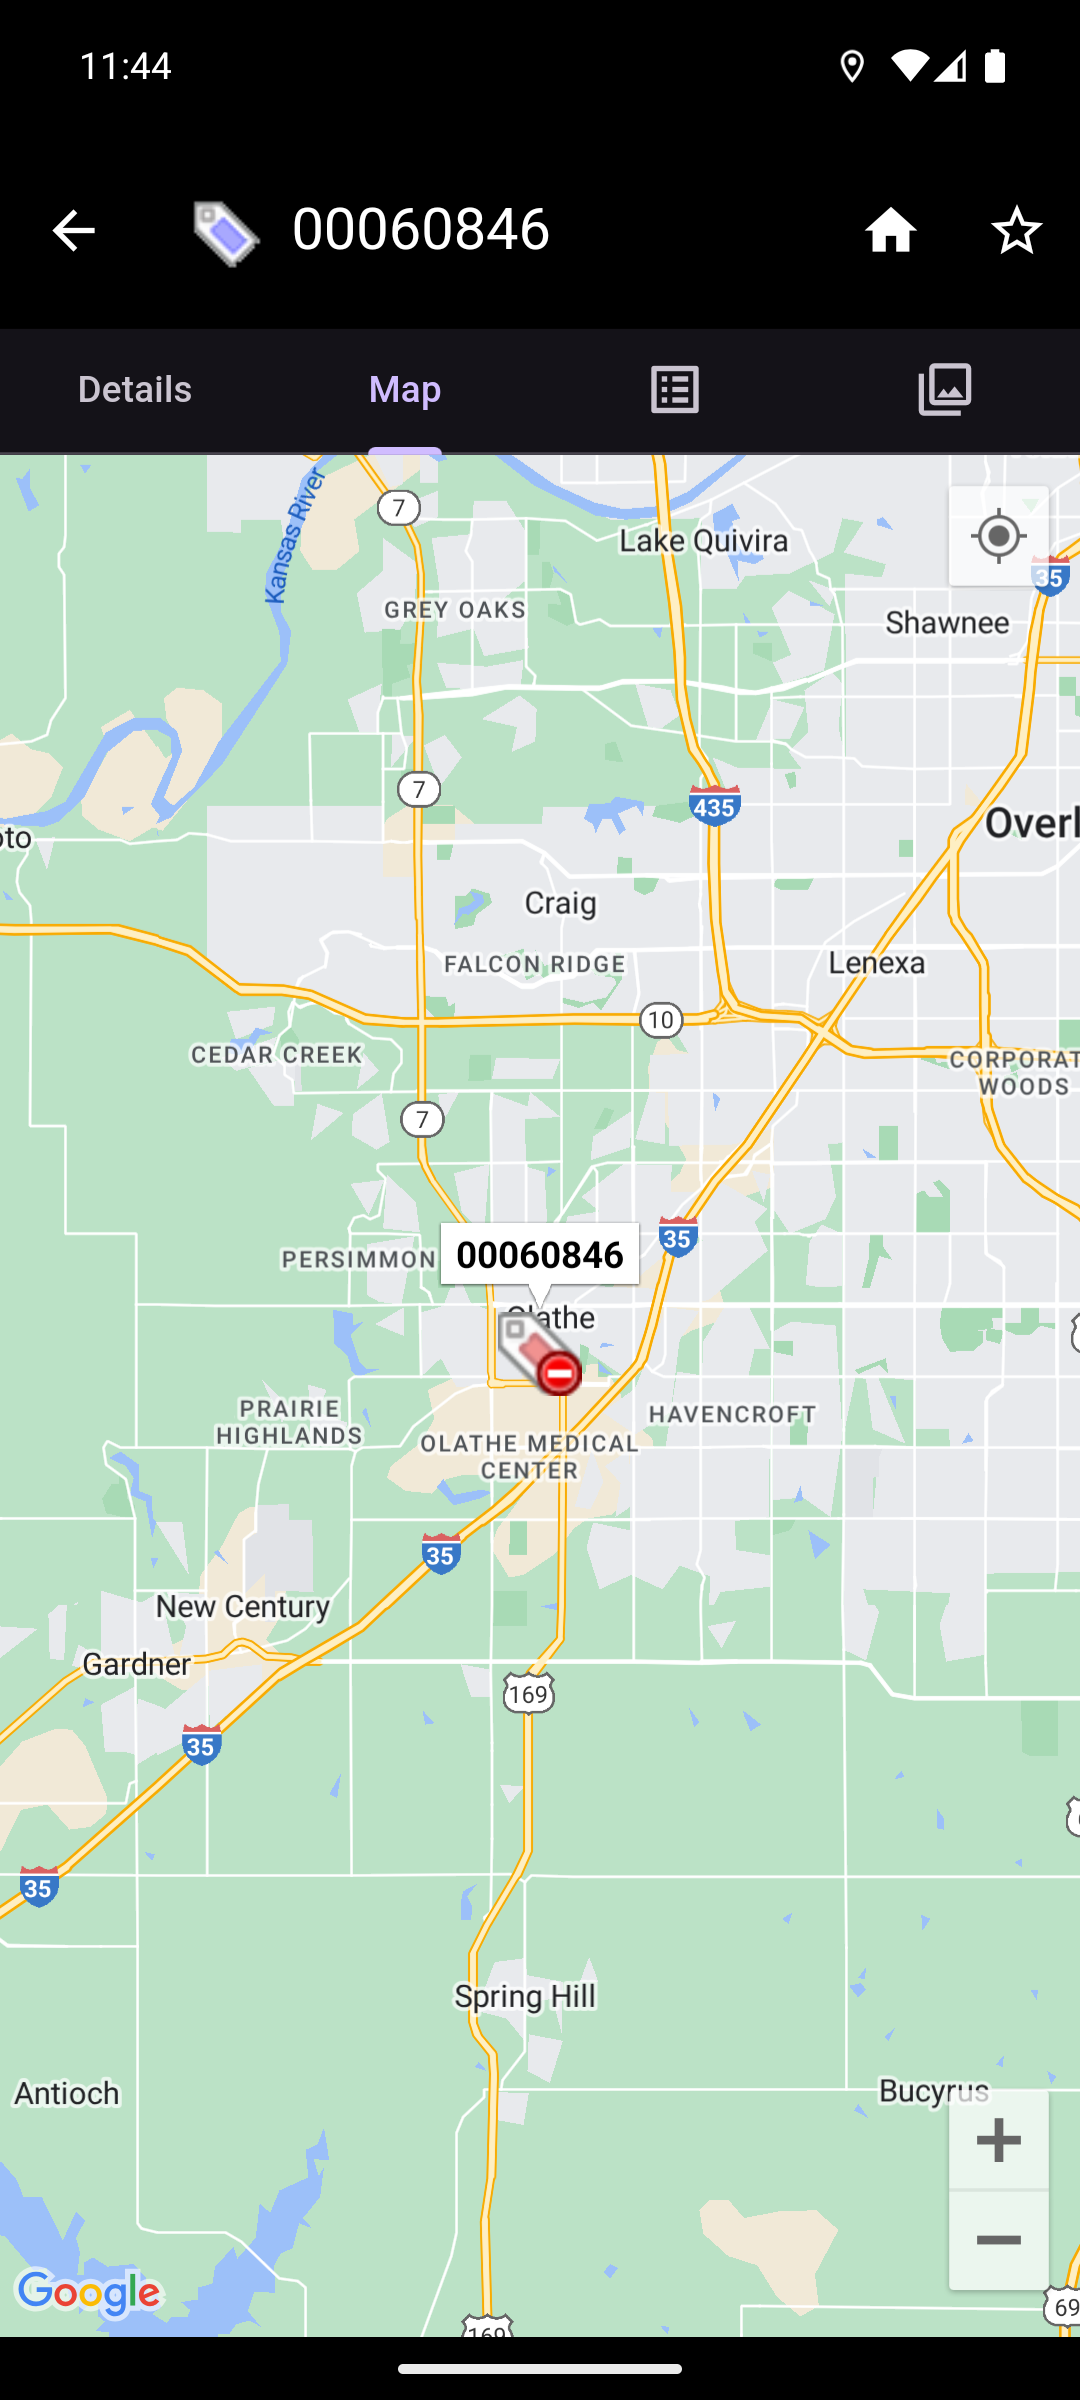
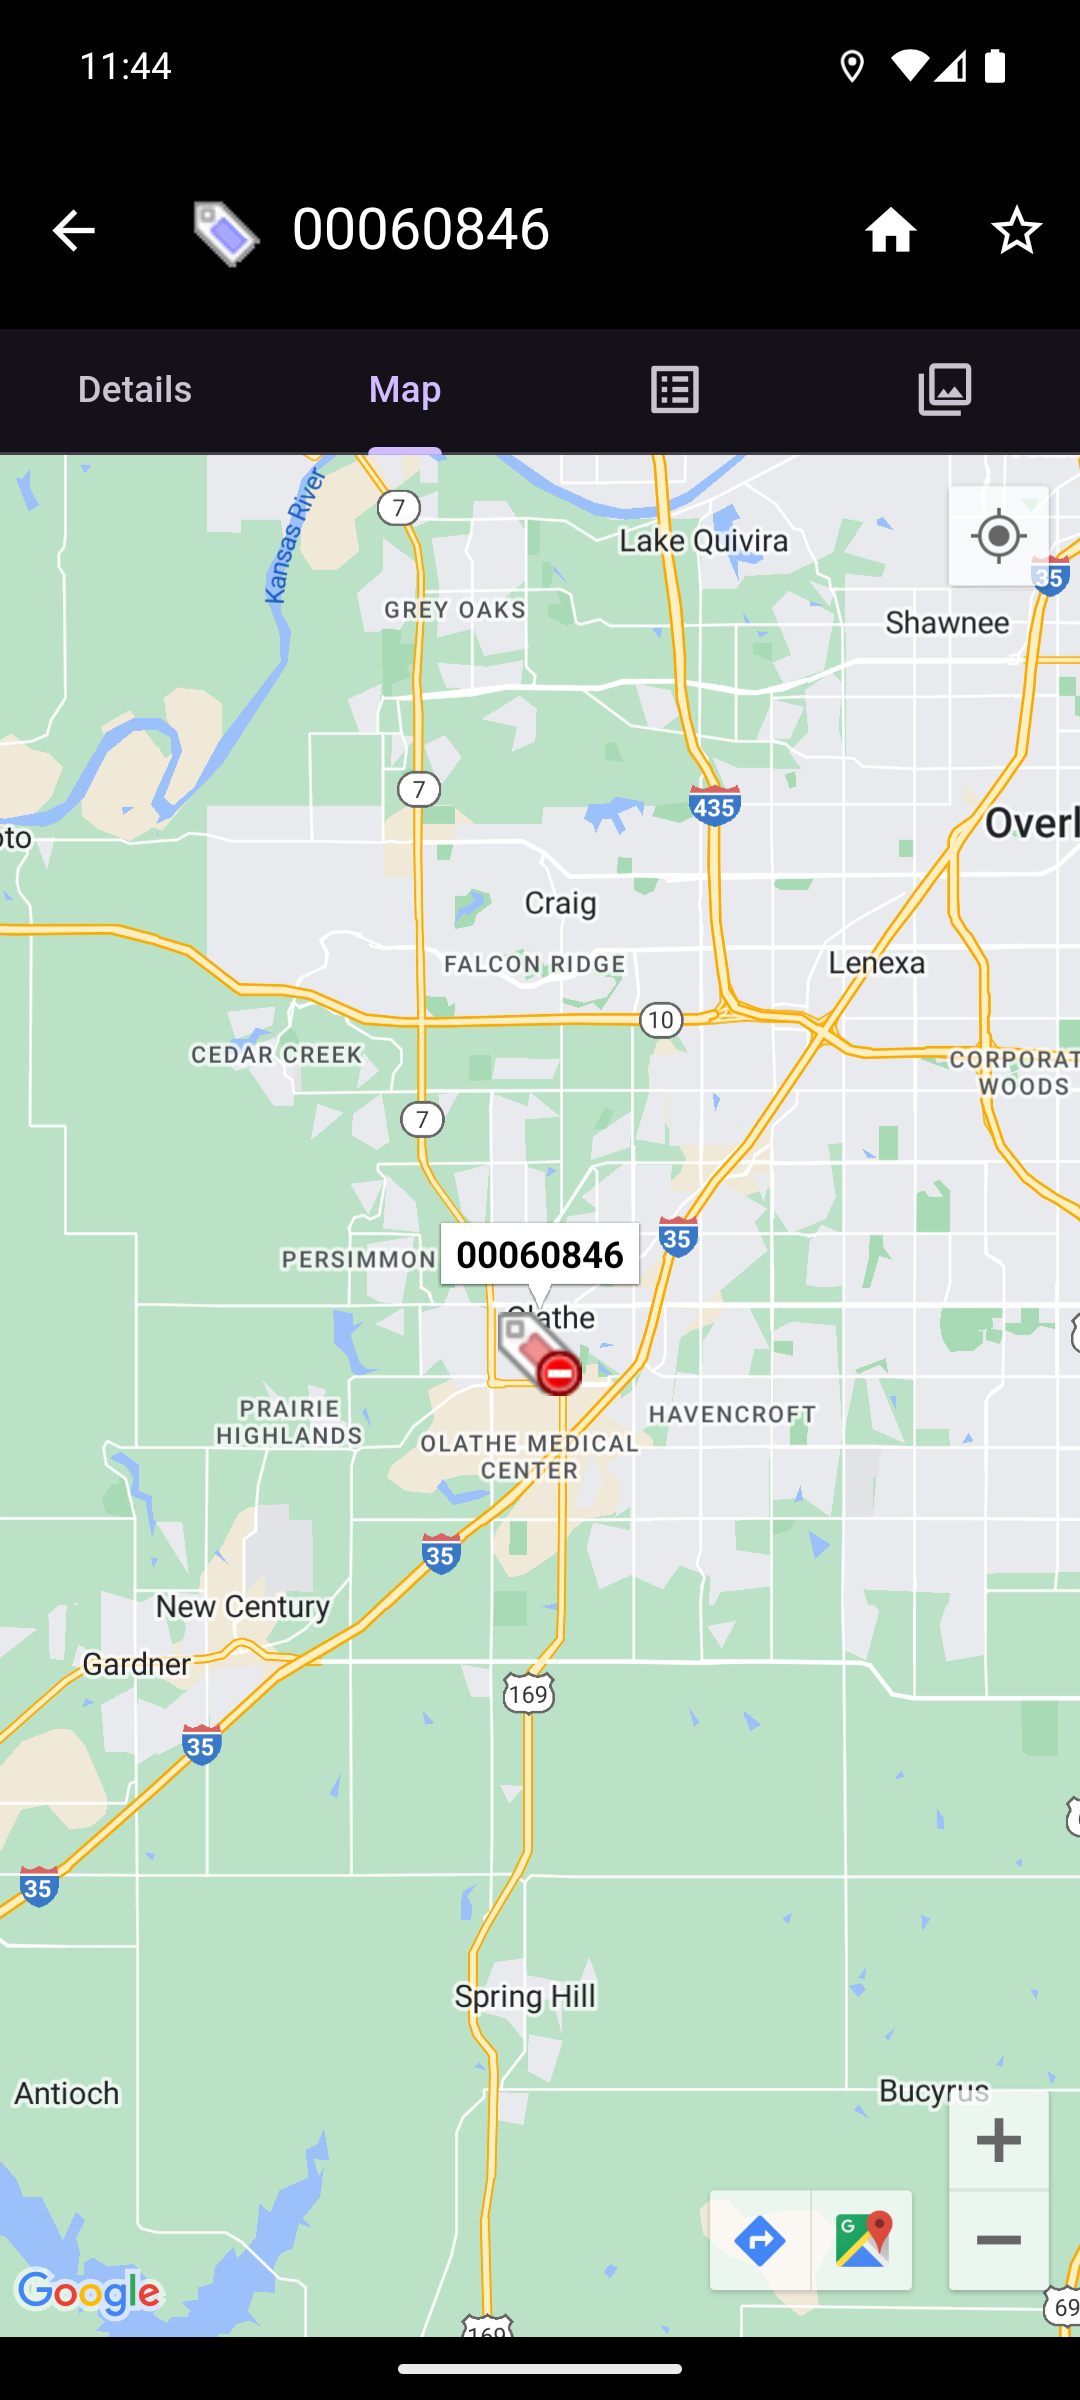
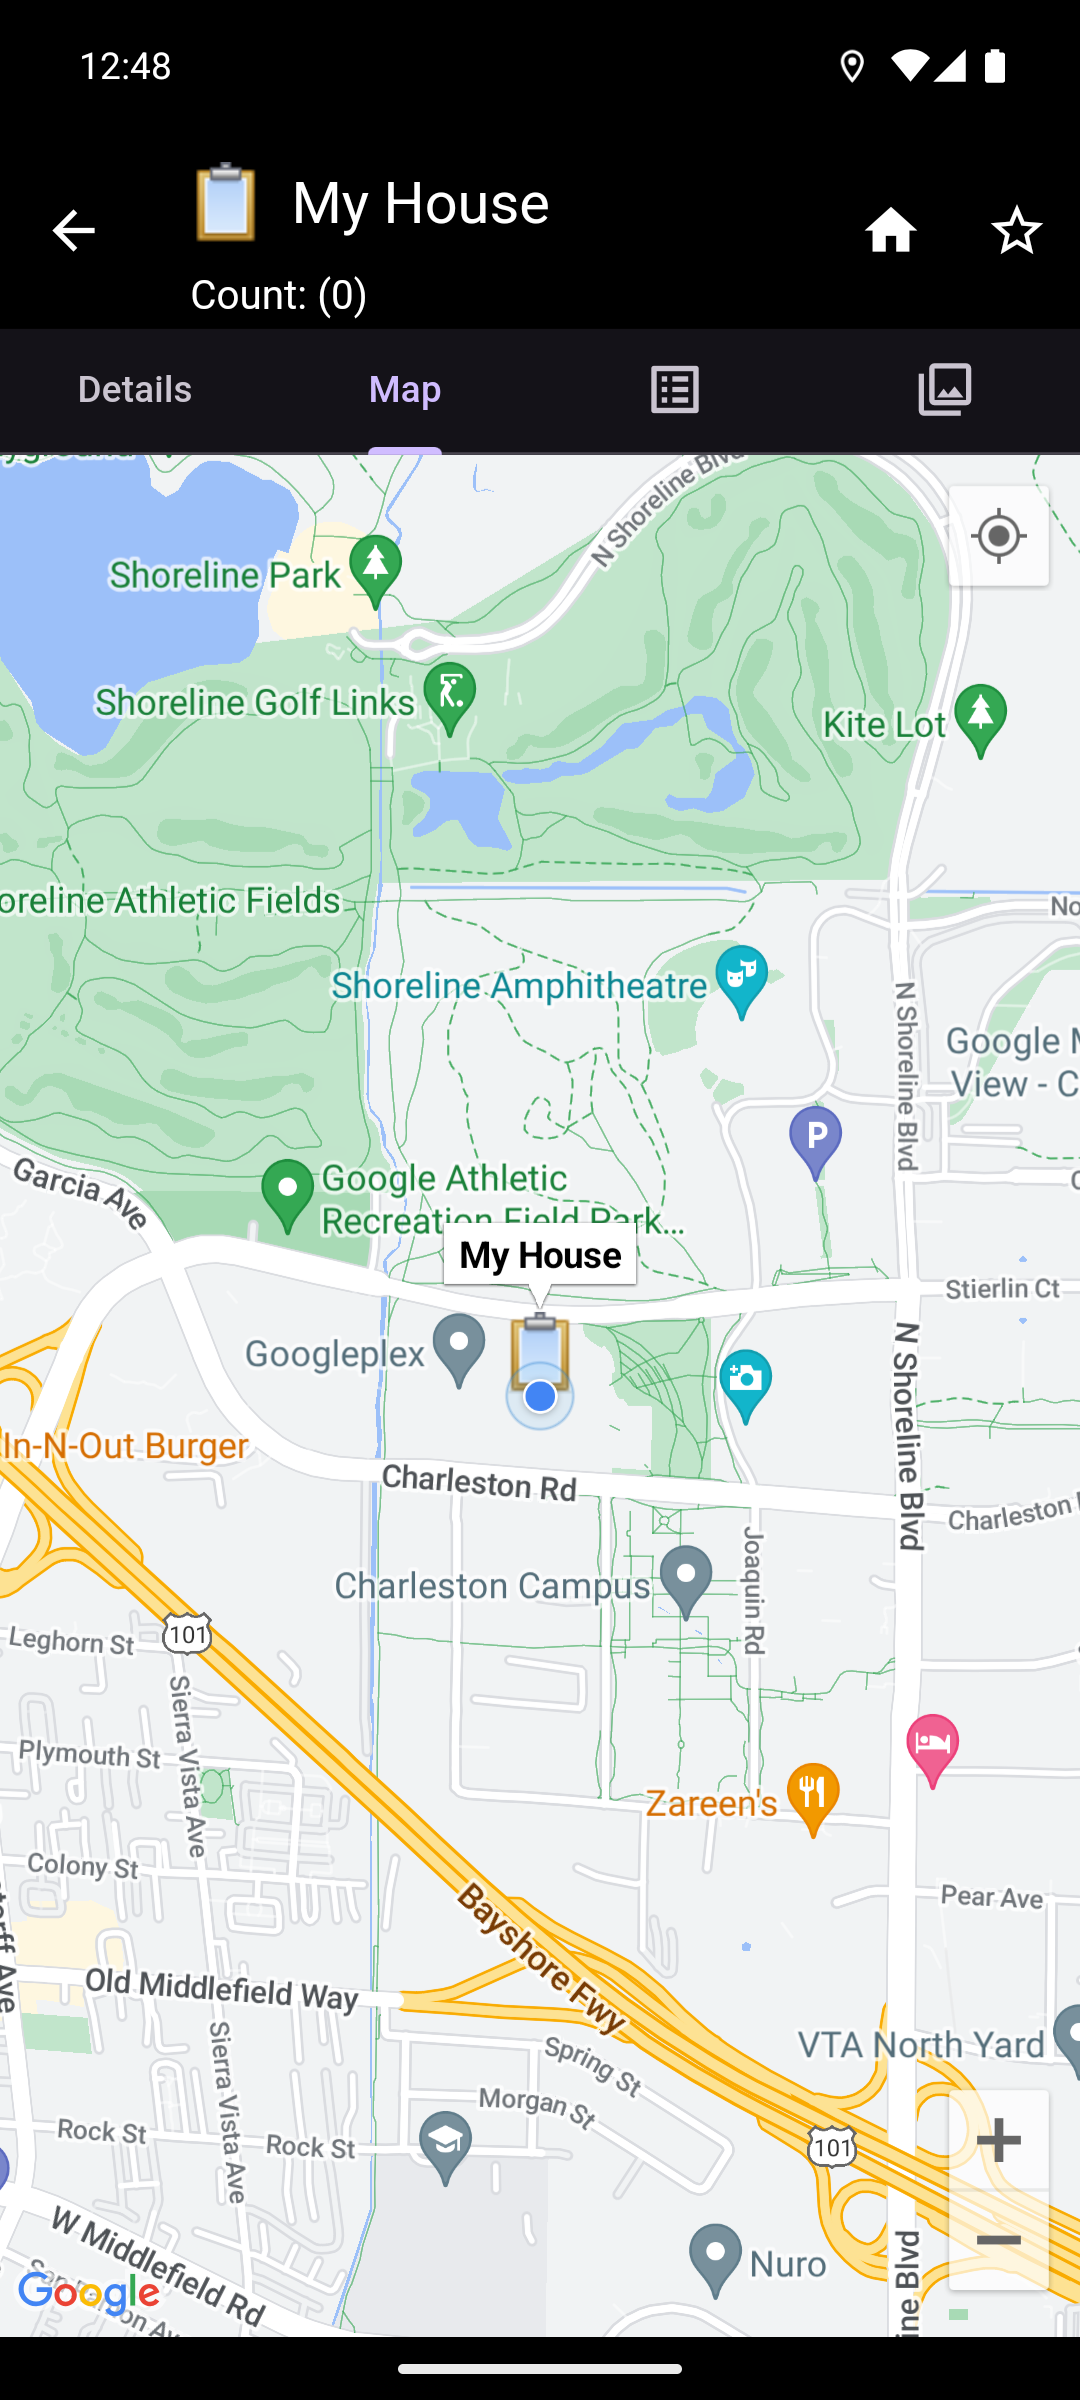
The Asset Map tab displays a map with a marker at the asset's last reported location. Tapping on the marker will give options to view the location in the google maps app, or to get directions to the location in the google maps app.
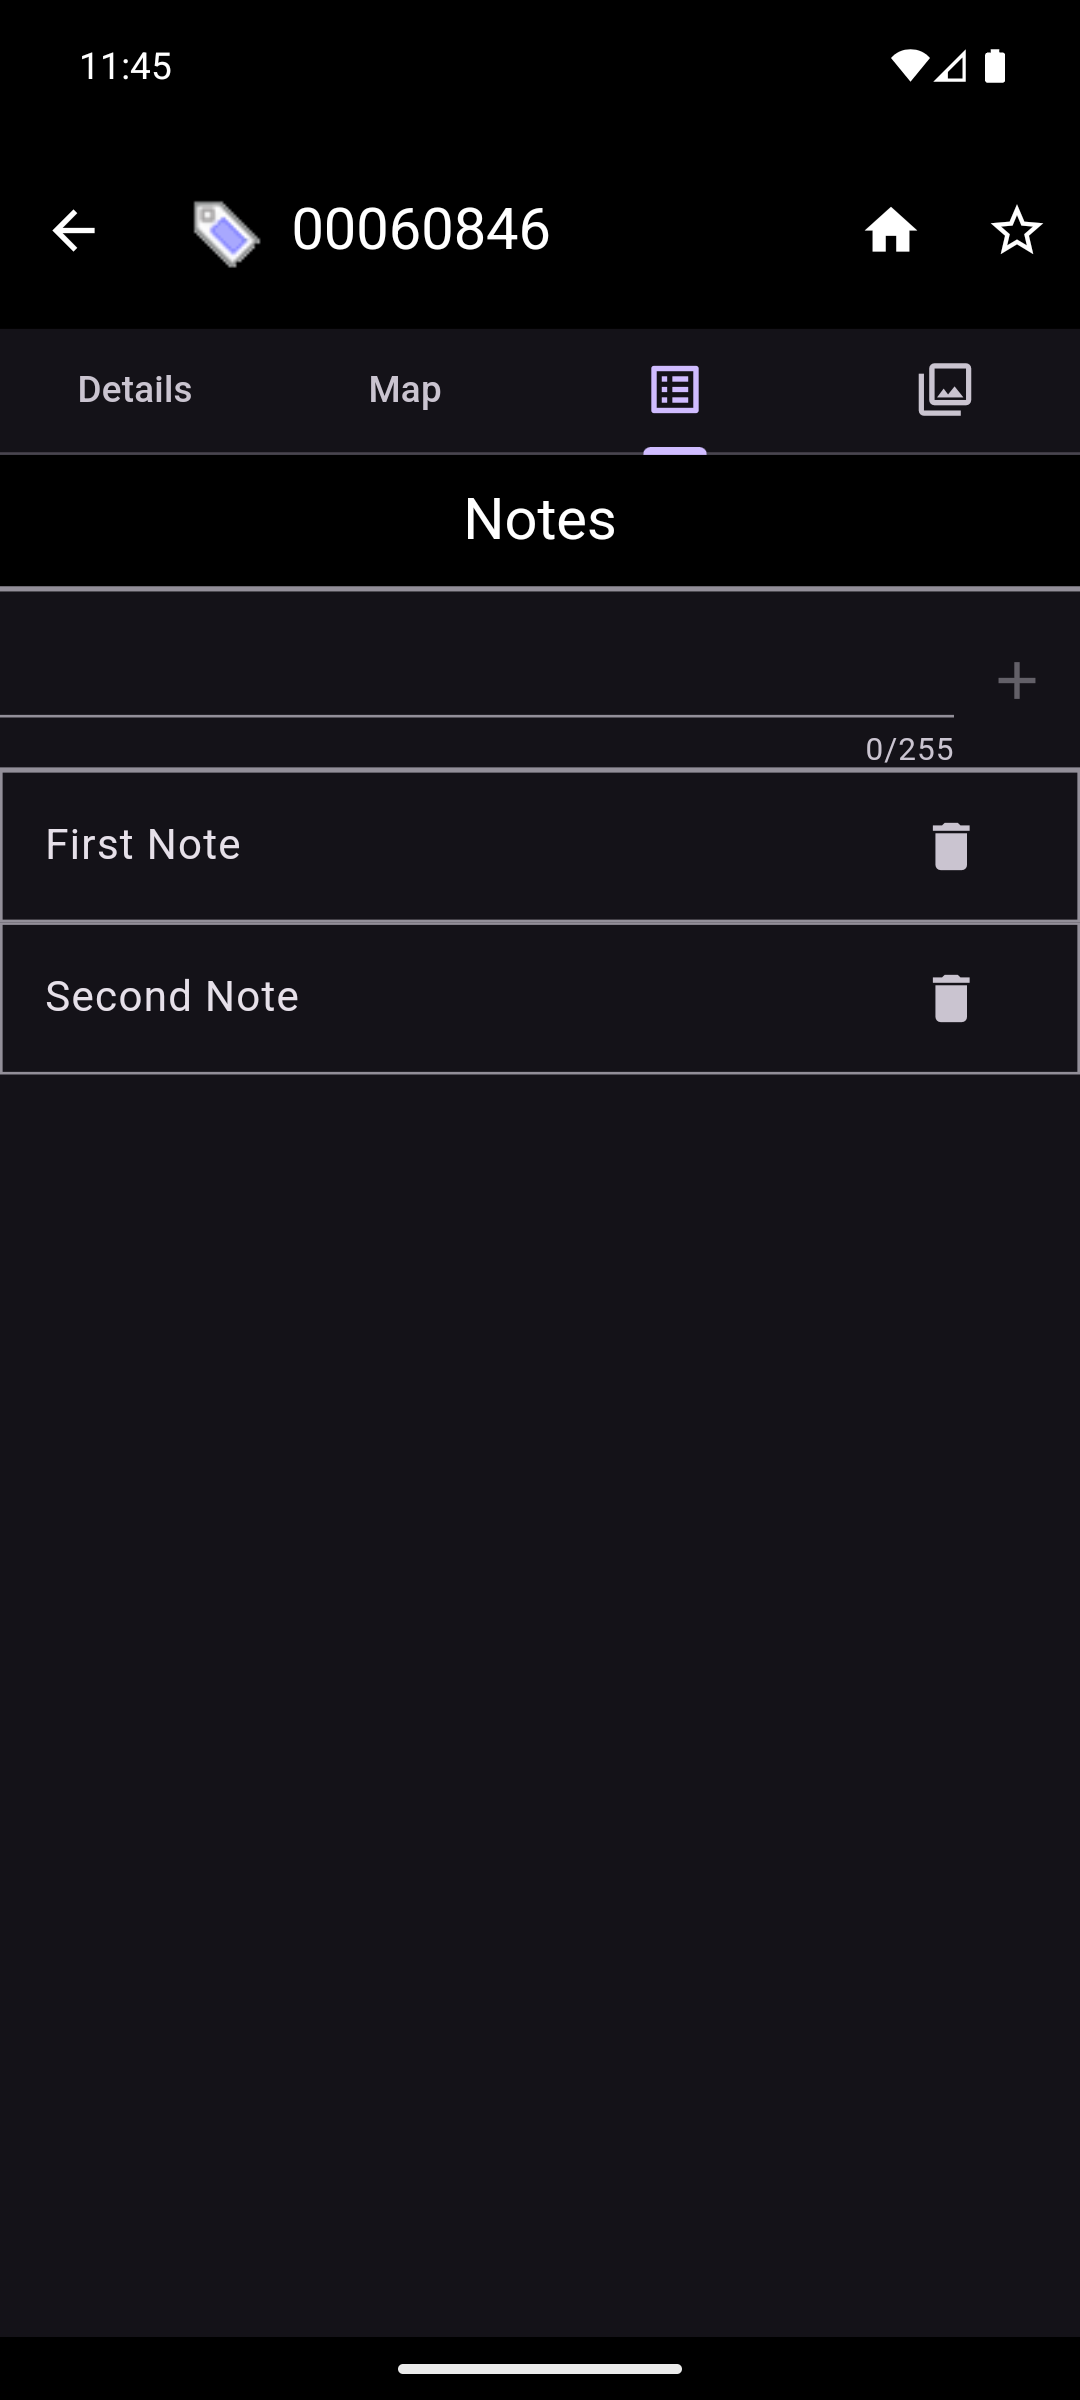
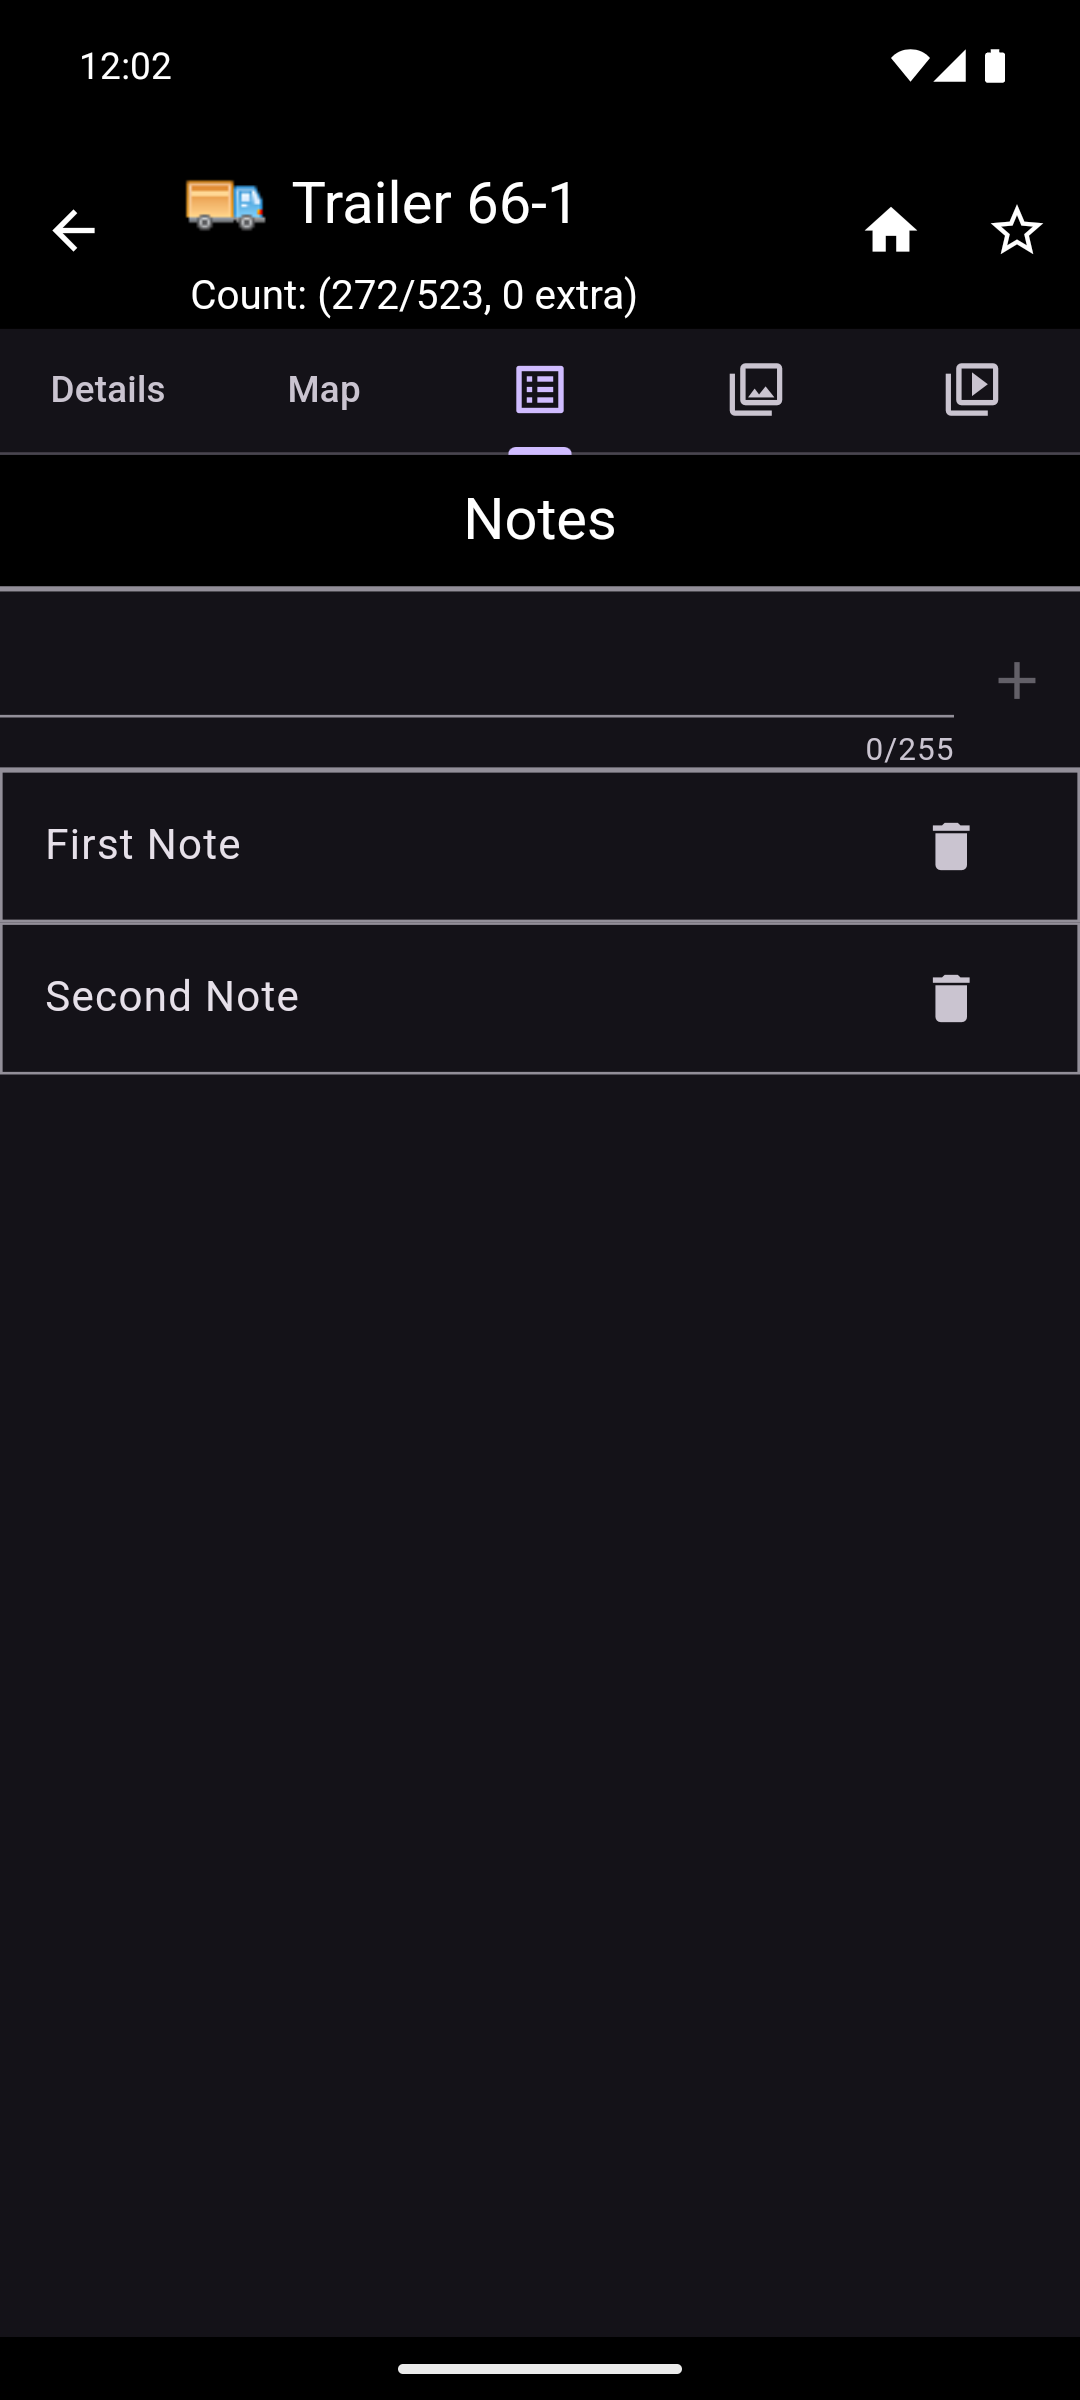
The Asset Notes tab displays a collection of notes that have been written about the asset. The notes can contain any relevant information. A user with the appropriate permissions can add, edit, and delete notes.
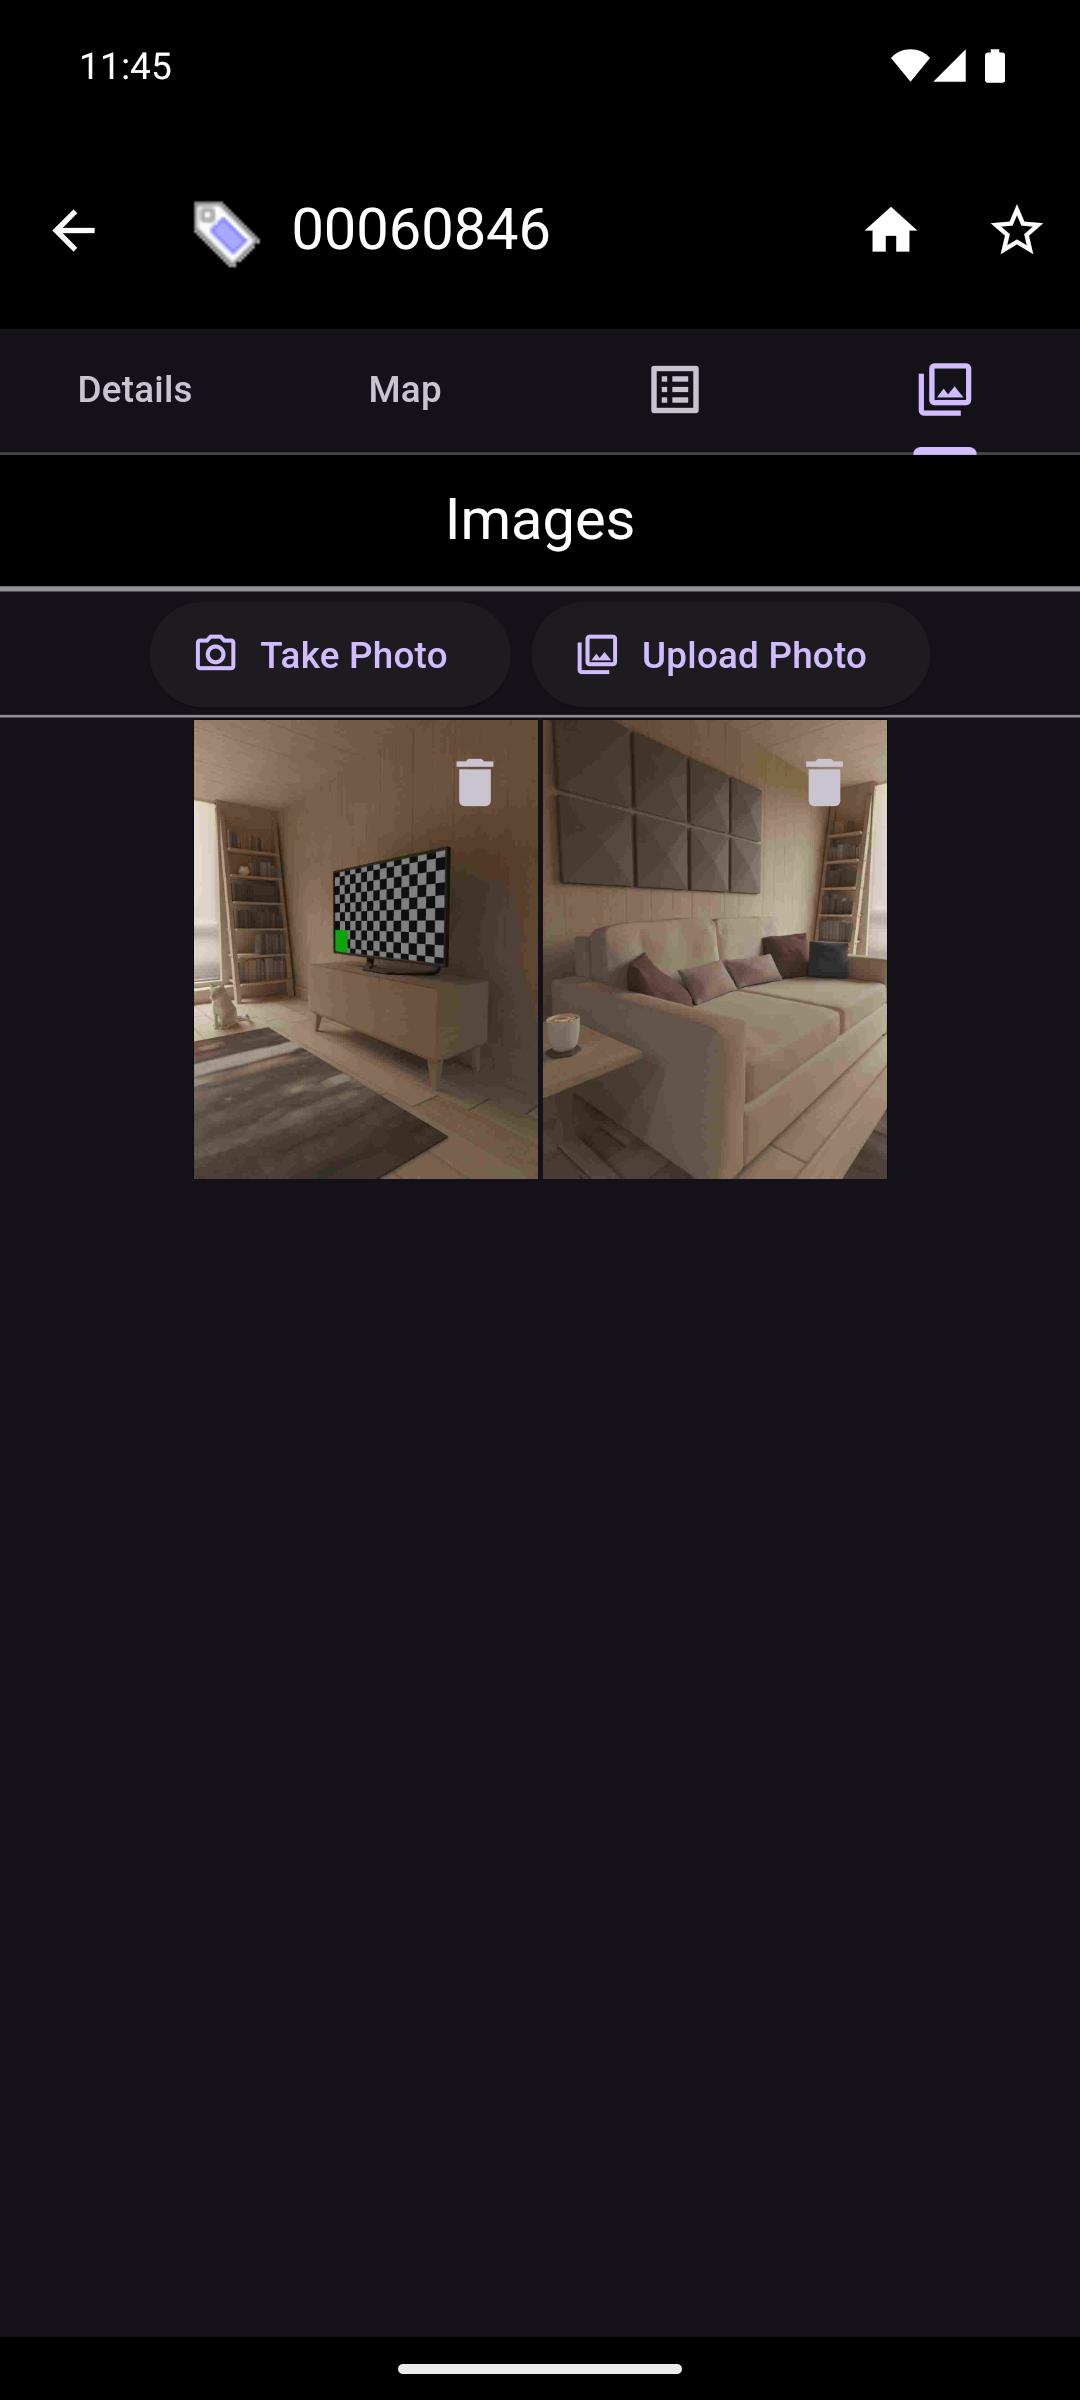
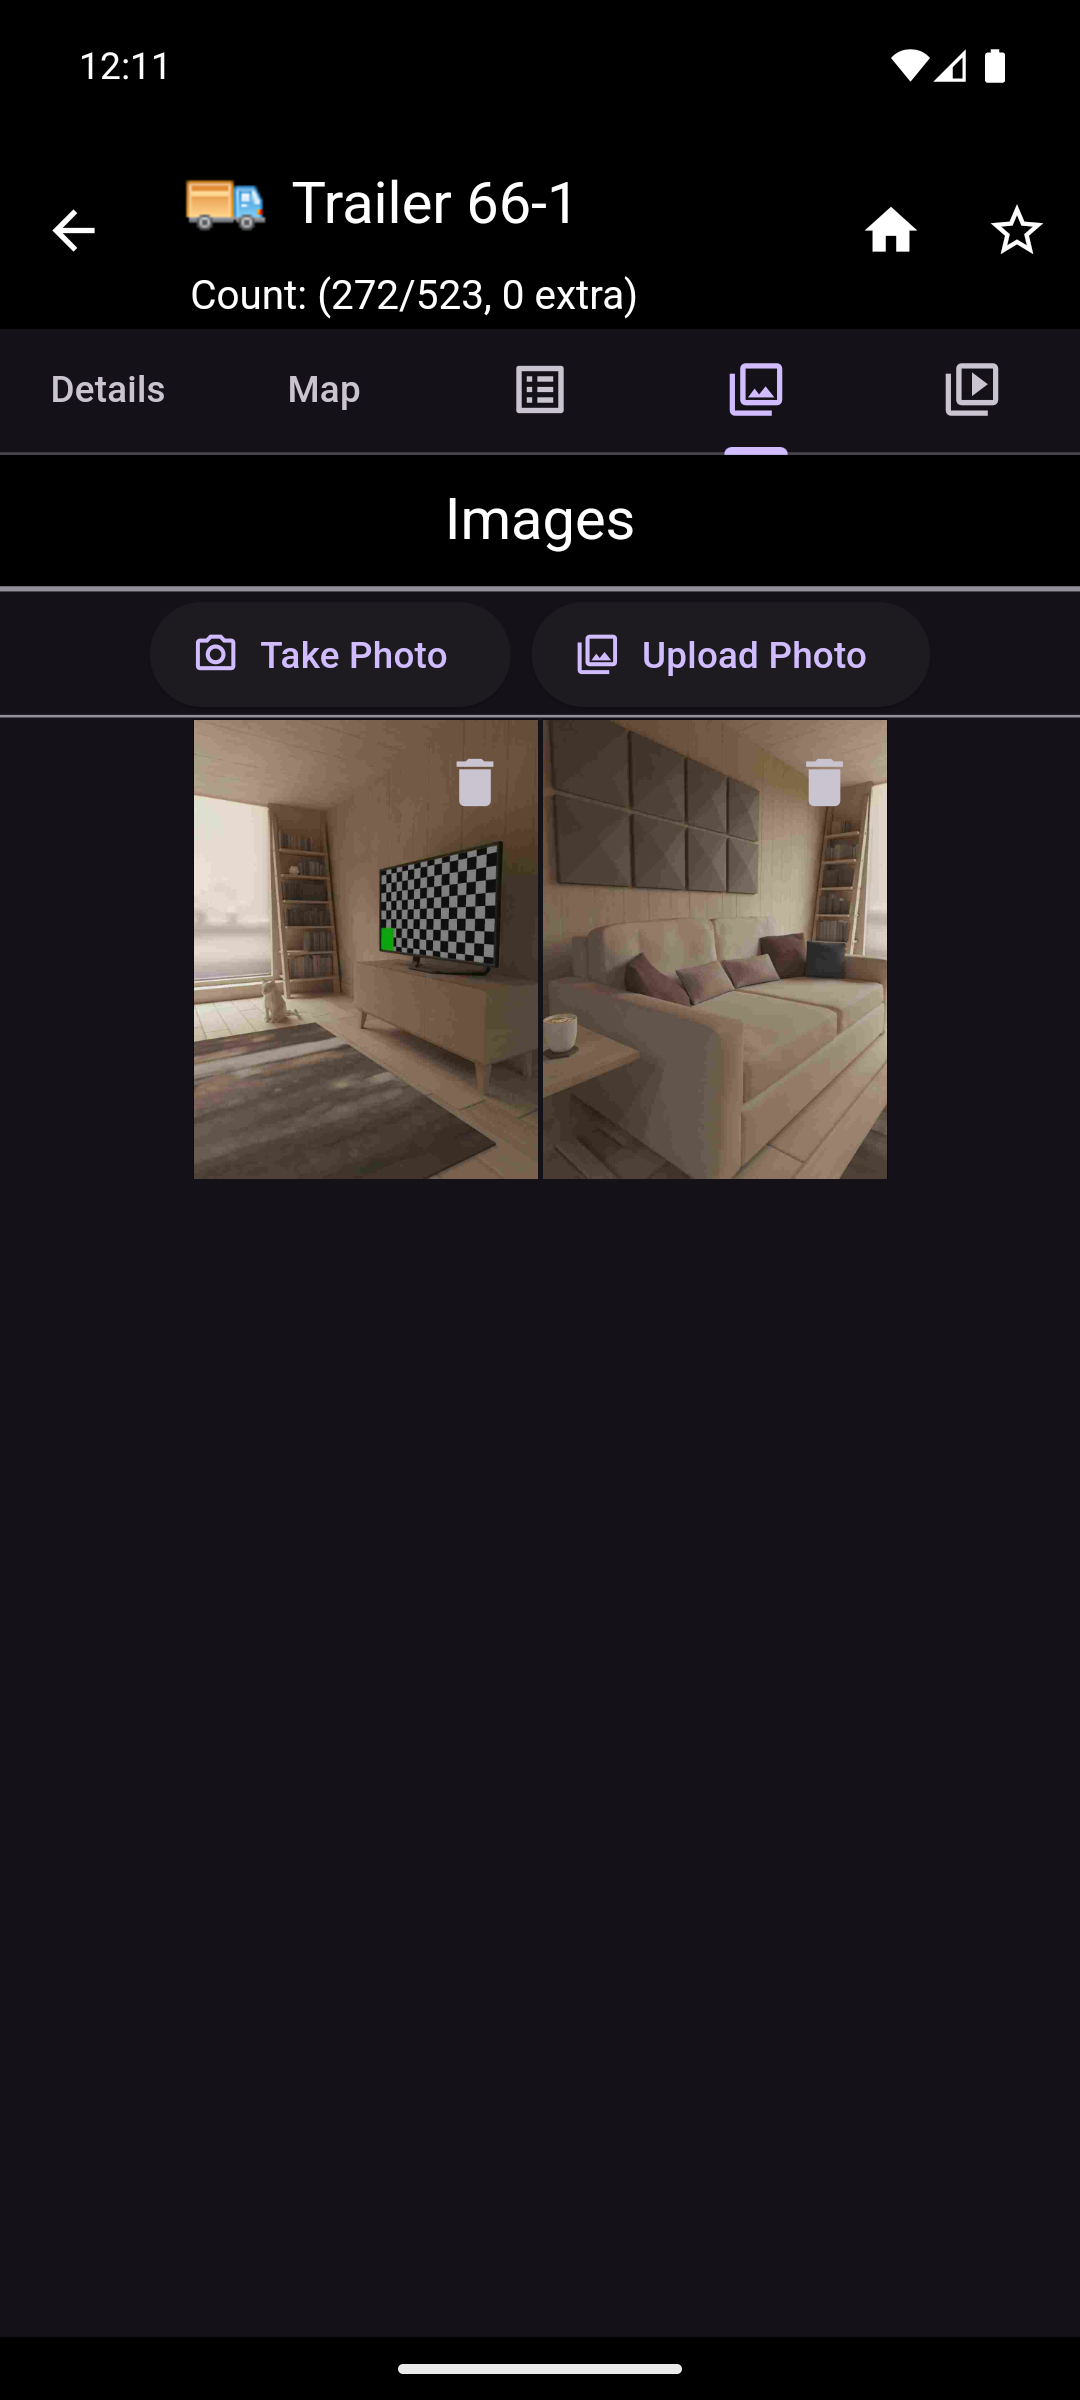
The Asset Images tab displays a collection of images that have been taken of the asset. A user with the appropriate permissions can add new images, delete old images, and rename existing images. Long pressing on an image will display the image's name with options to rename it and delete it. Tapping on the image will open the Image Viewer.
- The Image Viewer displays an image and allows for zooming and panning to view greater detail. An image can also be renamed or deleted from this page by using the overflow menu in the upper right.
NOTE: There is a maximum of five images that can be saved per asset.
The following actions are available if the user has the appropriate permissions. If not, these buttons are not shown.
- Home: The home icon button on the right of the header is for returning to the main menu.
- Favorite: The star icon button on the right of the header is for marking the asset as a favorite.
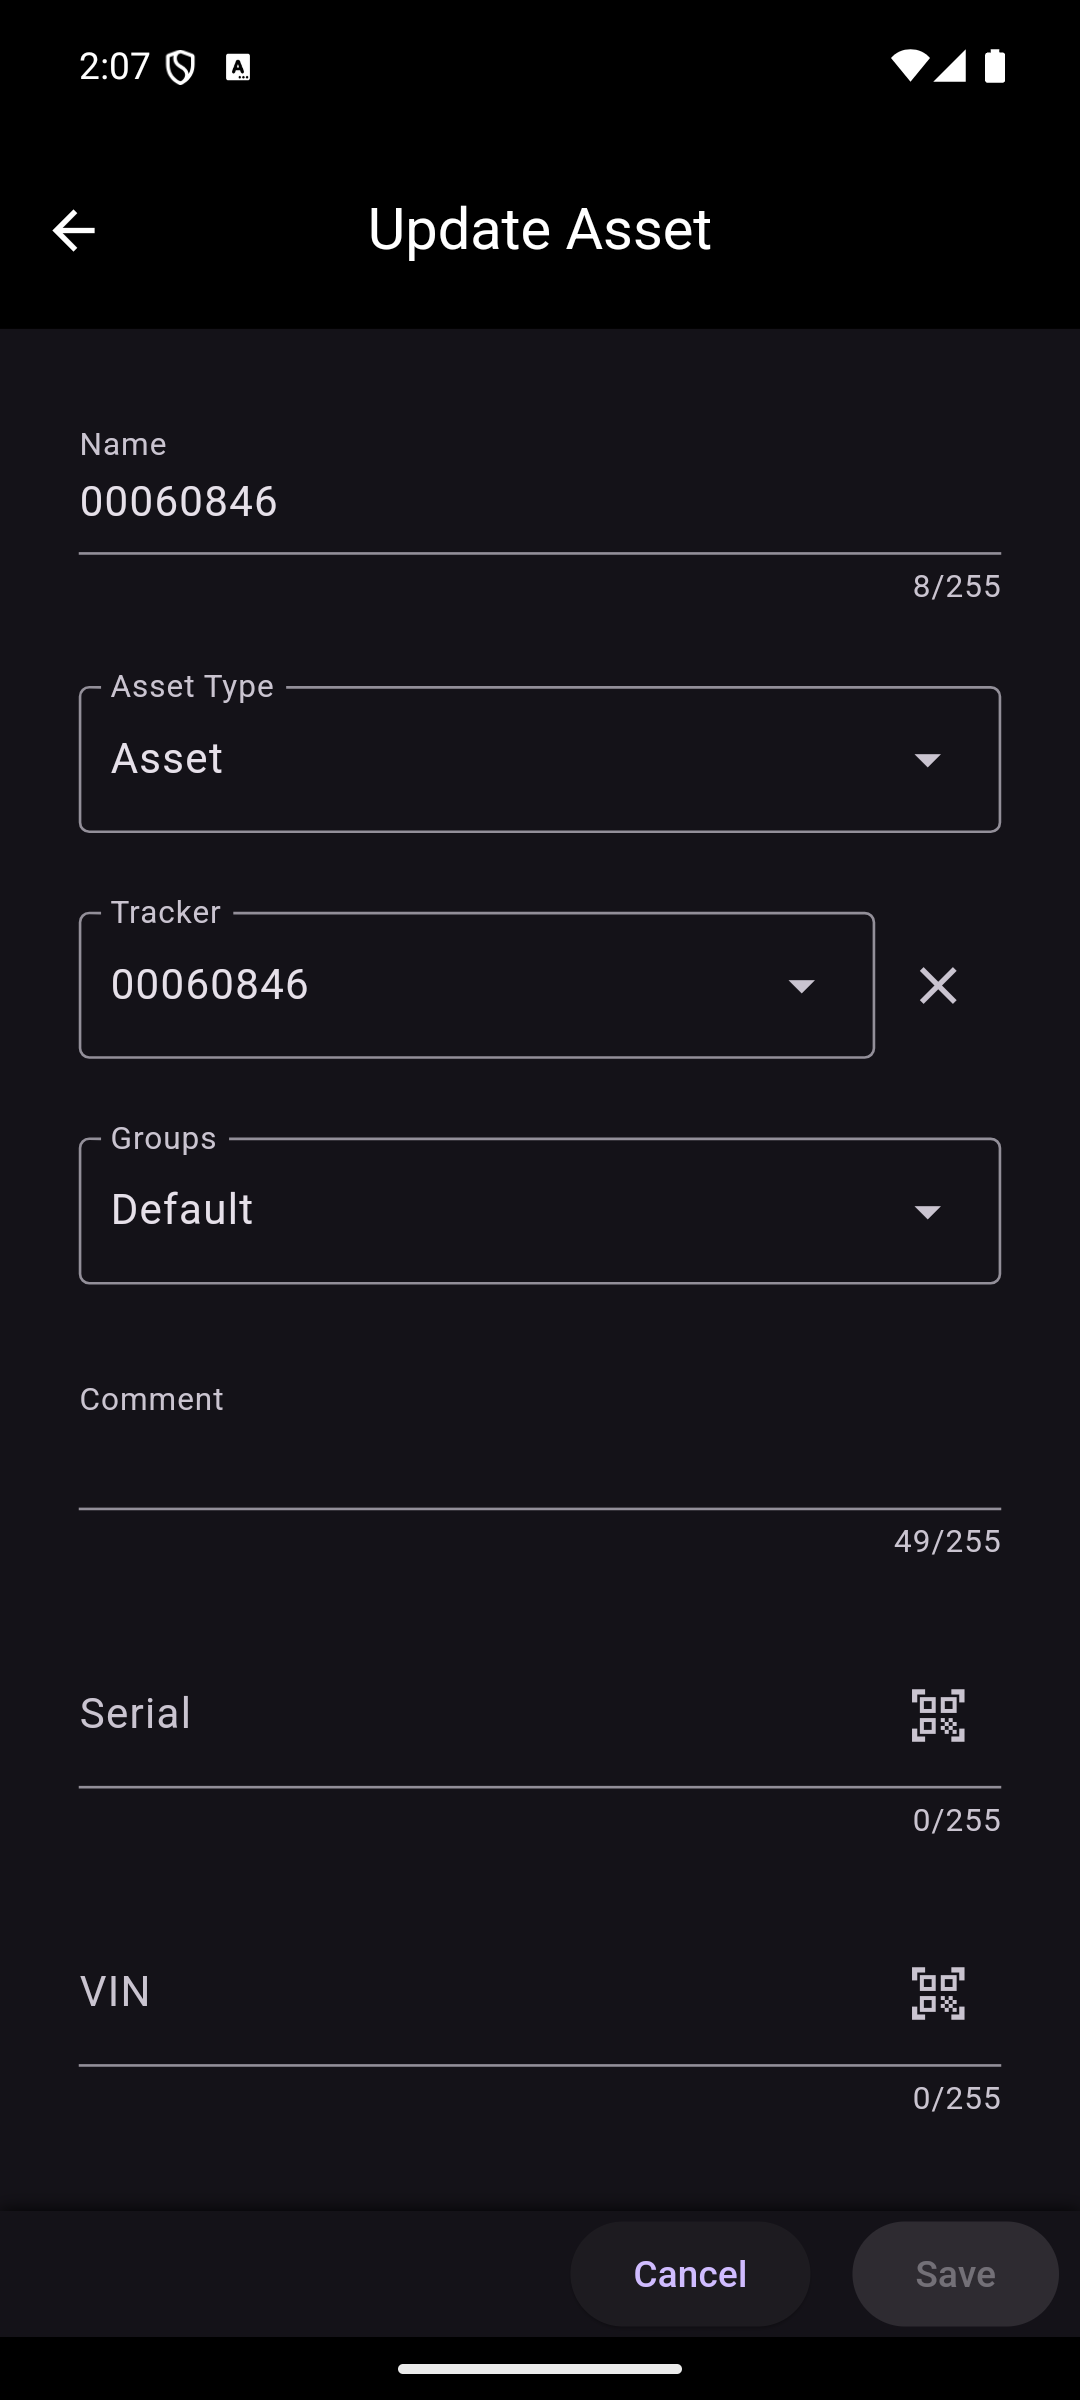
- Edit: The pencil icon button on the left of the footer is for editing the asset's information.
- Delete: The trash icon button in the center of the footer is for deleting the asset.
- Change Container: The reorder icon button on the right of the footer is for changing the asset's container.
NOTE: Deleting assets is a destructive process. All historic and current information for the selected asset will be deleted. To help prevent accidental deletion, the user will be prompted to confirm the deletion.
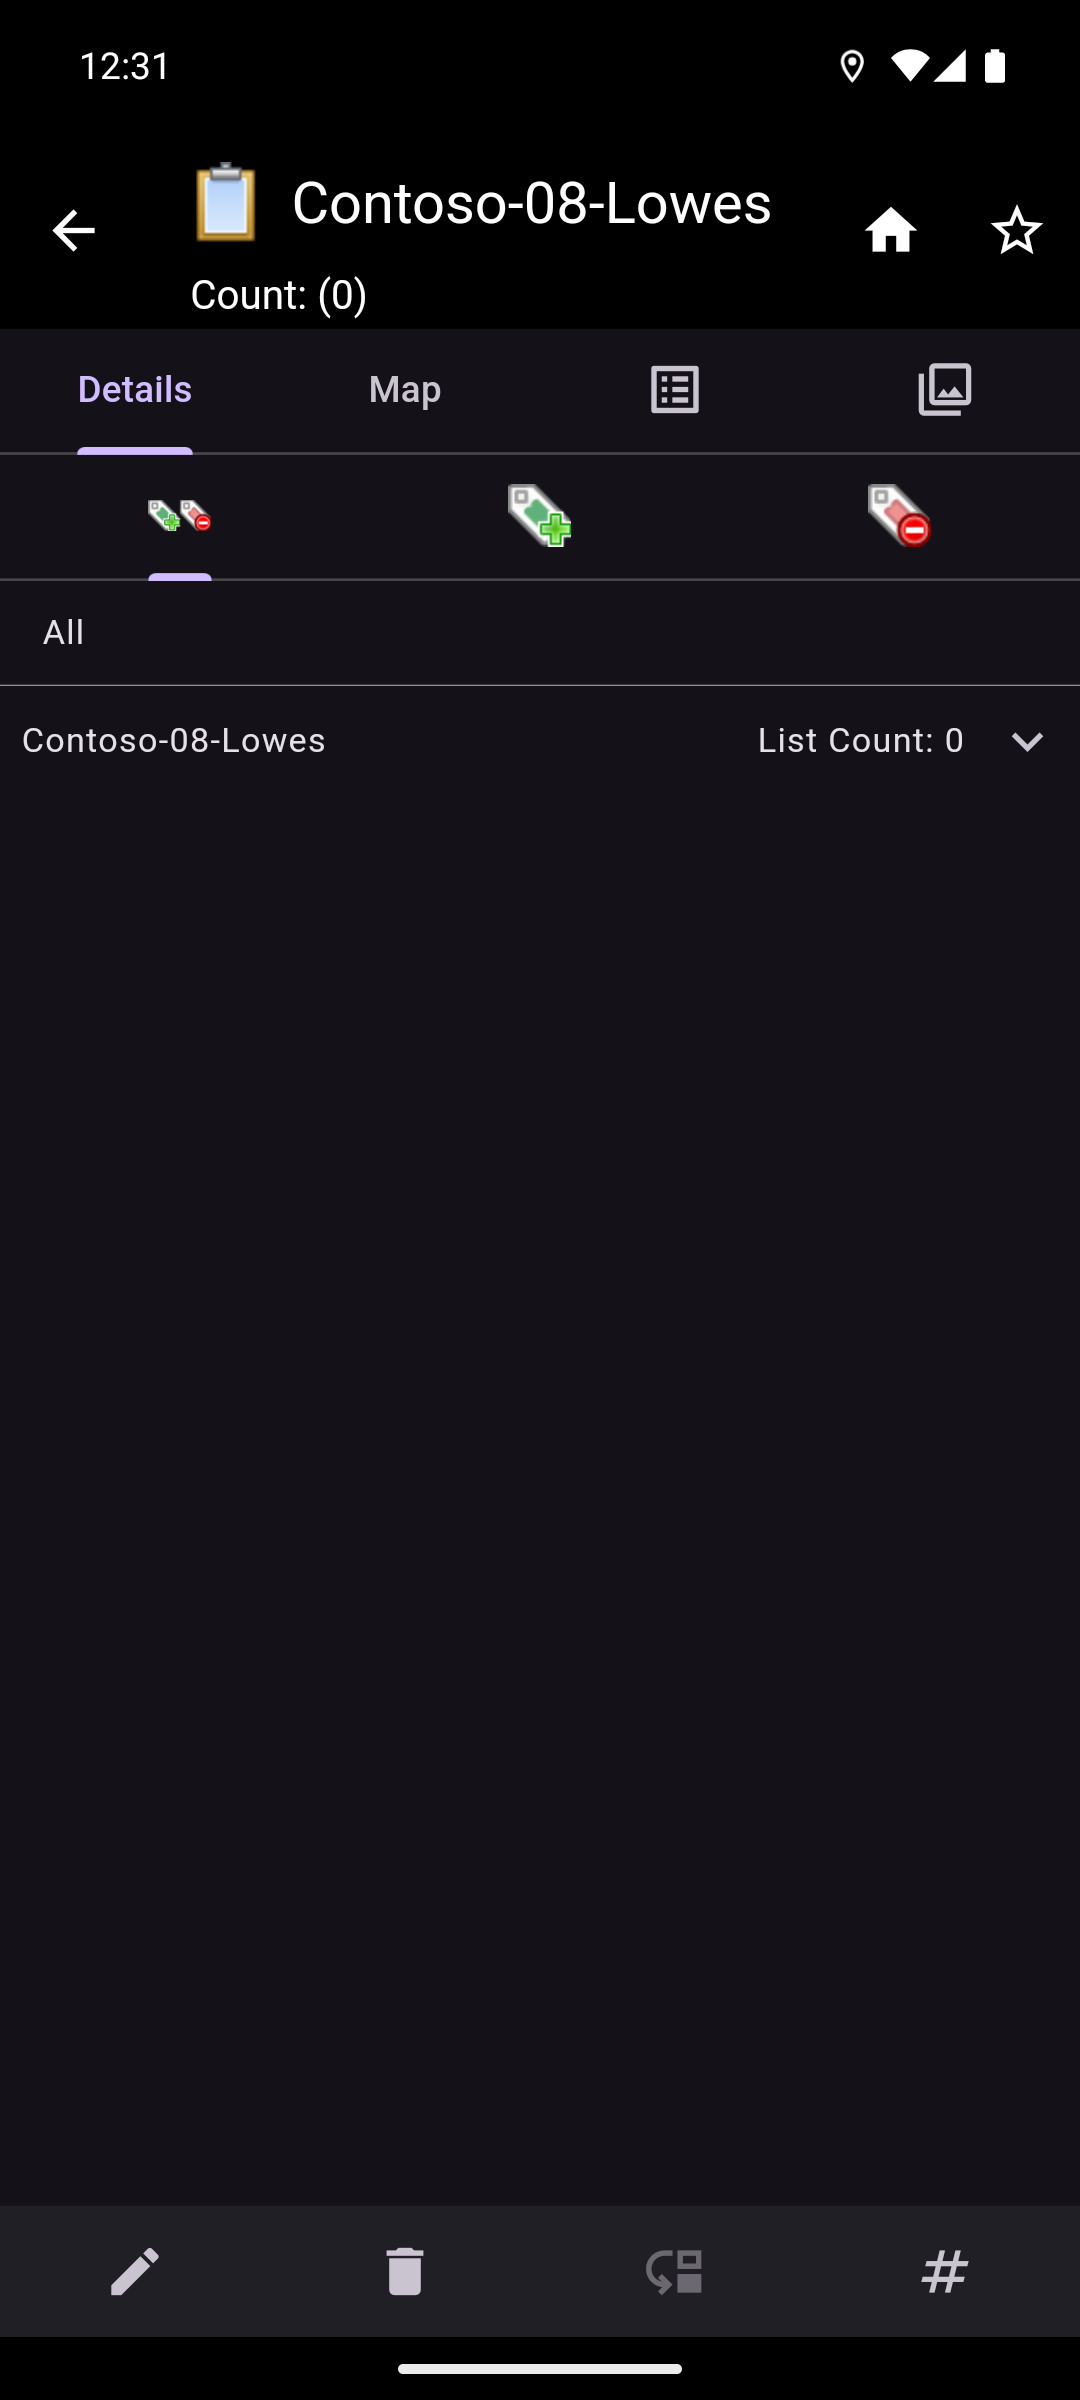
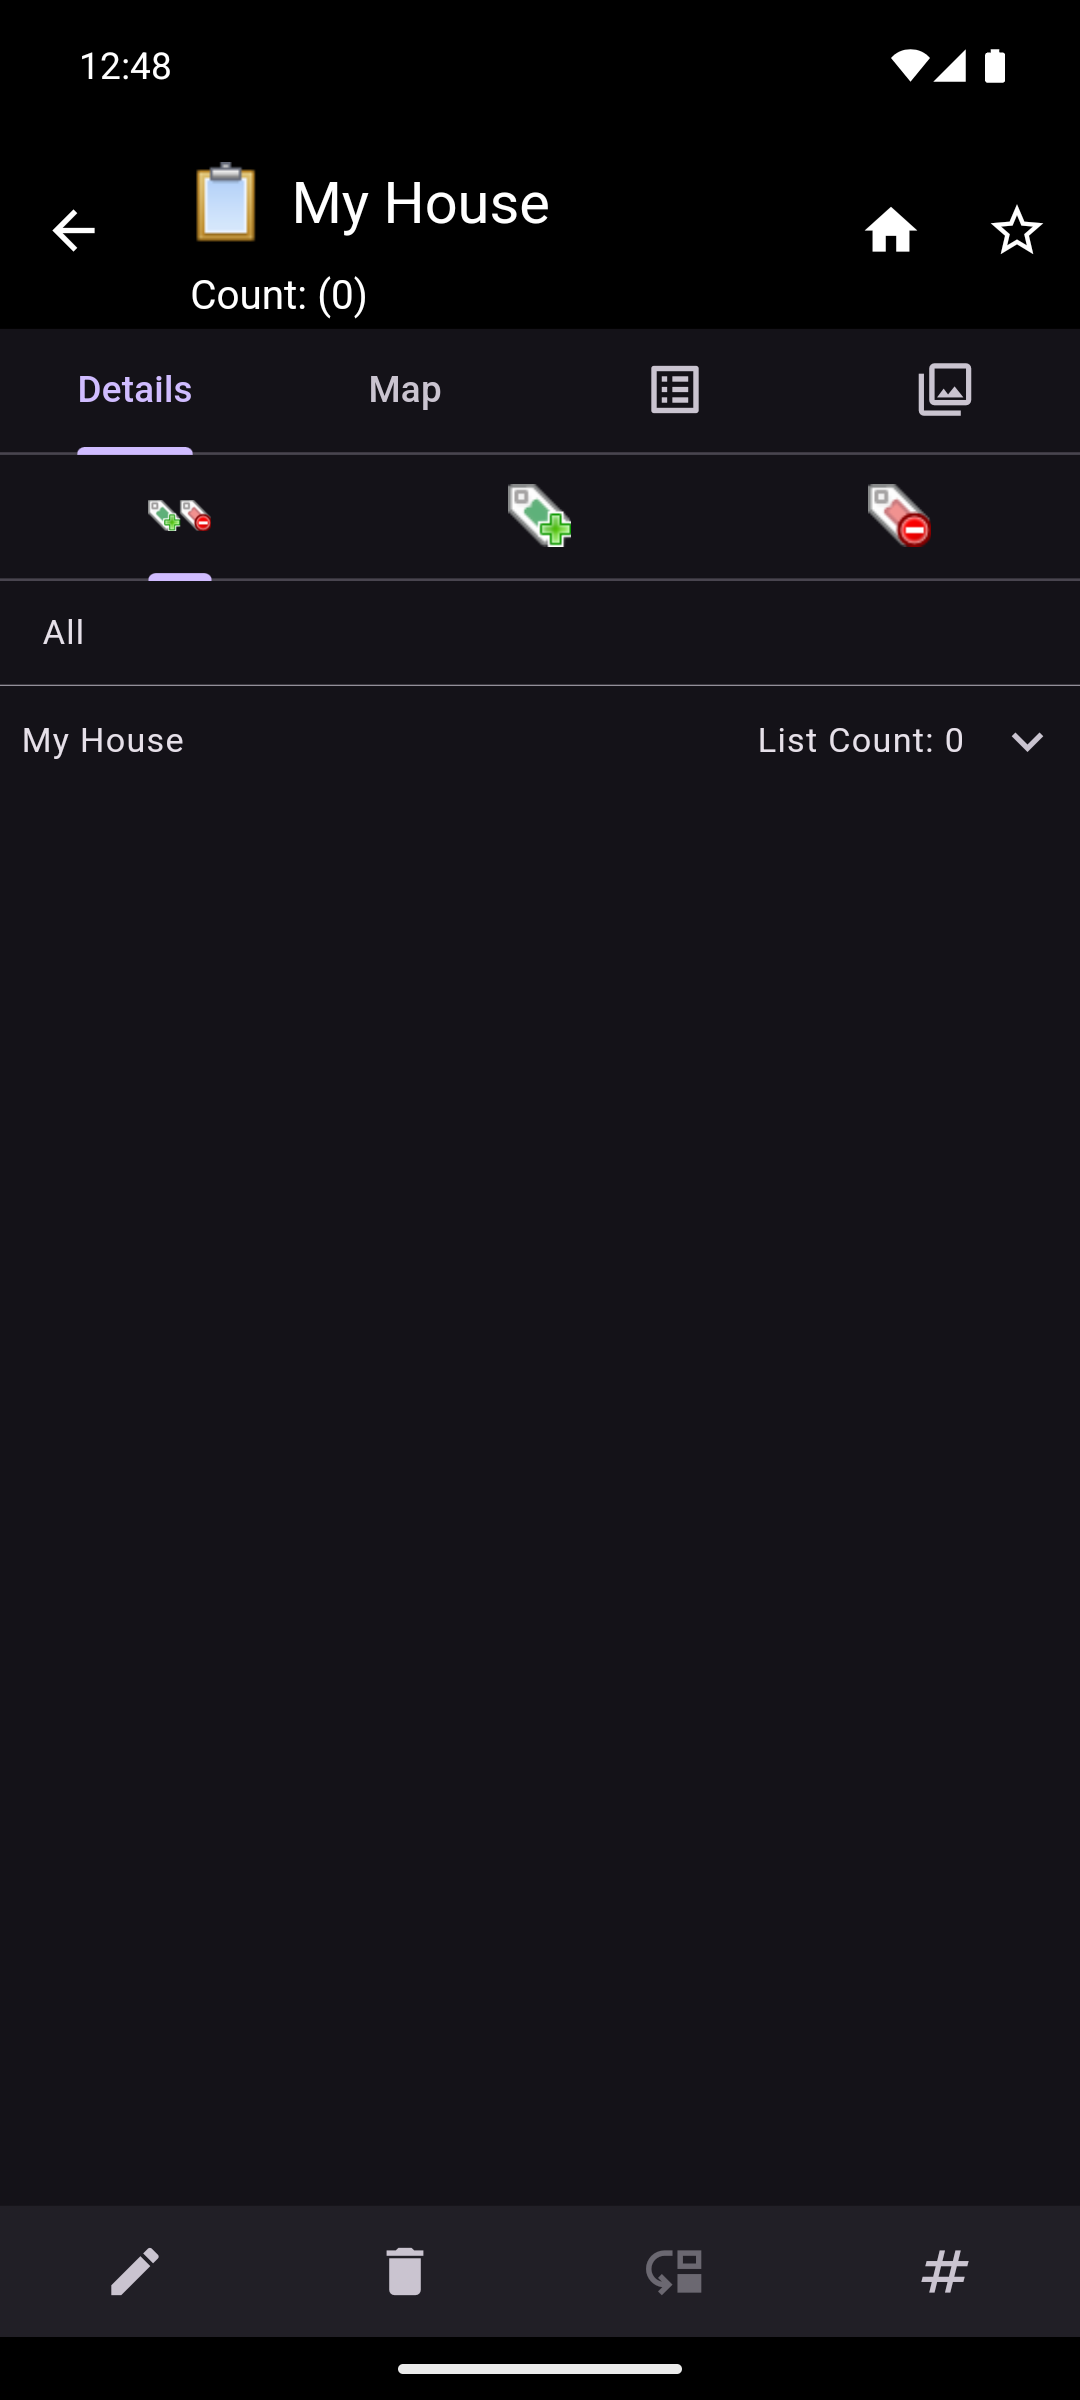
Container Asset

On the asset details screen, the asset's information is displayed. In the header, there is an icon showing the asset's type as well as the name of the asset. If the name is too long, it will be truncated. The full name can be viewed by long pressing on the asset's name.
Just below the header, there is a tabbed interface that allows switching between the Asset Details, Asset Map, Asset Notes, Asset Images, and, if applicable, Asset Videos.
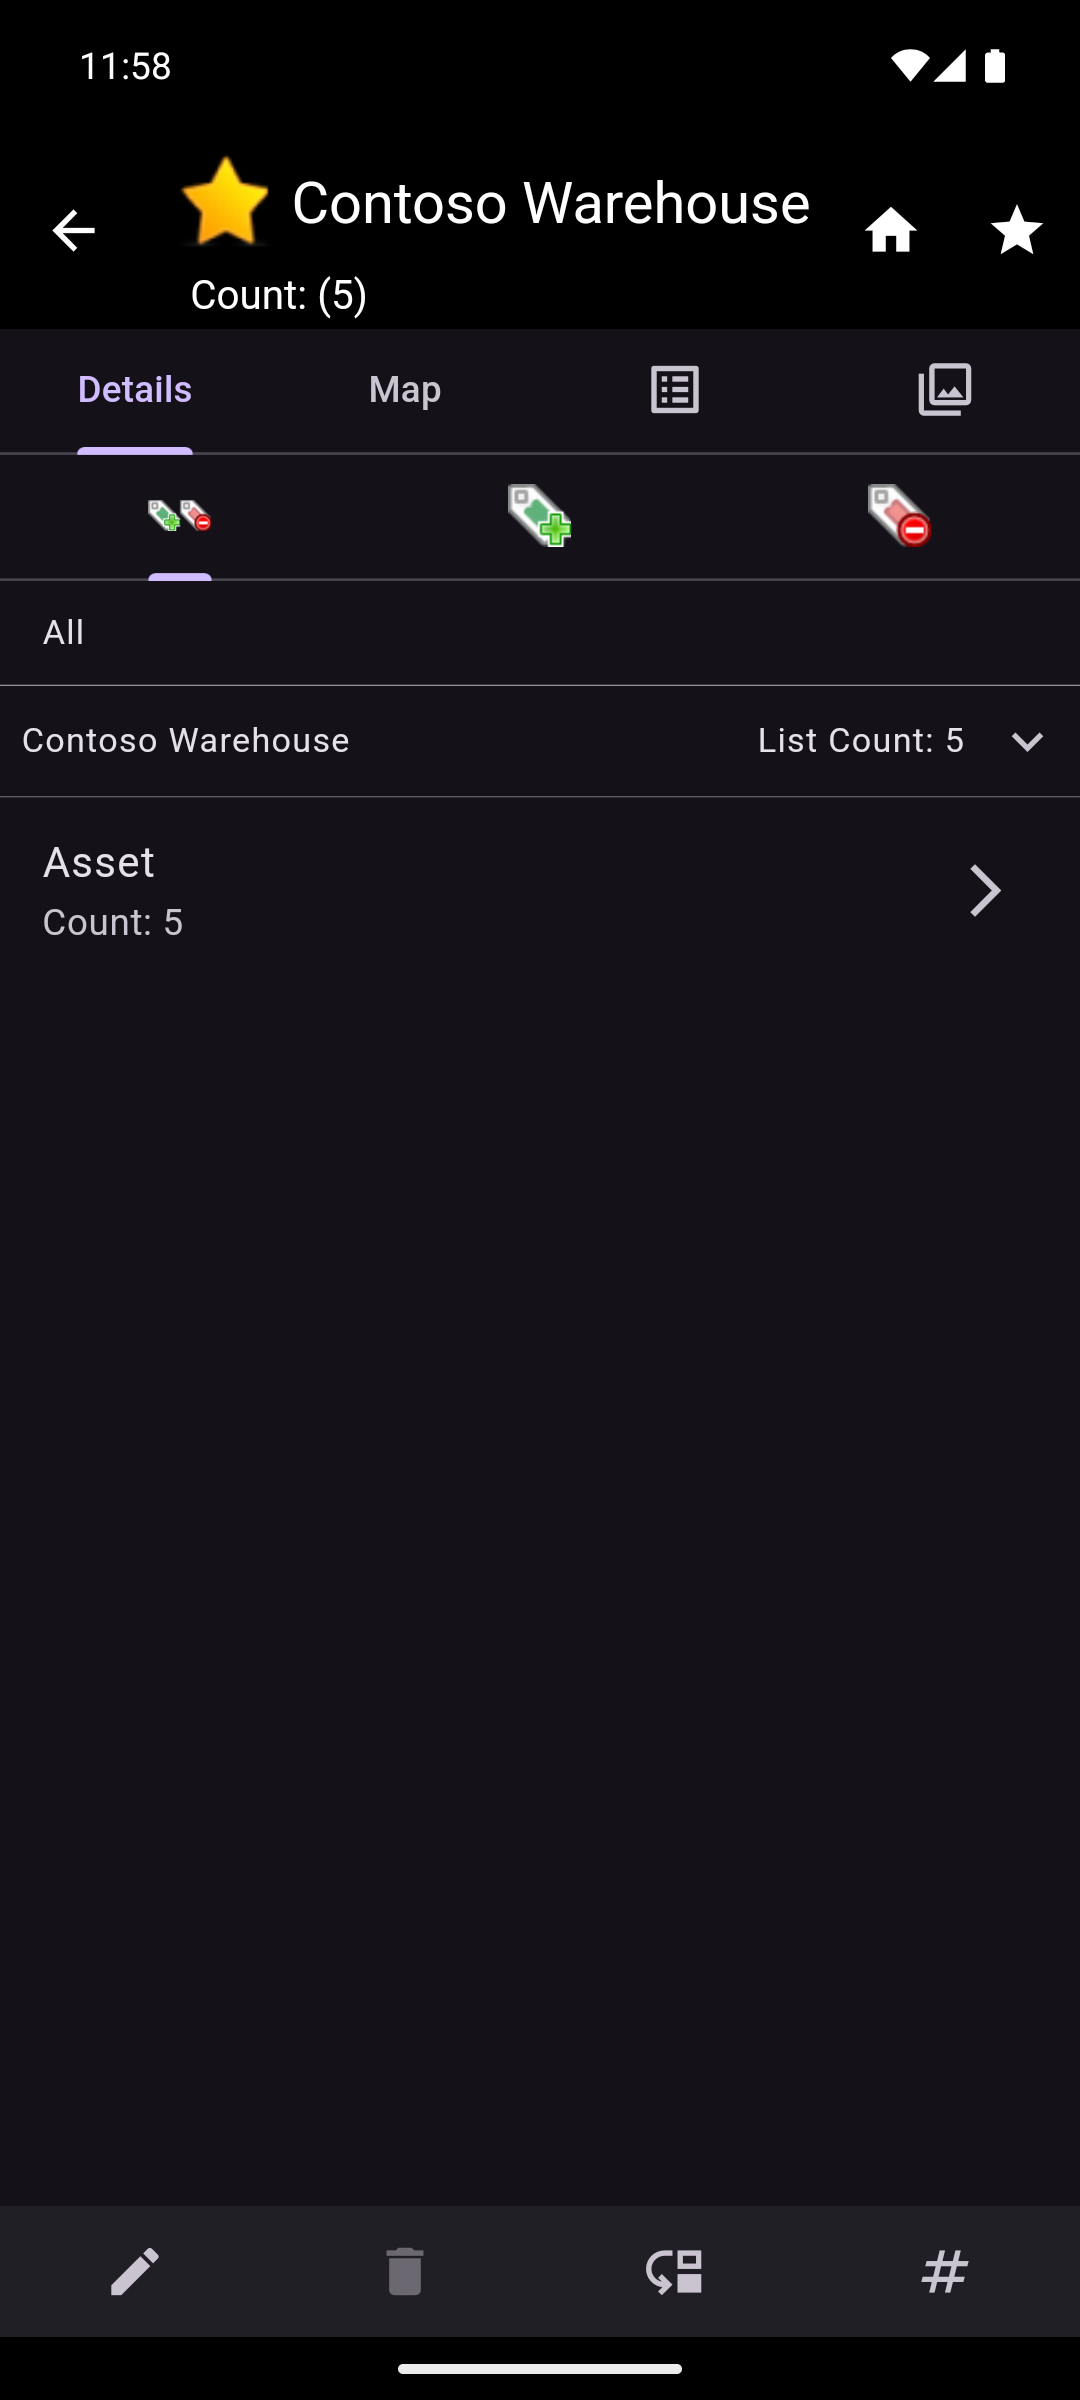
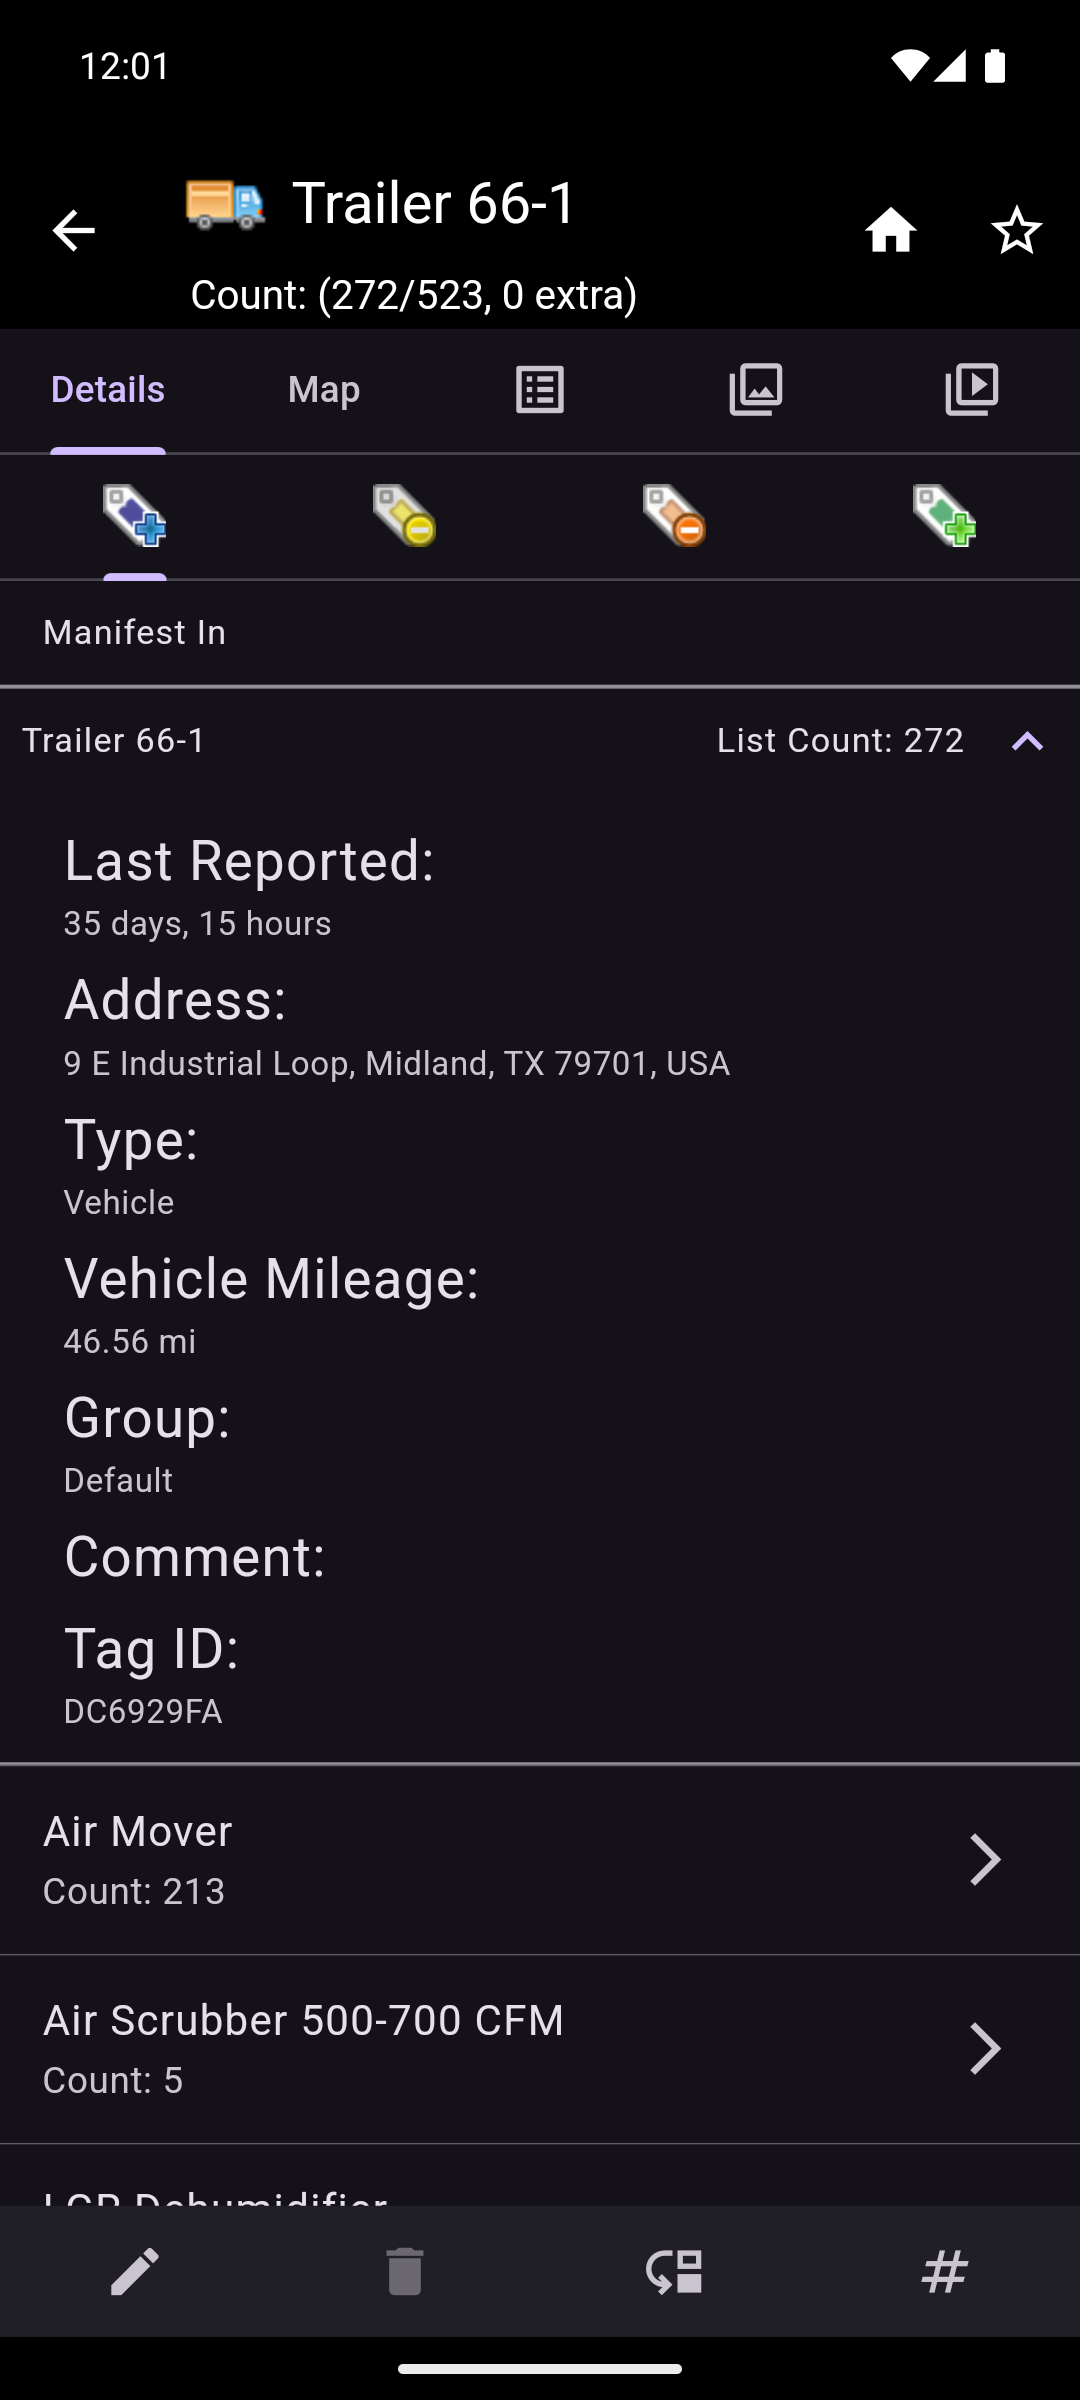
The Asset Details tab displays its own tabbed interface. Each tab represents a different state its child assets can be in. Just under the tab row, the name of the selected tab can be seen. The tab names can also be seen by long pressing the tab icon. Below the tab name, there is an expandable region that displays the asset name as well as the number of child assets in the current tab. Once expanded, the asset's details can also be viewed. The asset details include the following information:
- Last Reported: The last time the asset reported its location.
- Address: The address of the asset's reported location.
- Type: The asset type.
- Vehicle Mileage: The current mileage of the vehicle (if applicable).
- Group: The group the asset is in (if applicable).
- Comment: Any comments associated with the asset.
- Tag ID: The id of the tag associated with the asset.
Information on this tab can be copied by long pressing on the information.
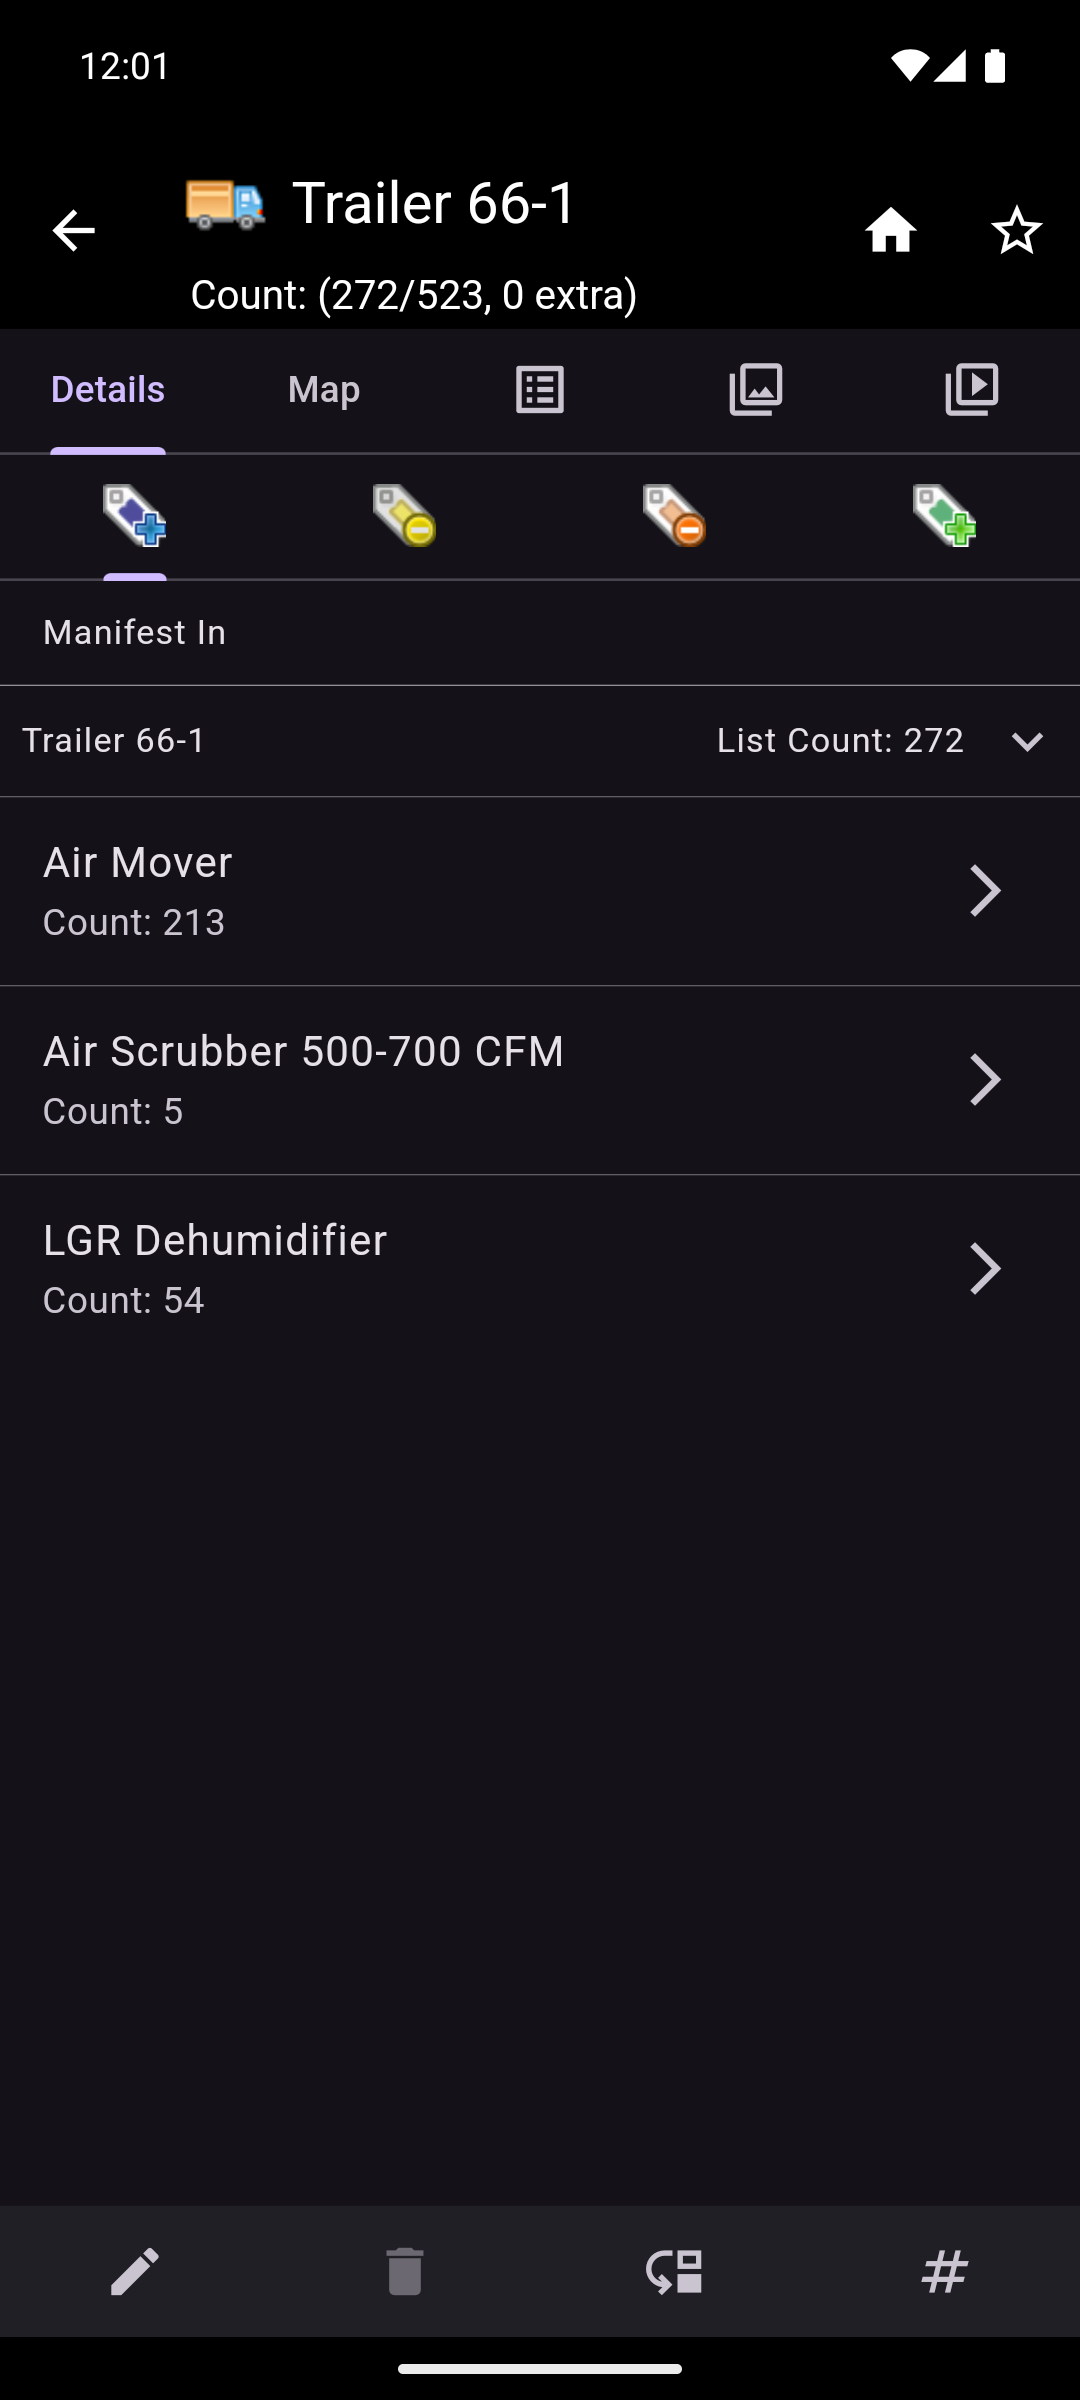
The tabs that can be selected change depending on if the container asset is a vehicle and if it has a manifest. The tabs are as follows:
- For Container Assets that are not Vehicles:
- All: All child assets of the container asset.
- In: (Green) Assets that are currently in the container asset.
- Out: (Red) Assets that are currently out of the container asset but have not been seen anywhere else.
- For Vehicles without a Manifest:
- In: (Green) Assets that are currently in the container asset.
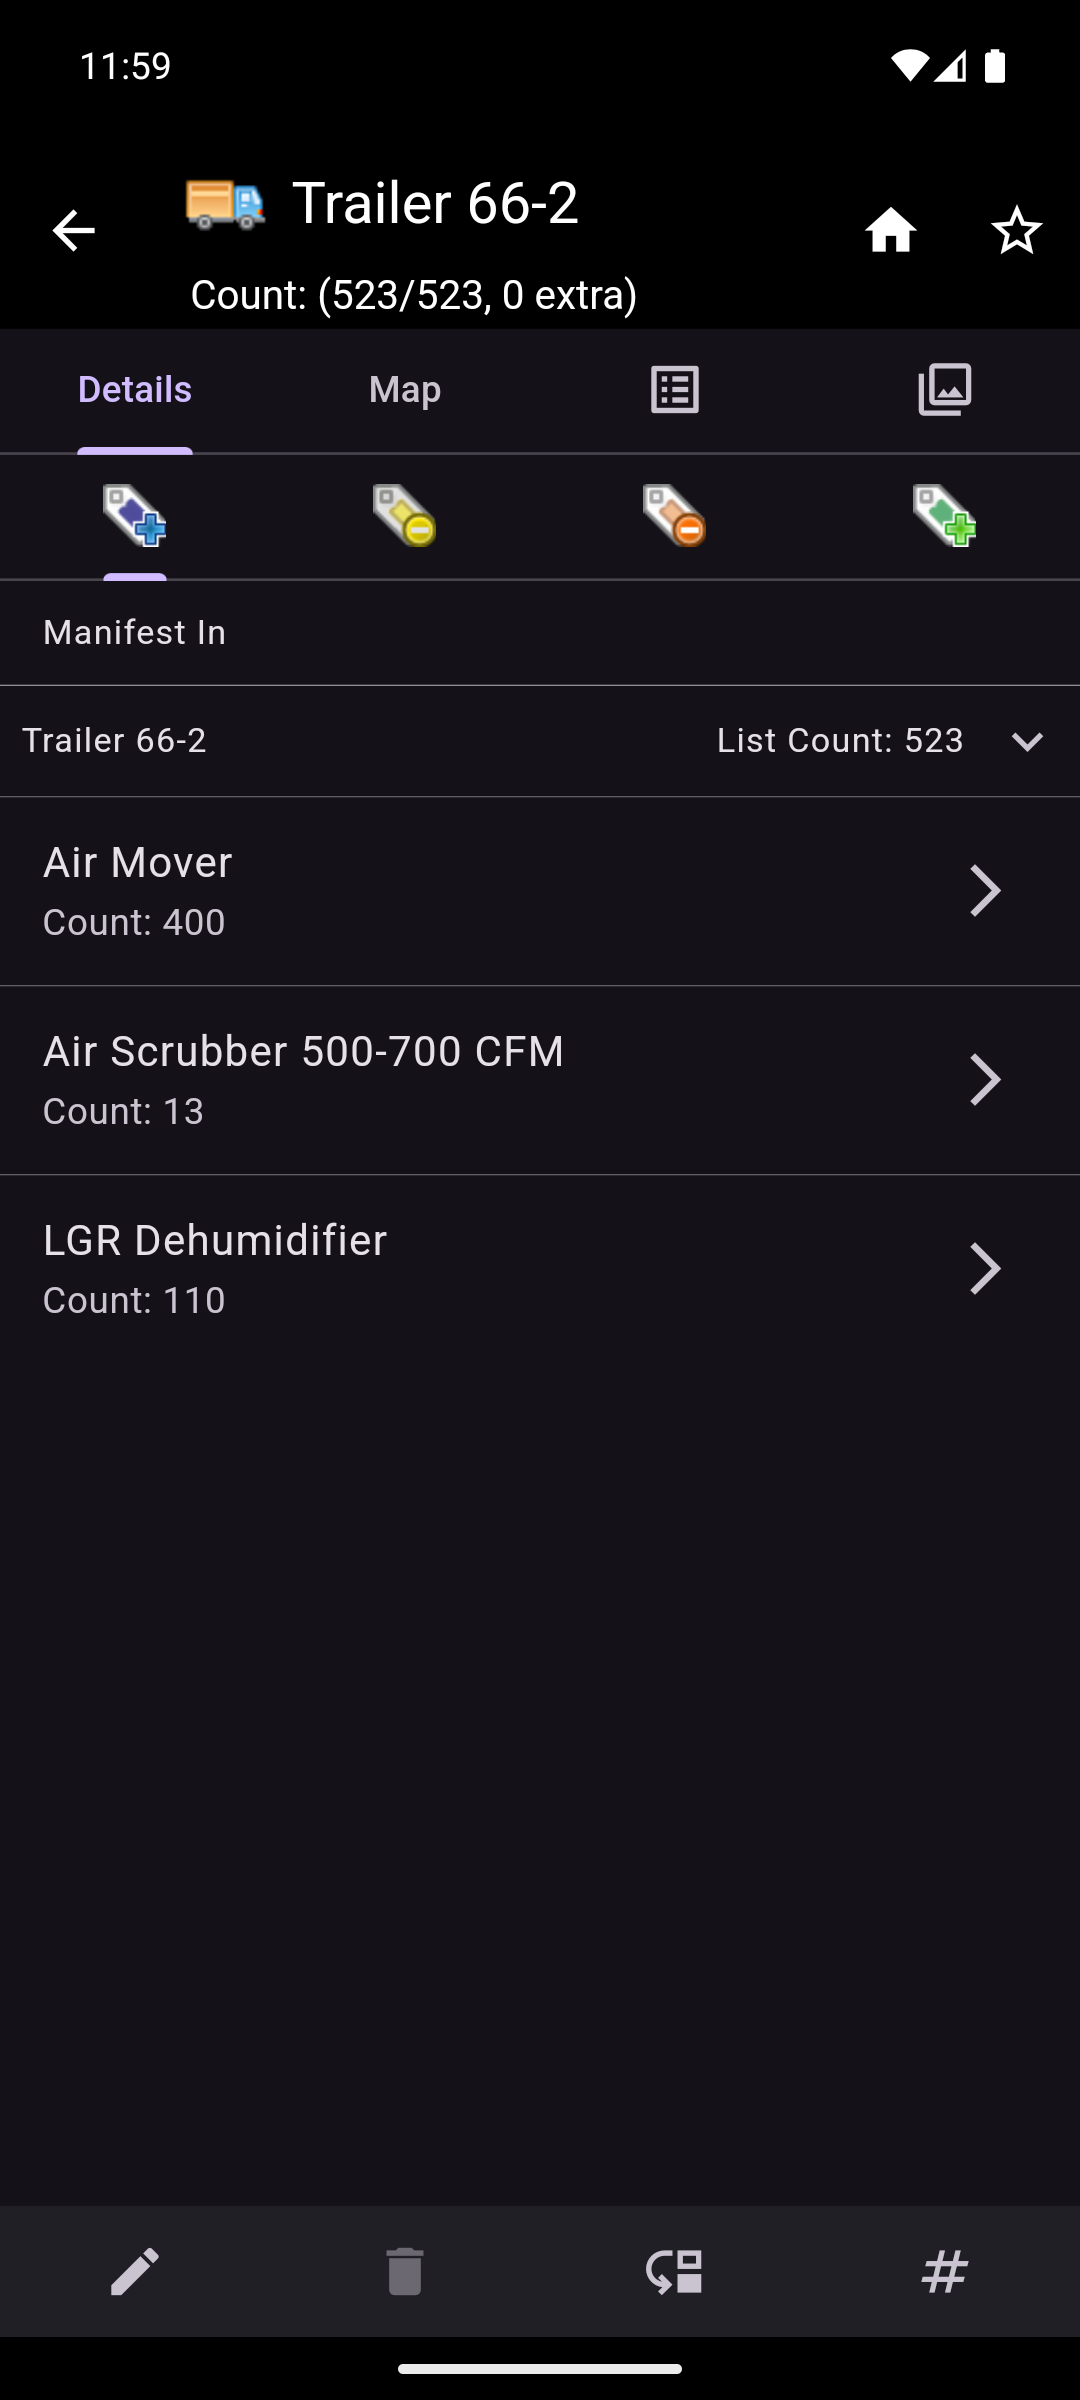
- For Vehicles with a Manifest:
- Manifest In: (Blue) Assets that are on the container asset's manifest and are currently in the container asset.
- Manifest Out: (Yellow) Assets that are on the container asset's manifest and are currently out of the container asset and have been seen somewhere else.
- Manifest Dropped: (Orange) Assets that are on the container asset's manifest and are currently out of the container asset but have not been seen anywhere else.
- In: (Green) Assets that are not on the container asset's manifest and are currently in the container asset.
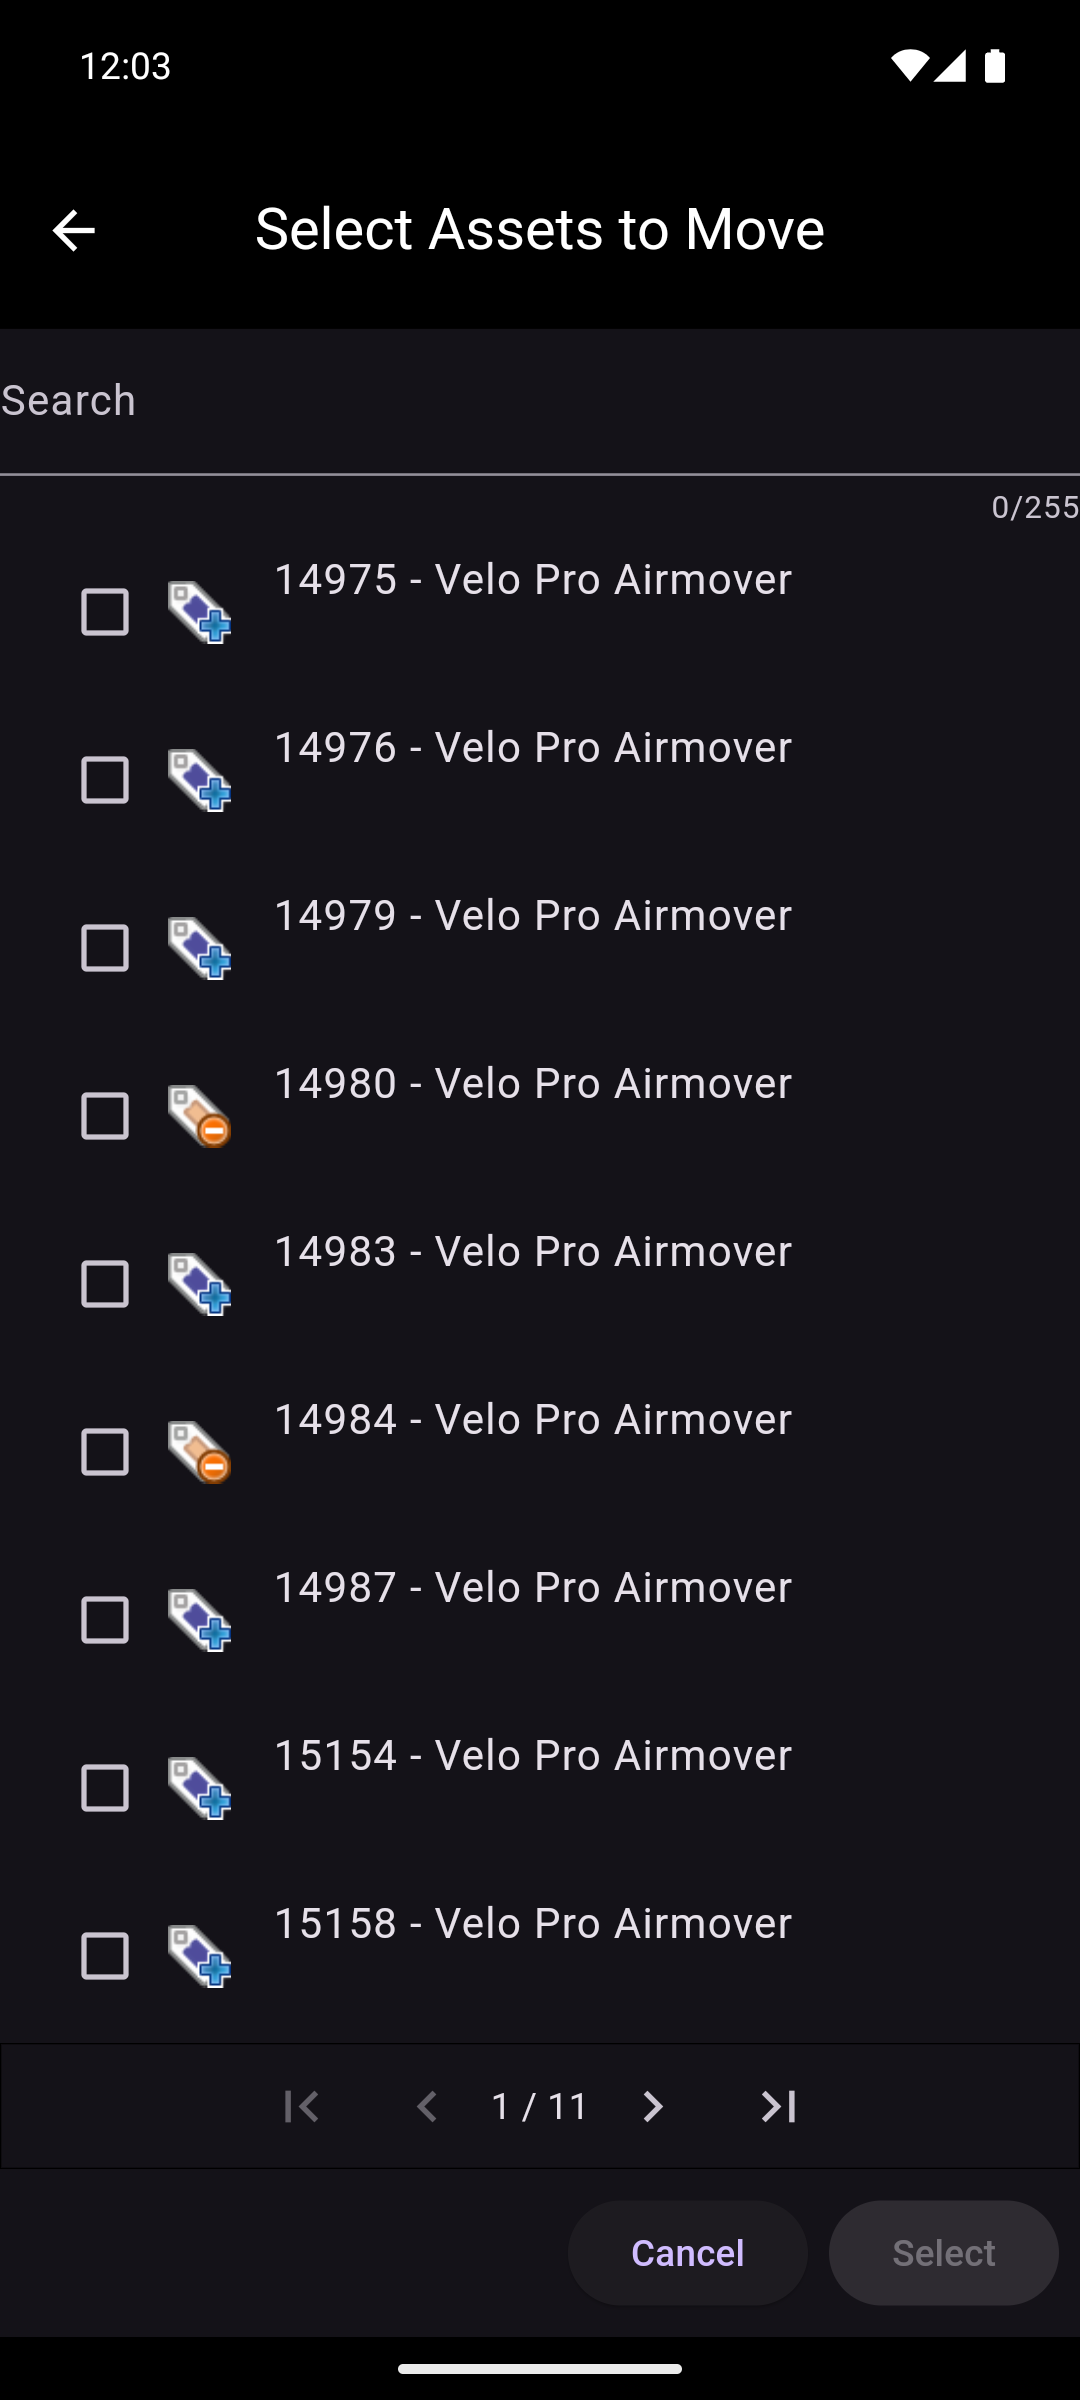
The tabs display a list of the different asset types and a count of how many assets of that type are in the container asset for the selected tab's asset state. If there are no assets for a given asset type and asset state, that asset type will not be displayed. Tapping on an asset type will display an Asset Selection screen with a list of the child assets of the given type and state. This Asset Selection screen includes a list count of the child assets in the header and the child assets' icons that reflect the state of the asset.
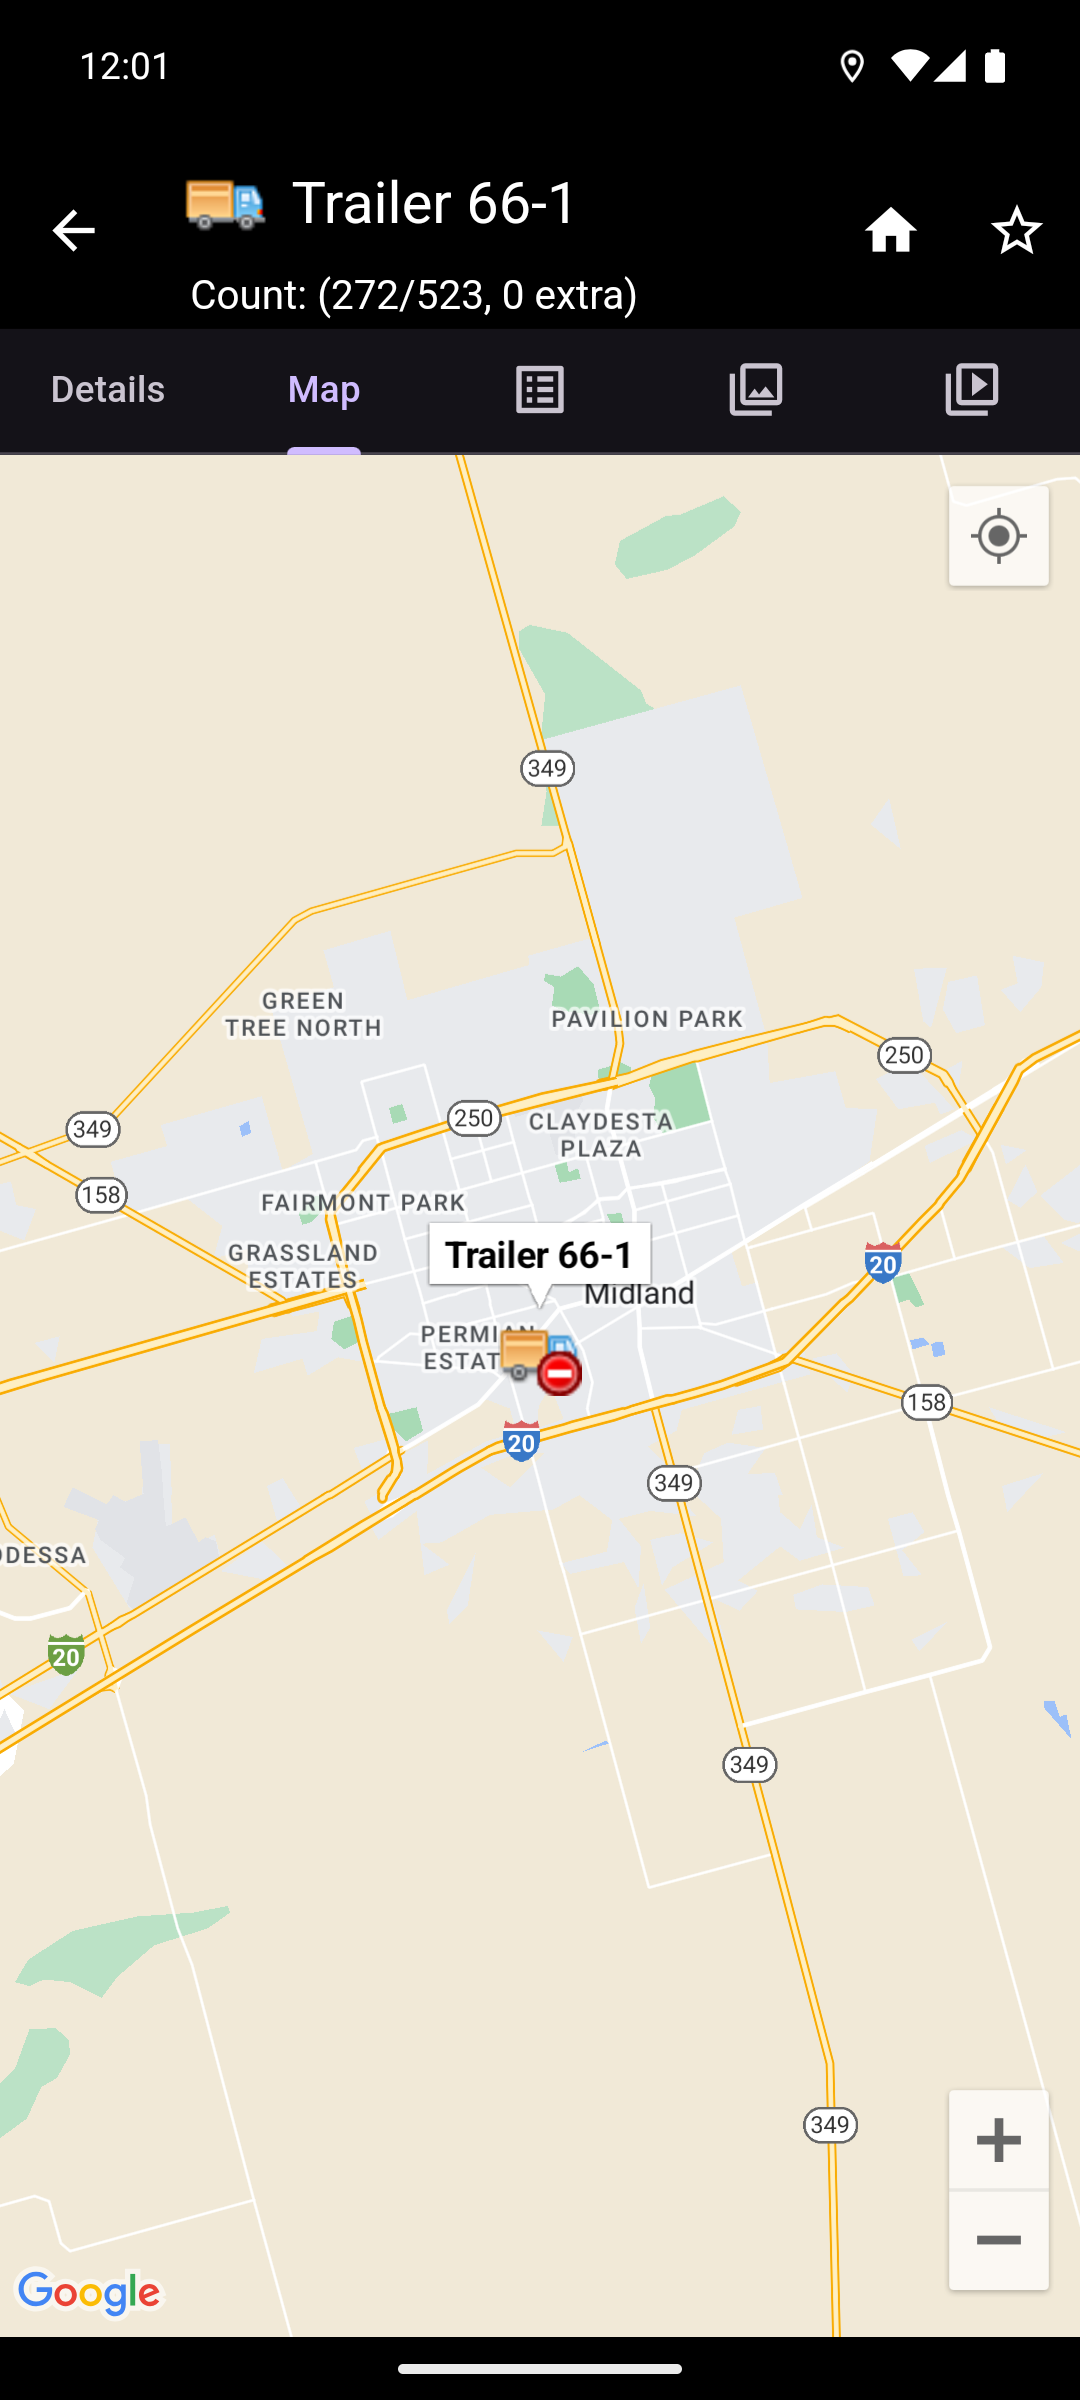
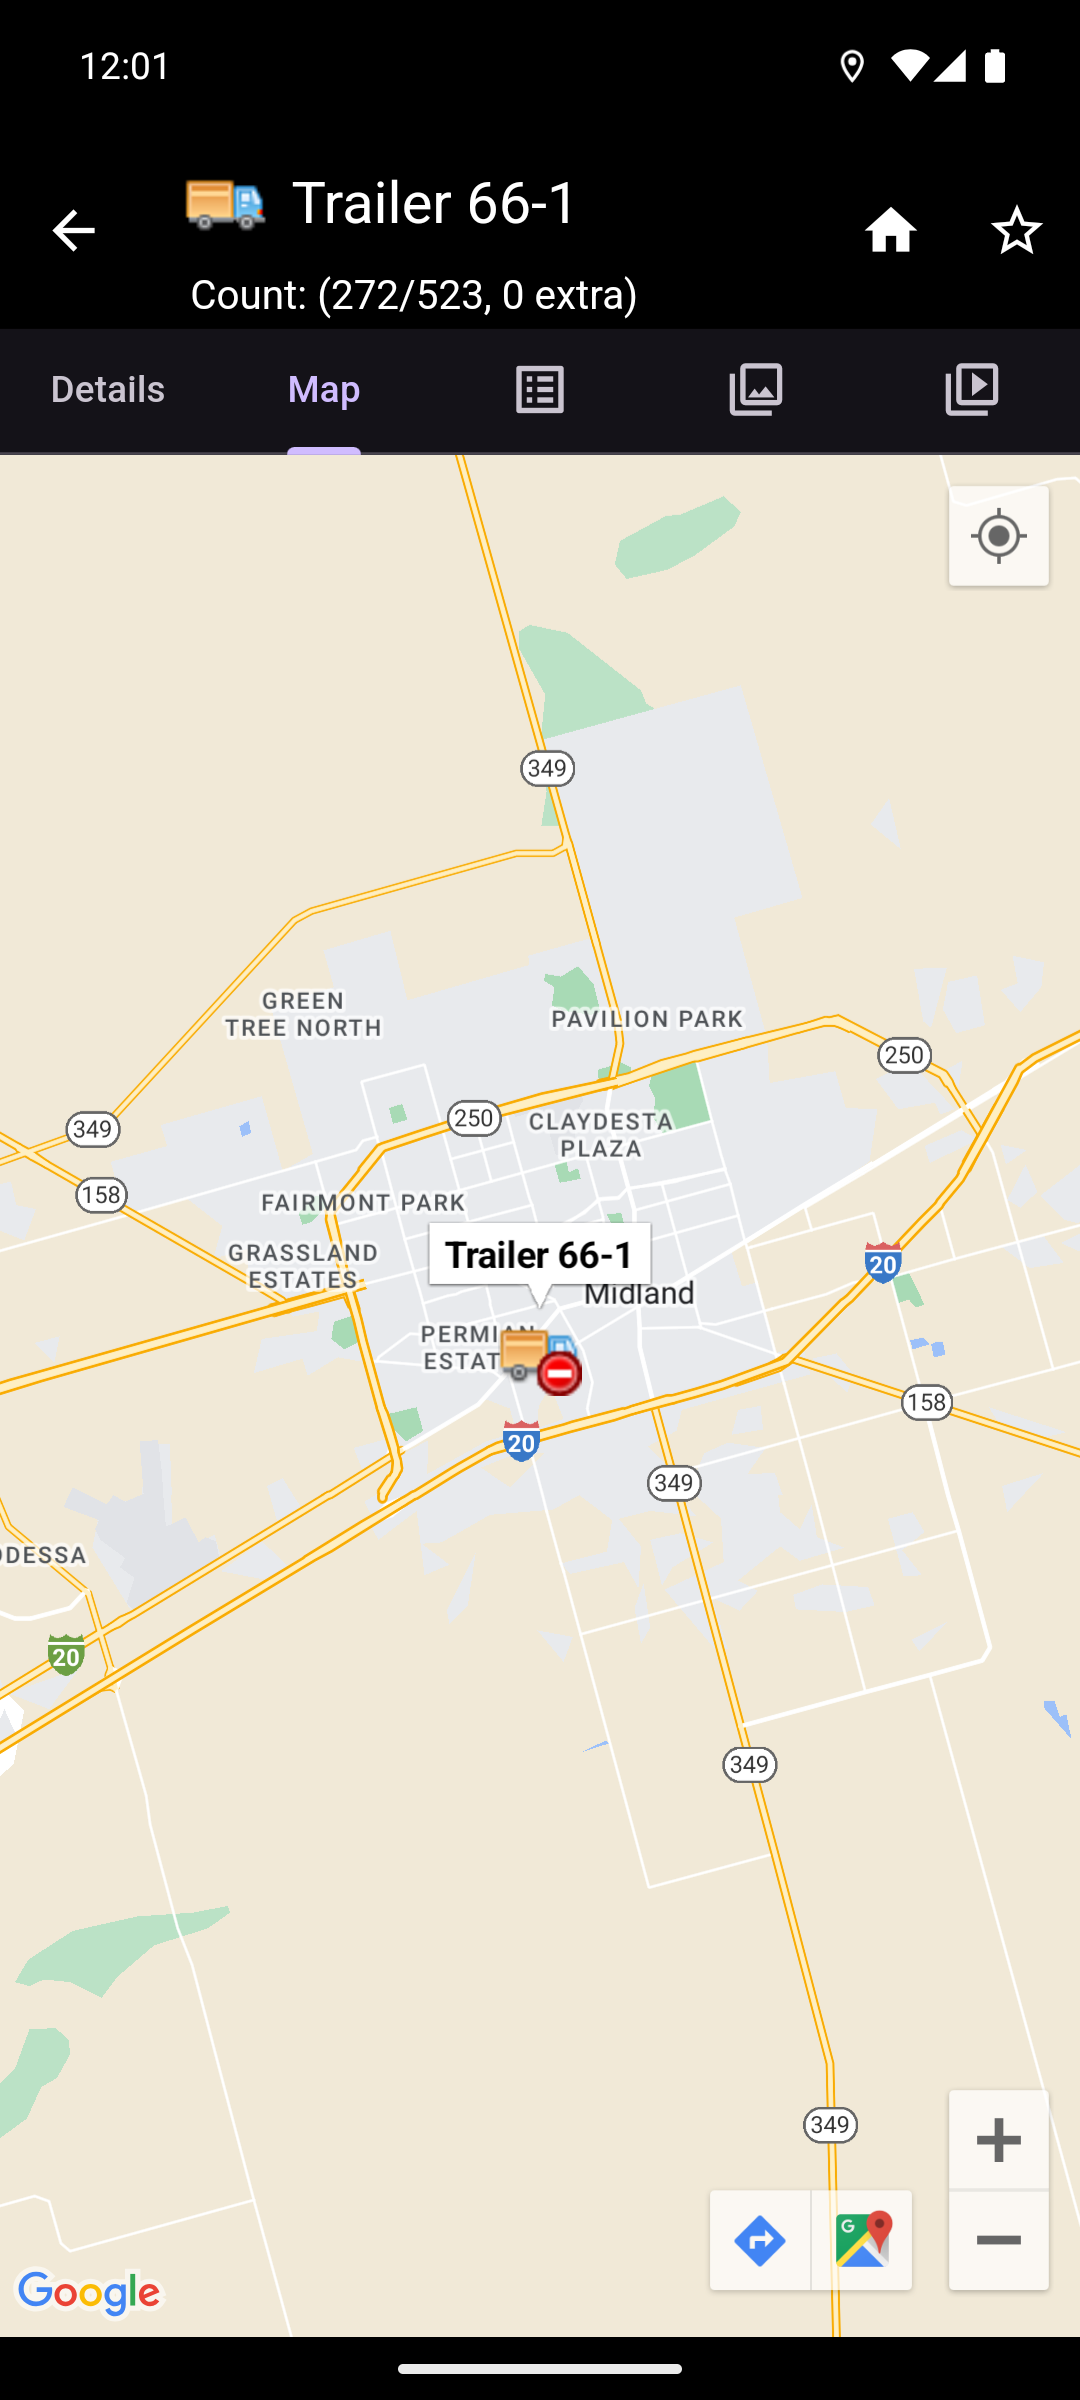
The Asset Map tab displays a map with a marker at the asset's last reported location. Tapping on the marker will give options to view the location in the google maps app, or to get directions to the location in the google maps app.
The Asset Notes tab displays a collection of notes that have been written about the asset. The notes can contain any relevant information. A user with the appropriate permissions can add, edit, and delete notes.
The Asset Images tab displays a collection of images that have been taken of the asset. A user with the appropriate permissions can add new images, delete old images, and rename existing images. Long pressing on an image will display the image's name with options to rename it and delete it. Tapping on the image will open the Image Viewer.
- The Image Viewer displays an image and allows for zooming and panning to view greater detail. An image can also be renamed or deleted from this page by using the overflow menu in the upper right.
NOTE: There is a maximum of five images that can be saved per asset.
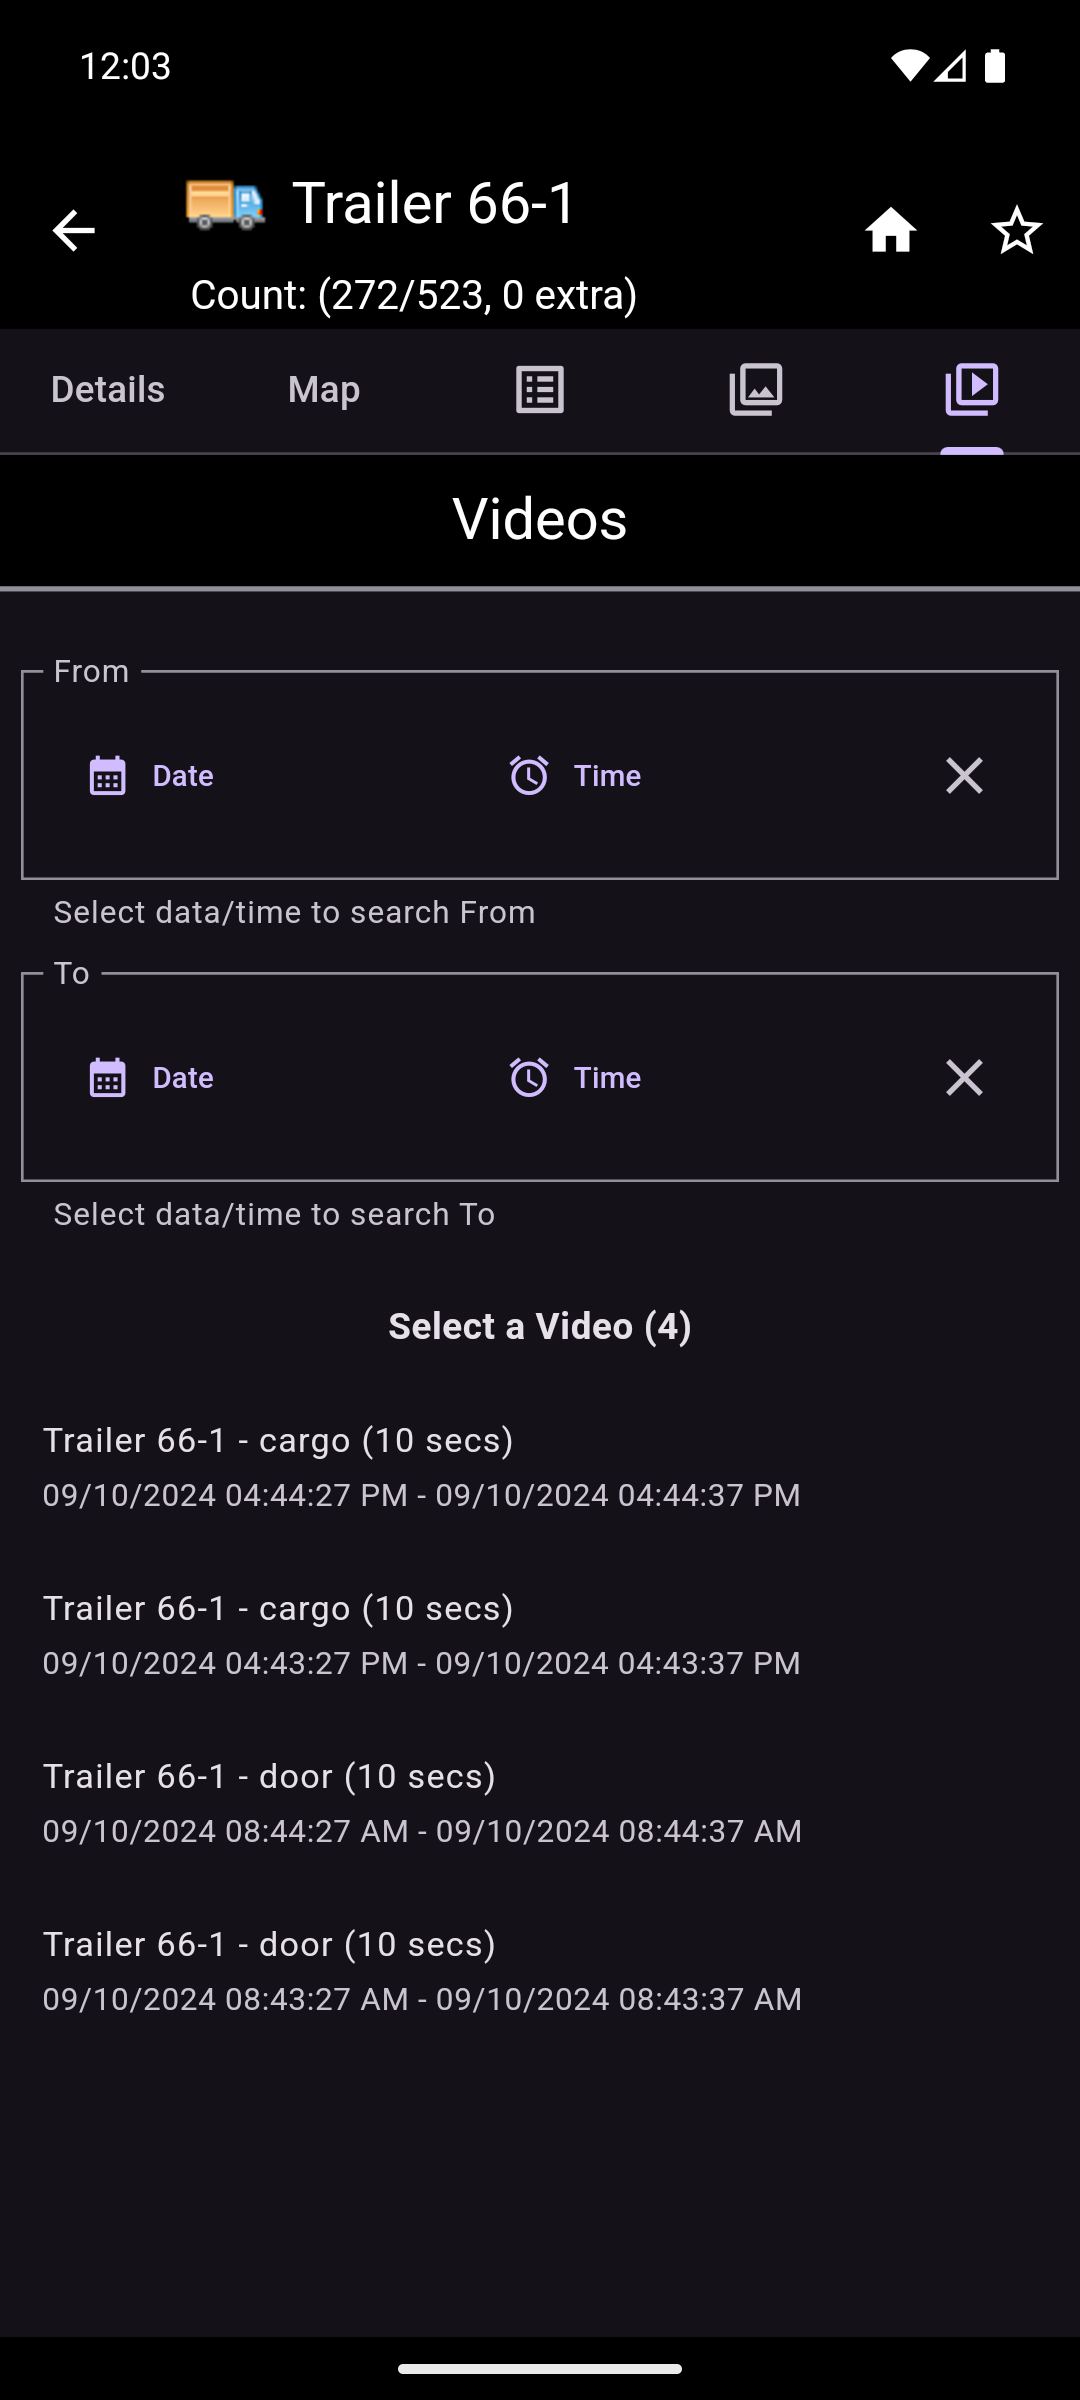
The Asset Videos tab displays a list of videos associated with the asset. This tab is only displayed if the current asset has videos associated with it. It allows filtering the videos by selecting a date and time range. The From selection will filter out all videos older than the chosen date and time. The To selection will filter out all videos newer than the chosen date and time. Below the filter options, the number of videos in the date time range can be seen, as well as a list of videos that can be viewed. The videos are sorted from the most recent to the oldest. The list displays each video's camera name/location on the container asset, duration, and date and time it was taken. The videos can be viewed by tapping on the video. This will bring up the video playback screen.
If there are more than 50 videos in the list, page controls will appear on the bottom of the screen. There are a maximum of 50 videos on each page. The forward, back, first page, and last page buttons navigate between the pages. To go to a specific page, tap on the page number and enter the desired page number in the field.
The following actions are available if the user has the appropriate permissions. The Child Counts is available to all users.
- Home: The home icon button on the right of the header is for returning to the main menu.
- Favorite: The star icon button on the right of the header is for marking the asset as a favorite.
- Edit: The pencil icon button on the left of the footer is for editing the asset's information.
- Change Container: The reorder icon button on the left center of the footer is for changing the child assets' container.
- Delete: The trash icon button on the right center of the footer is for deleting the container asset. This action is disabled if the container asset contains any child assets.
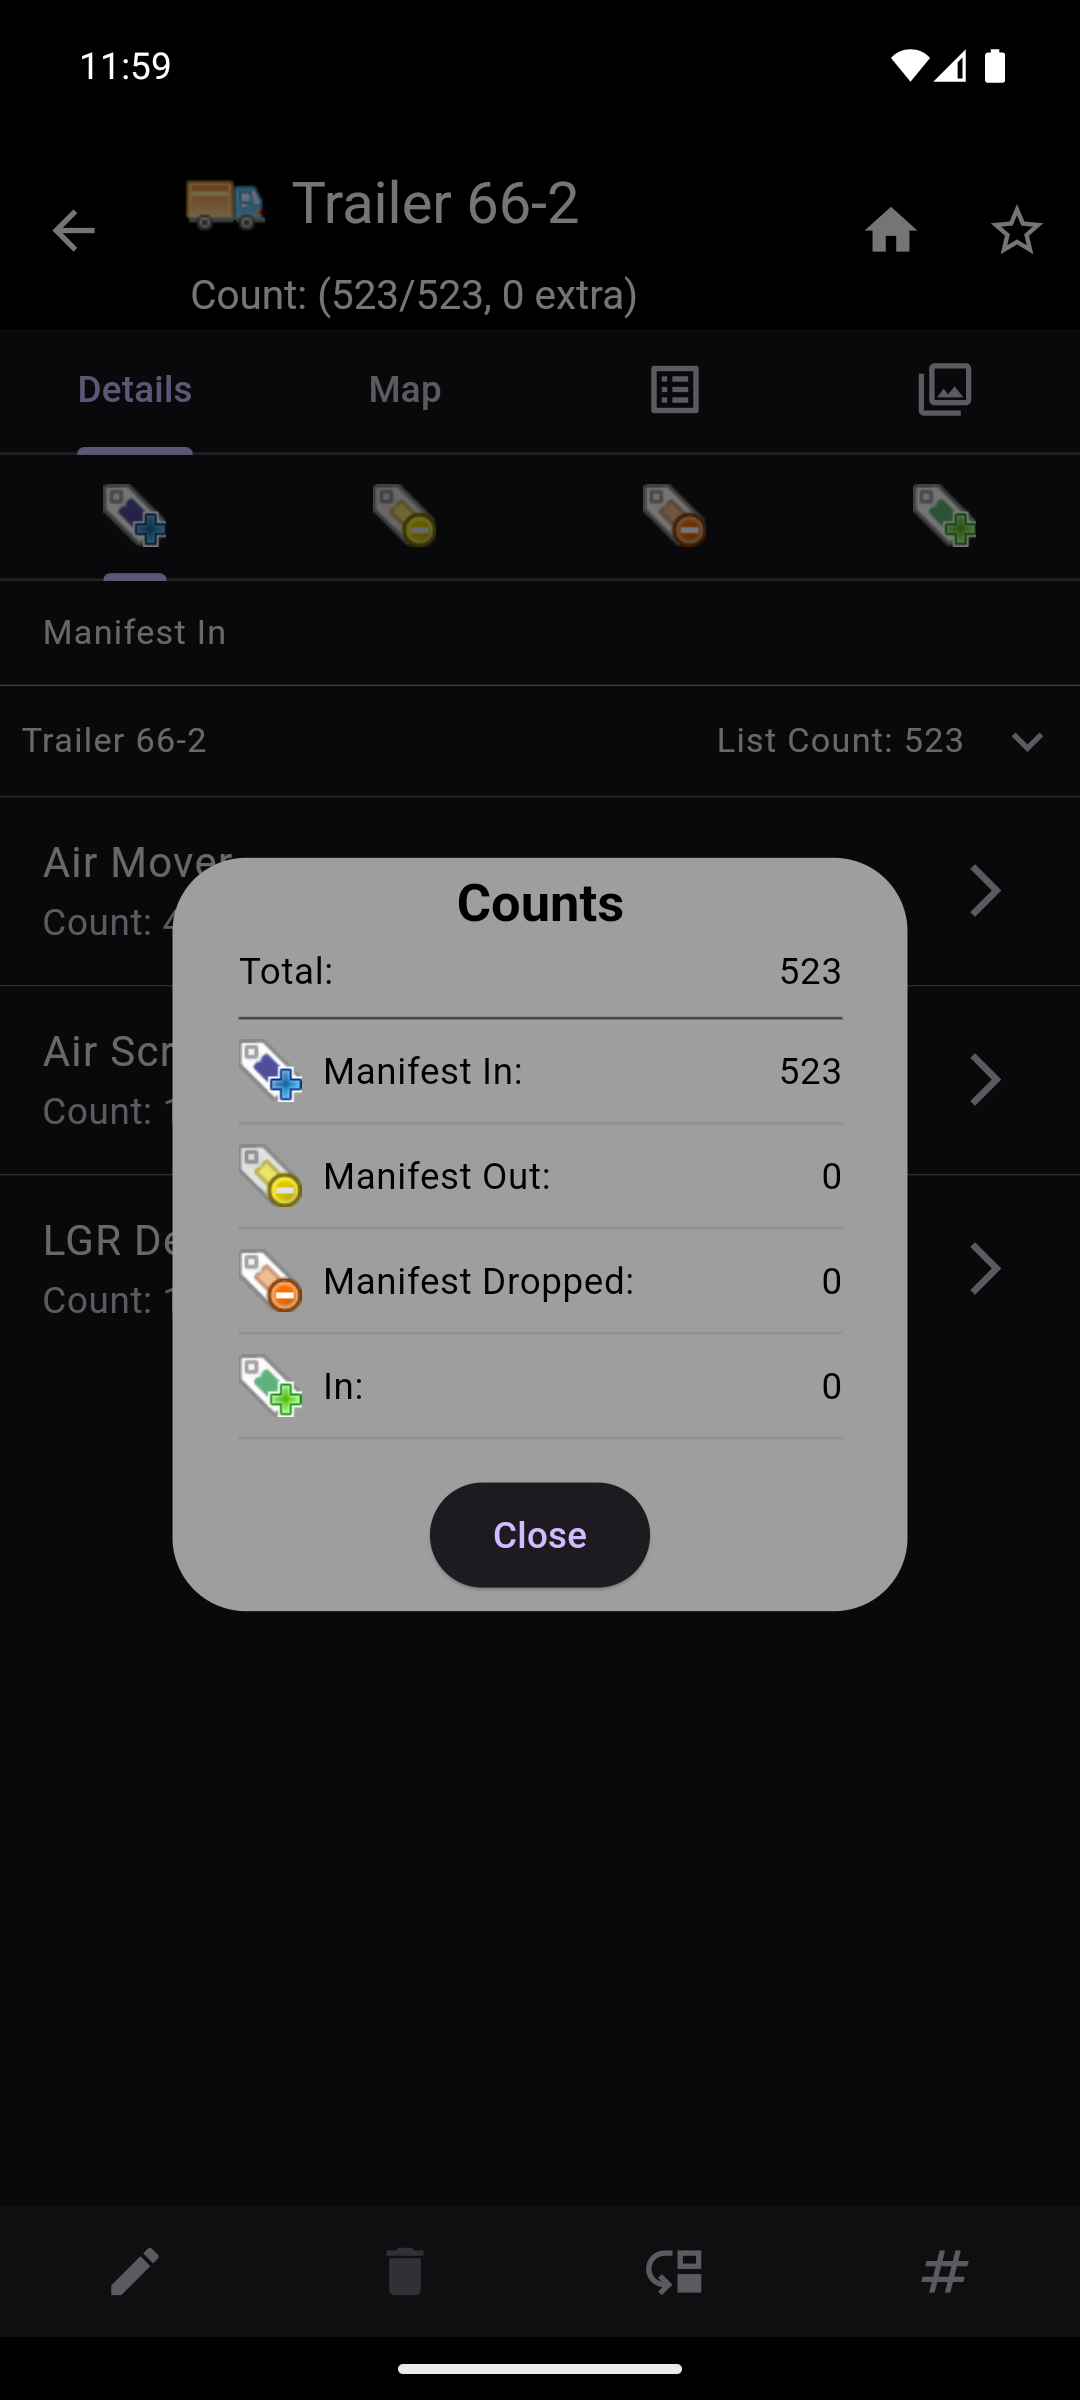
- Child Counts: The pound icon button on the right of the footer displays a dialog with the child asset counts broken down by the asset's state:
- Manifest In (if applicable)
- Manifest Out (if applicable)
- Manifest Dropped (if applicable)
- In
- Out
NOTE: Deleting assets is a destructive process. All historic and current information for the selected asset will be deleted. To help prevent accidental deletion, the user will be prompted to confirm the deletion.
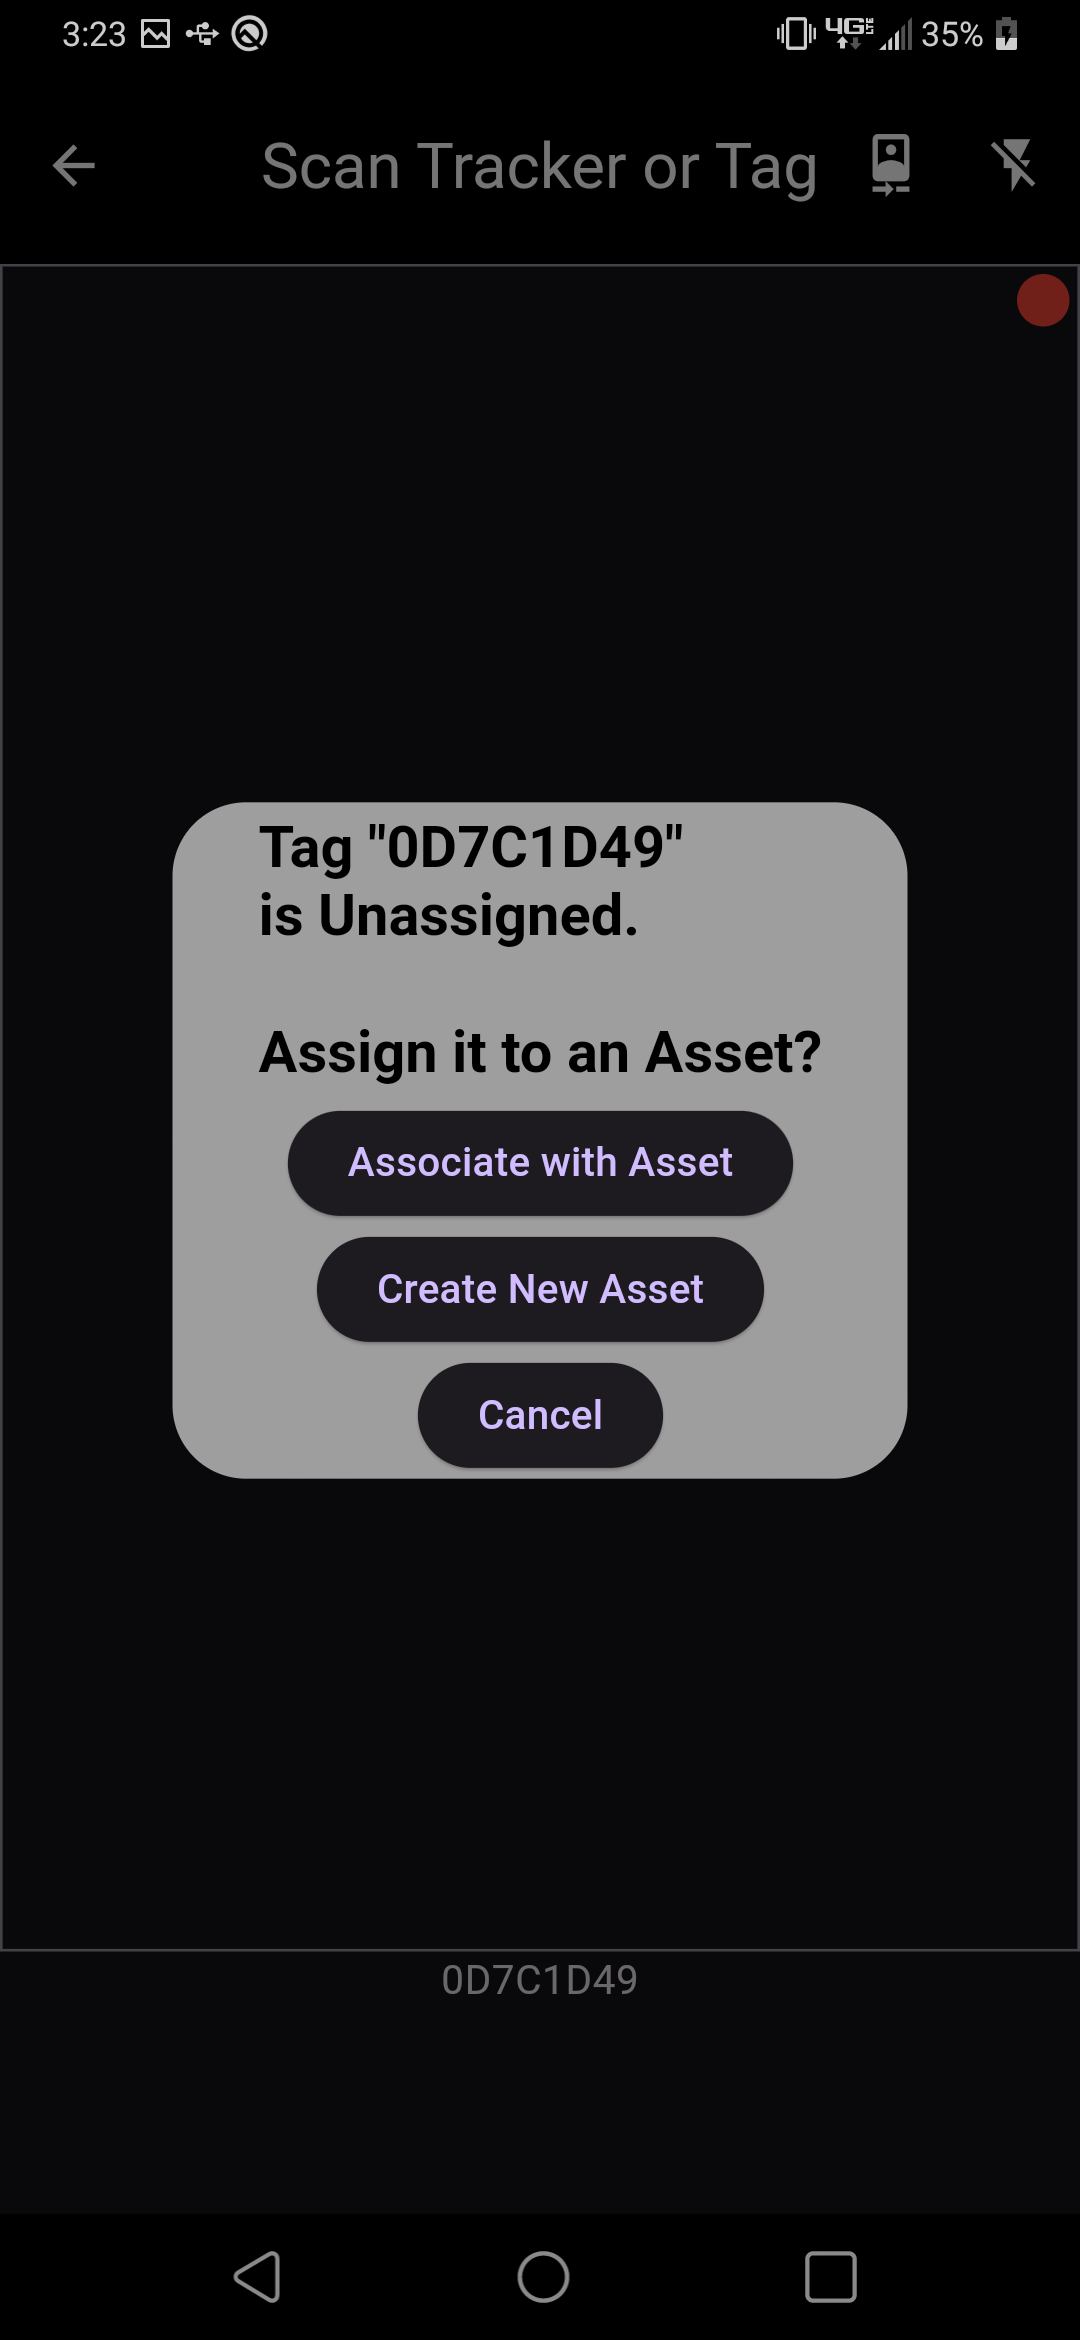
Unassigned Tracker/Tag
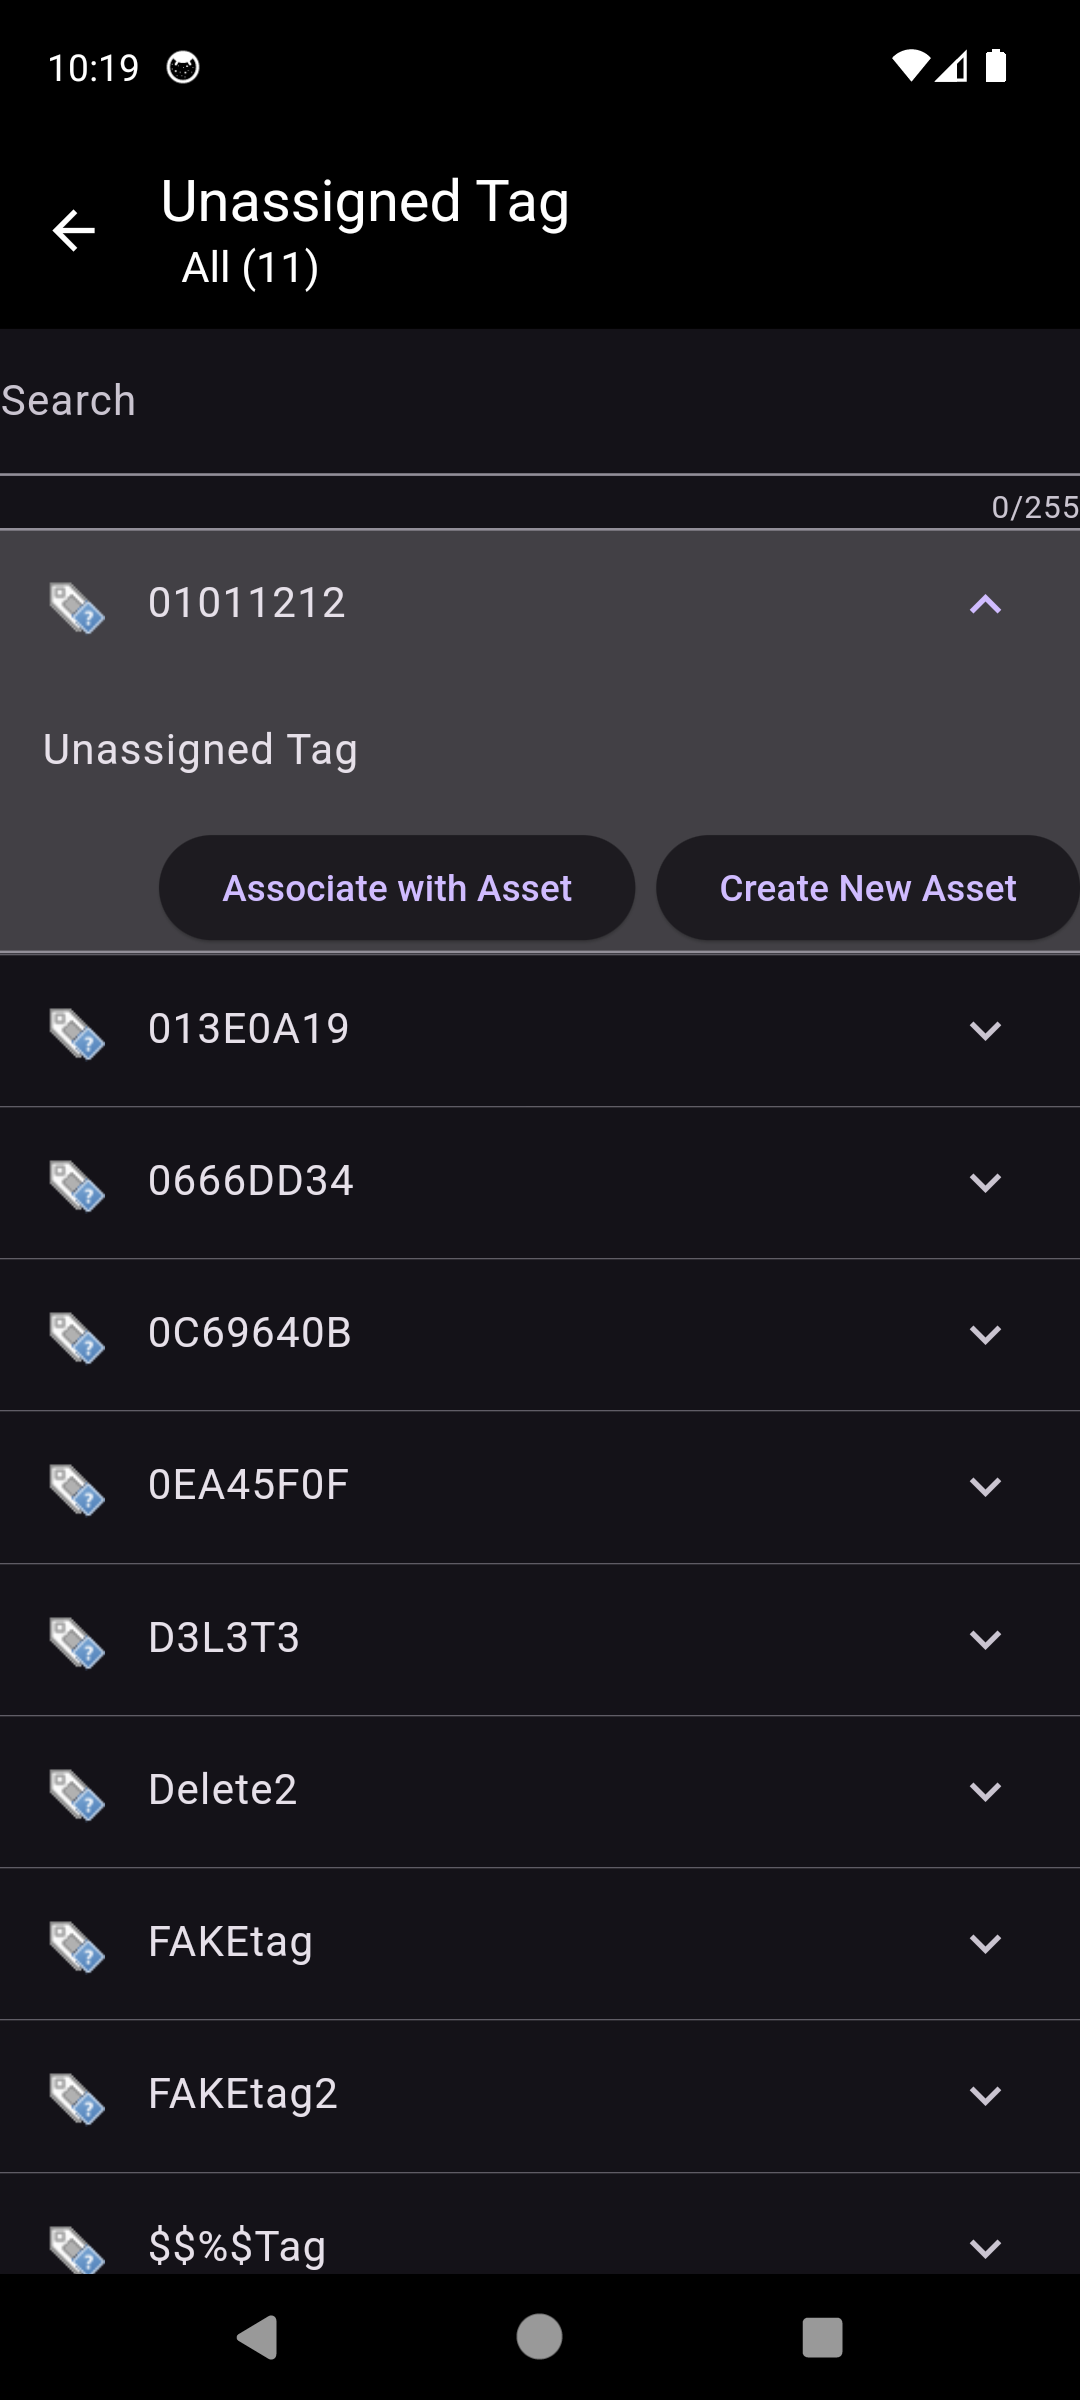
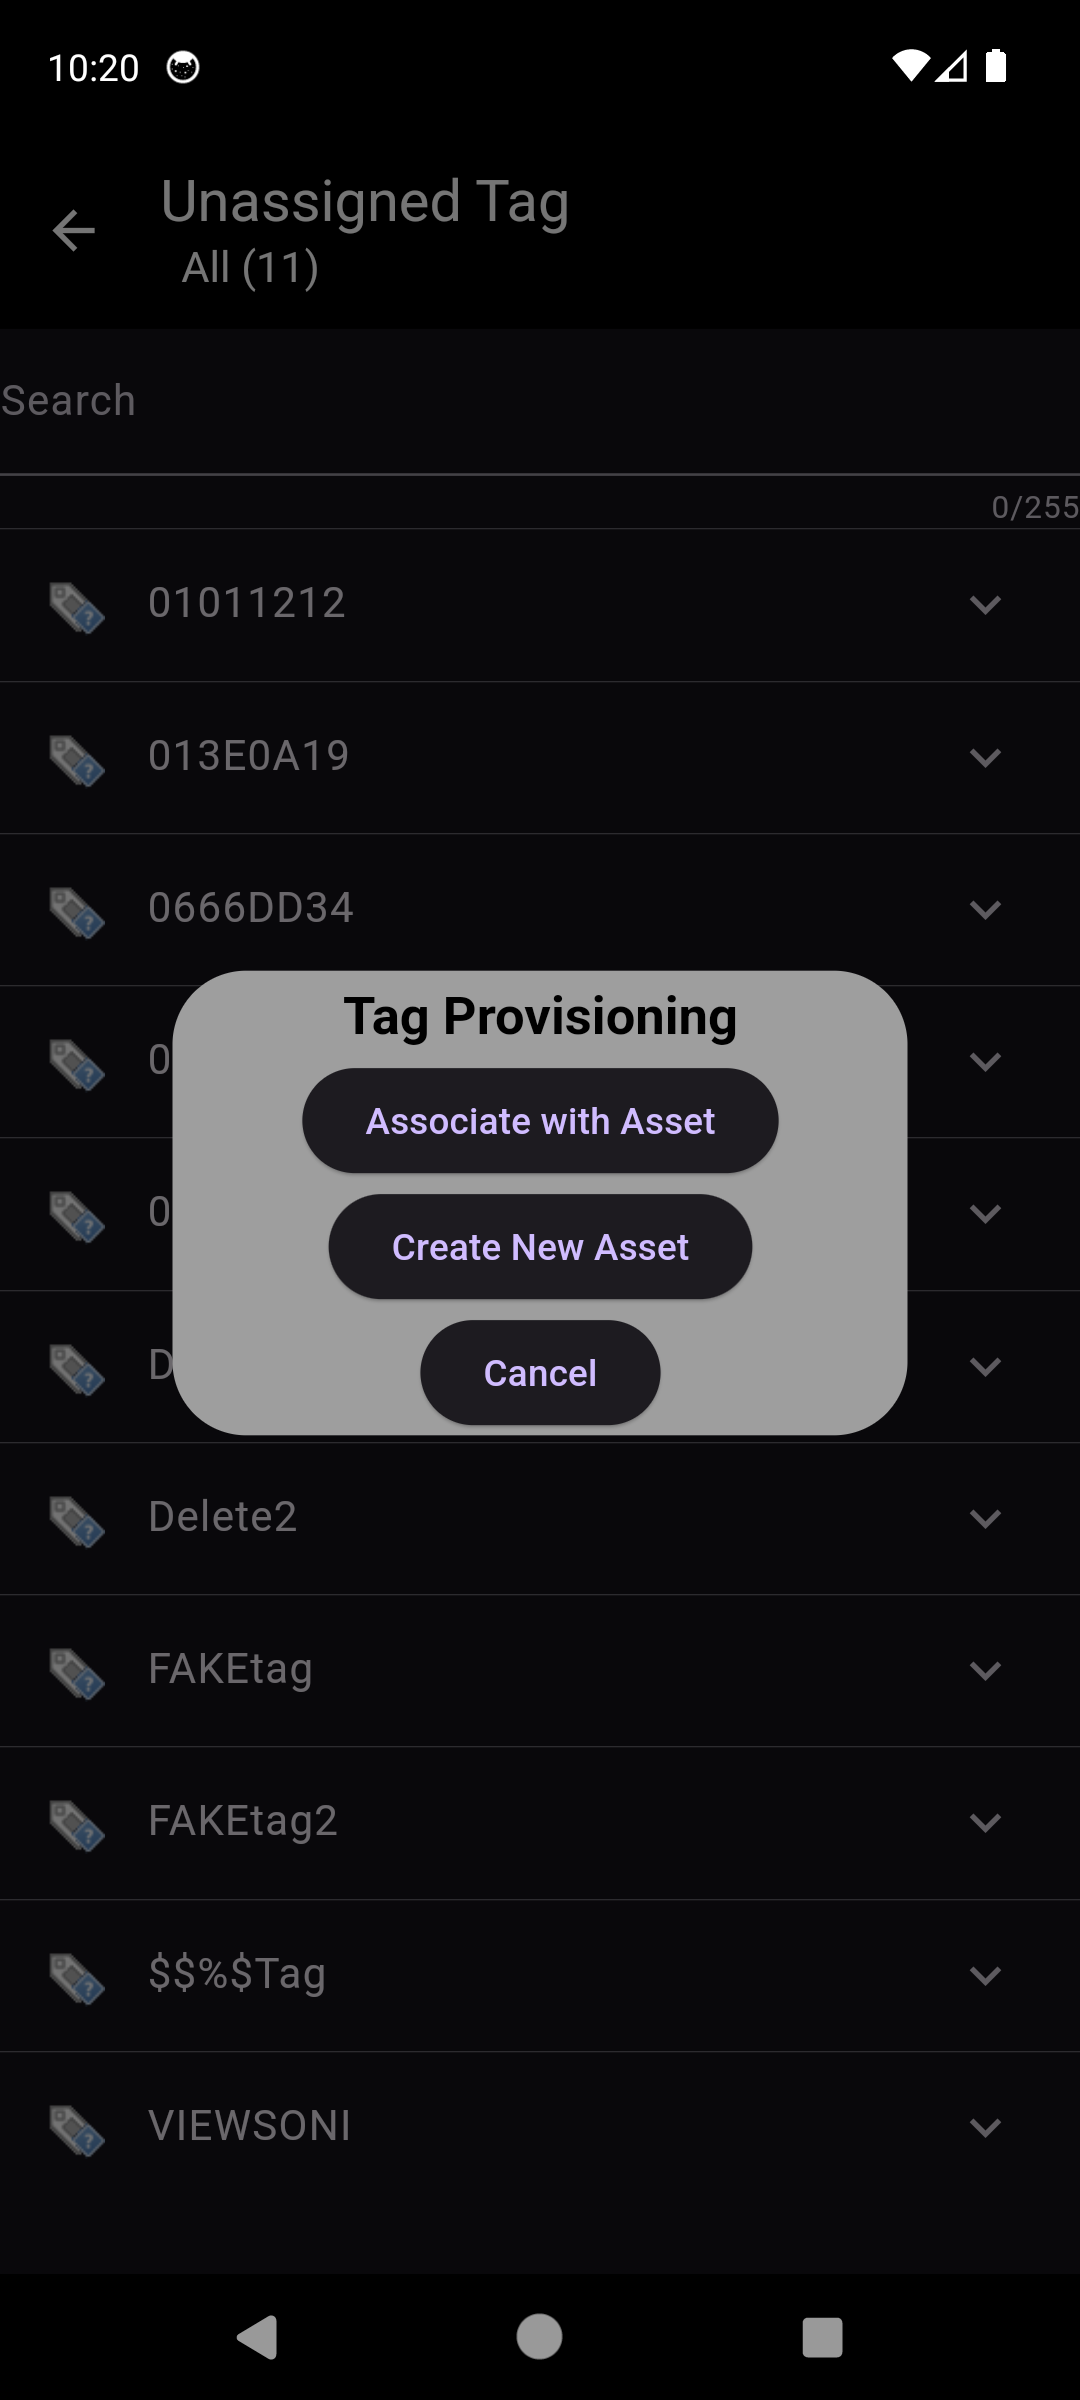
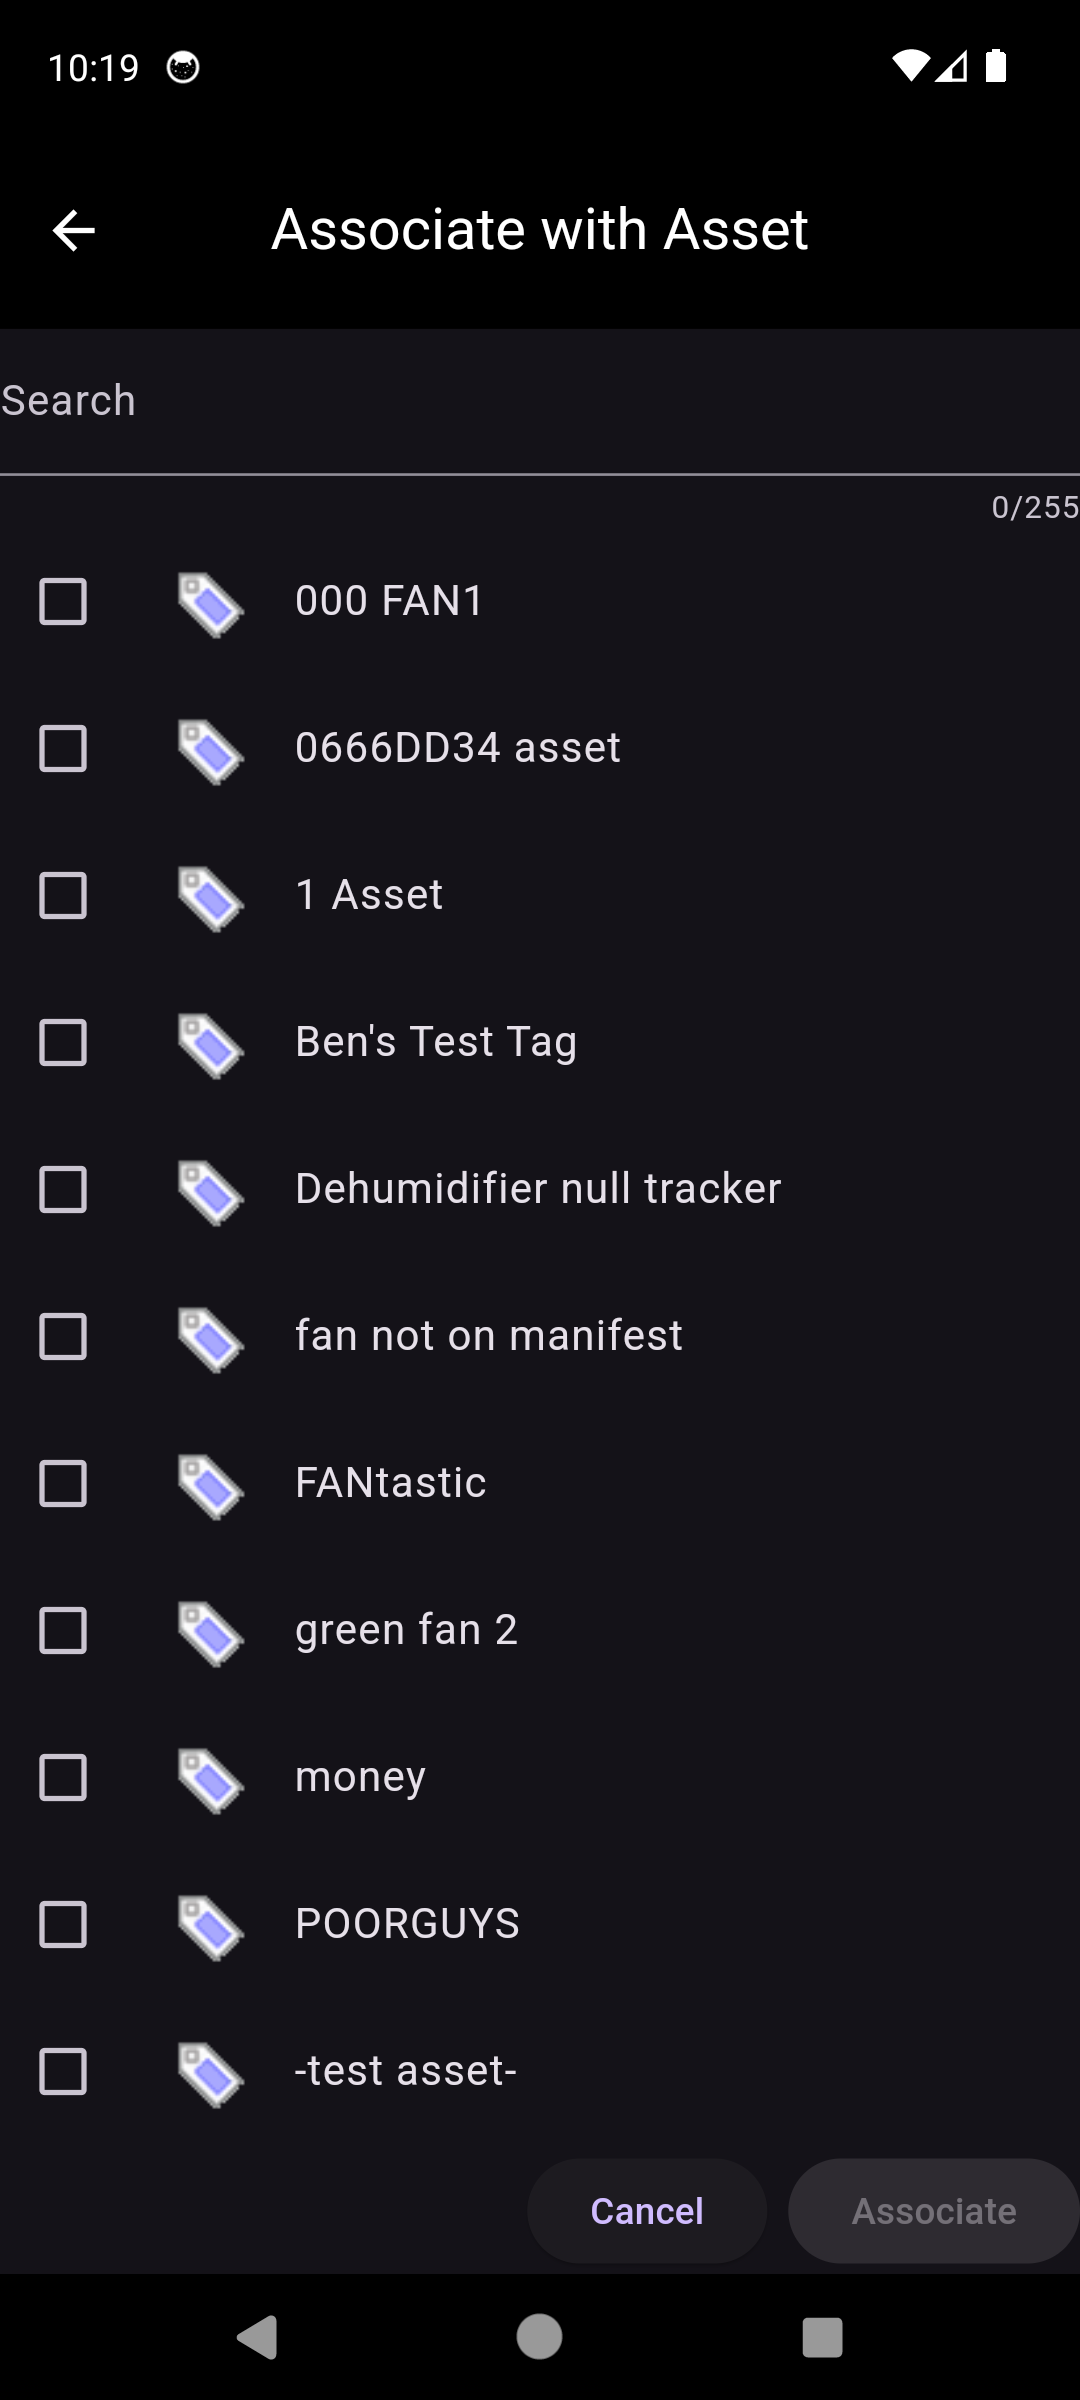
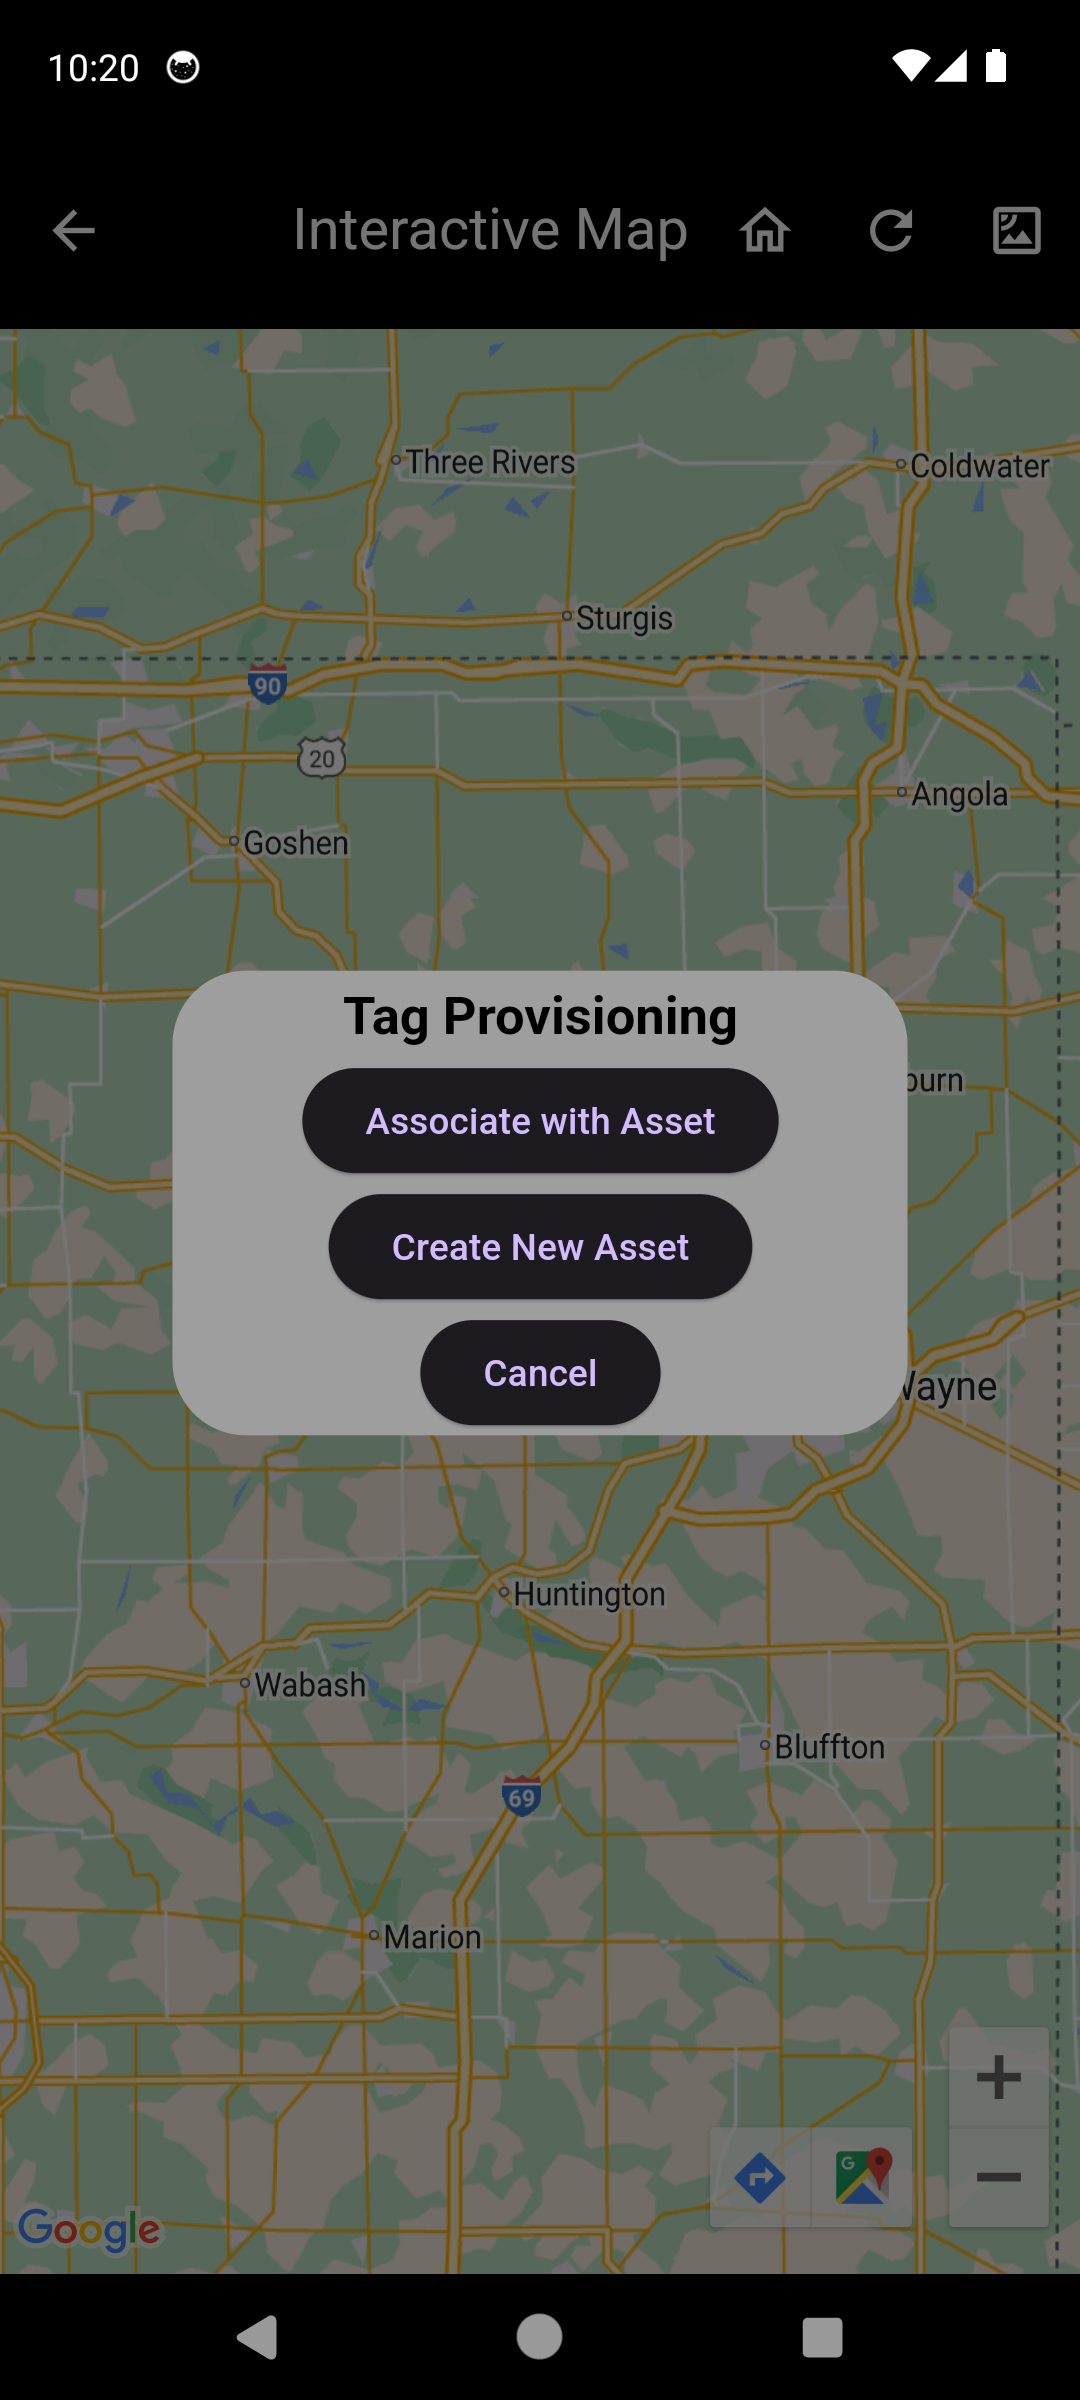
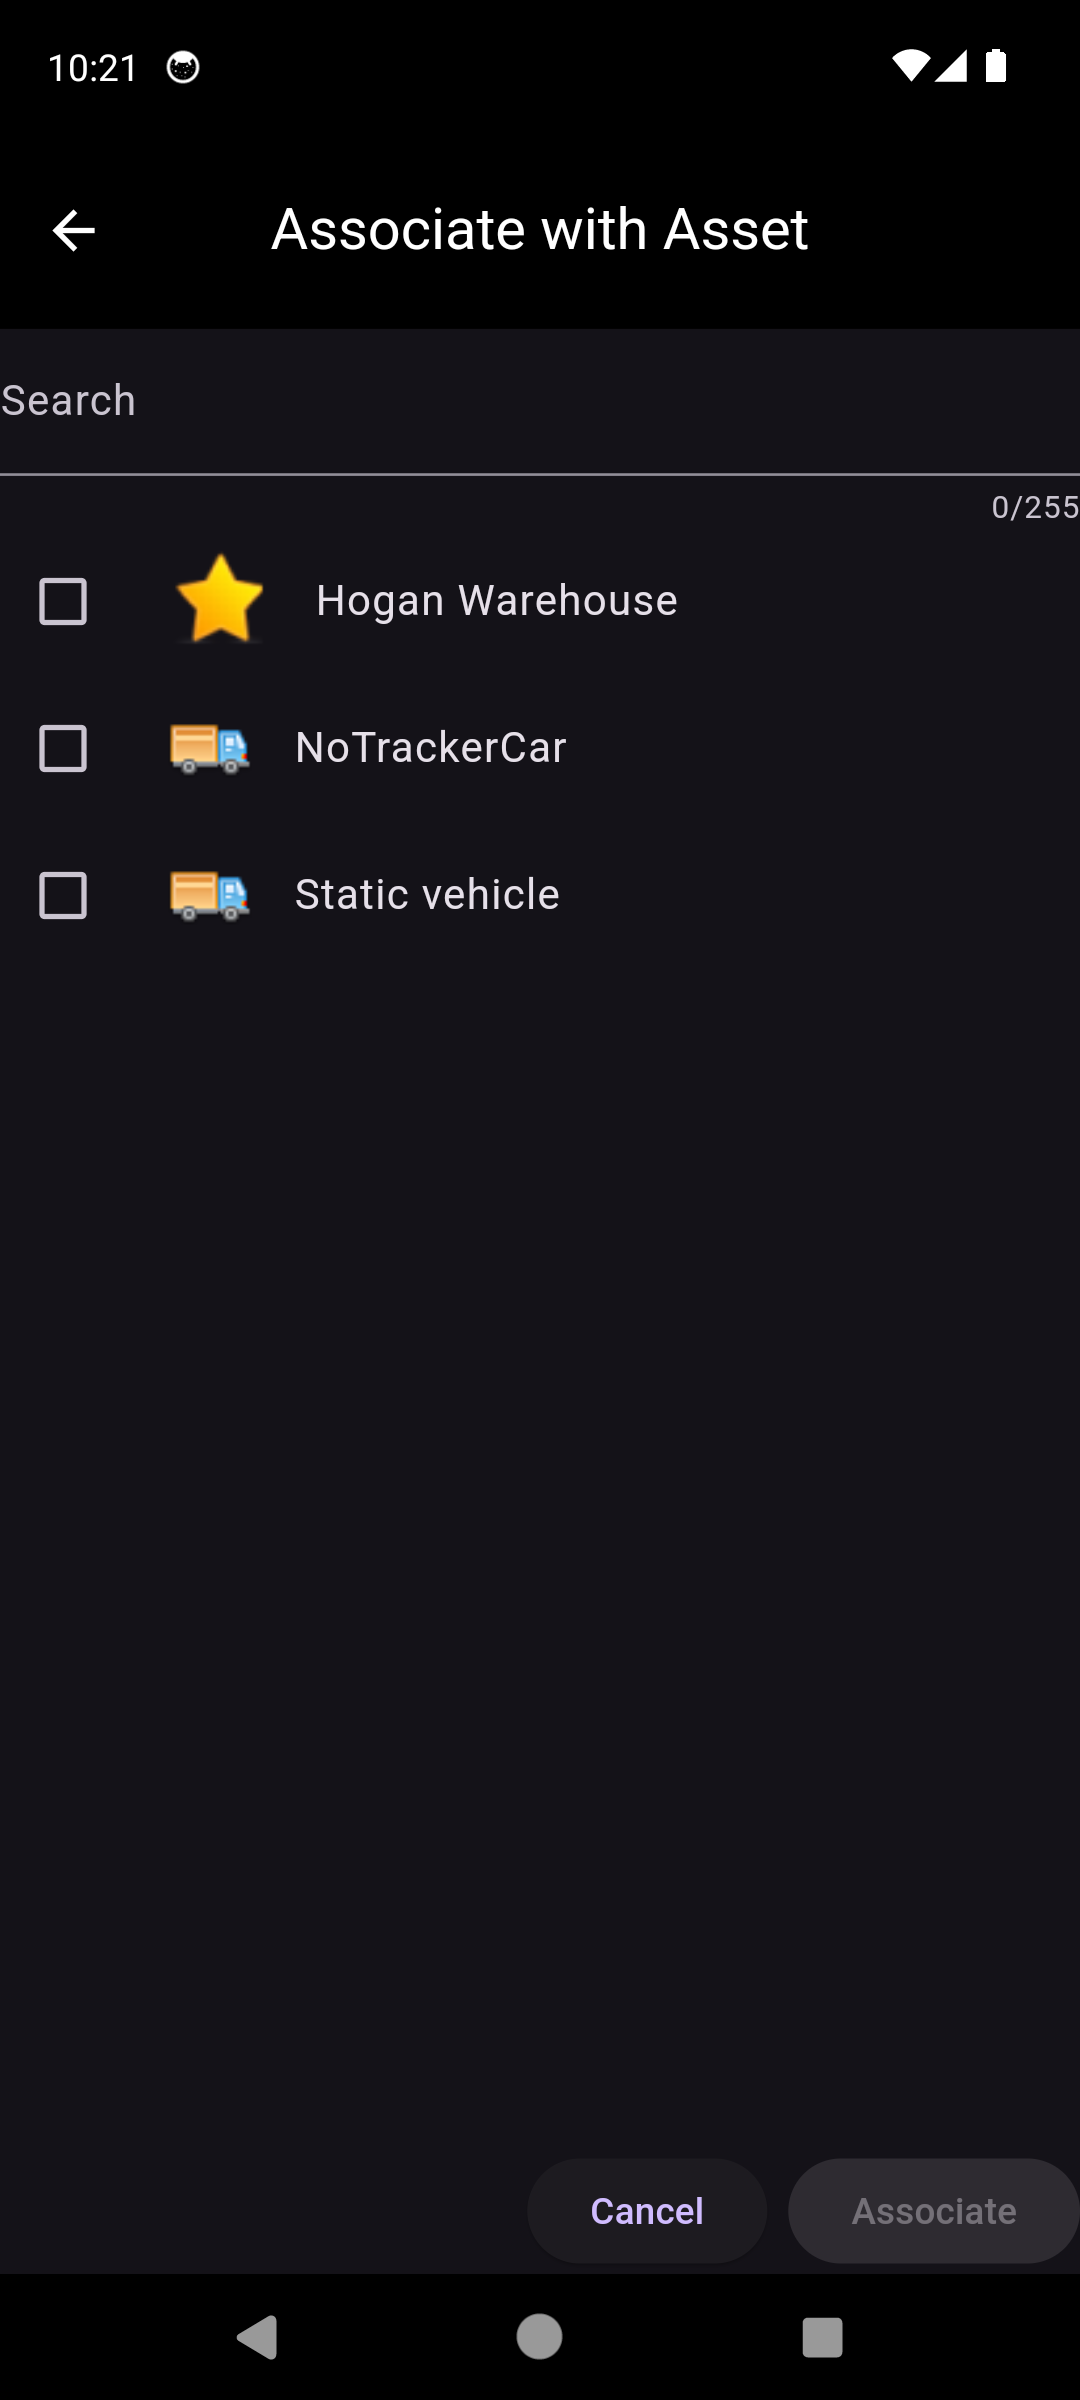
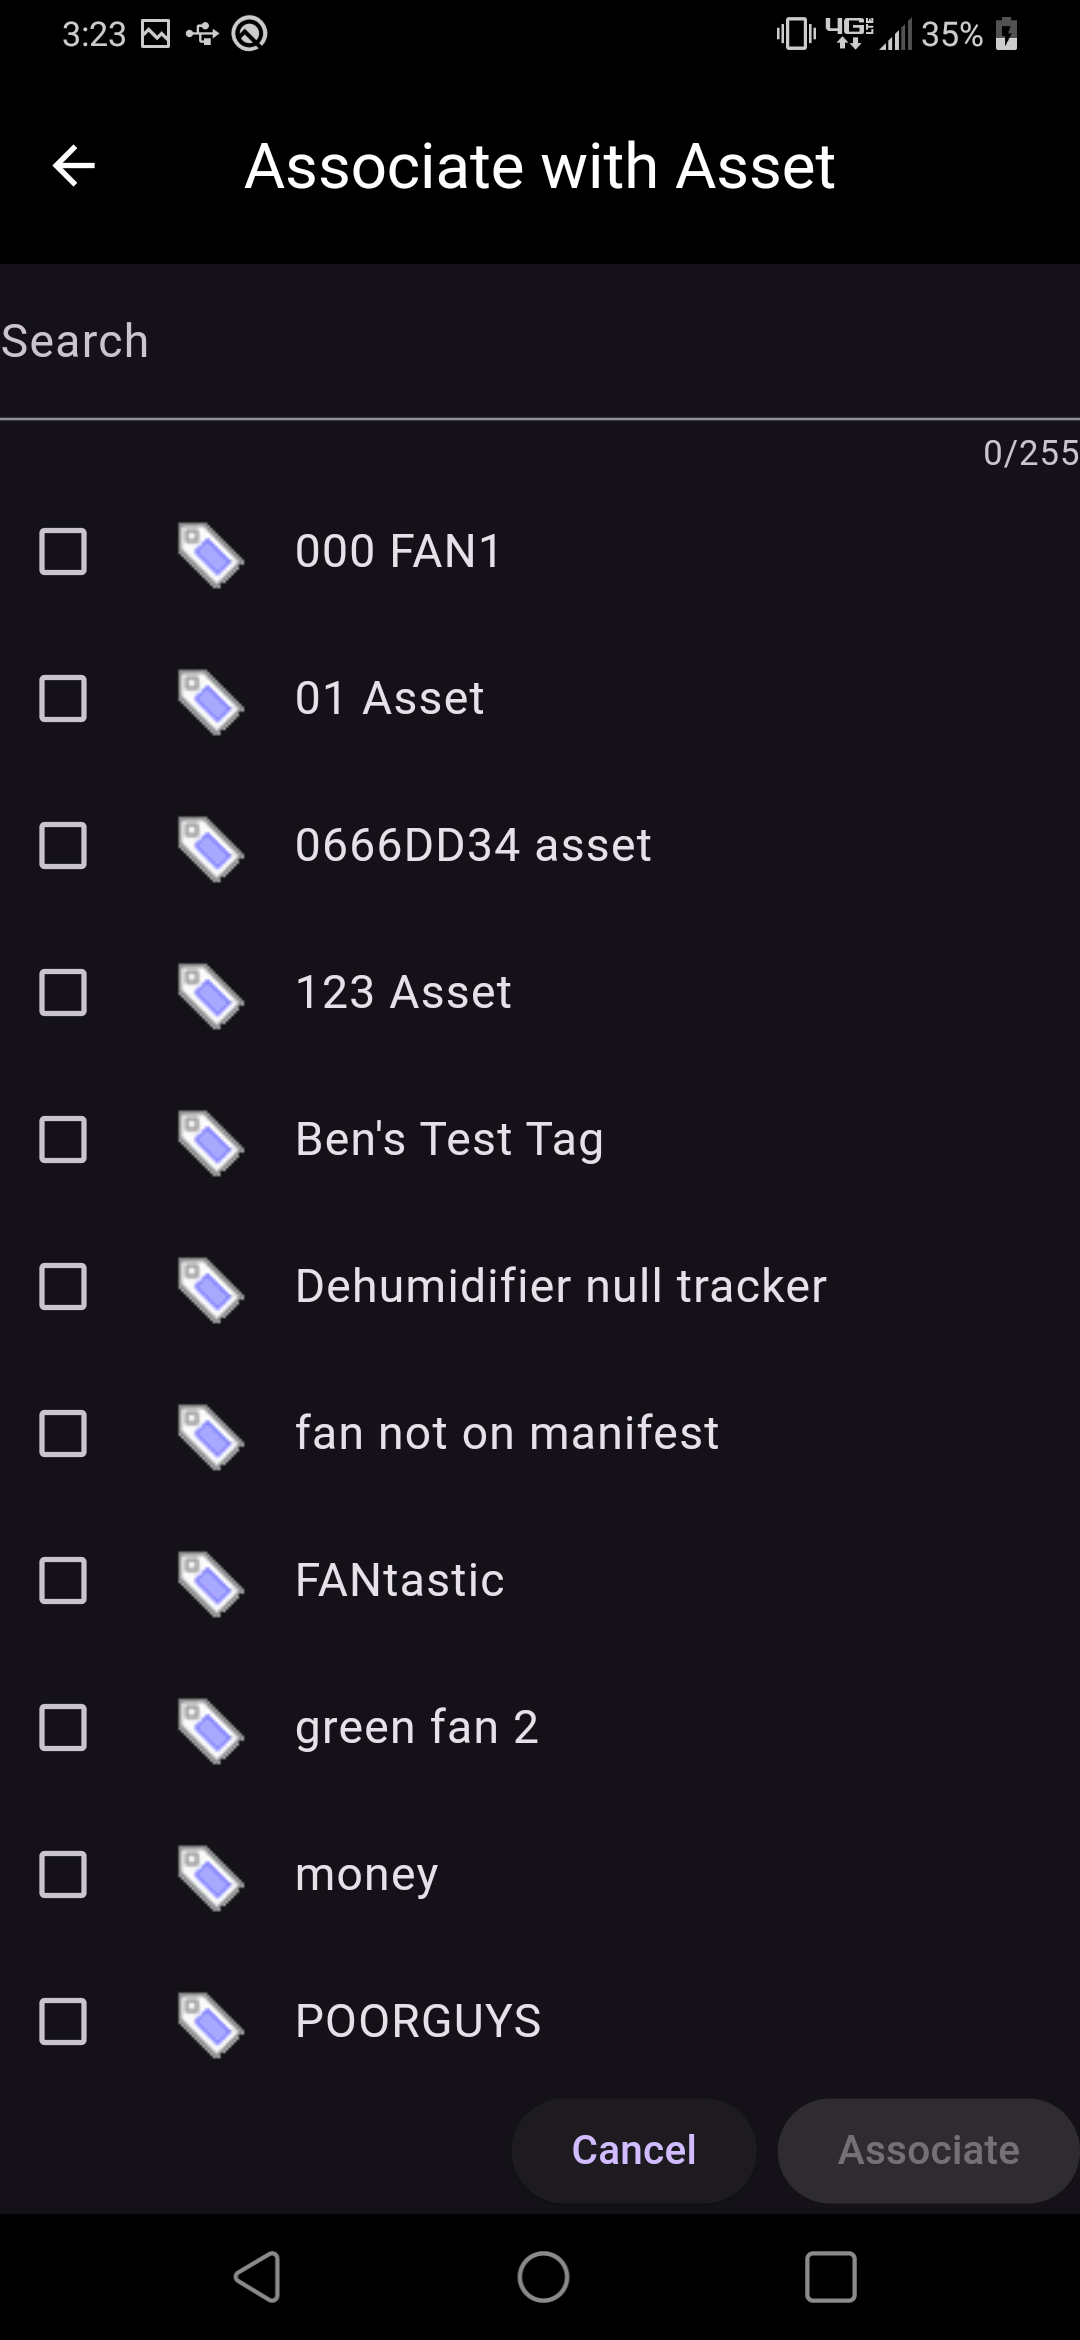
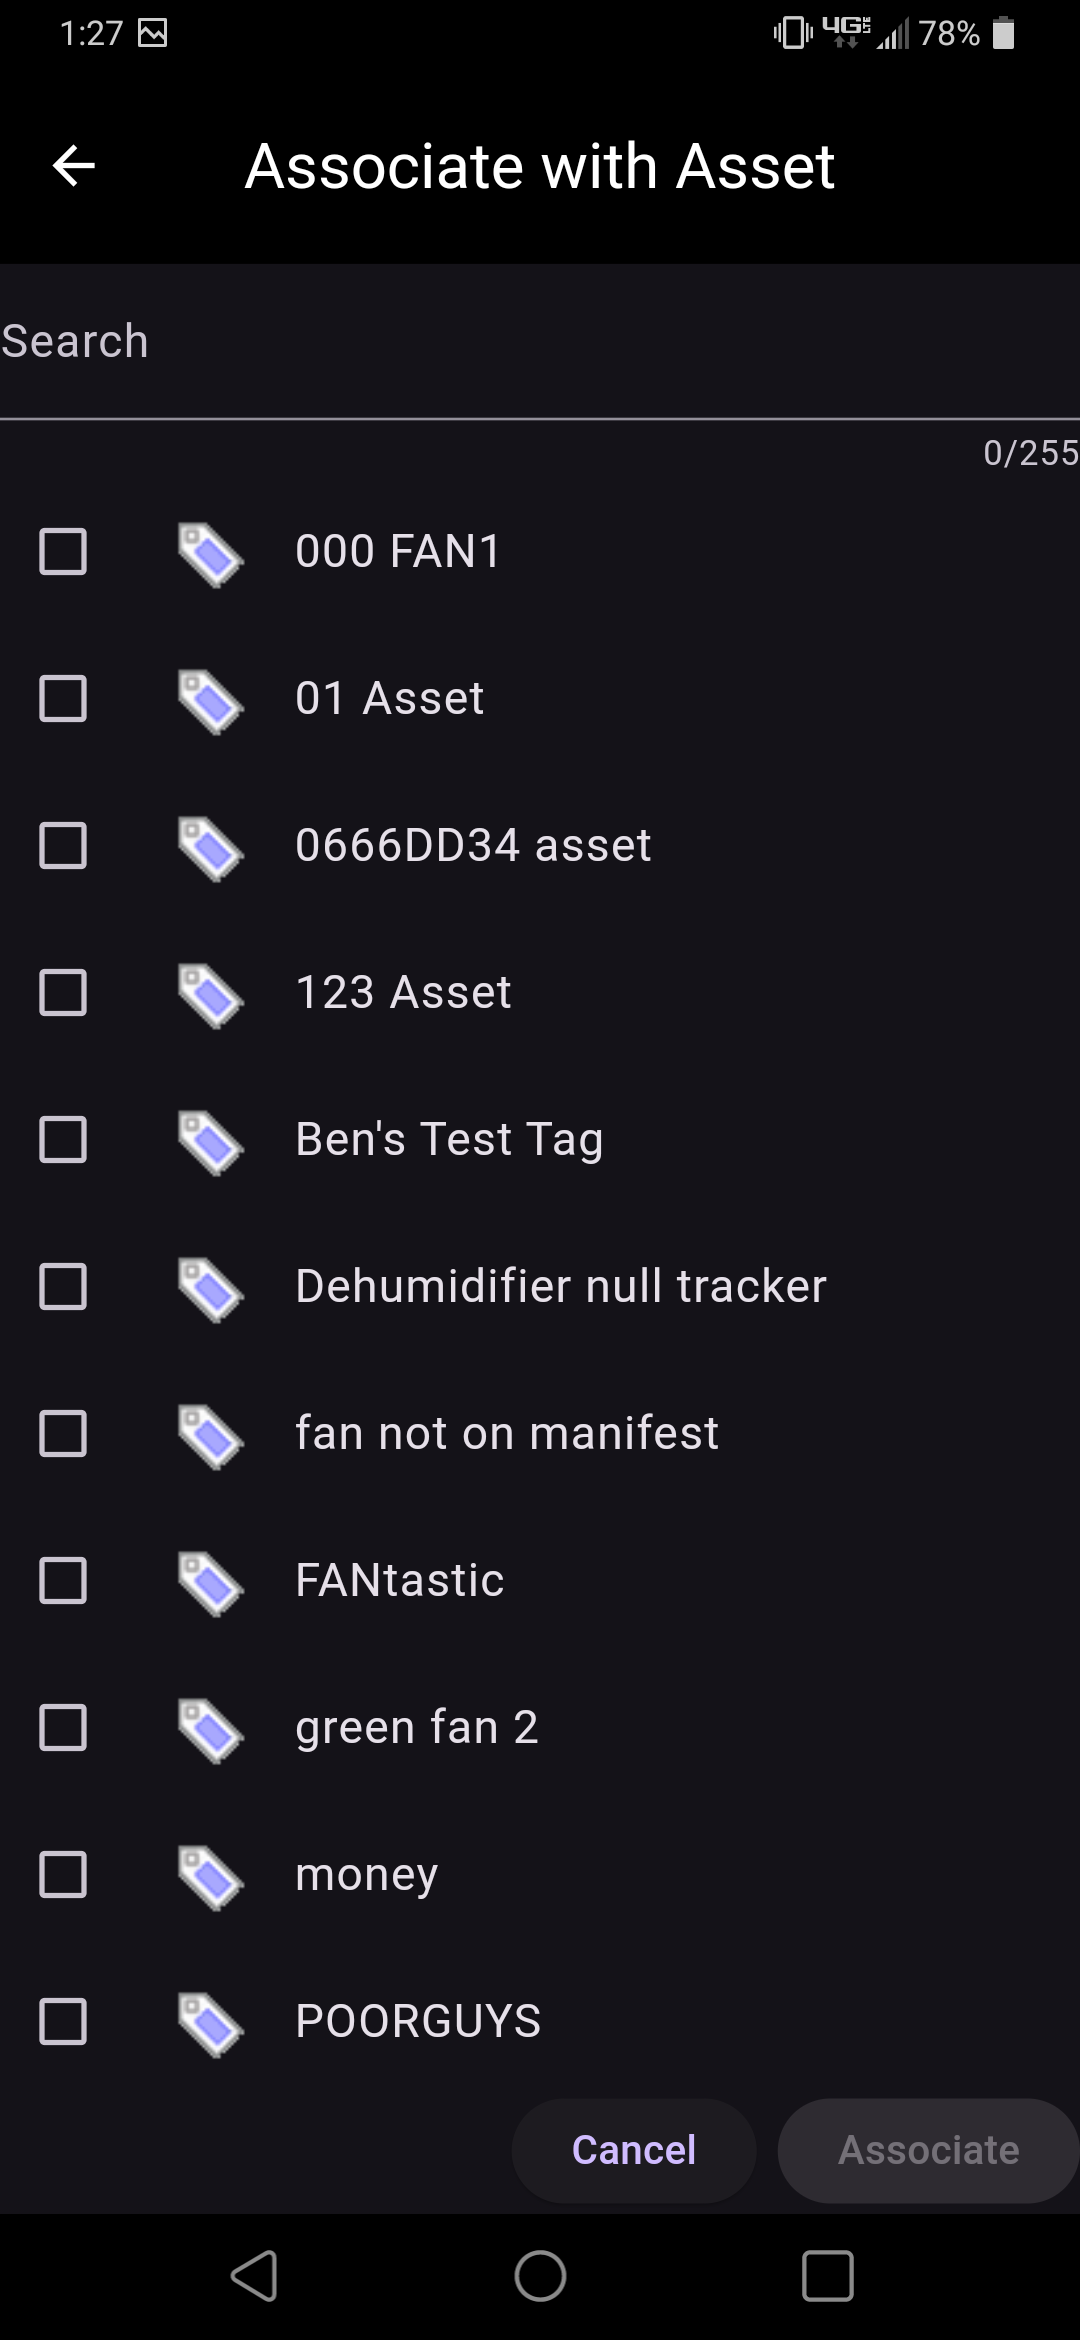
When searching in Find there are occasions where a tracker or tag is found that is not associated with an asset. These are known as Unassigned Trackers and Unassigned Tags, and they have no inherent information other than the tag ID and a potential location. When selecting an unassigned tracker or tag, the user will be prompted to select an asset to associate with the tracker or tag, or to create a new asset to associate with the tracker or tag.
Trackers are associated with container assets, while tags are associated with non-container assets. Only assets that do not already have a tracker or tag associated with them will be available for selection.
Interactive Map
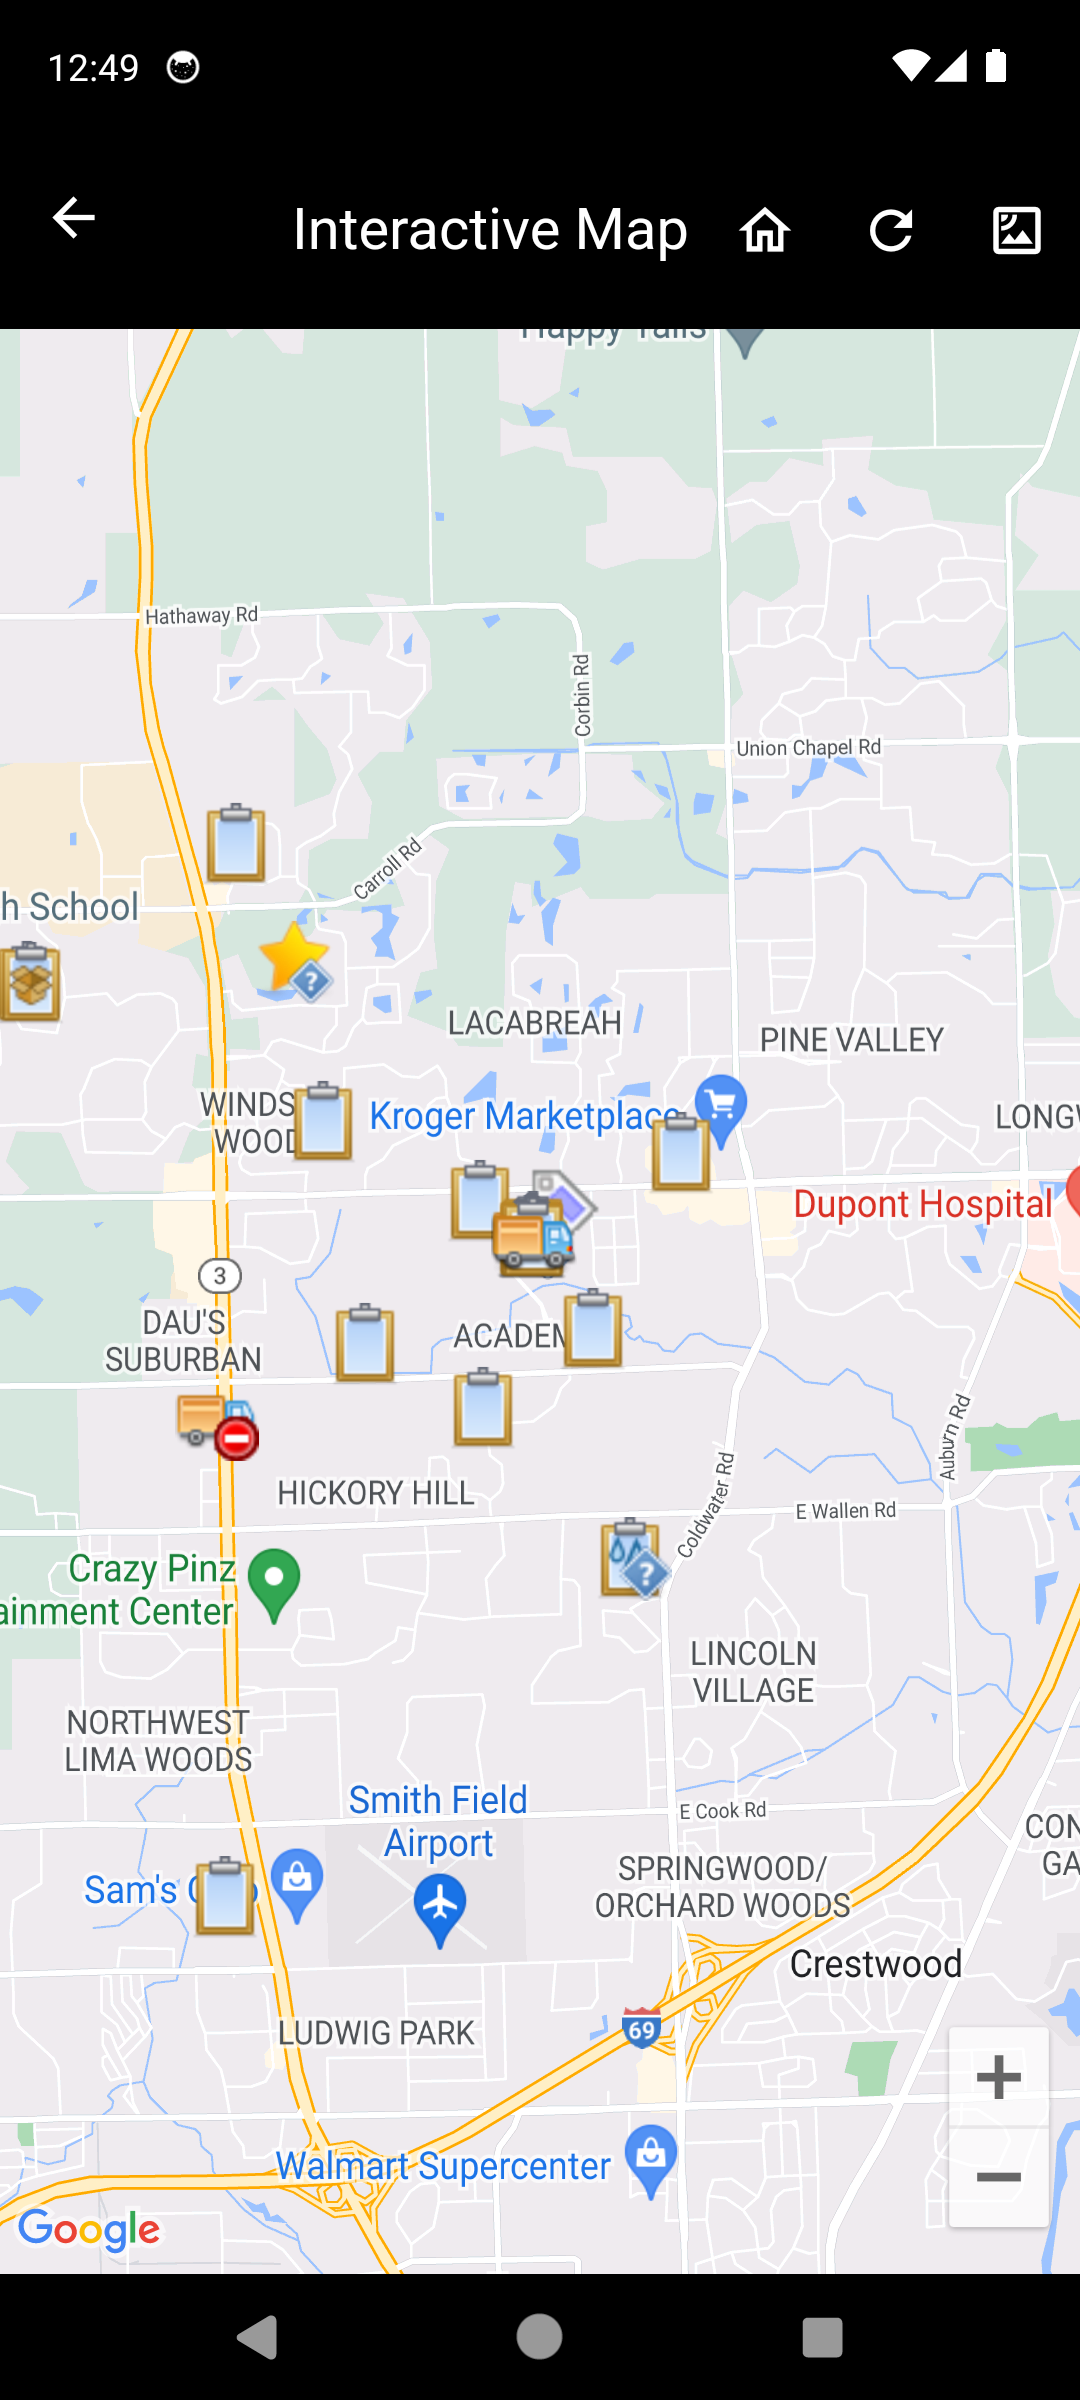
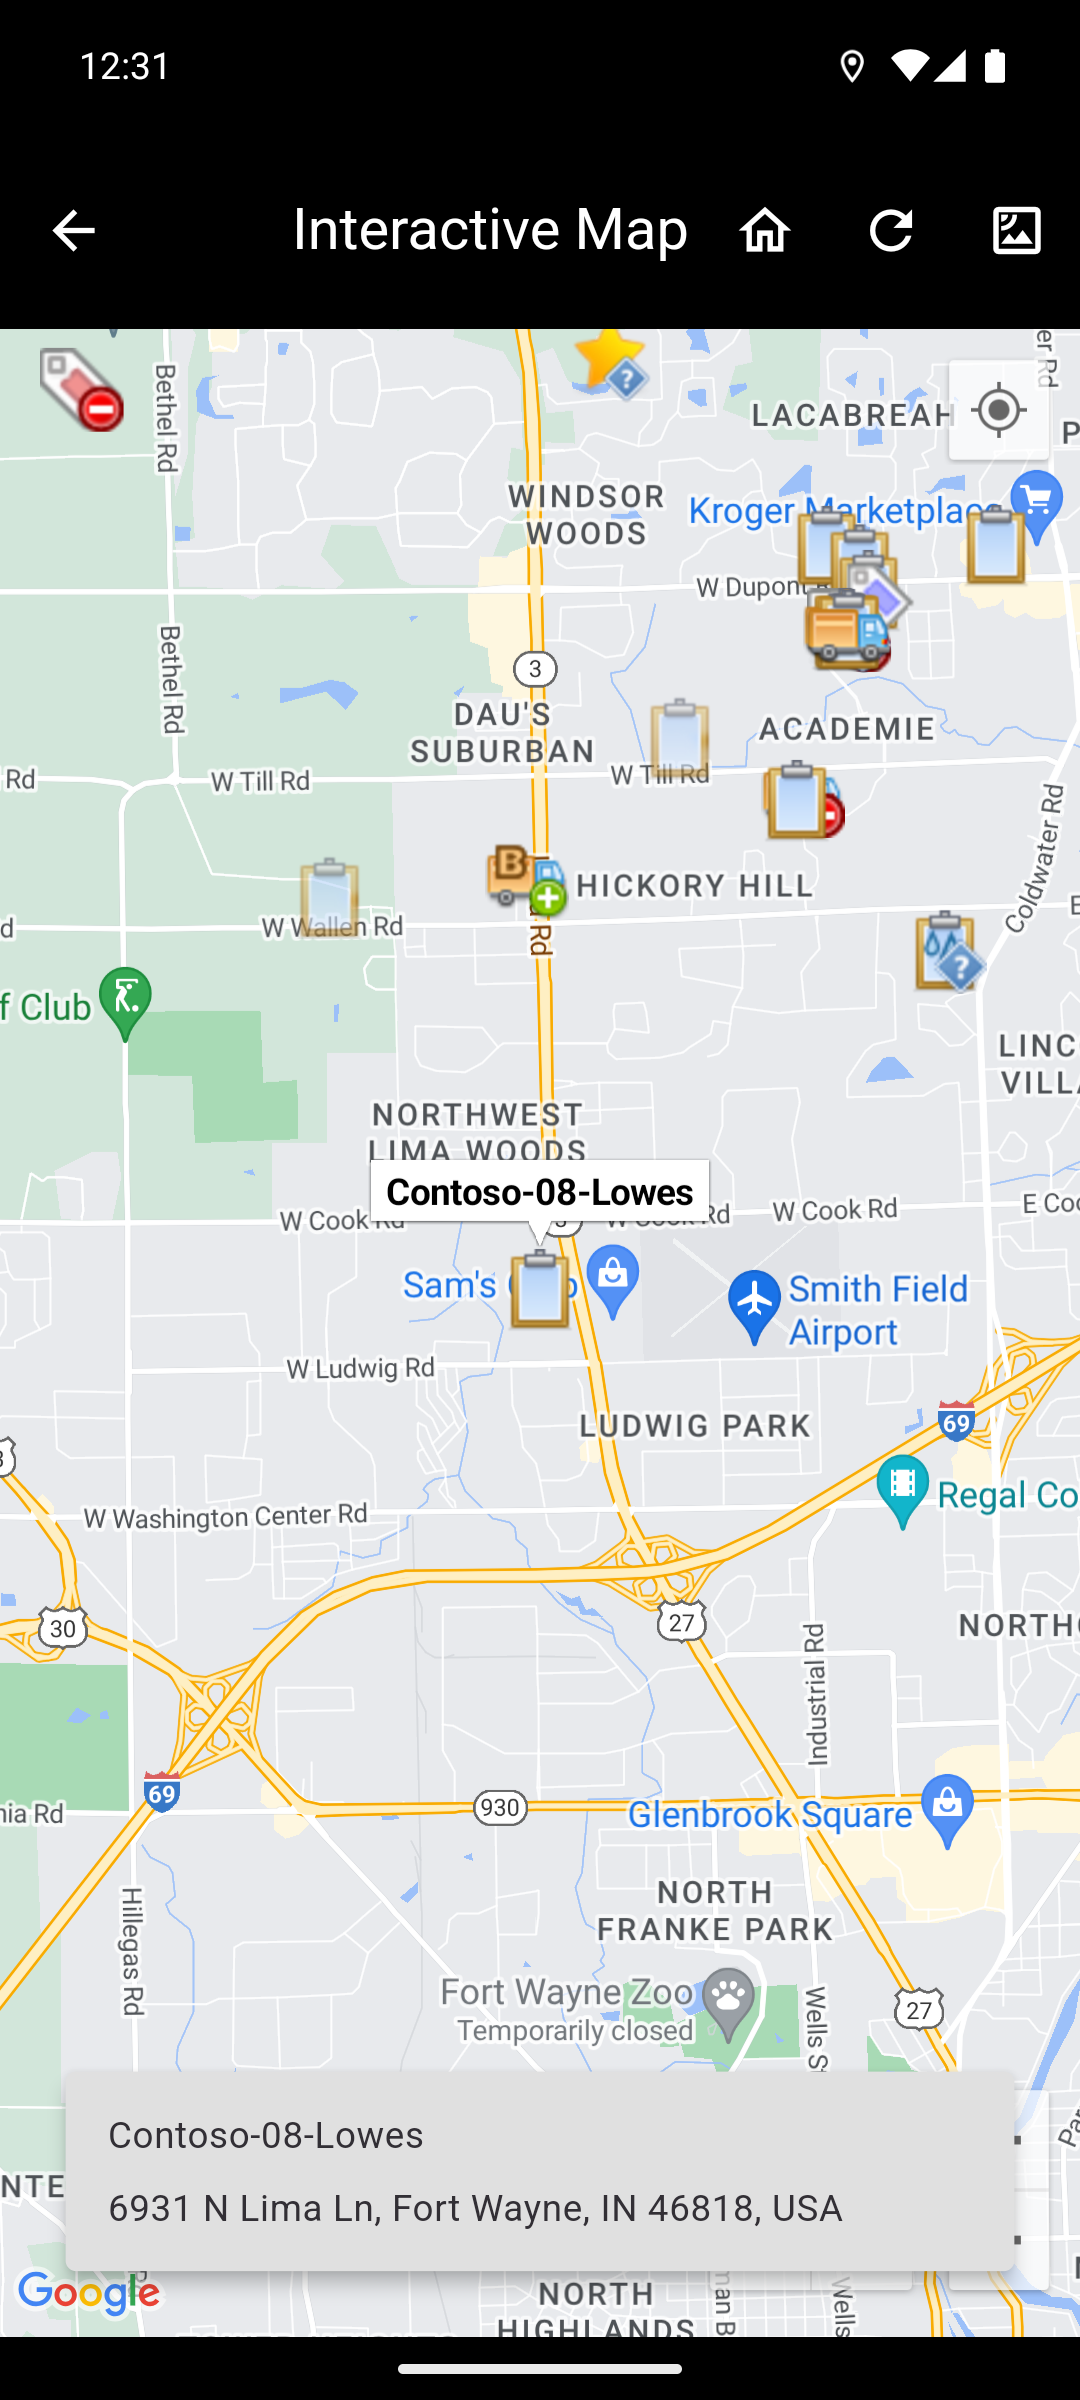
The Interactive Map displays a map of the assets. Assets are shown at their geographic location. If there are multiple assets in a region, they may be grouped together in a cluster. A cluster will display the number of assets it is representing on its marker icon. Zooming in on the cluster will un-group the assets and display them on the map.
Tapping on an asset will display an info window with the asset's name. A pop up with the asset's name and address will be displayed at the bottom of the screen at the same time. Tapping on the info window will bring up the asset details screen of that asset. With an asset selected, options will become available to view the location in the google maps app, or to get directions to the location in the google maps app. These options can get covered by the pop up at the bottom of the screen. To view the options, the pop up can be dismissed by swiping left or right.
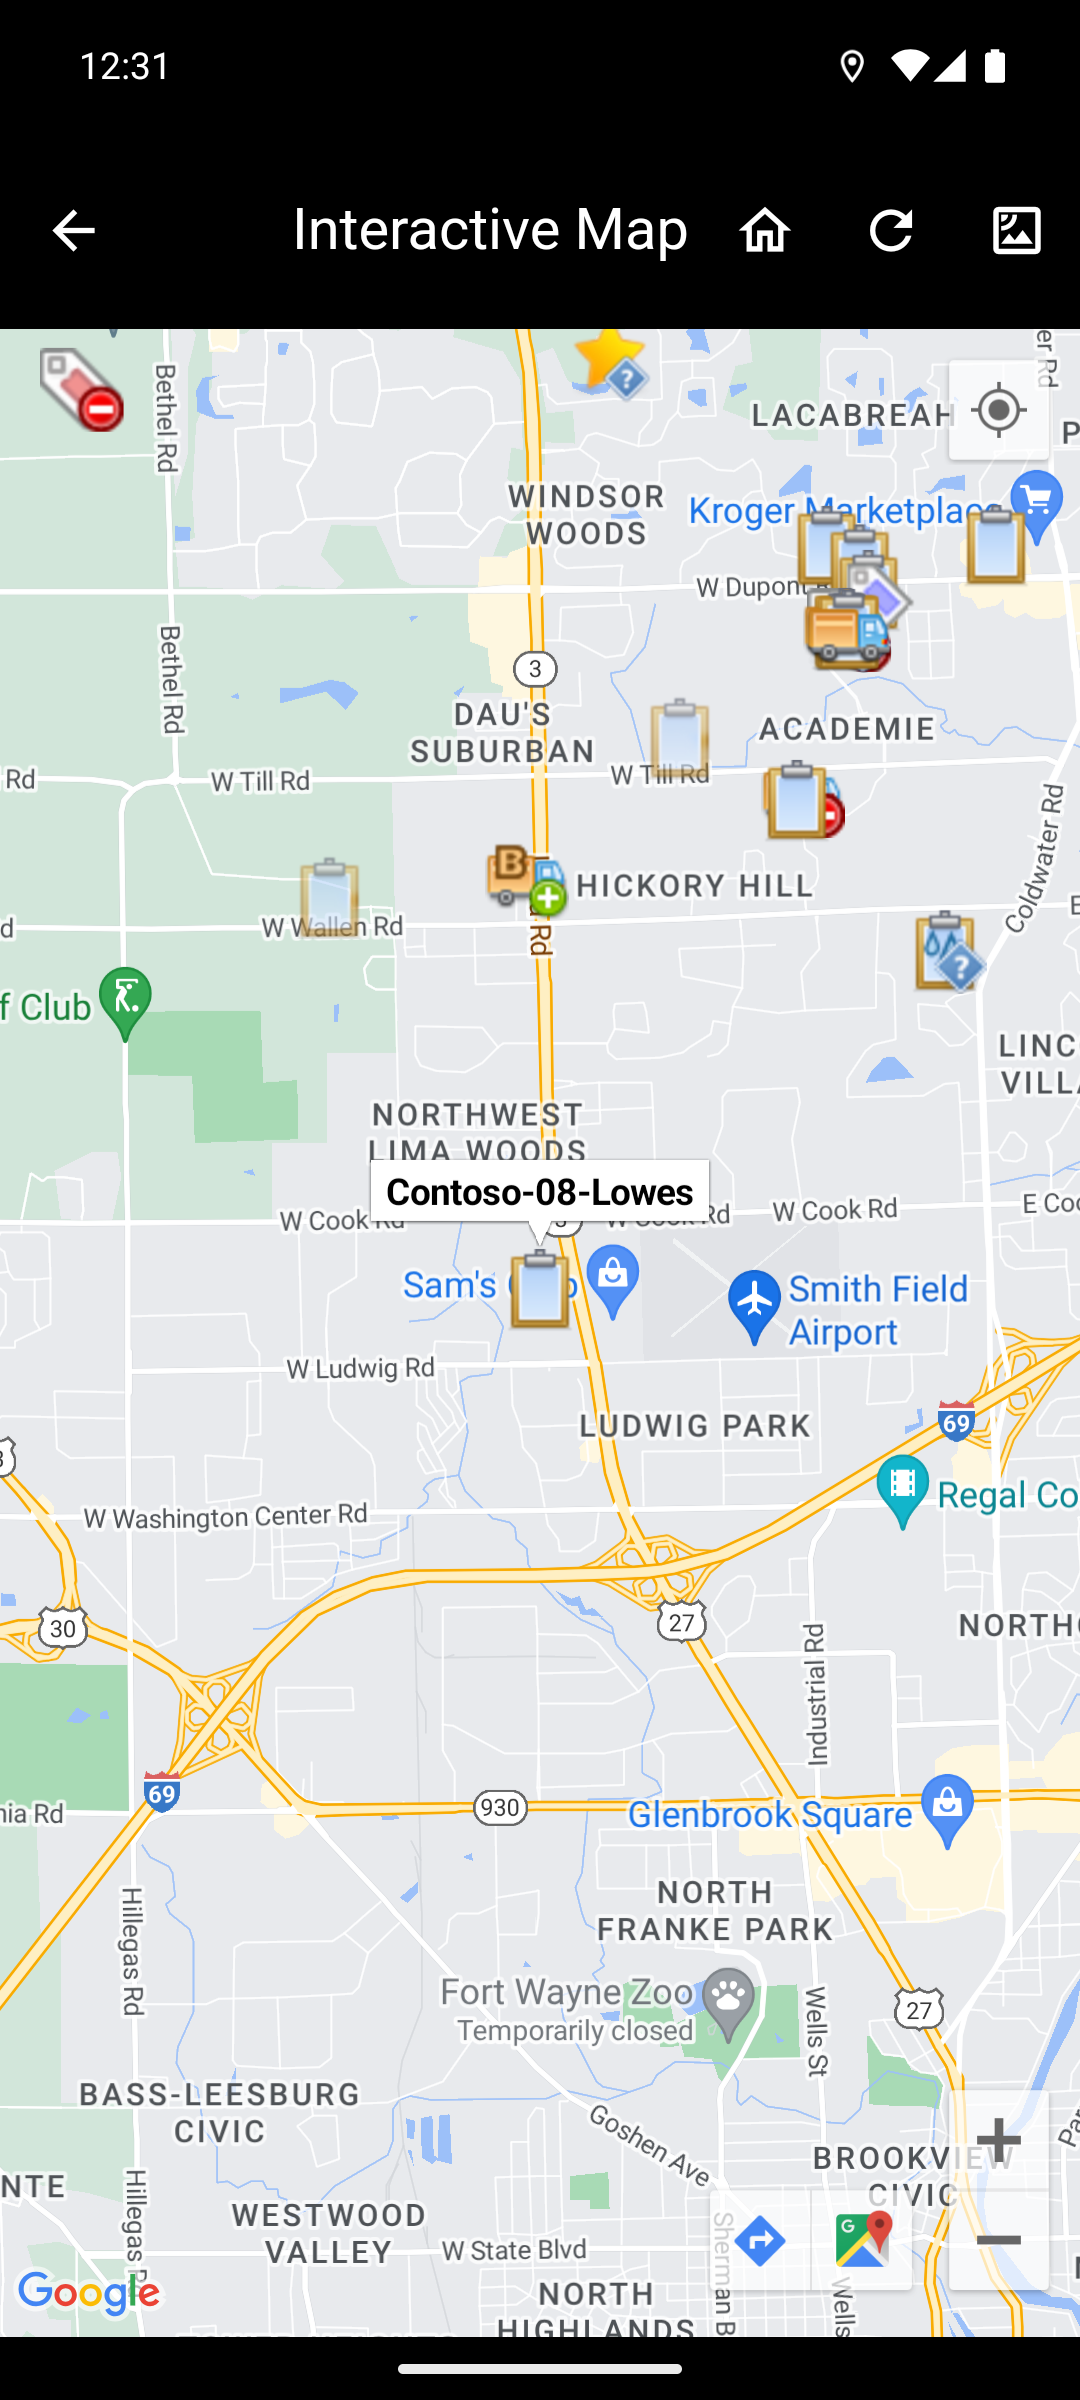
The following action buttons can be used to interact with the map.
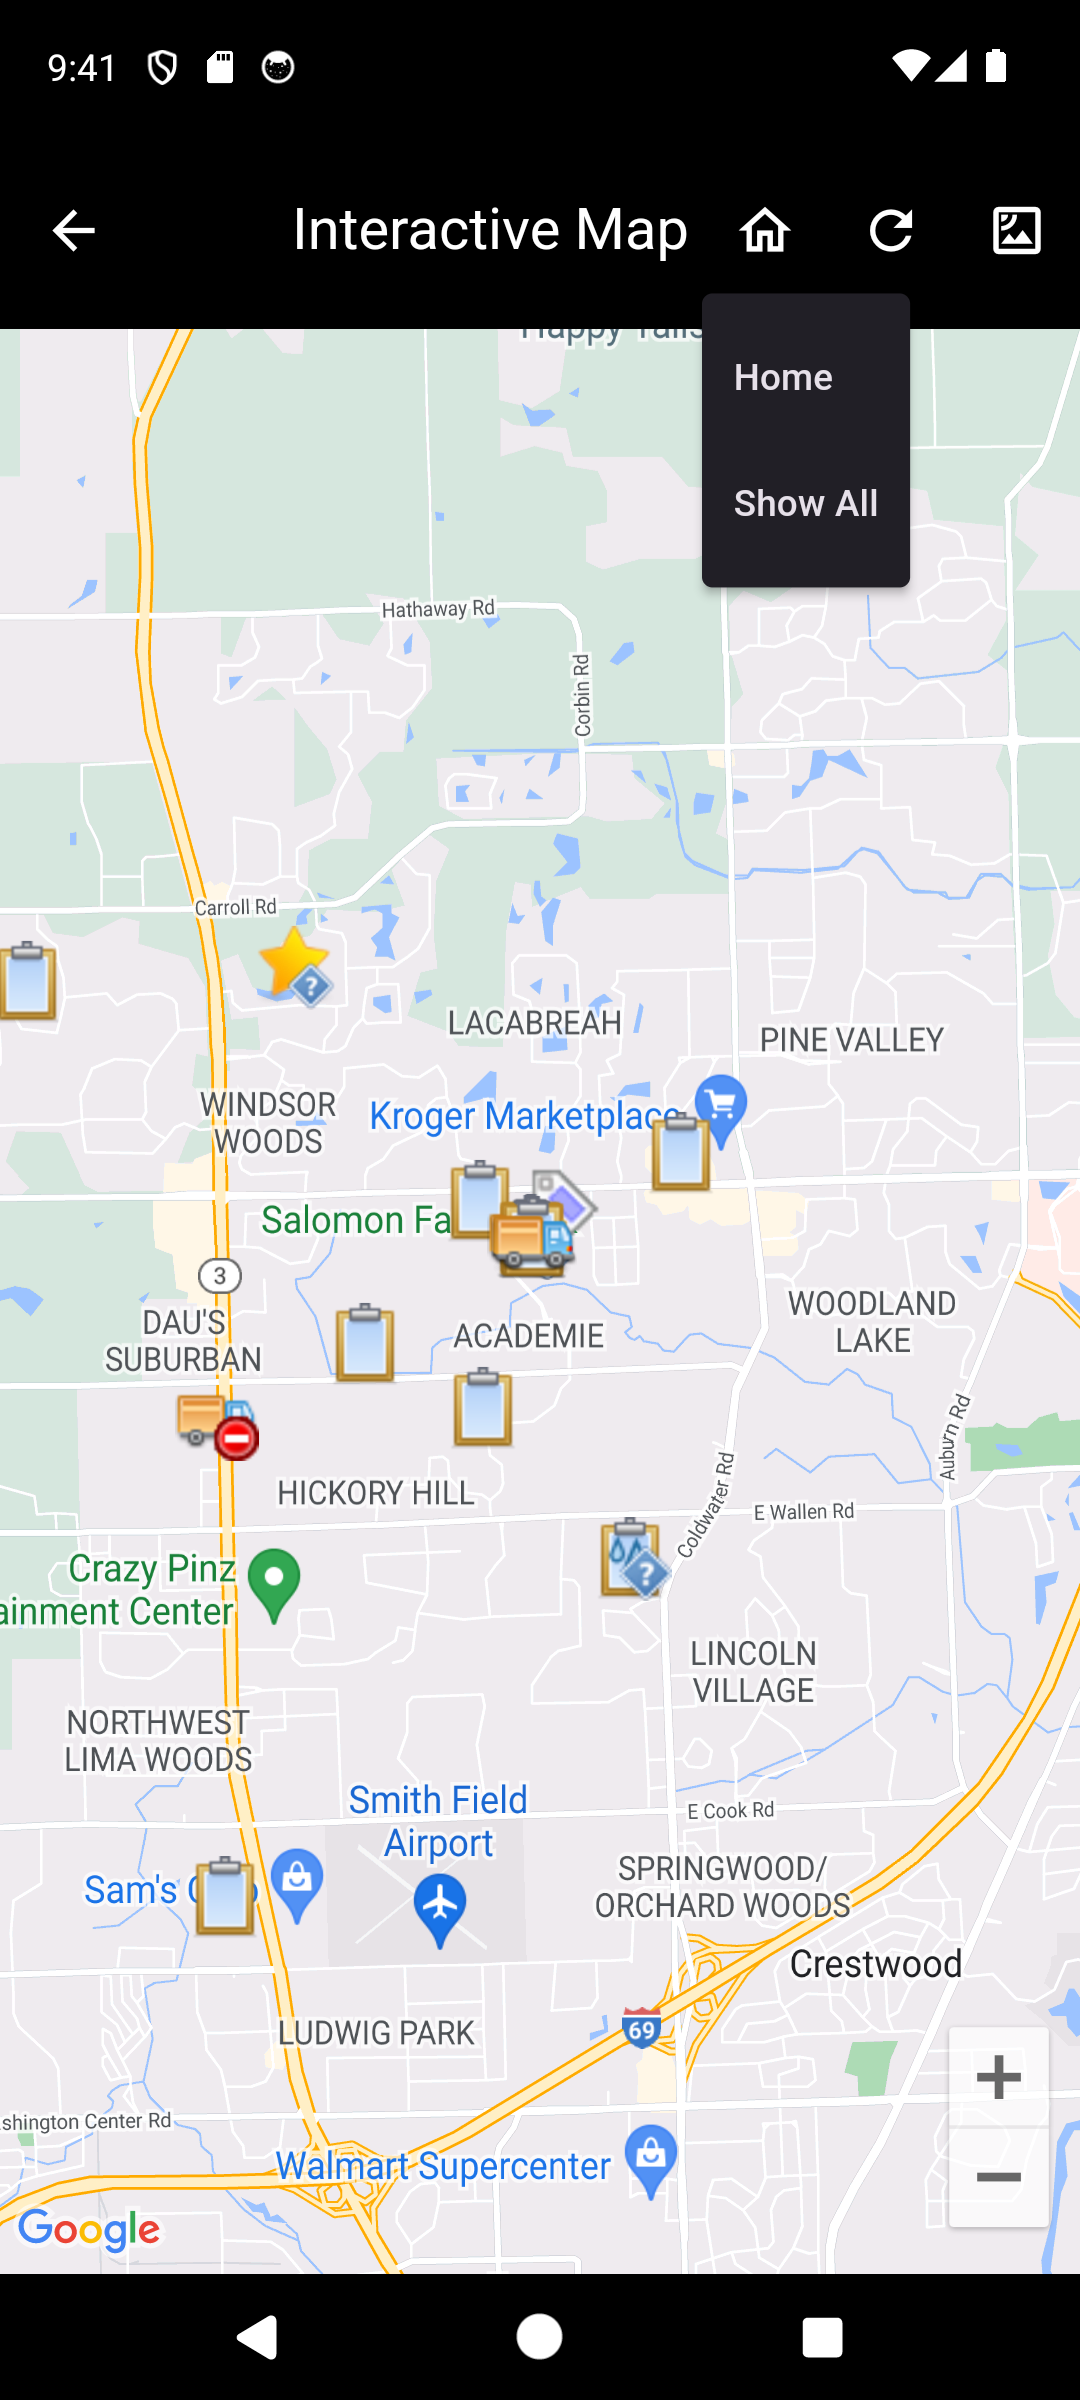
- Home: The home icon button resets the map's location and zoom level. By default this will use the customer's home location and zoom level. A custom home location and zoom level can be set in the Overview Web Portal.
- Alternatively, holding down on the home icon button will display a menu with the following options:
- Home: Resets the map's location and zoom level. The same as tapping the home icon button.
- Show All: Changes the map's location and zoom level to show all assets on the map.
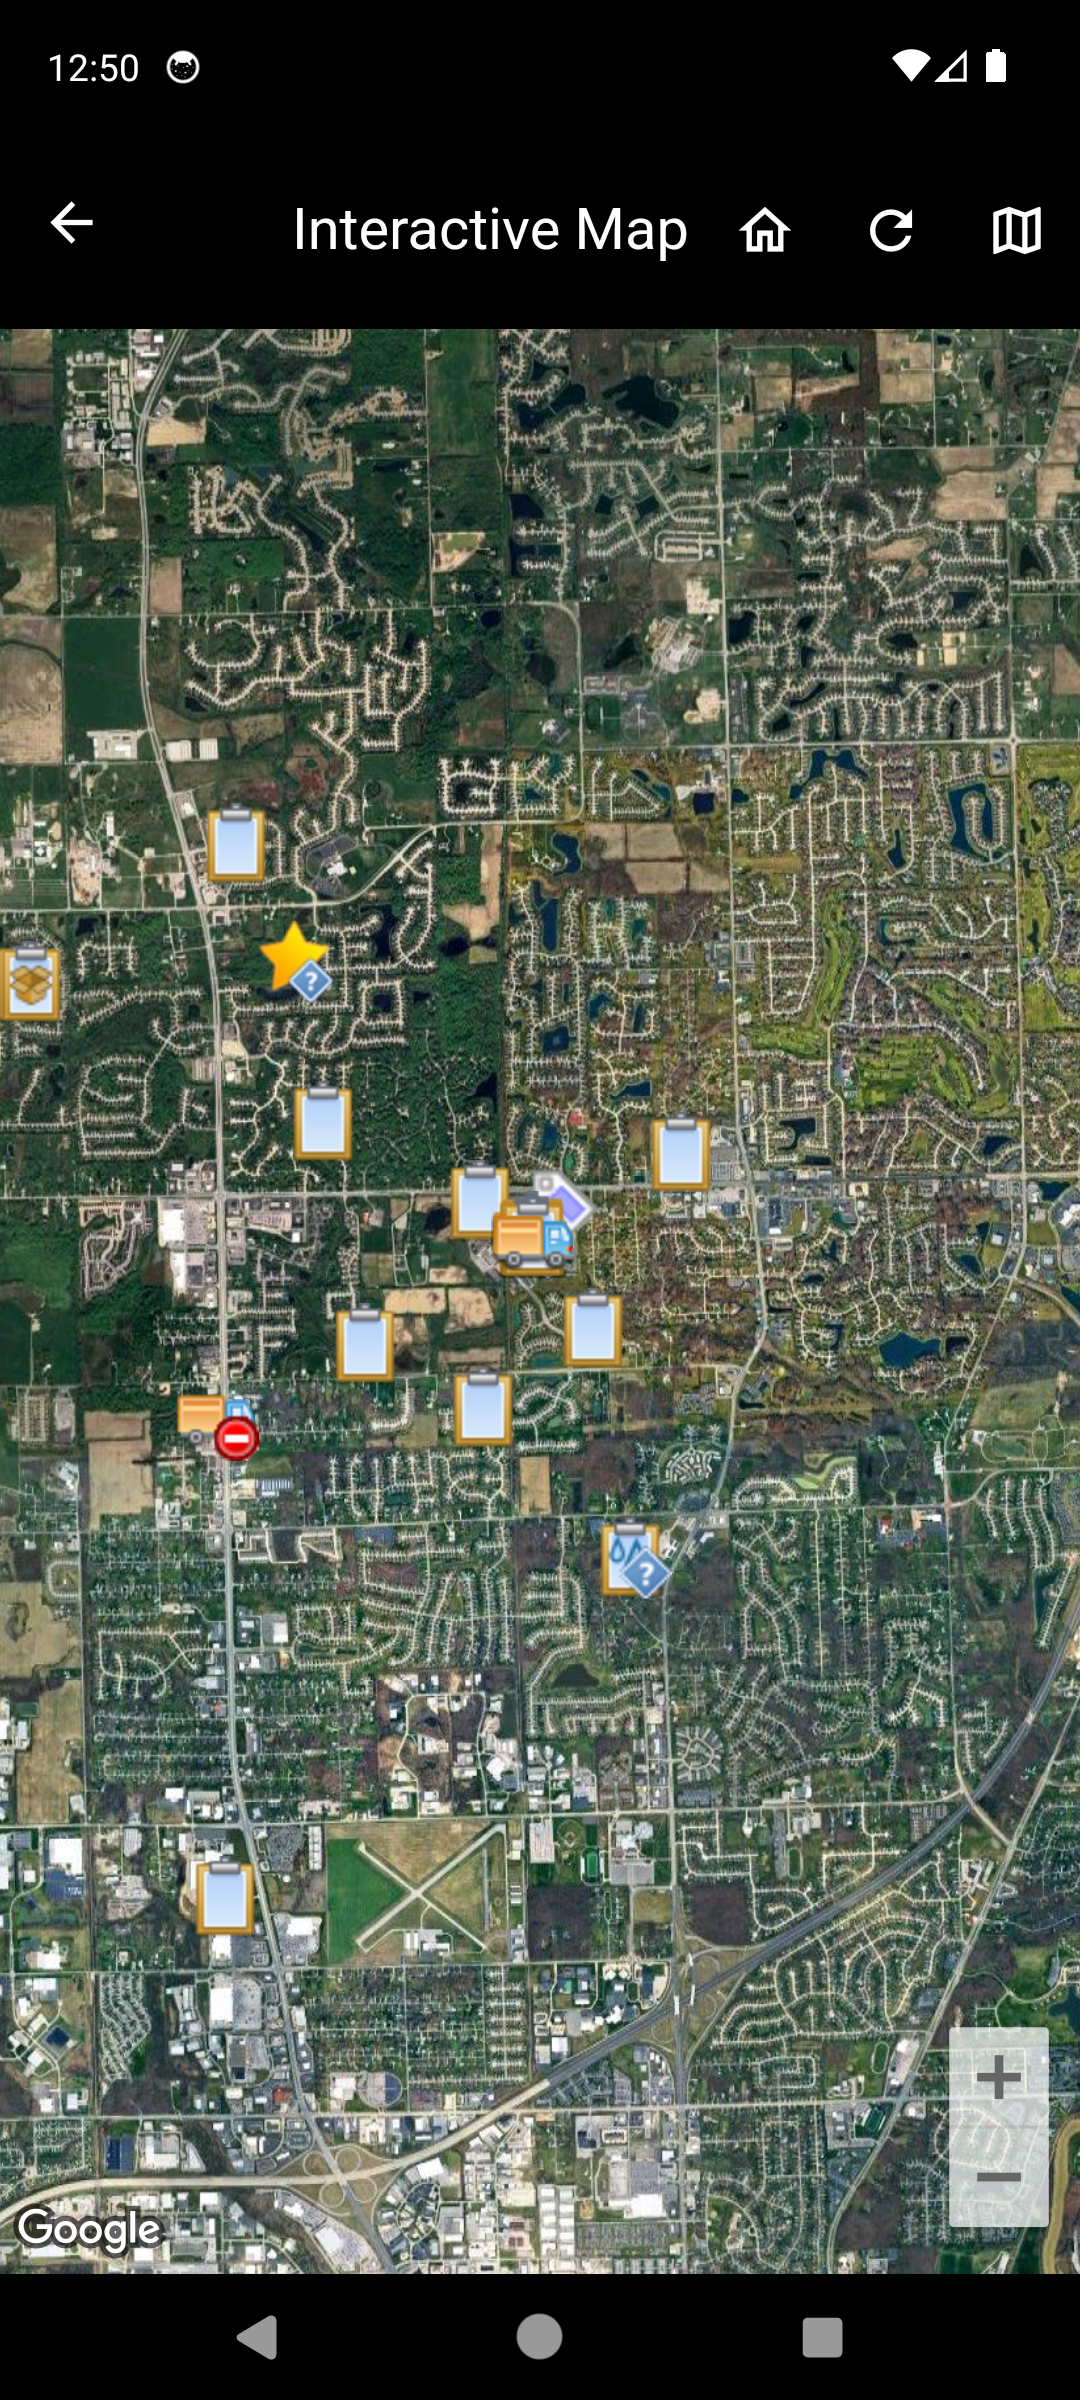
- Refresh: The refresh icon button refreshes the assets on the map.
- Change Map Type: The map/satellite icon button allows switching between the default map view and a satellite view. The icon changes to display which map type will be switched to when tapped.
NOTE: Child assets will not be displayed on the map unless they are not in a container asset.
Video Playback
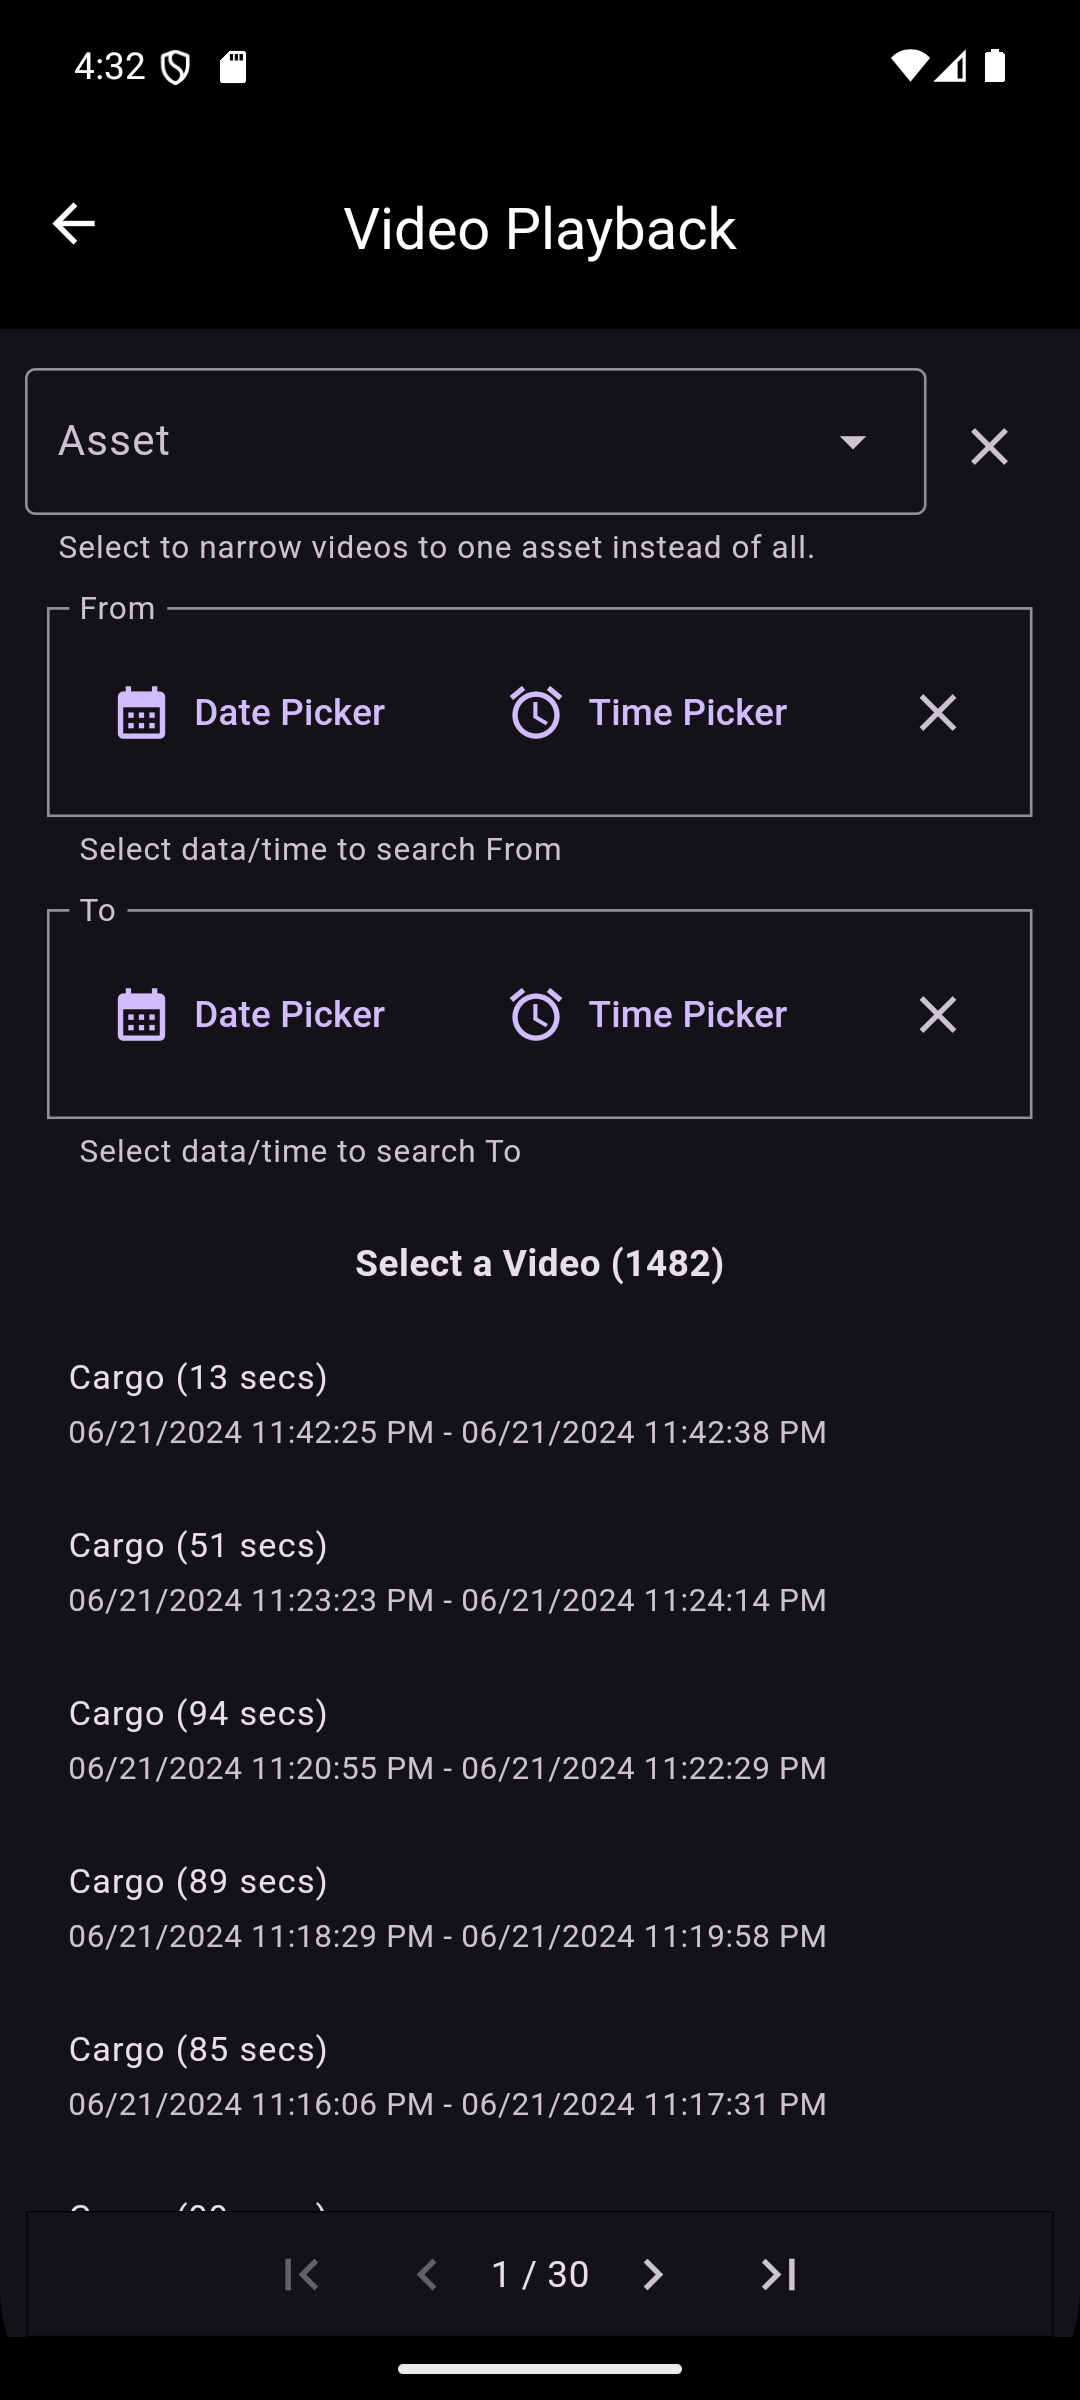
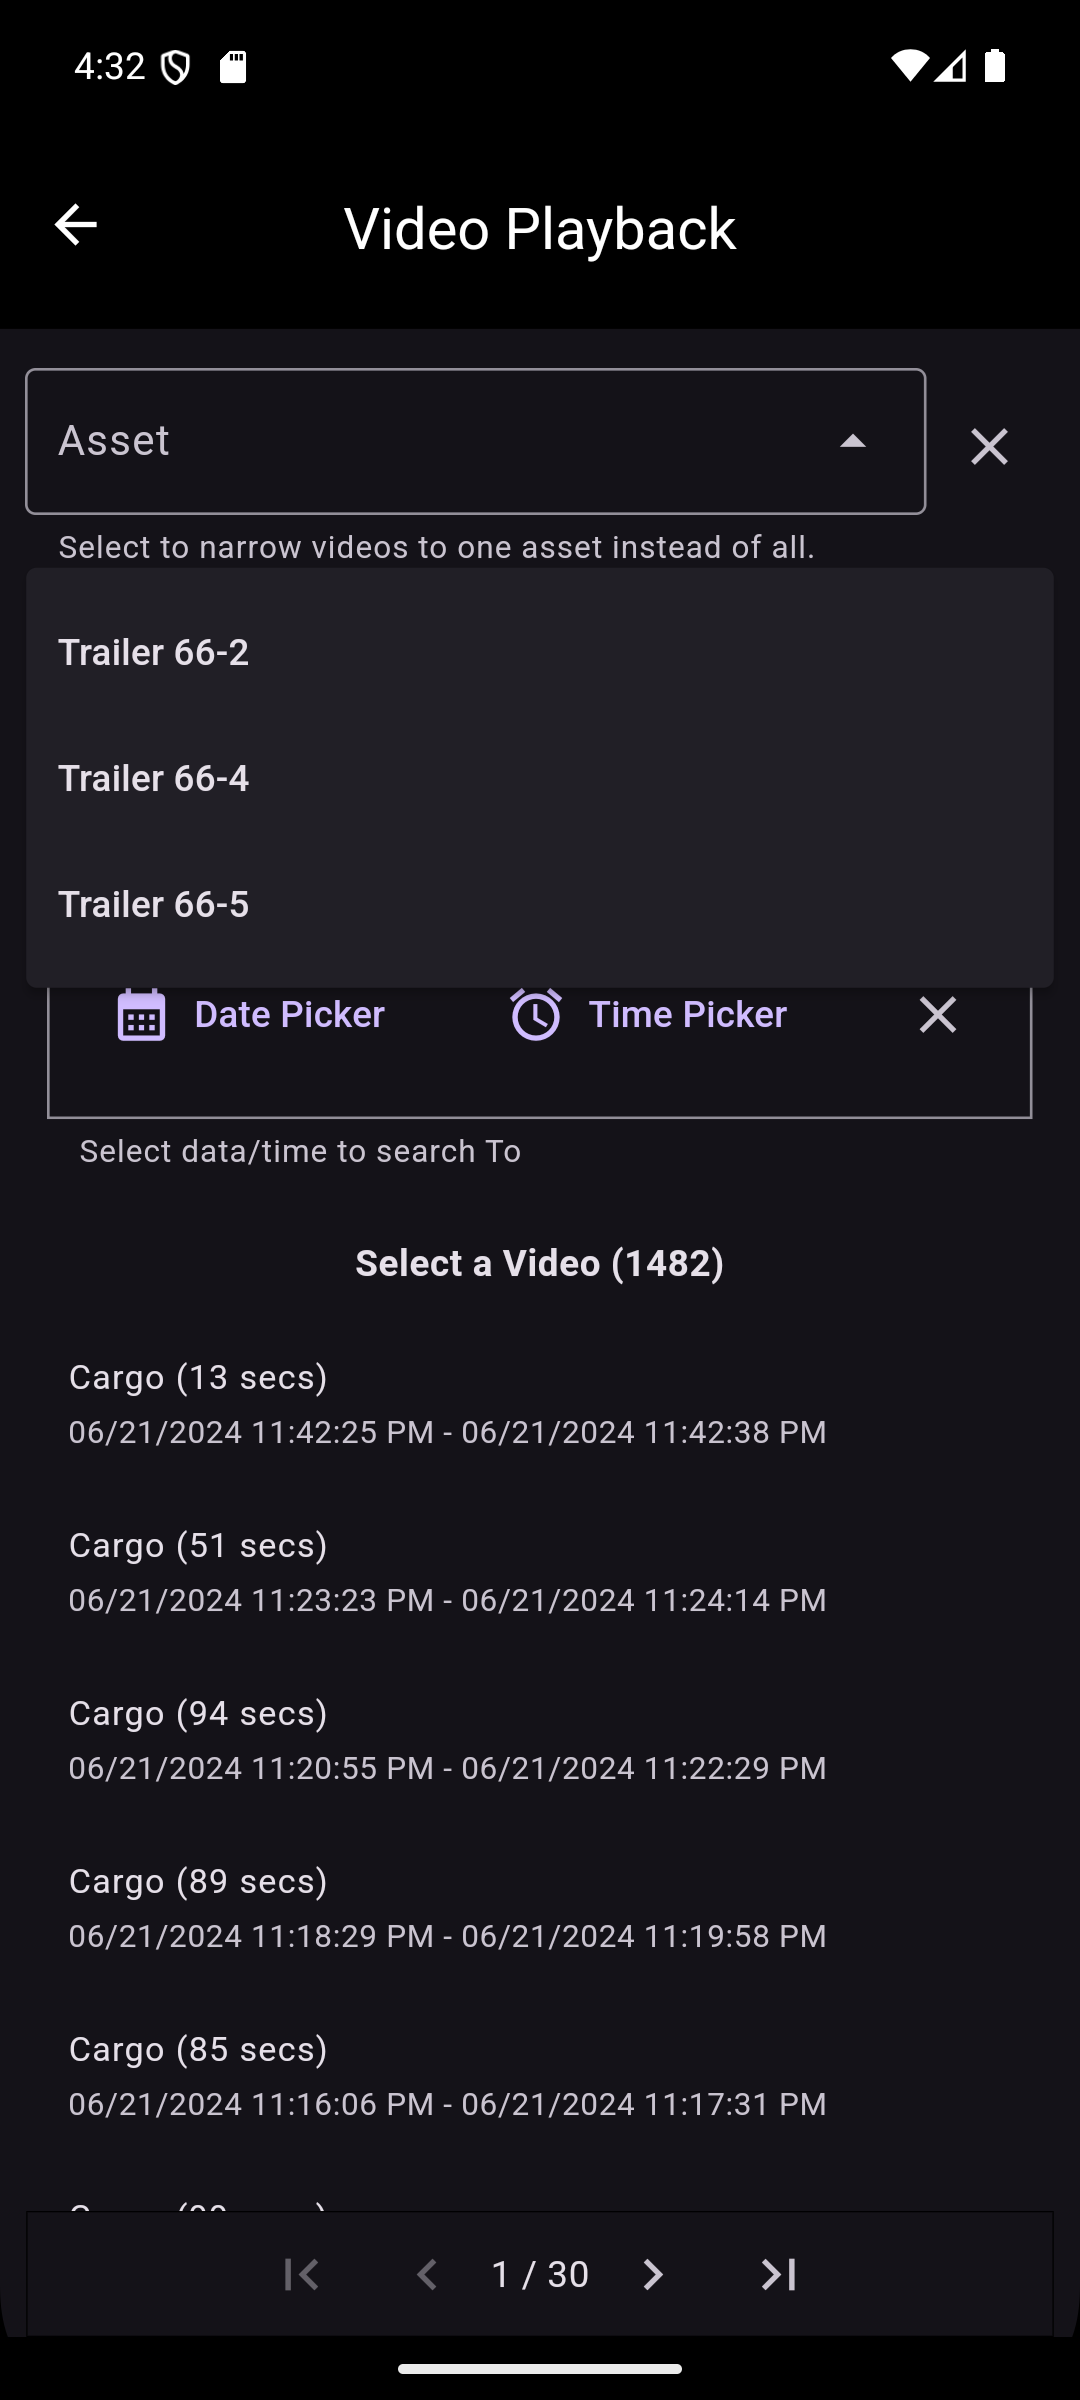
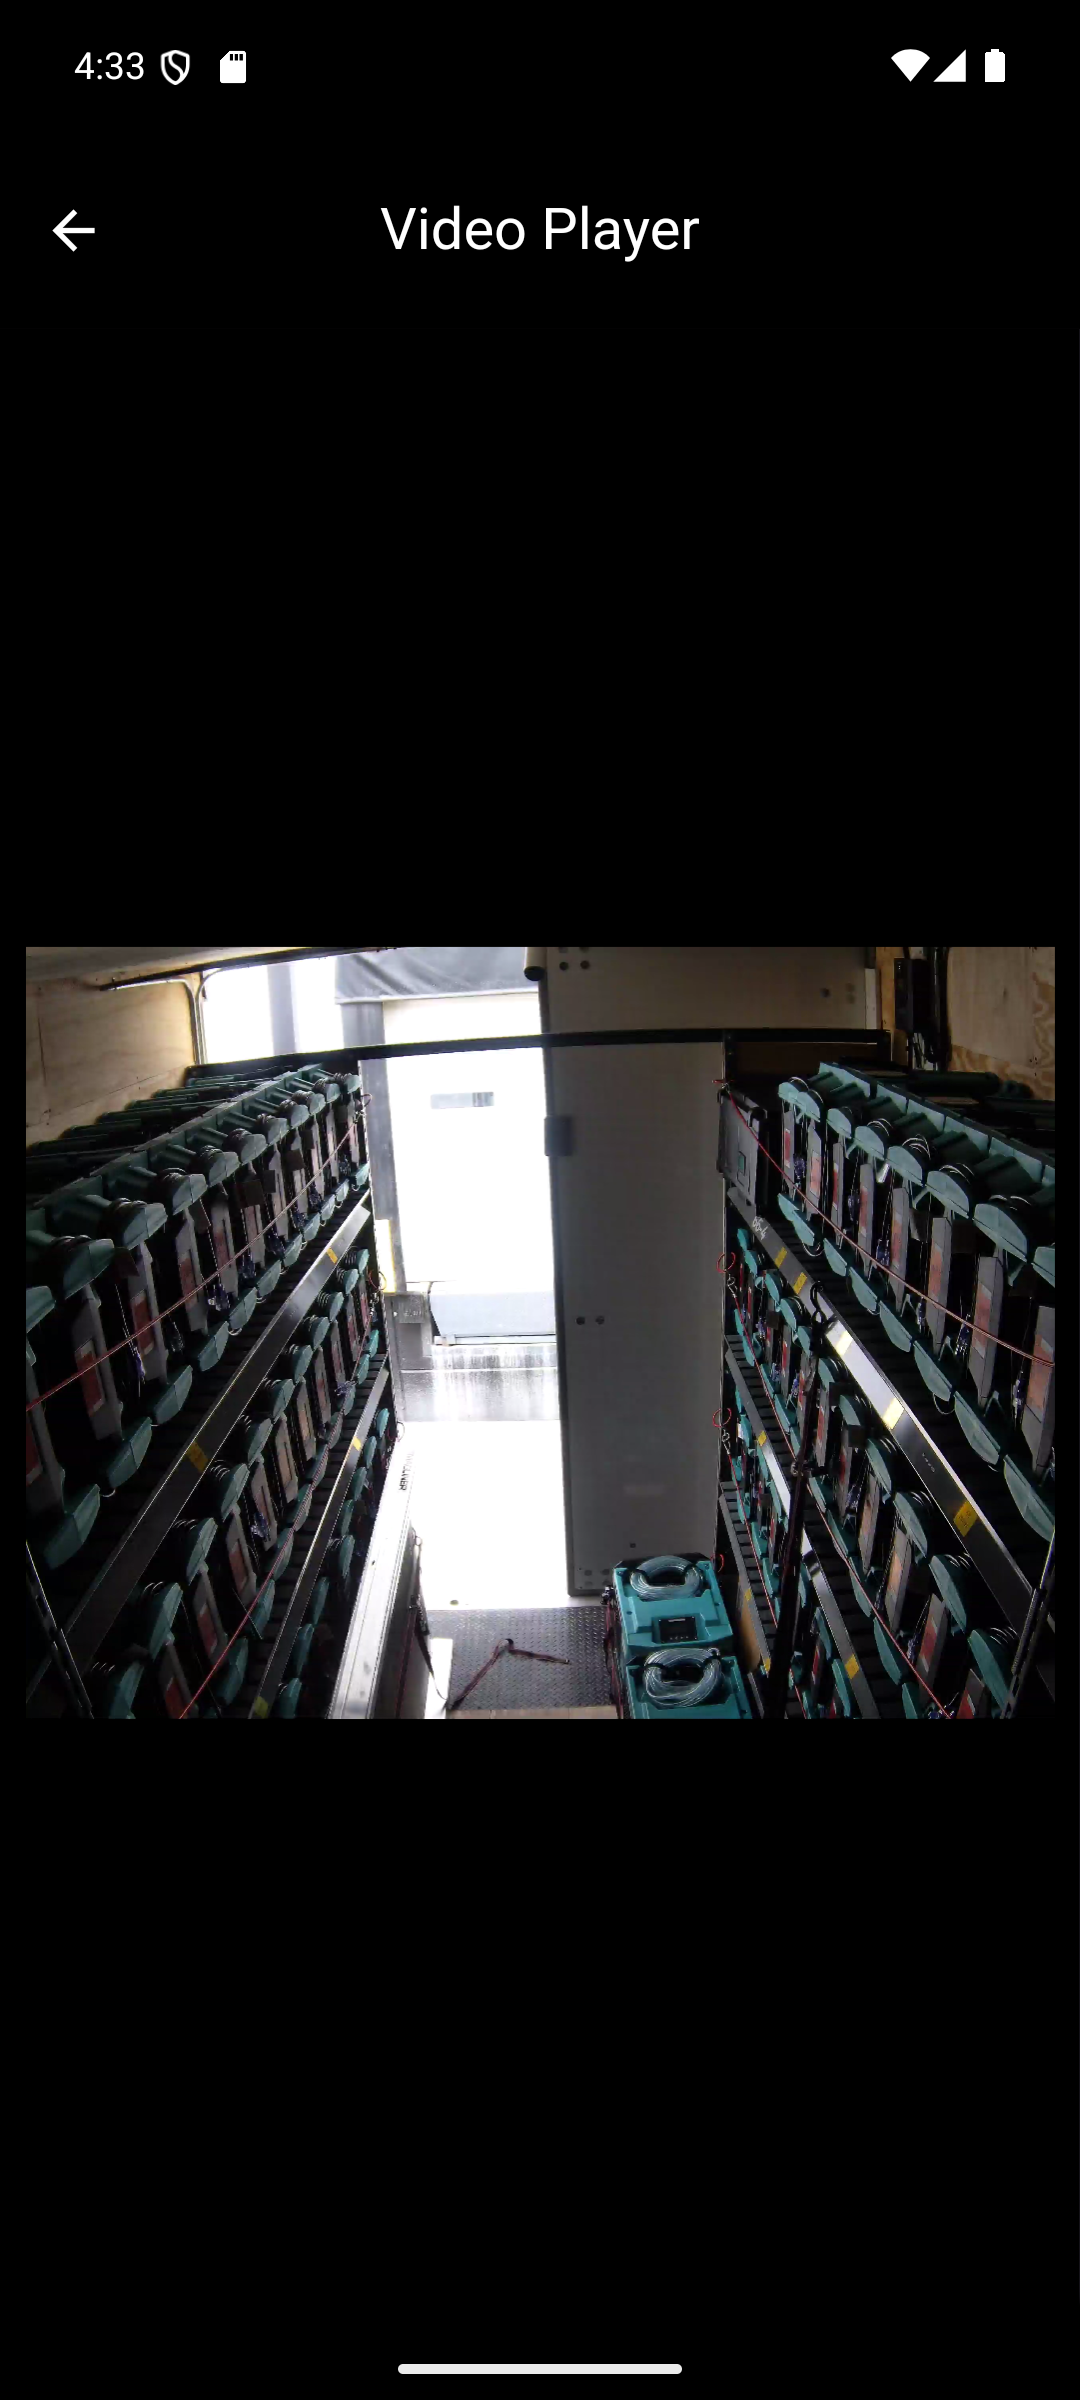
The Video Playback screen displays a list of videos associated with the asset.
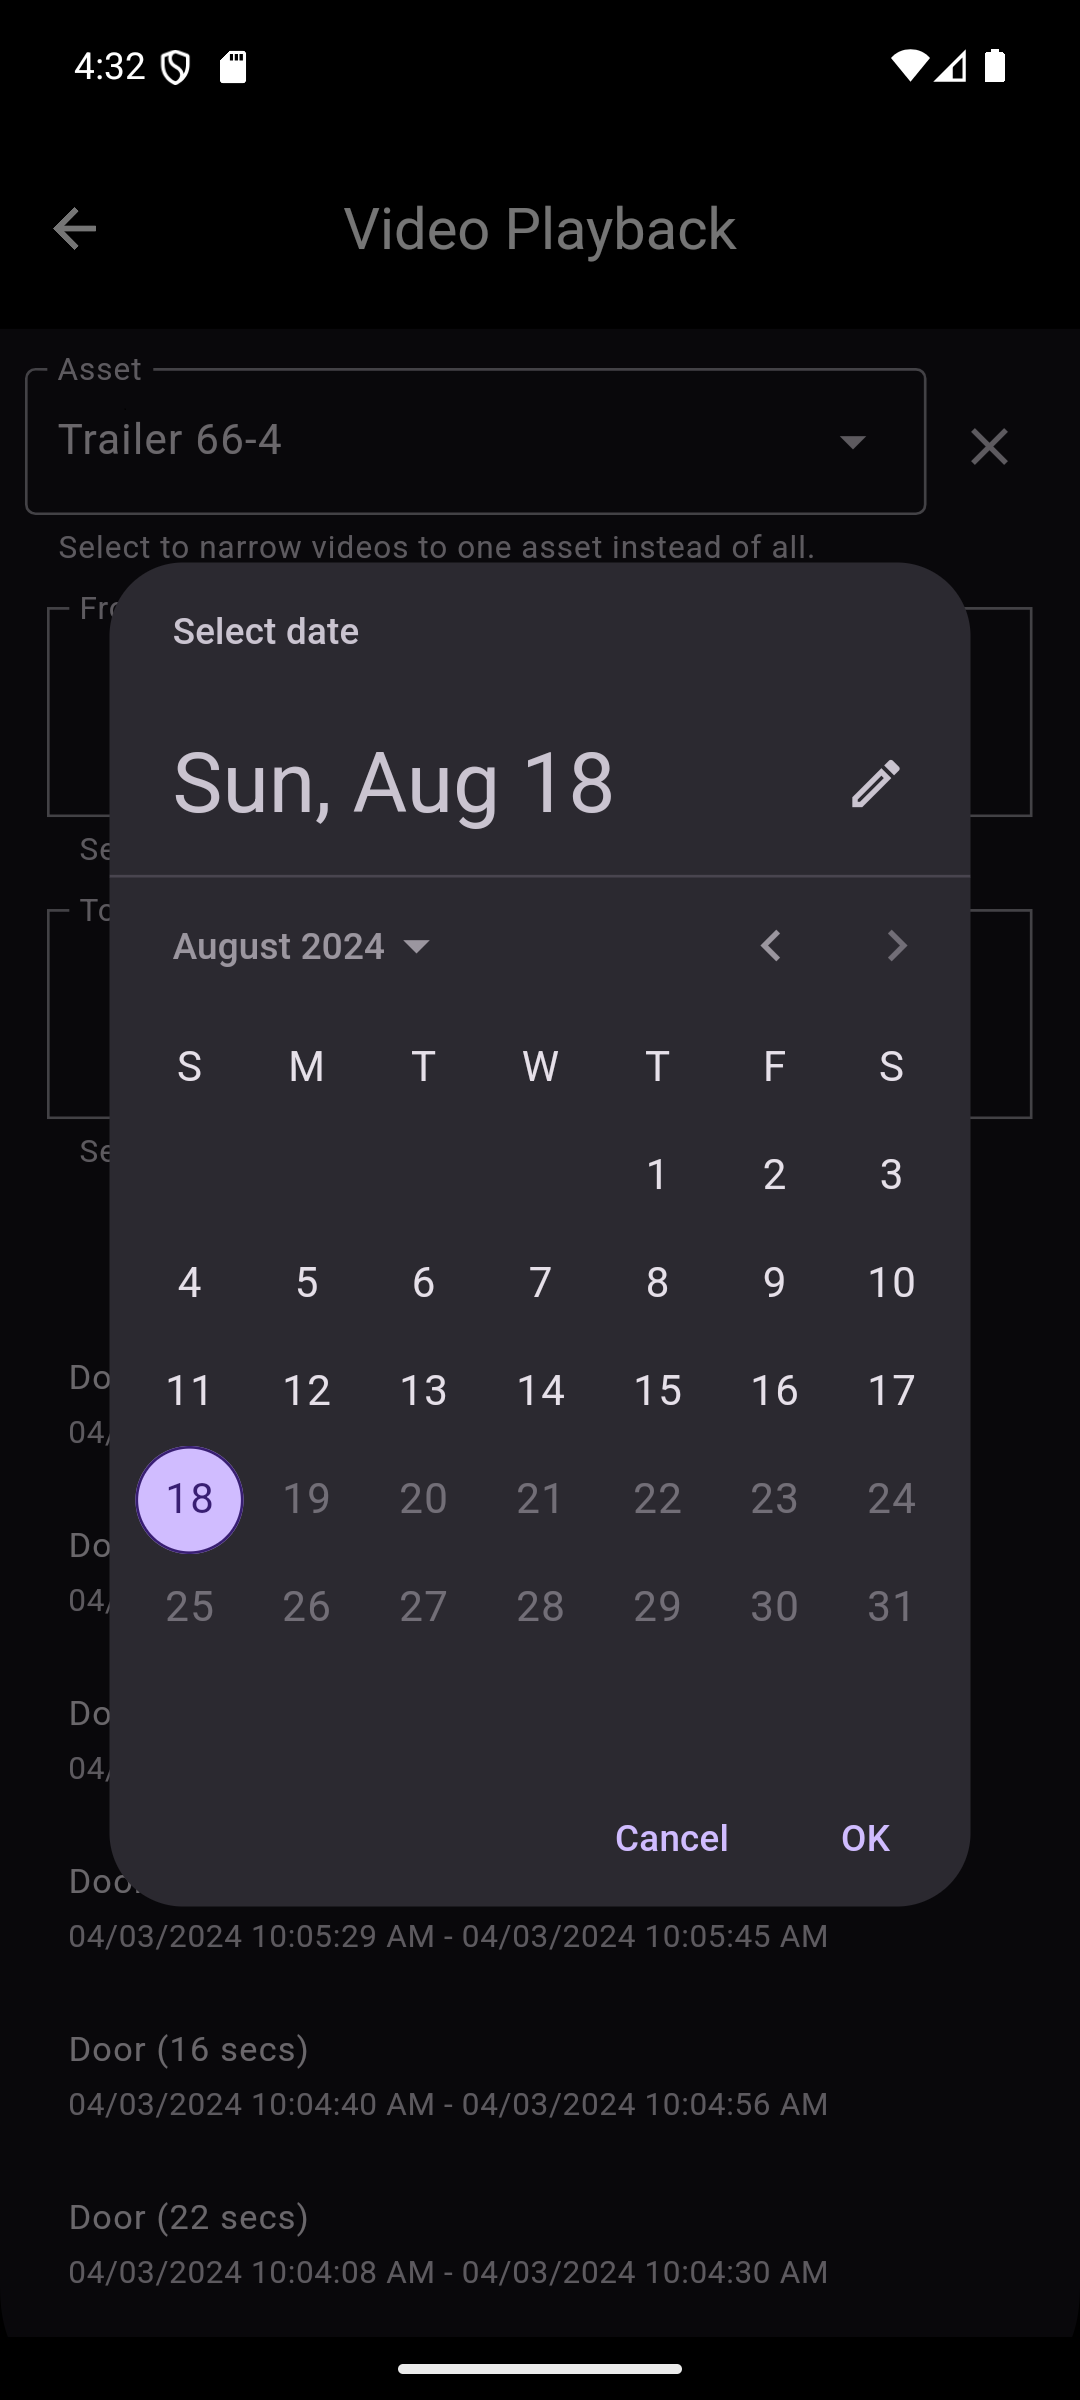
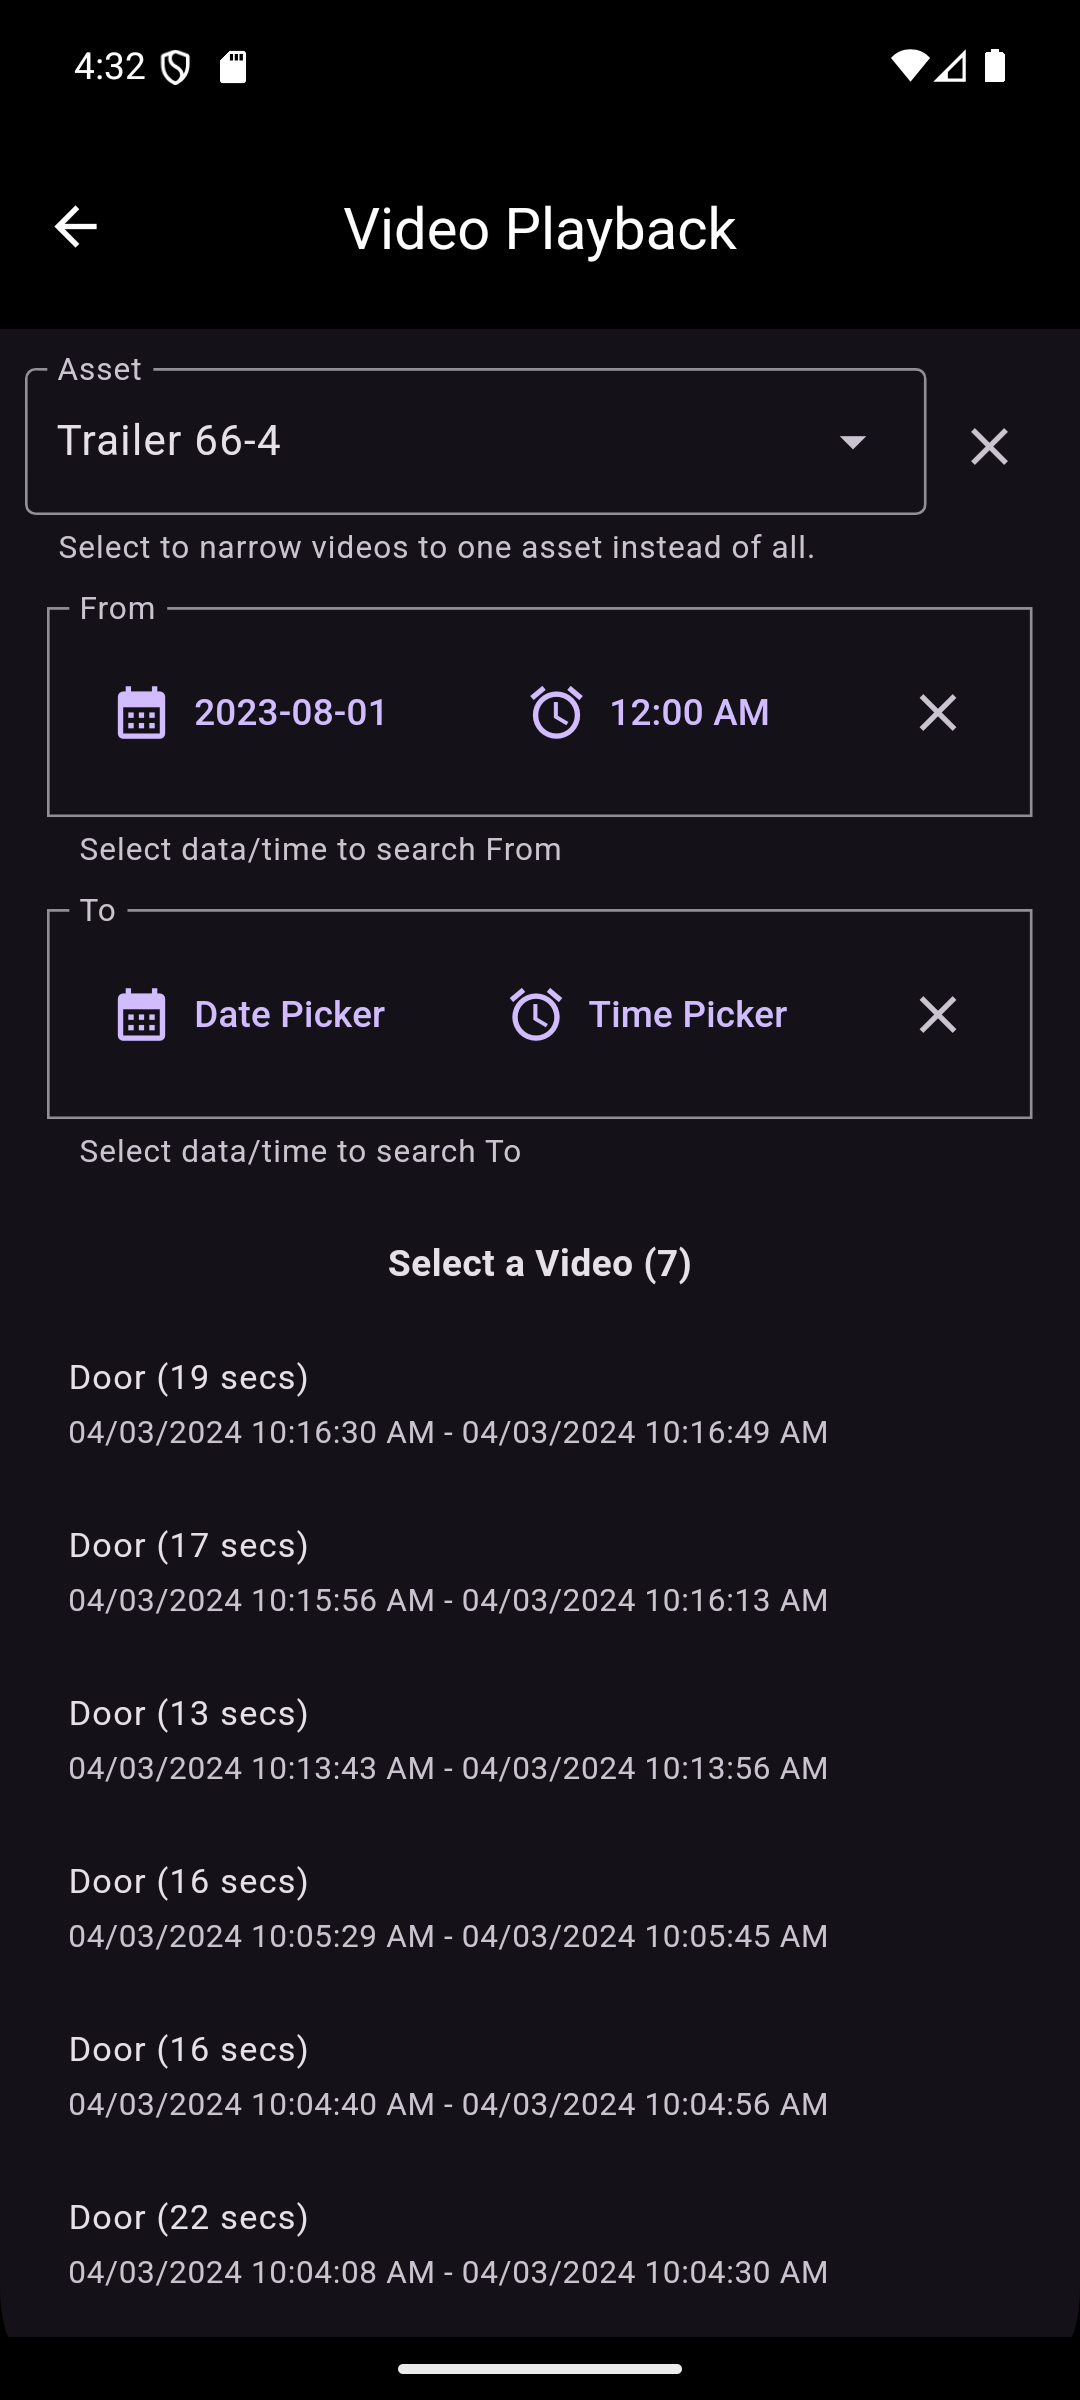
It allows filtering the videos by selecting an asset, and by selecting a date and time range. Selecting an asset will filter out videos that are not associated with the asset. The From selection will filter out all videos older than the chosen date and time. The To selection will filter out all videos newer than the chosen date and time.
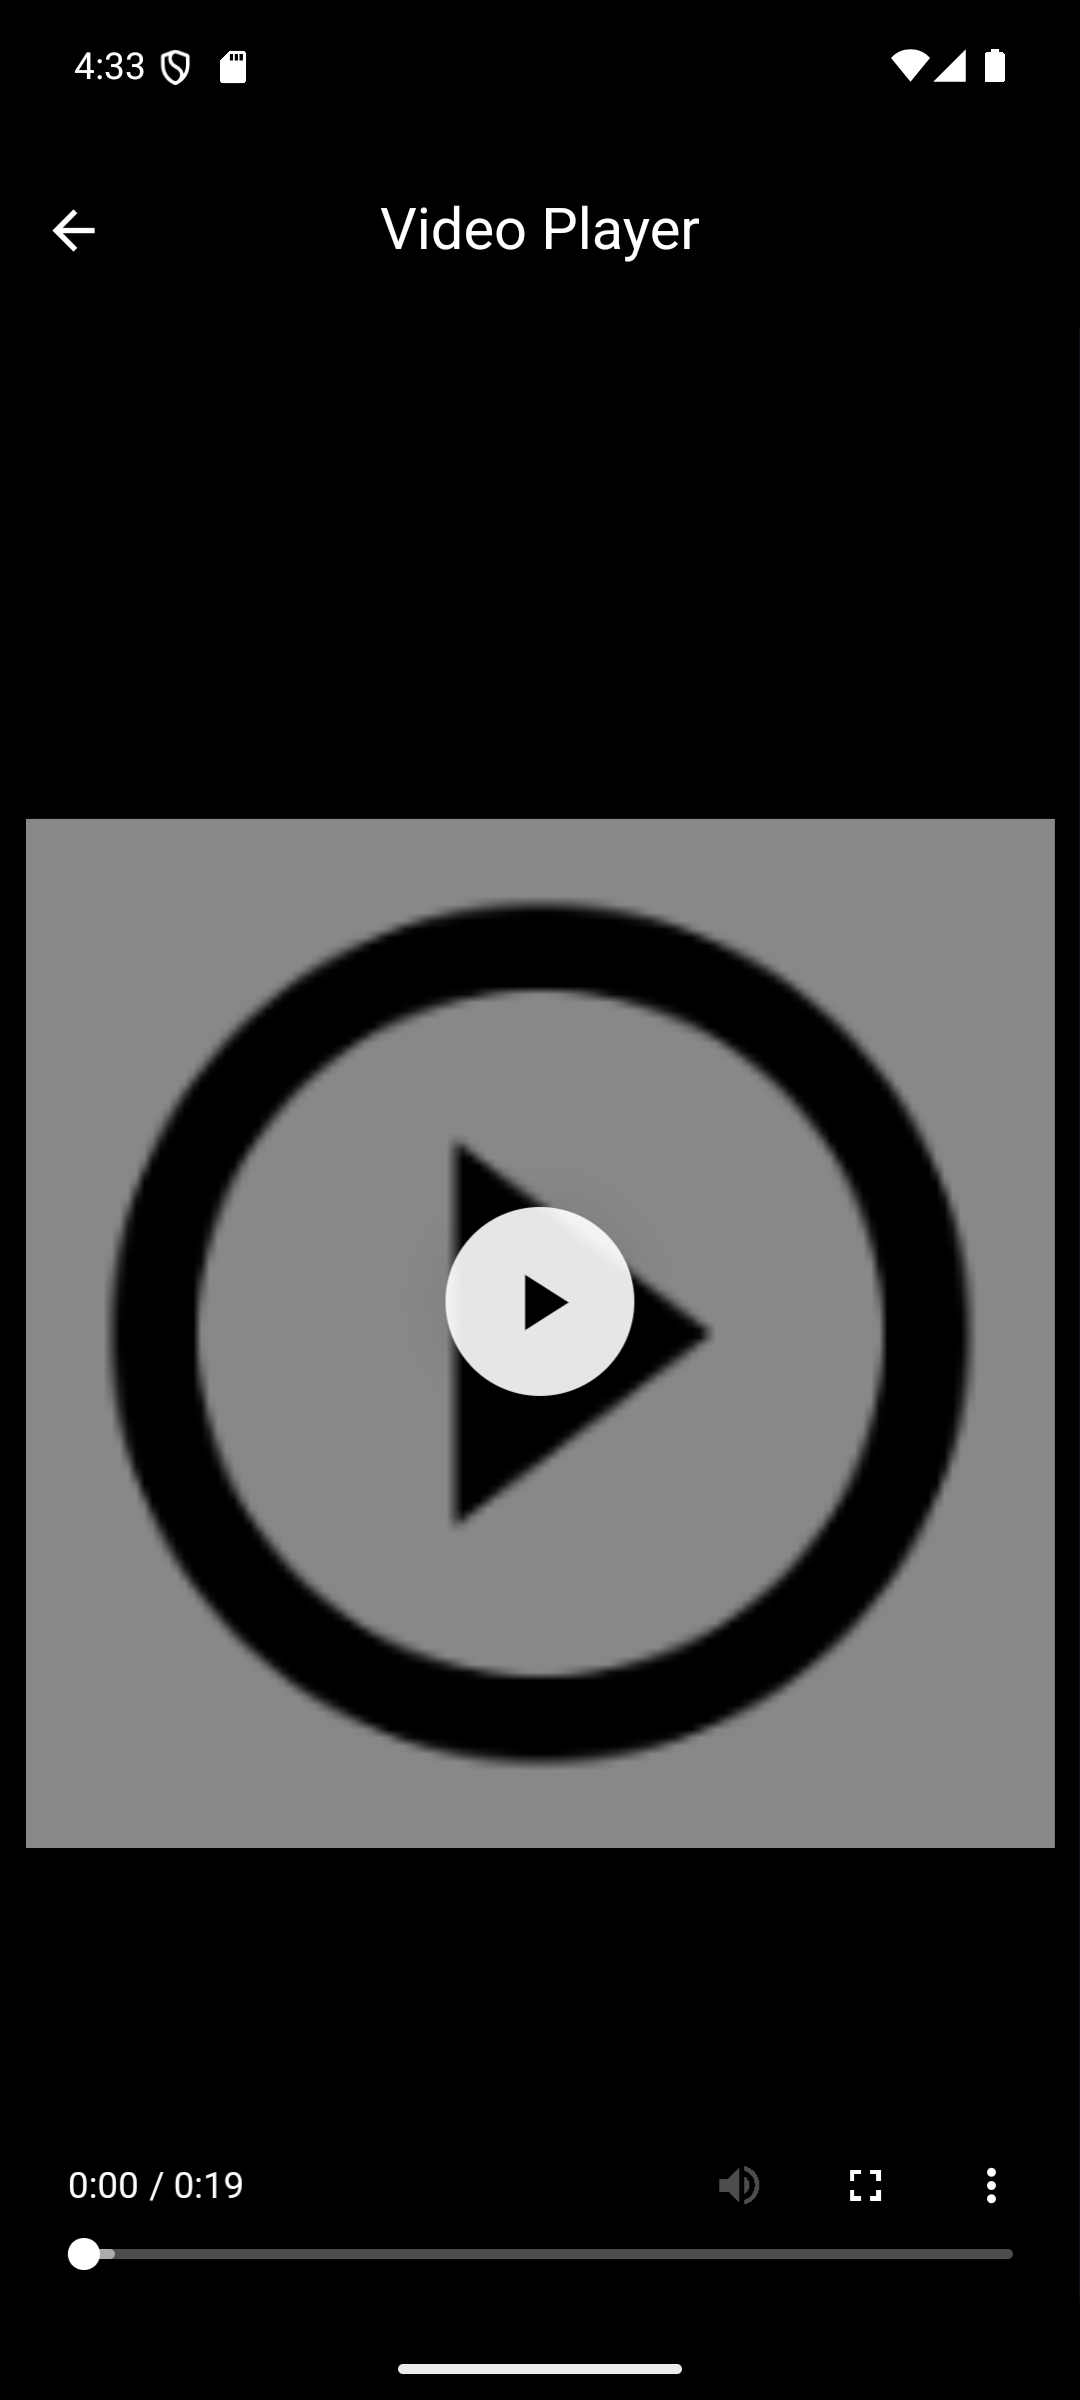
Below the filter options, the number of videos in the date time range can be seen, as well as a list of videos that can be viewed. The videos are sorted from the most recent to the oldest. The list displays each video's camera name/location on the container asset, duration, and date and time it was taken. The videos can be viewed by tapping on the video. This will bring up the video playback screen.
If there are more than 50 videos in the list, page controls will appear on the bottom of the screen. There are a maximum of 50 videos on each page. The forward, back, first page, and last page buttons navigate between the pages. To go to a specific page, tap on the page number and enter the desired page number in the field.
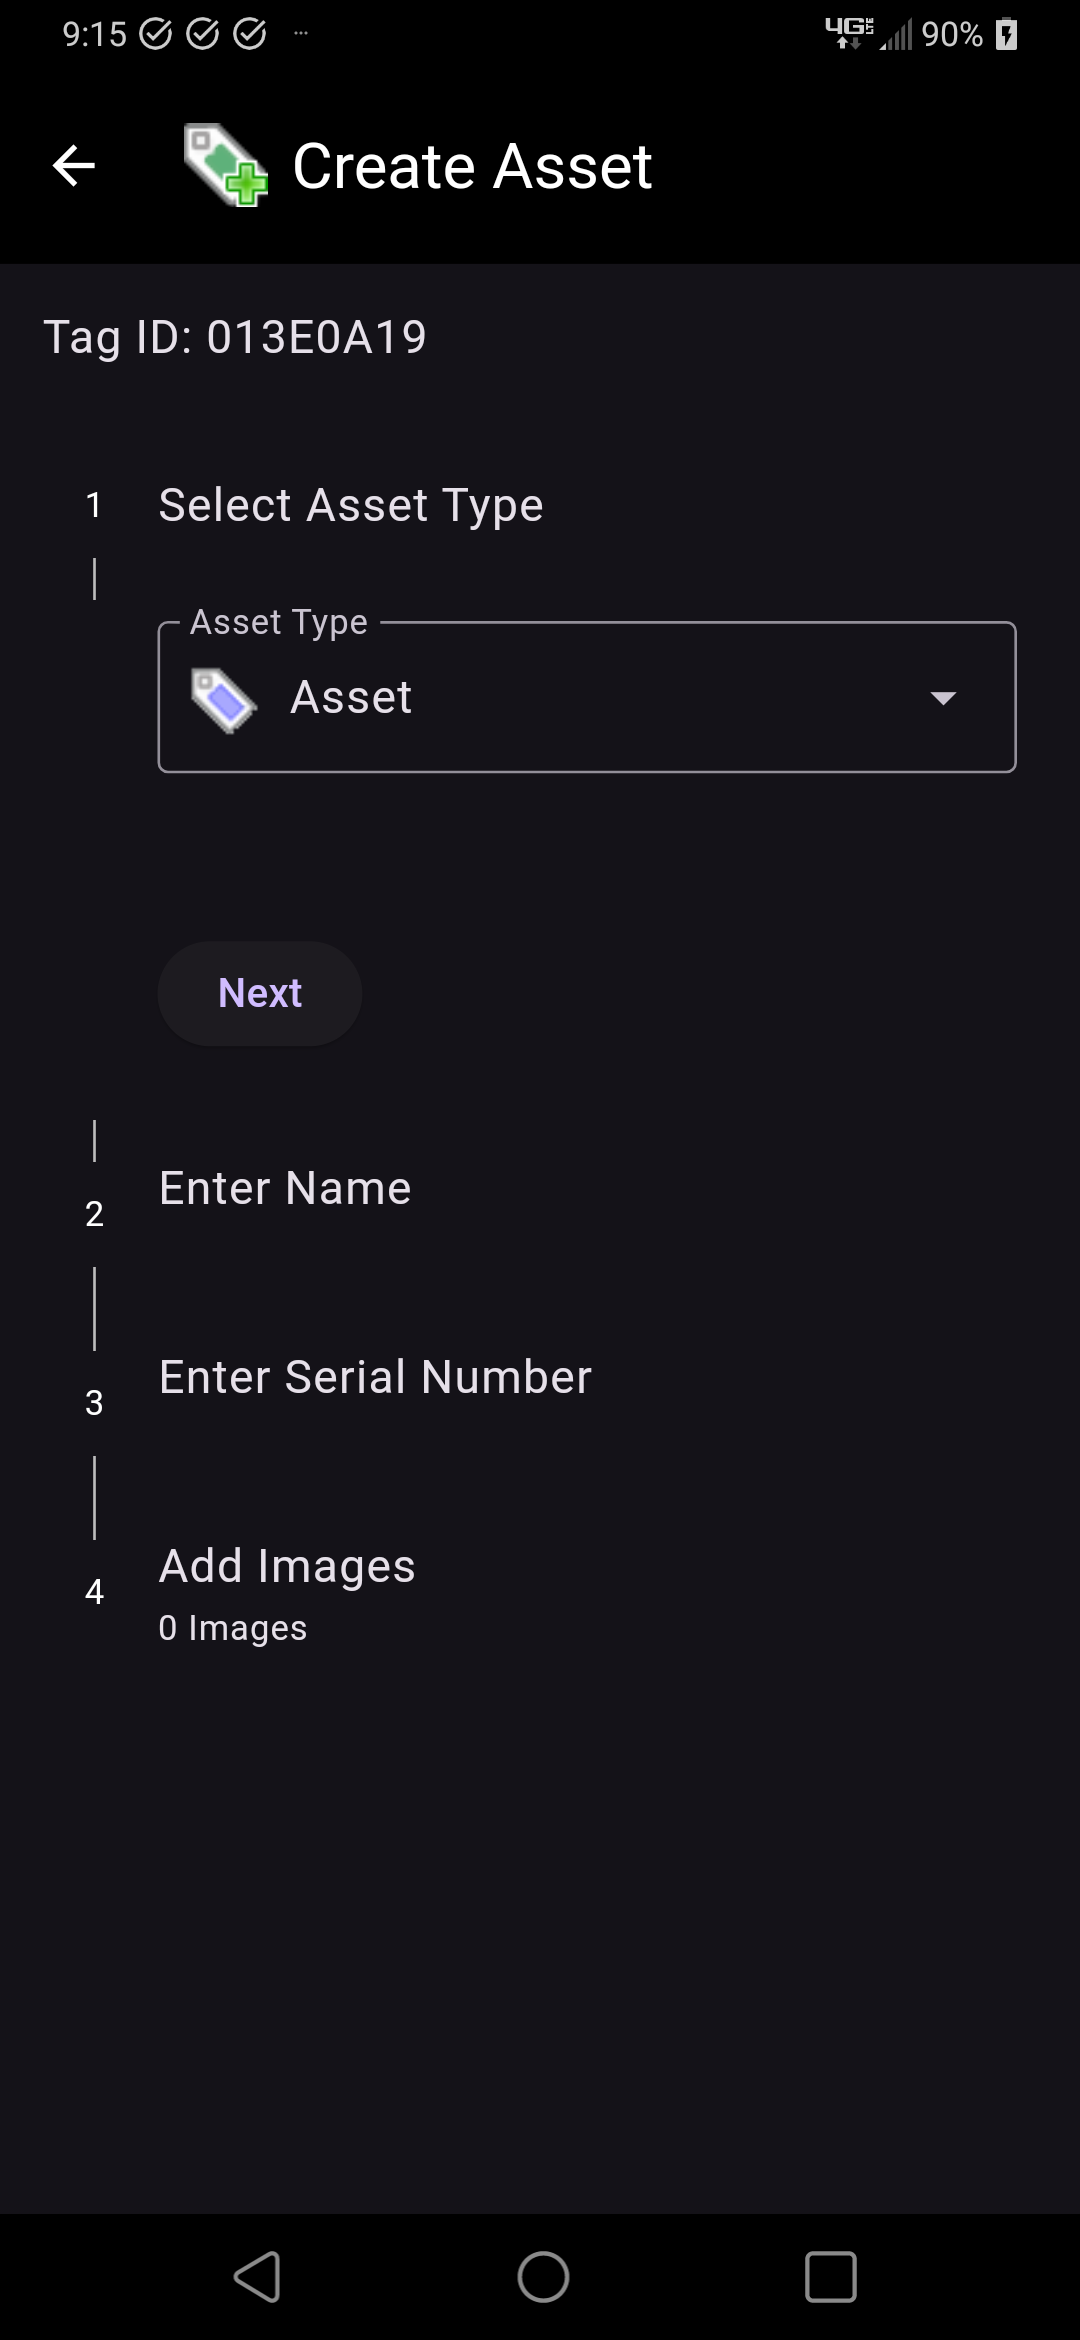
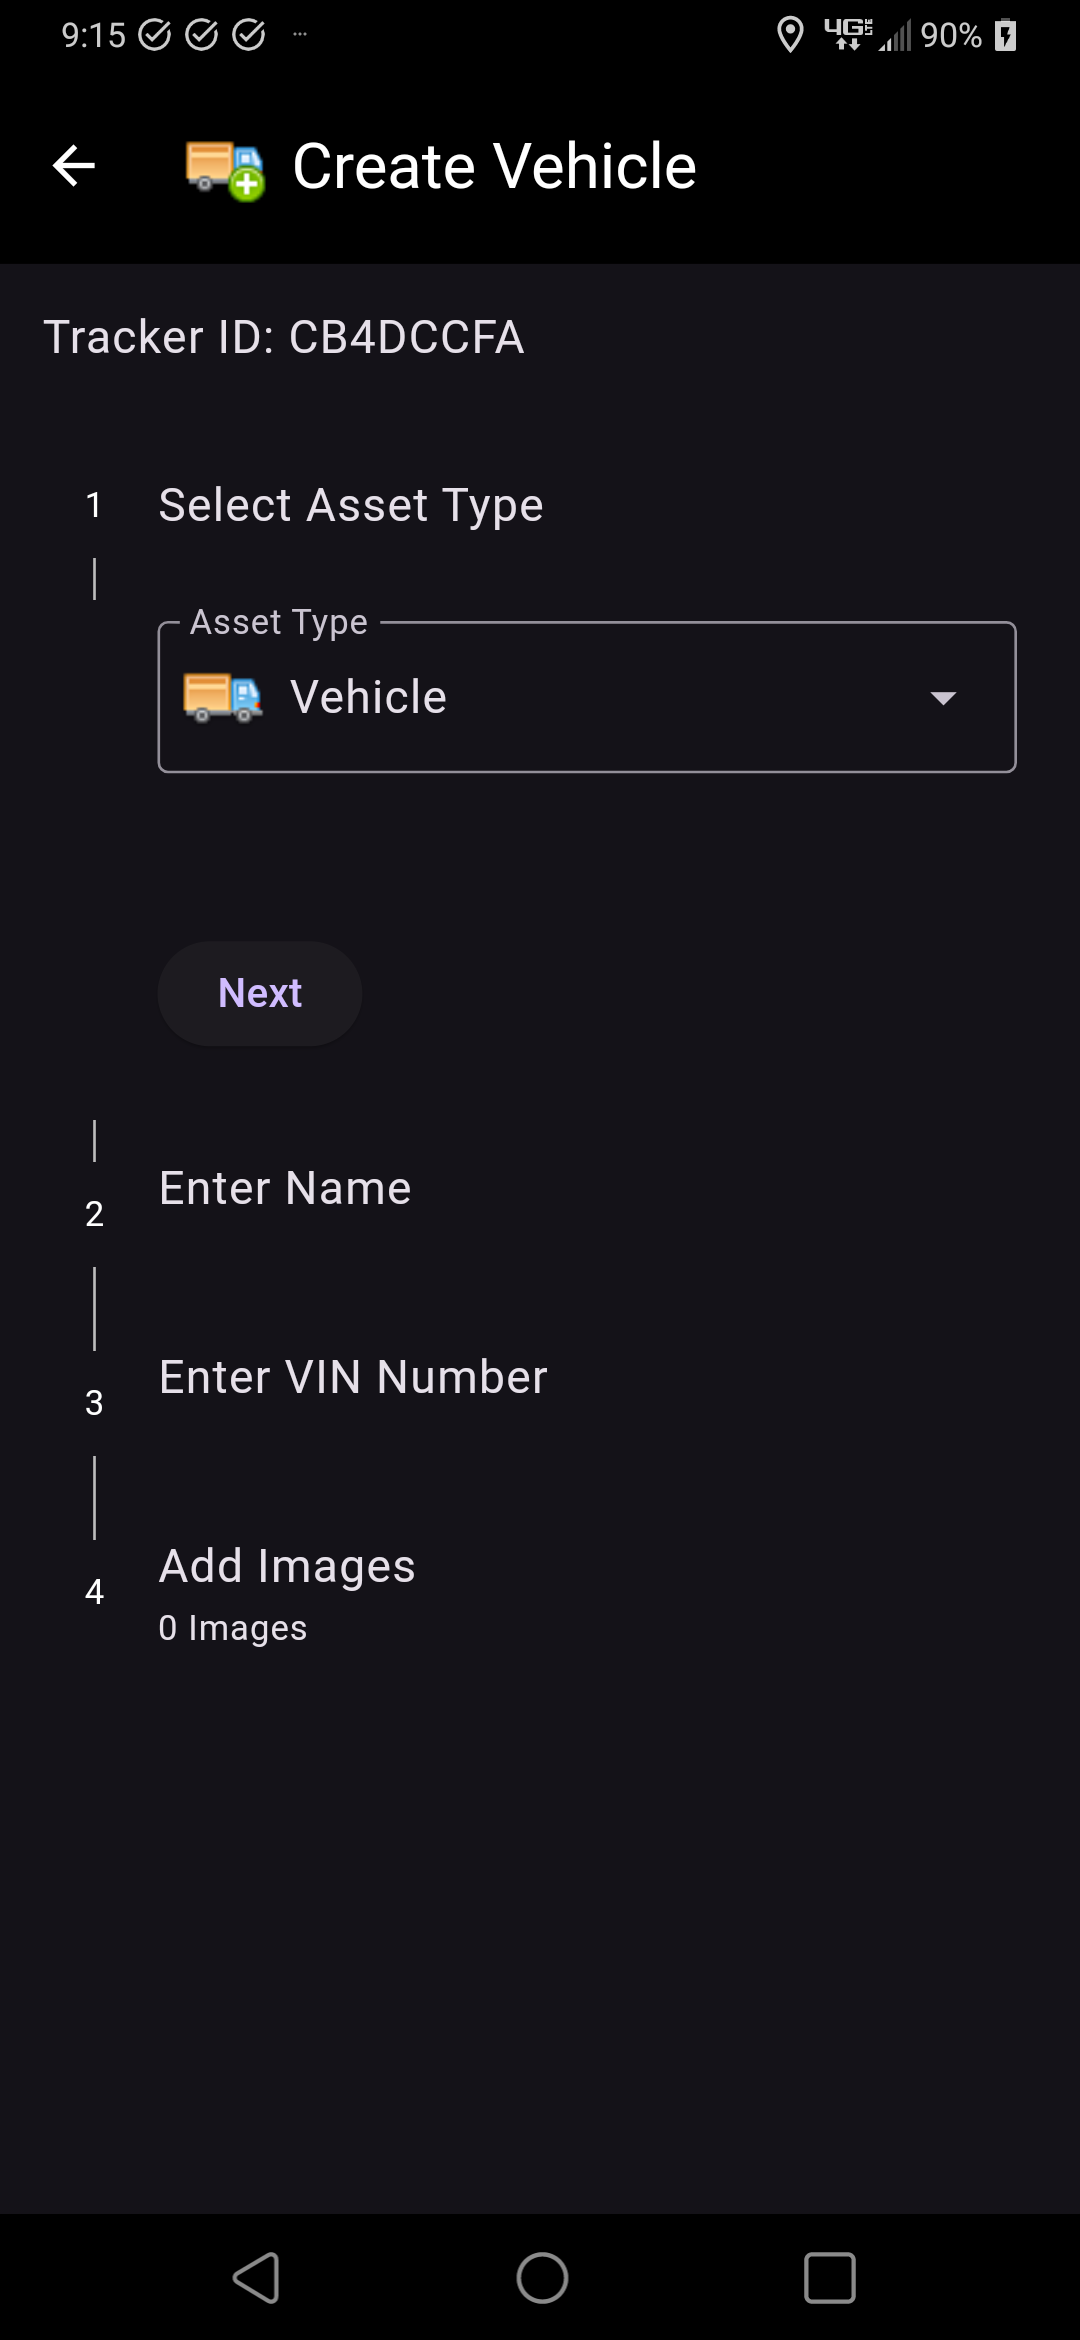
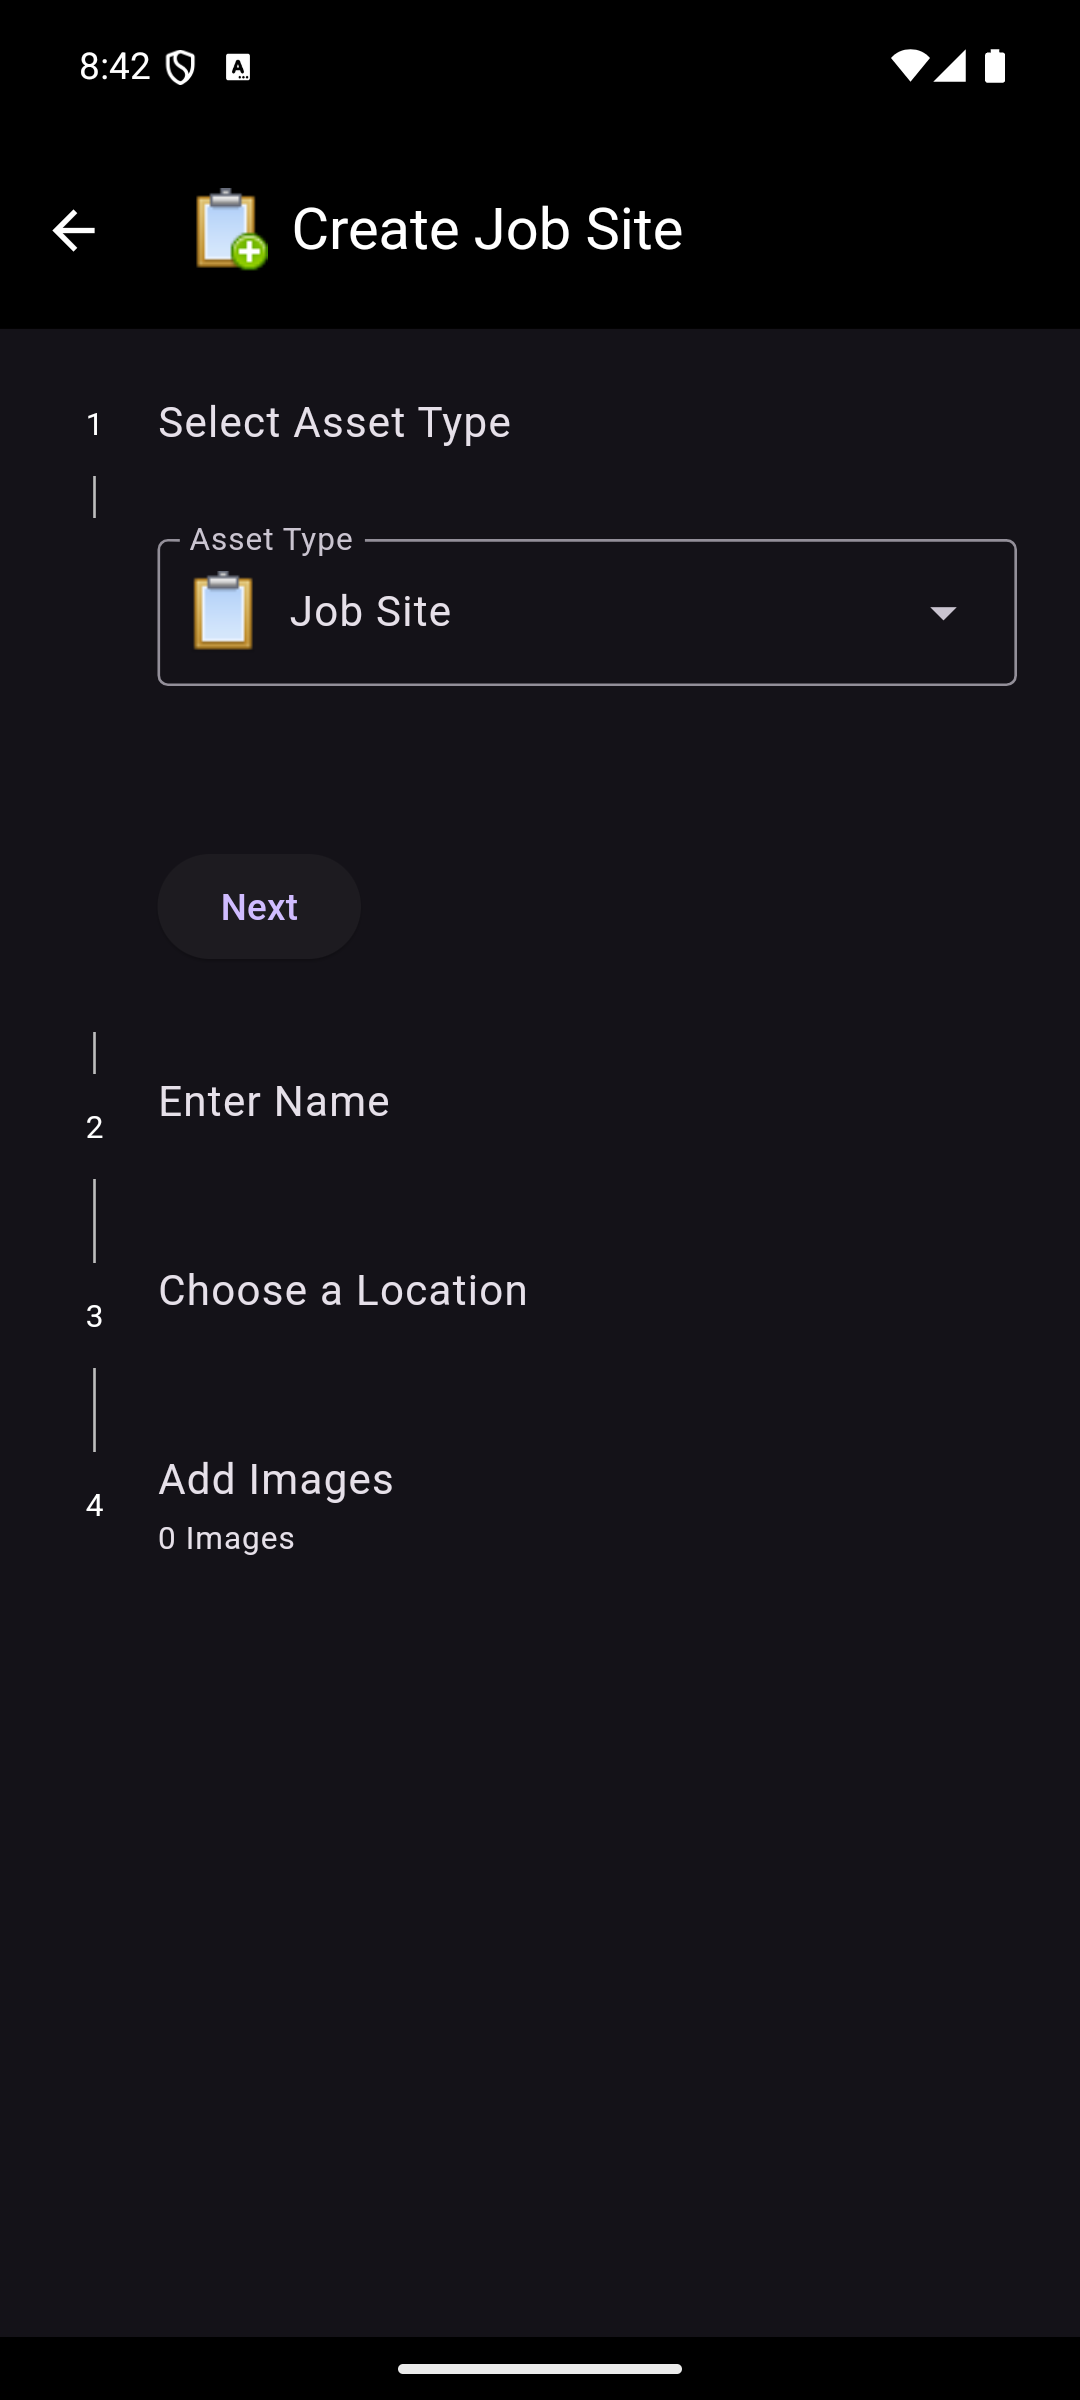
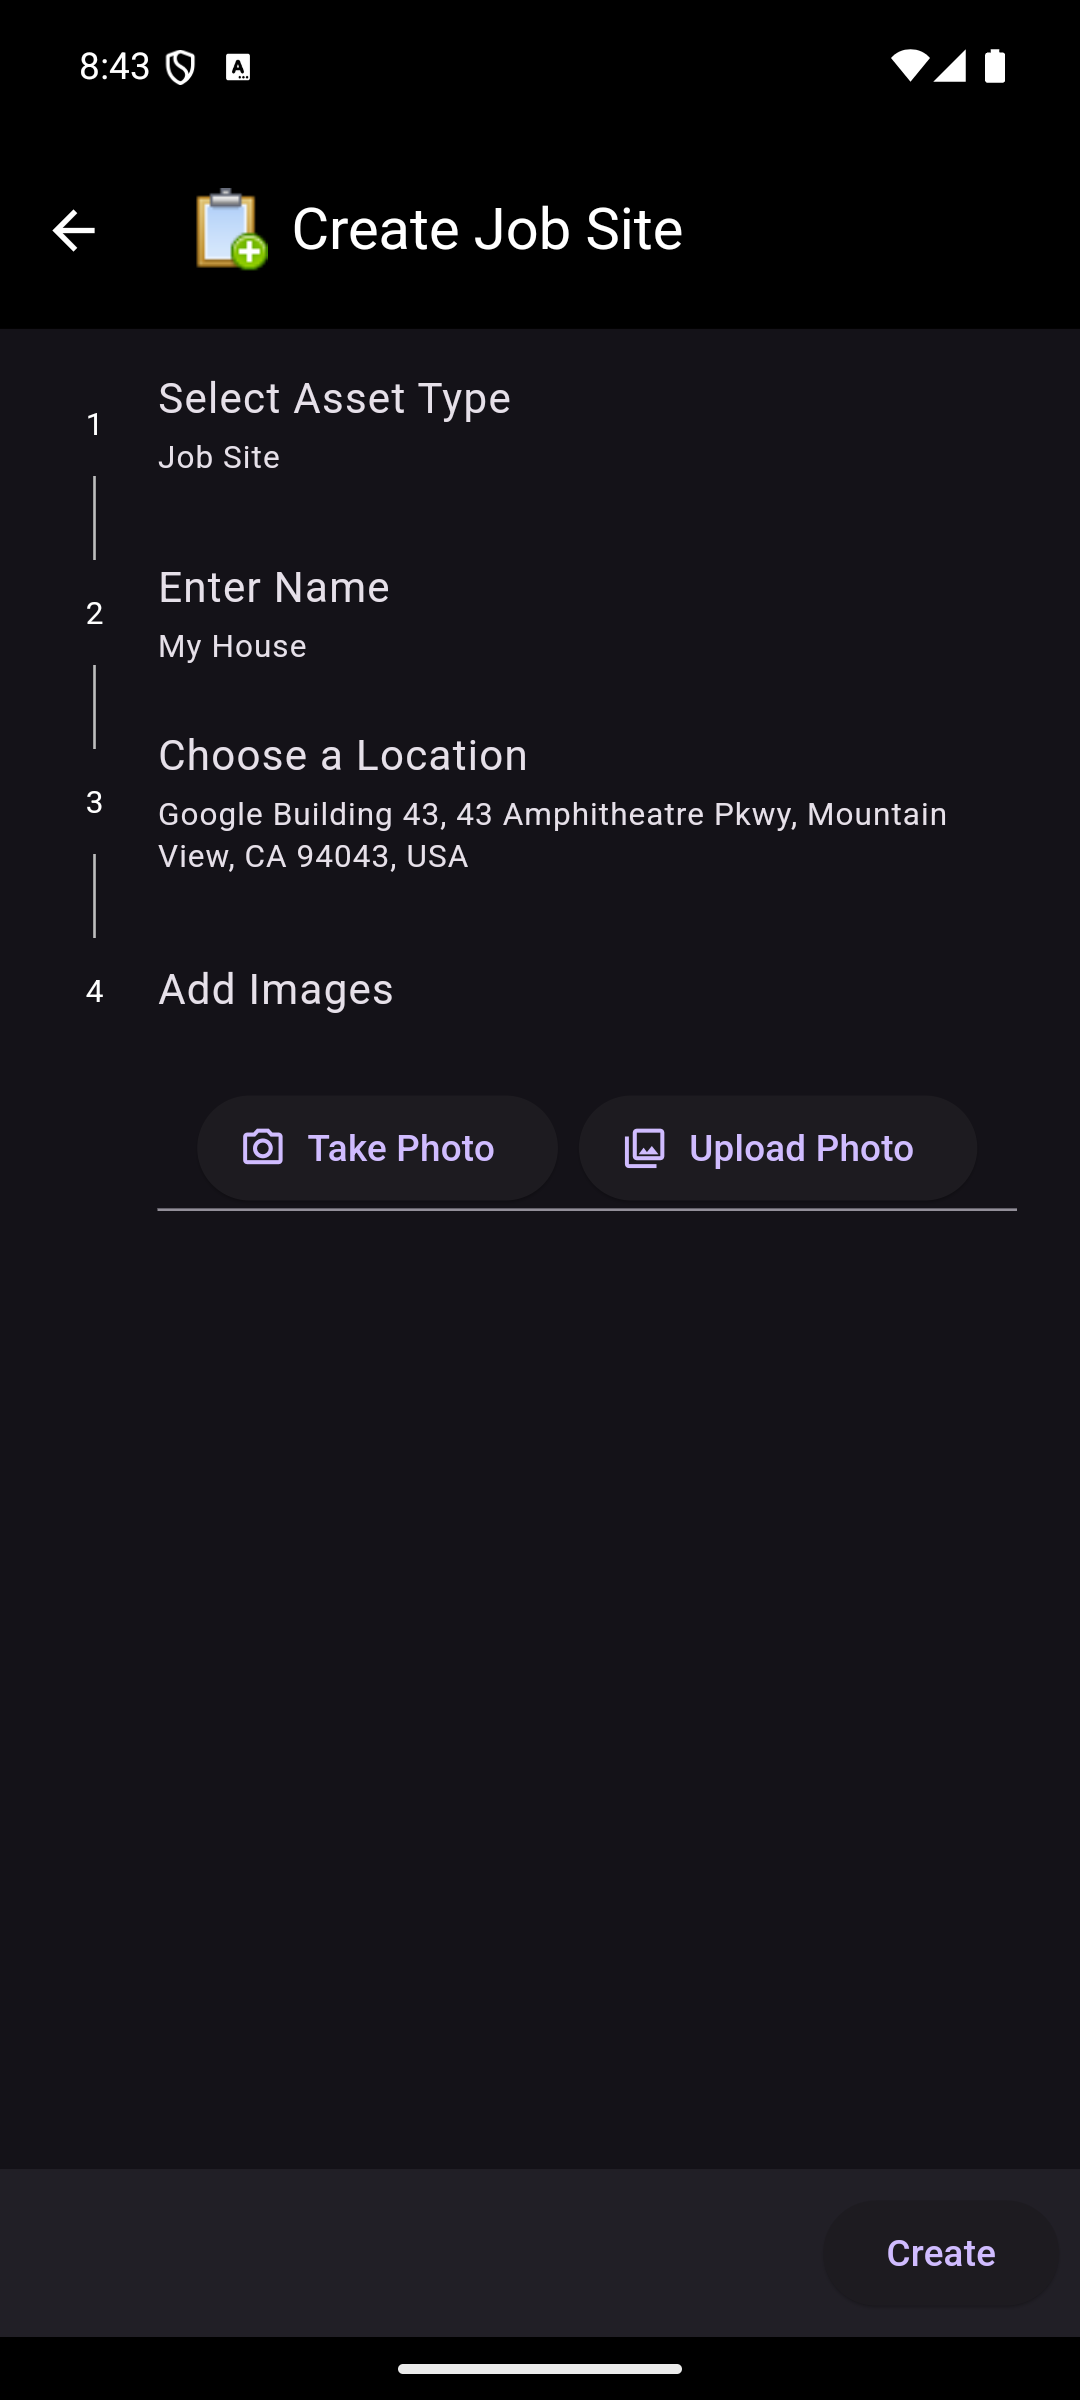
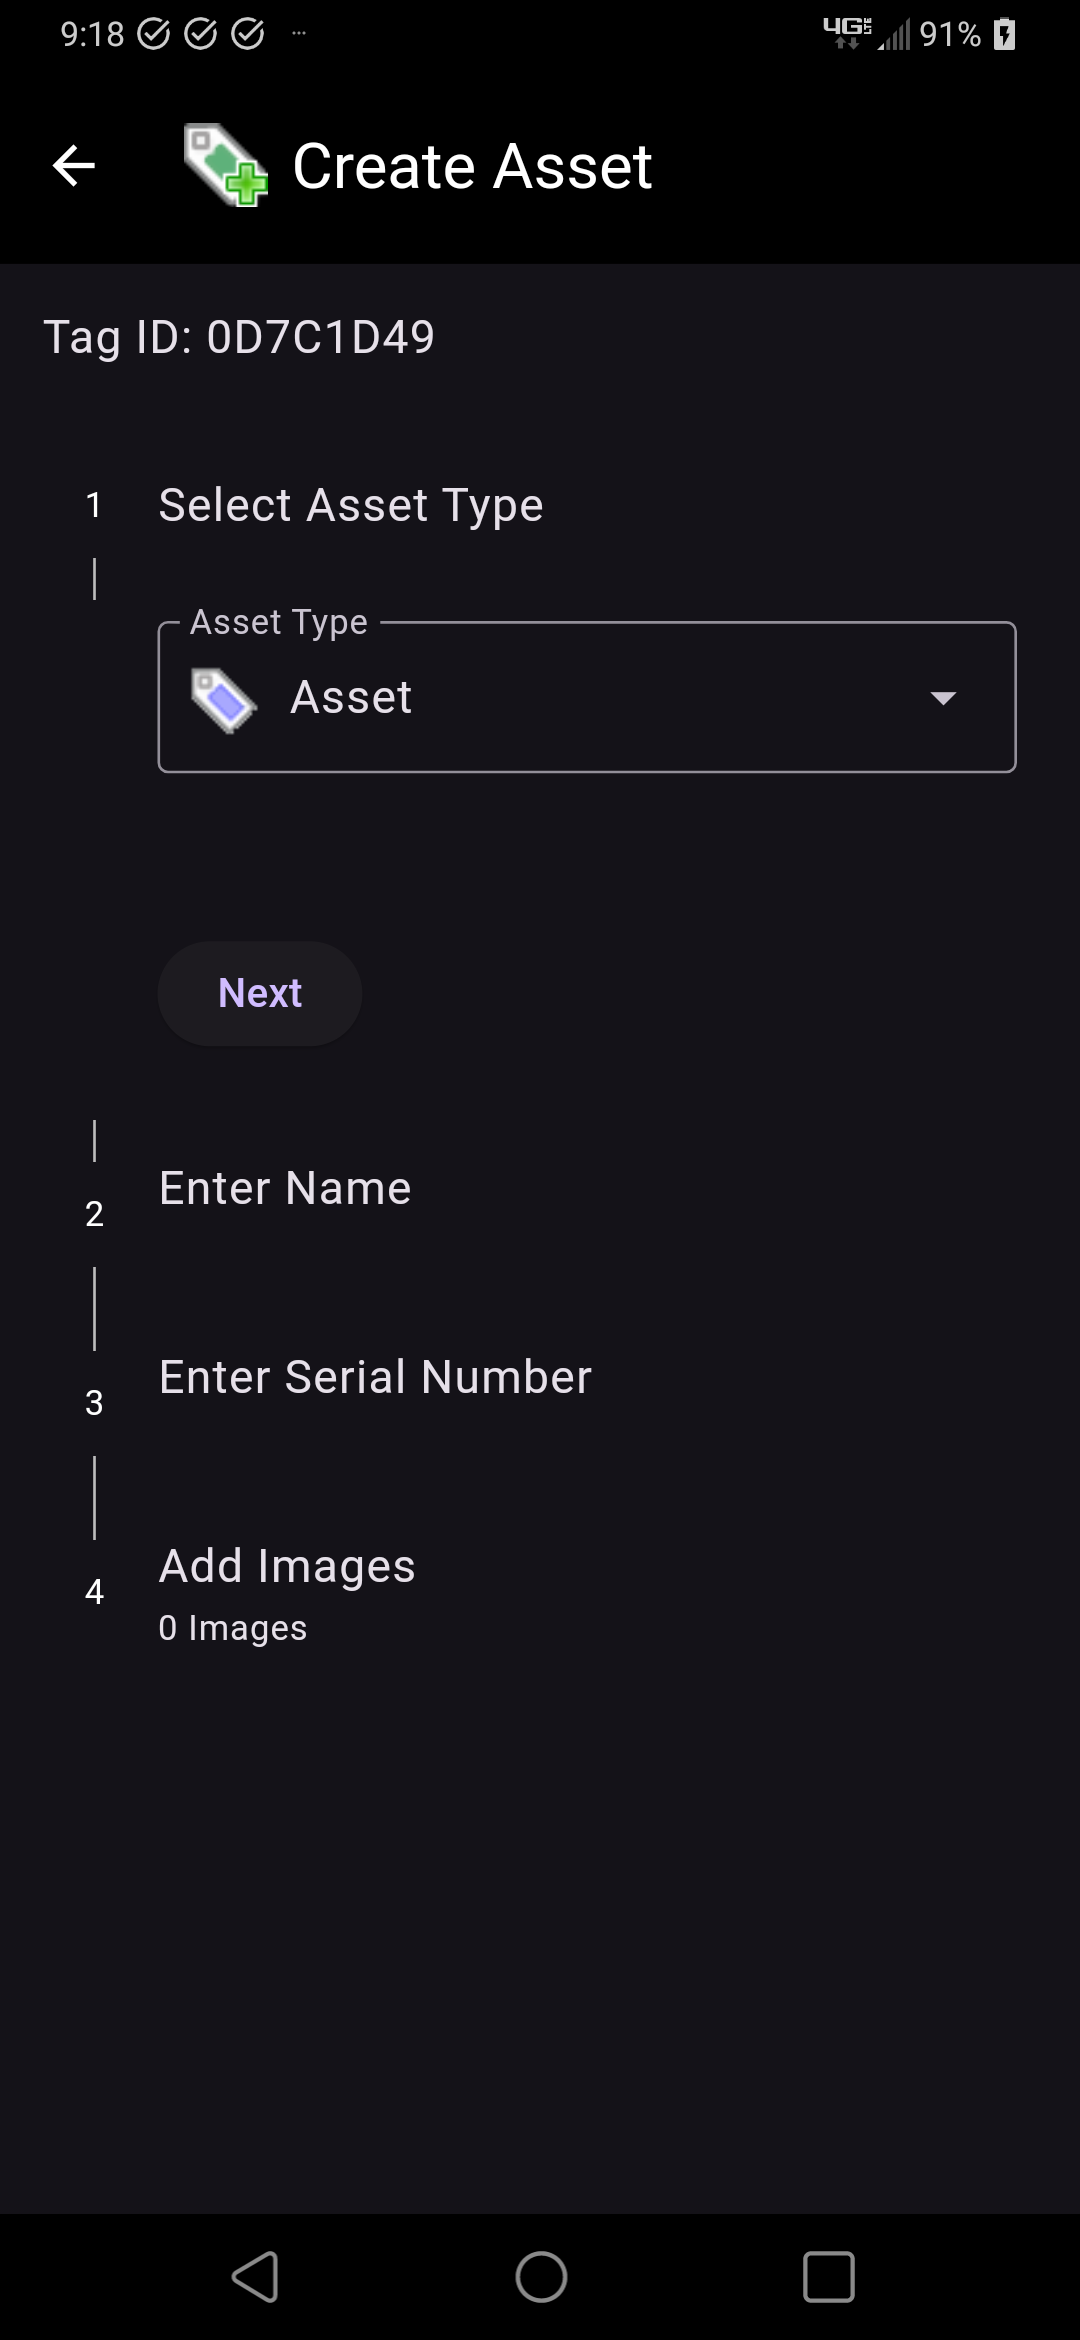
Create
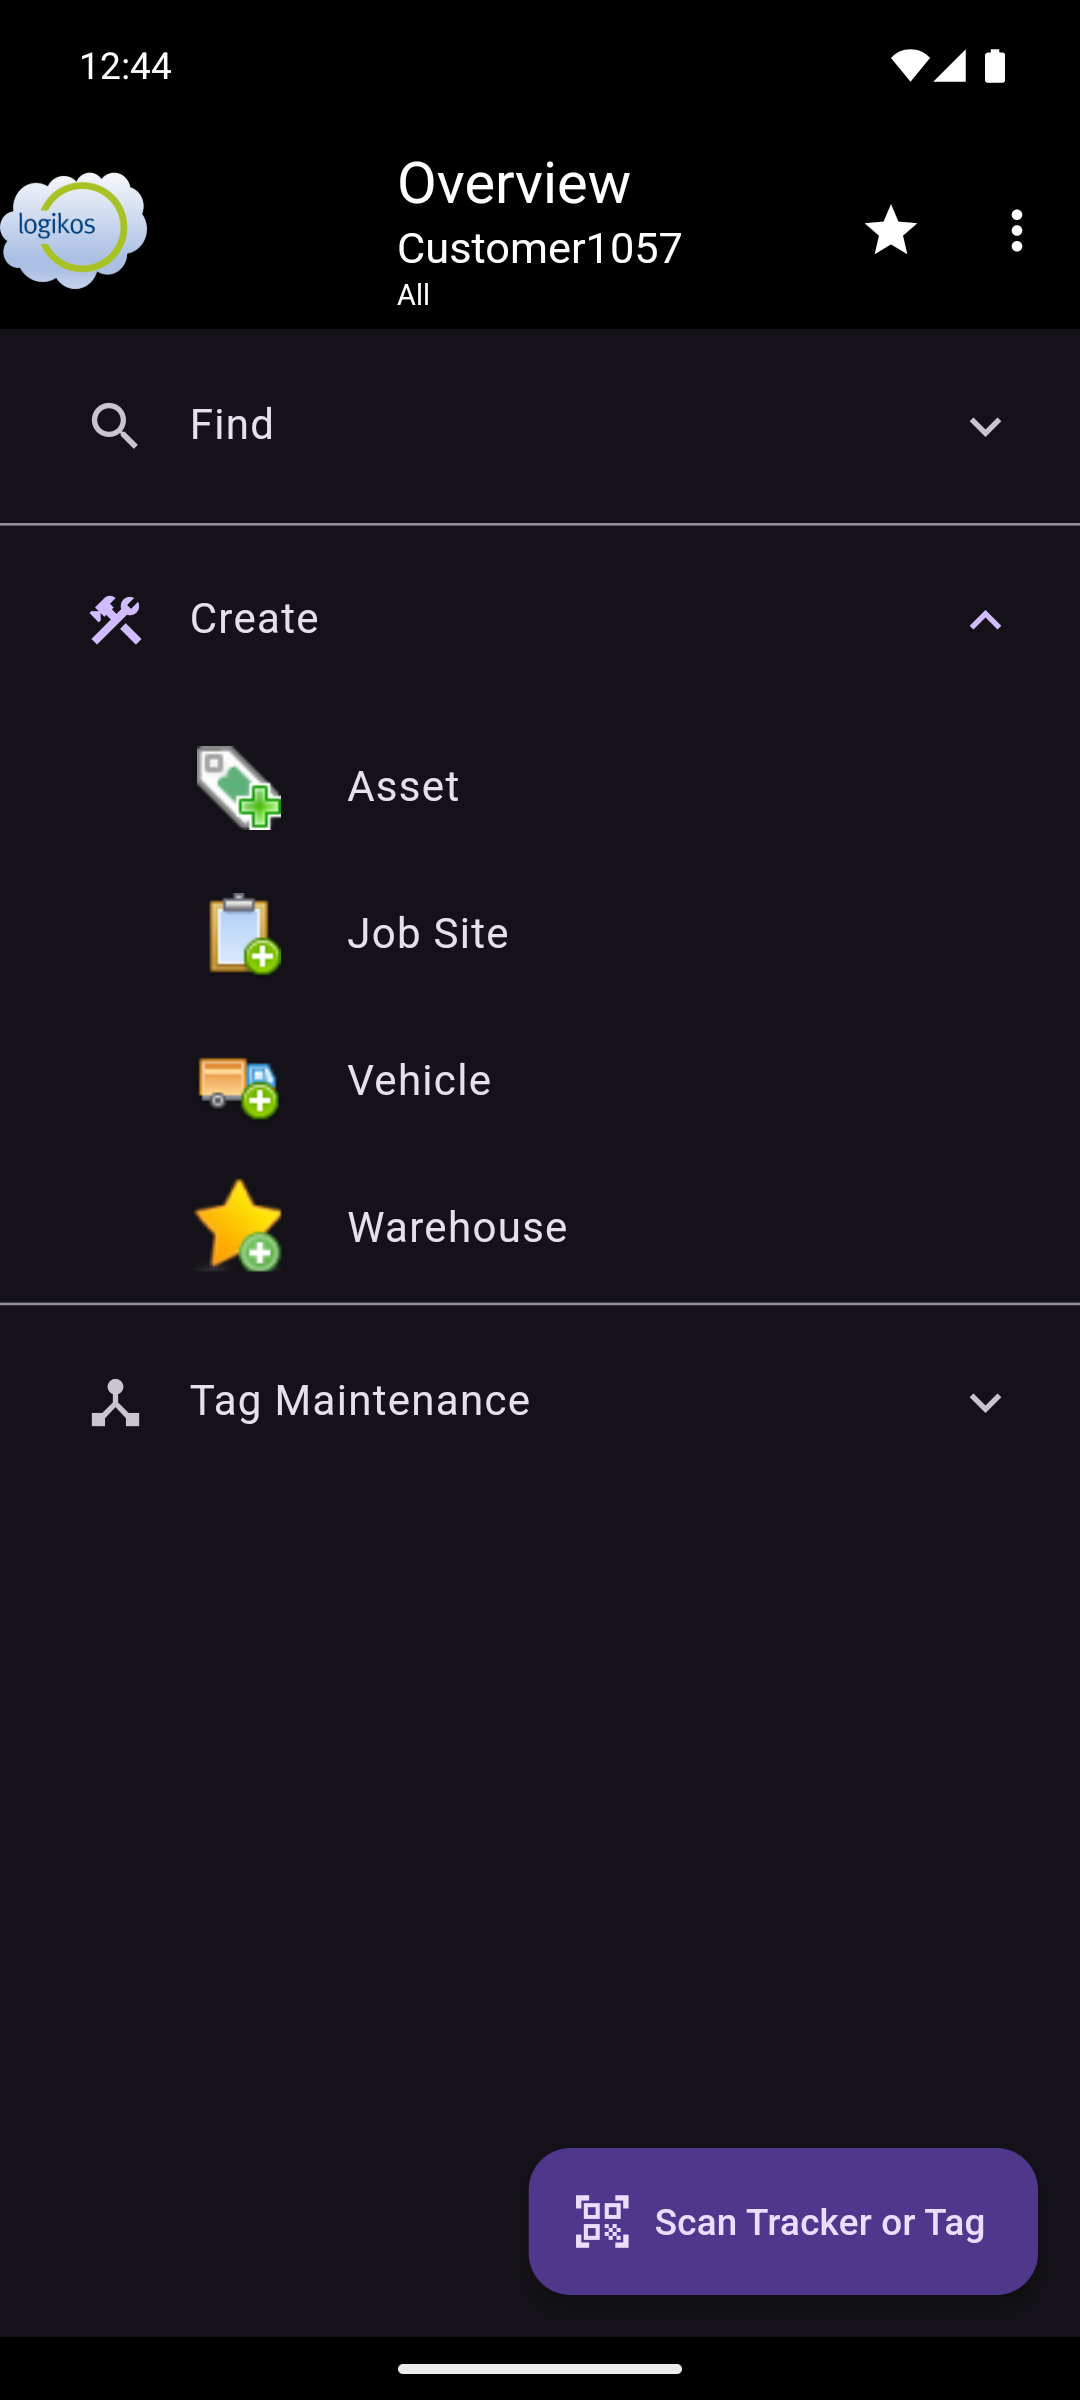

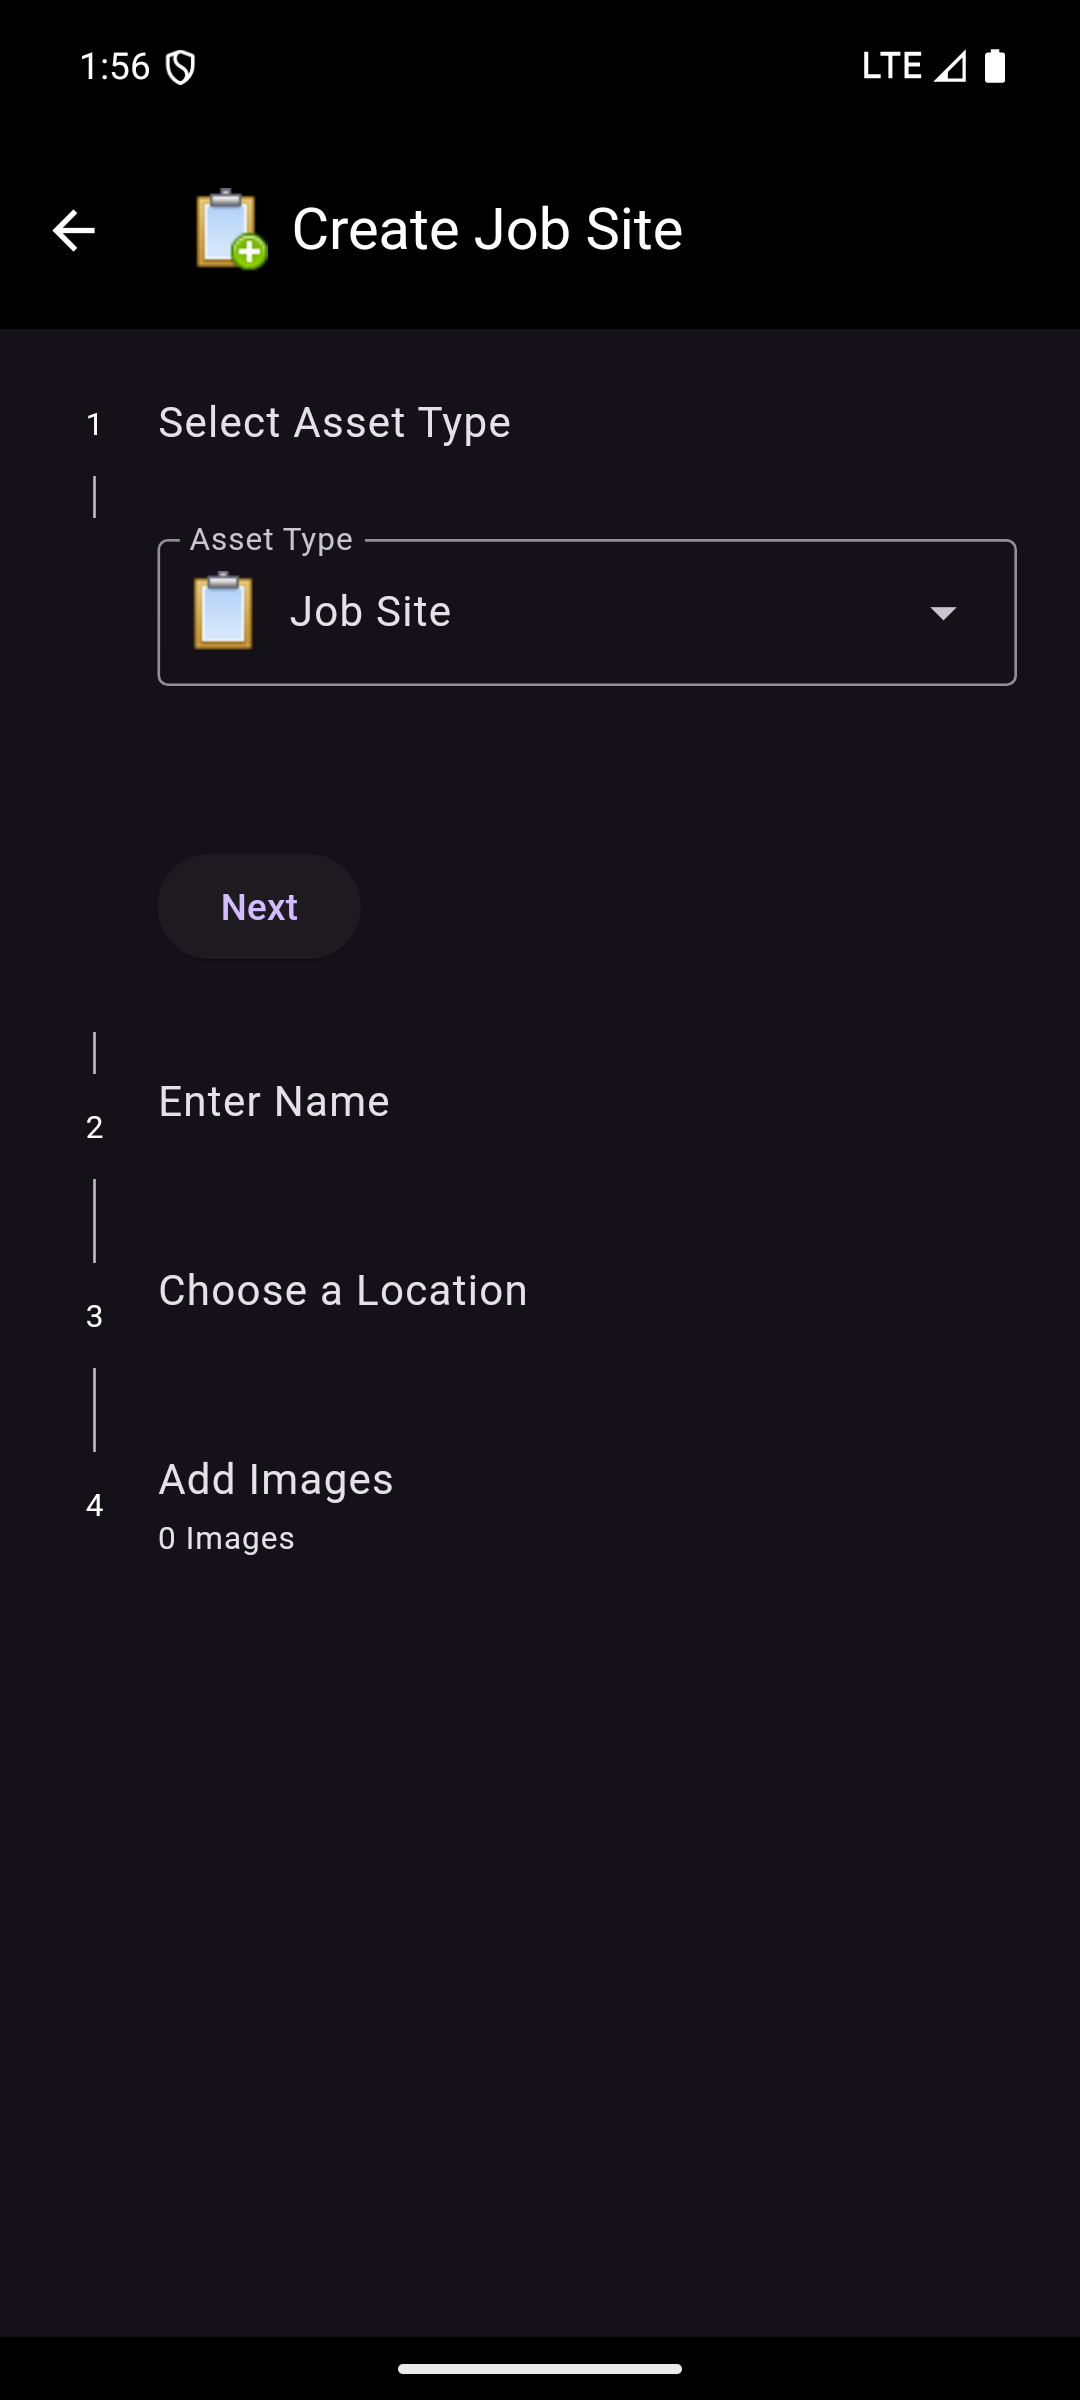
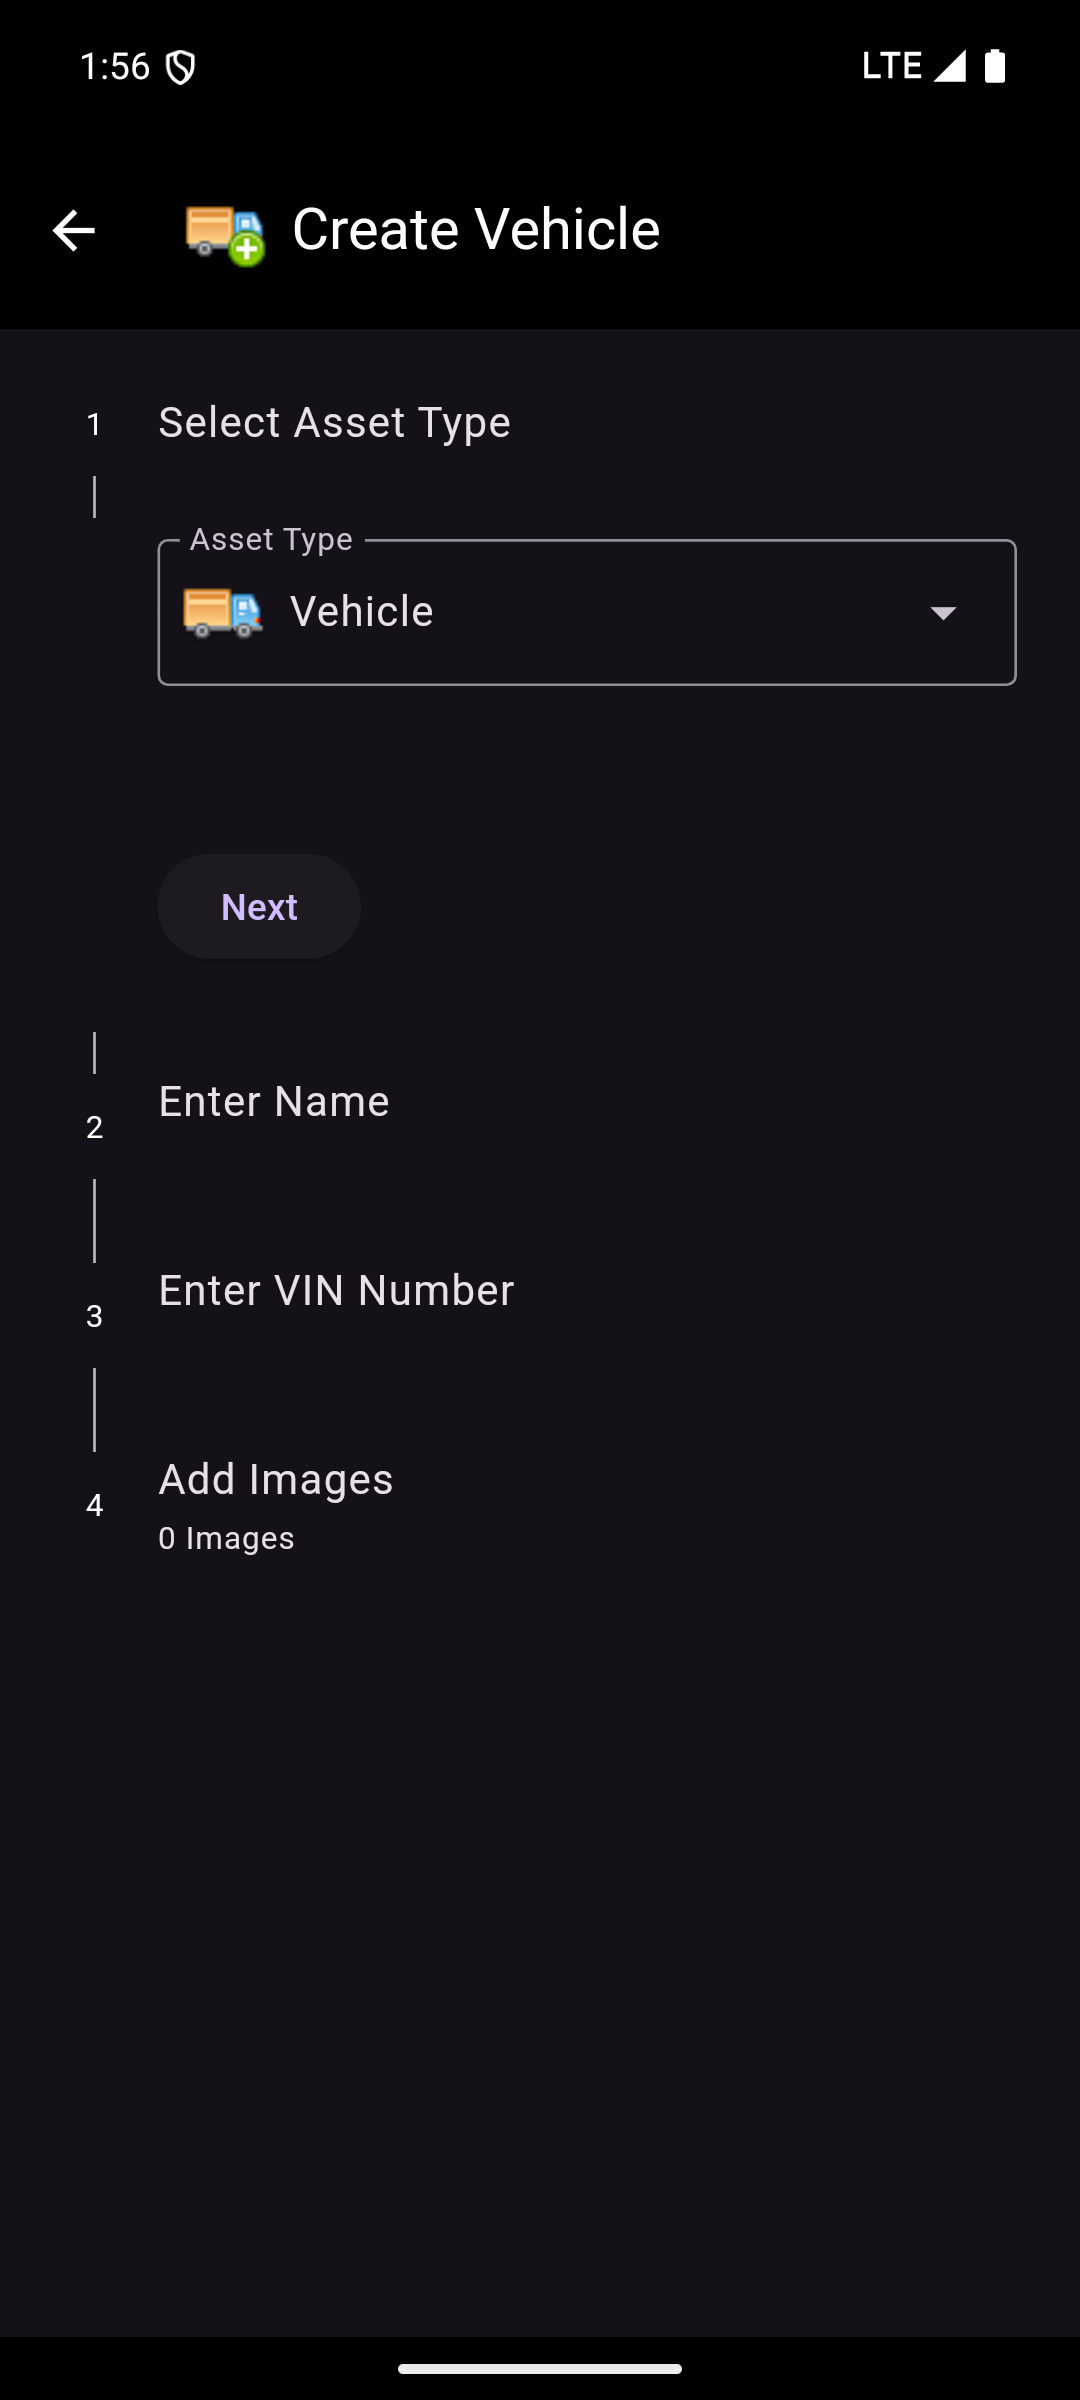
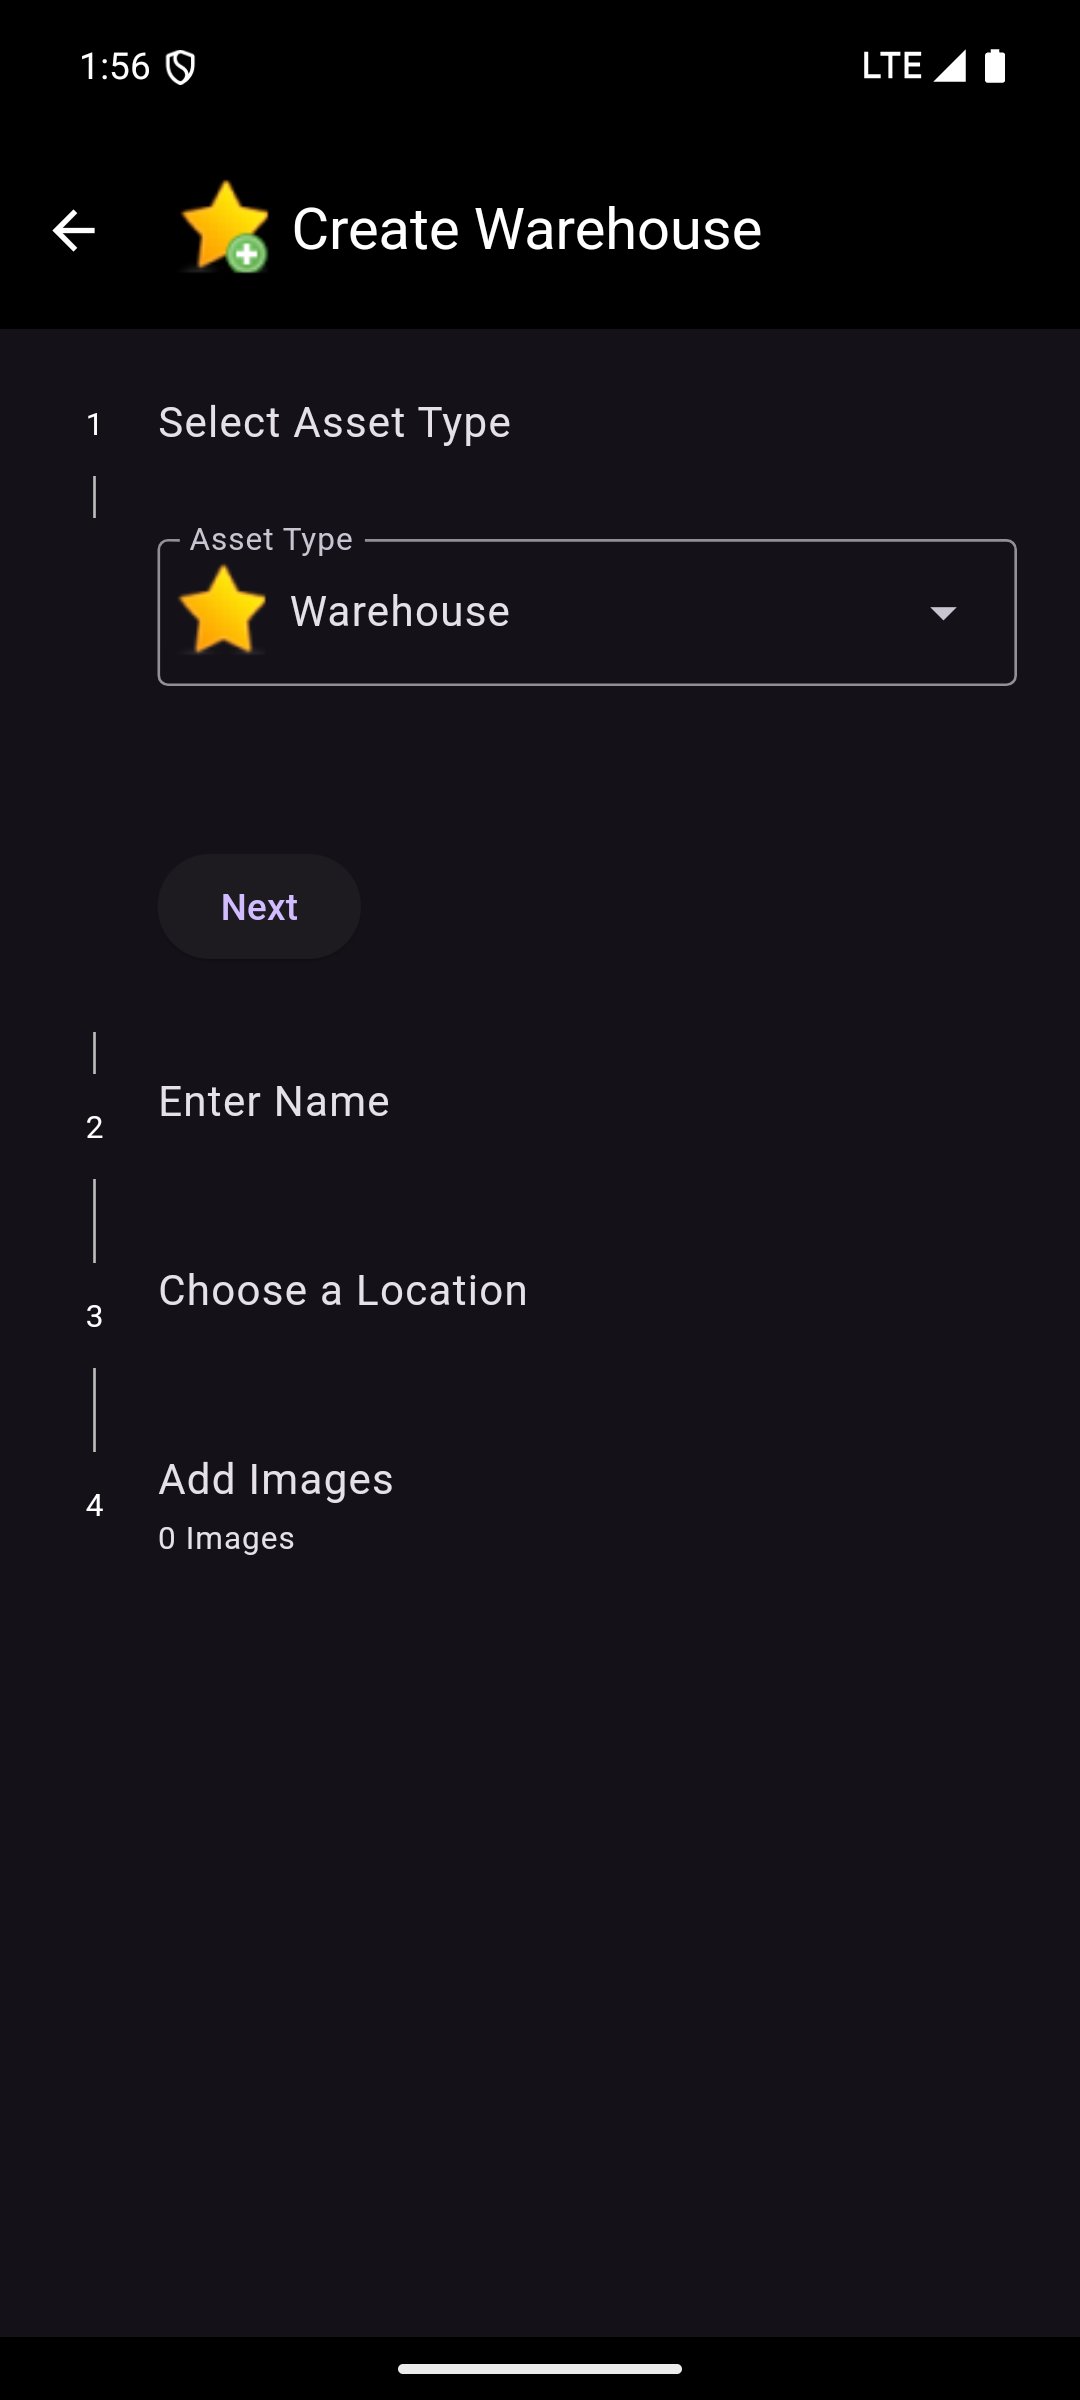
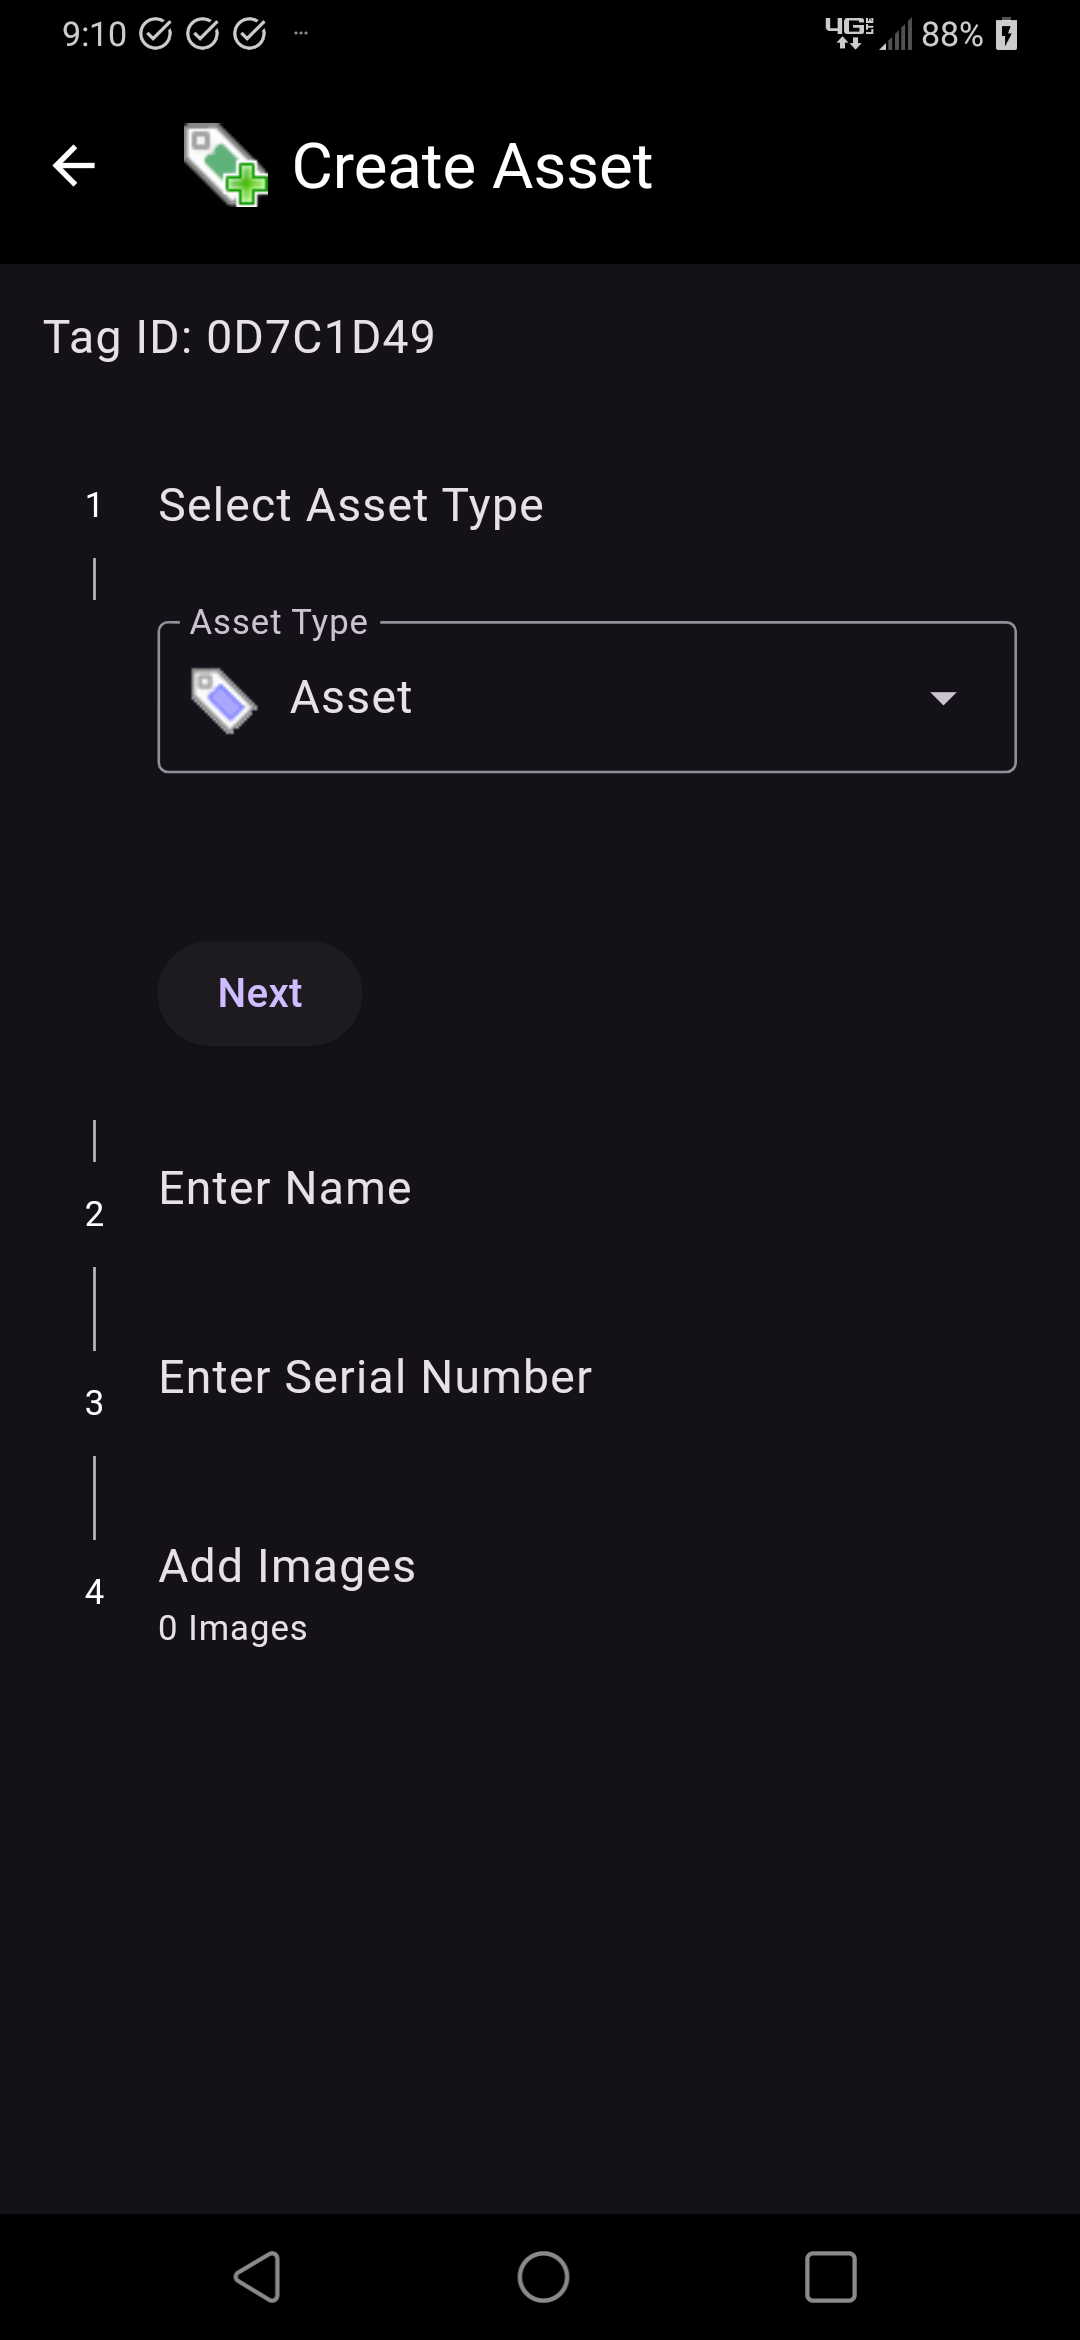
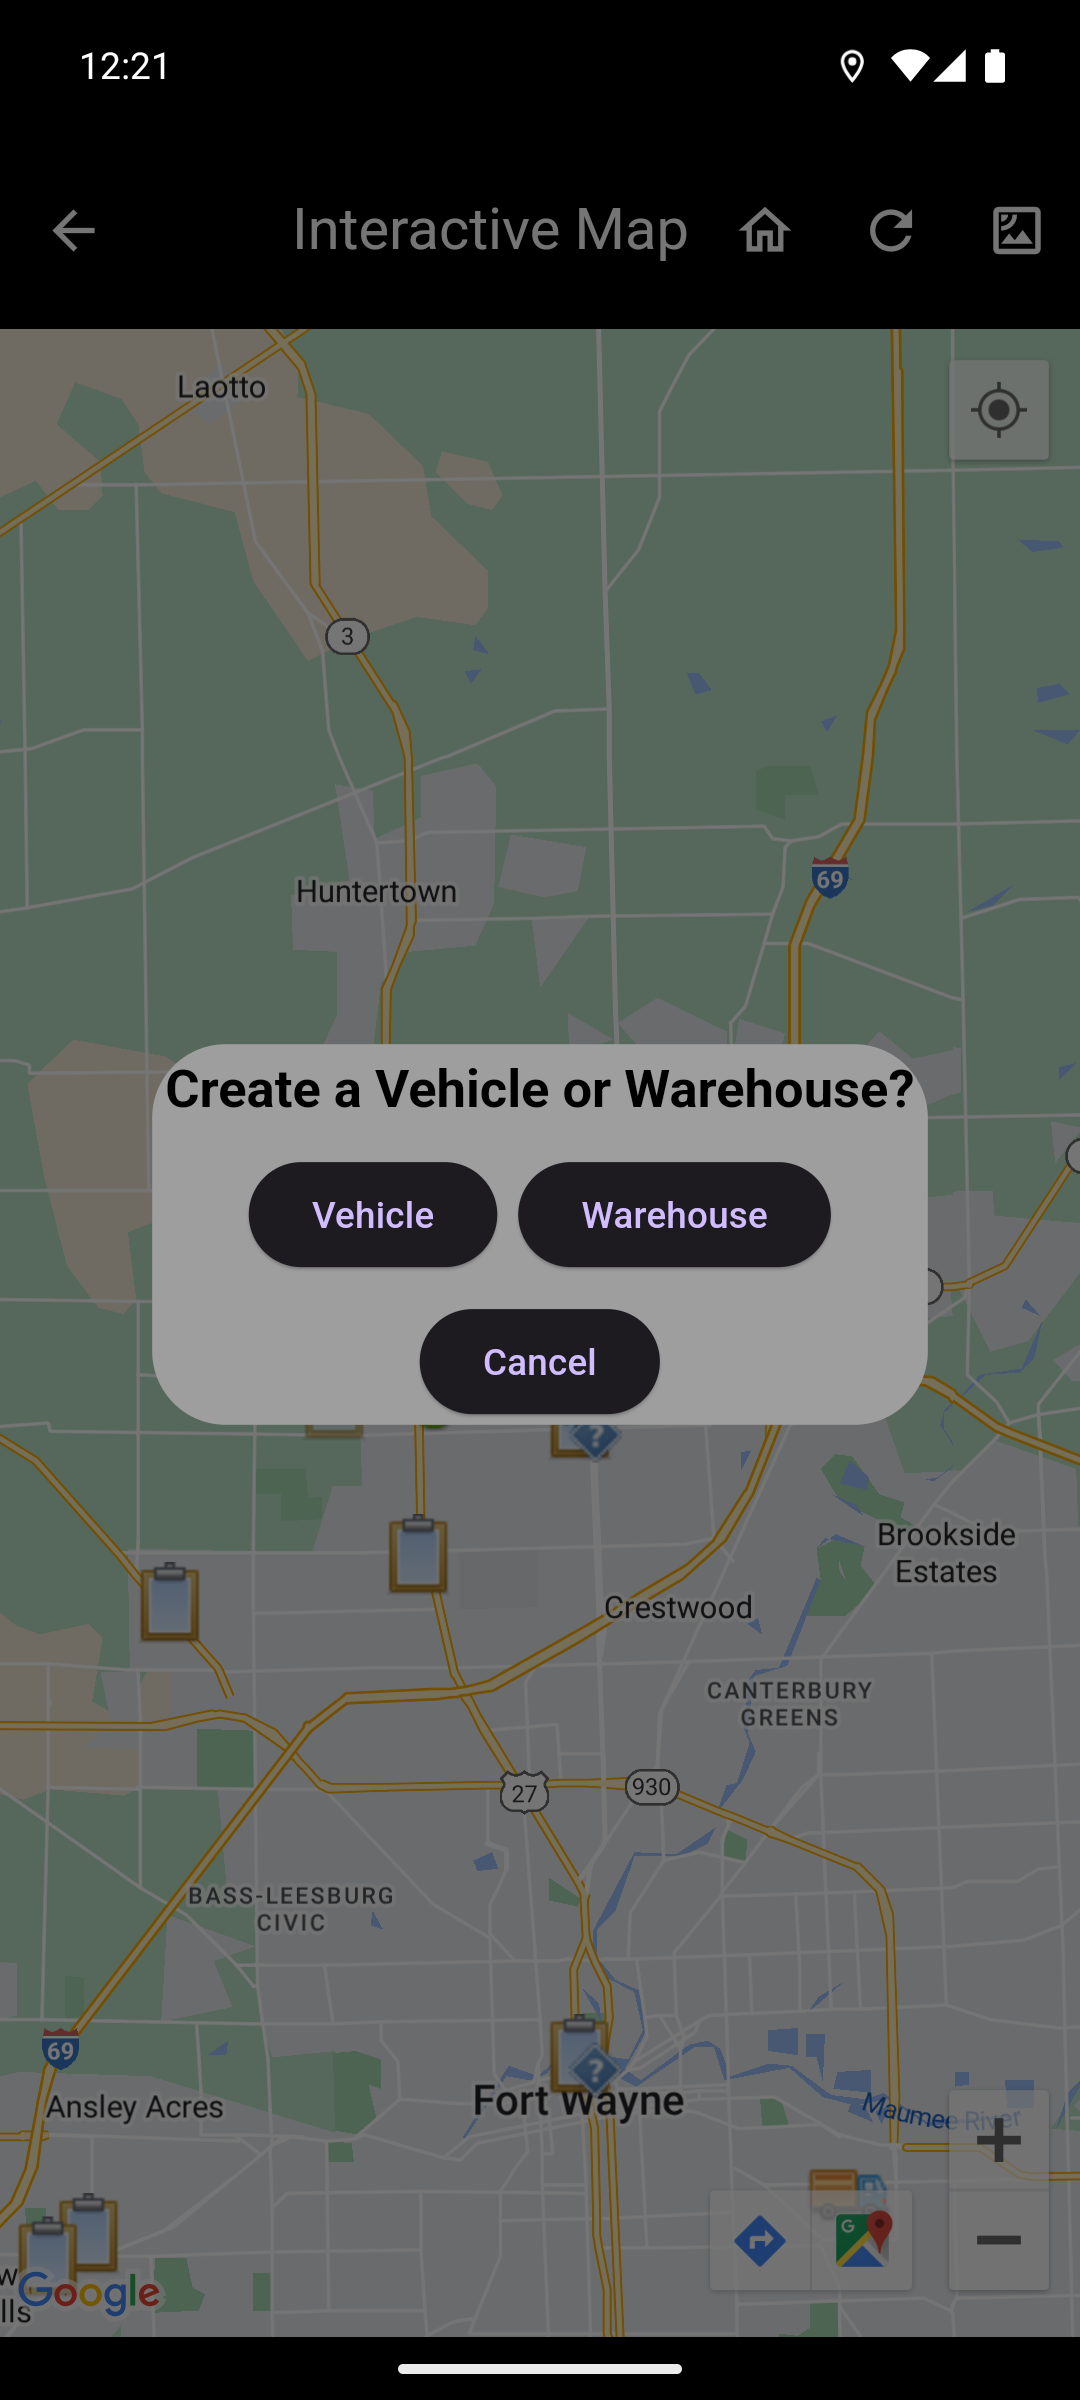
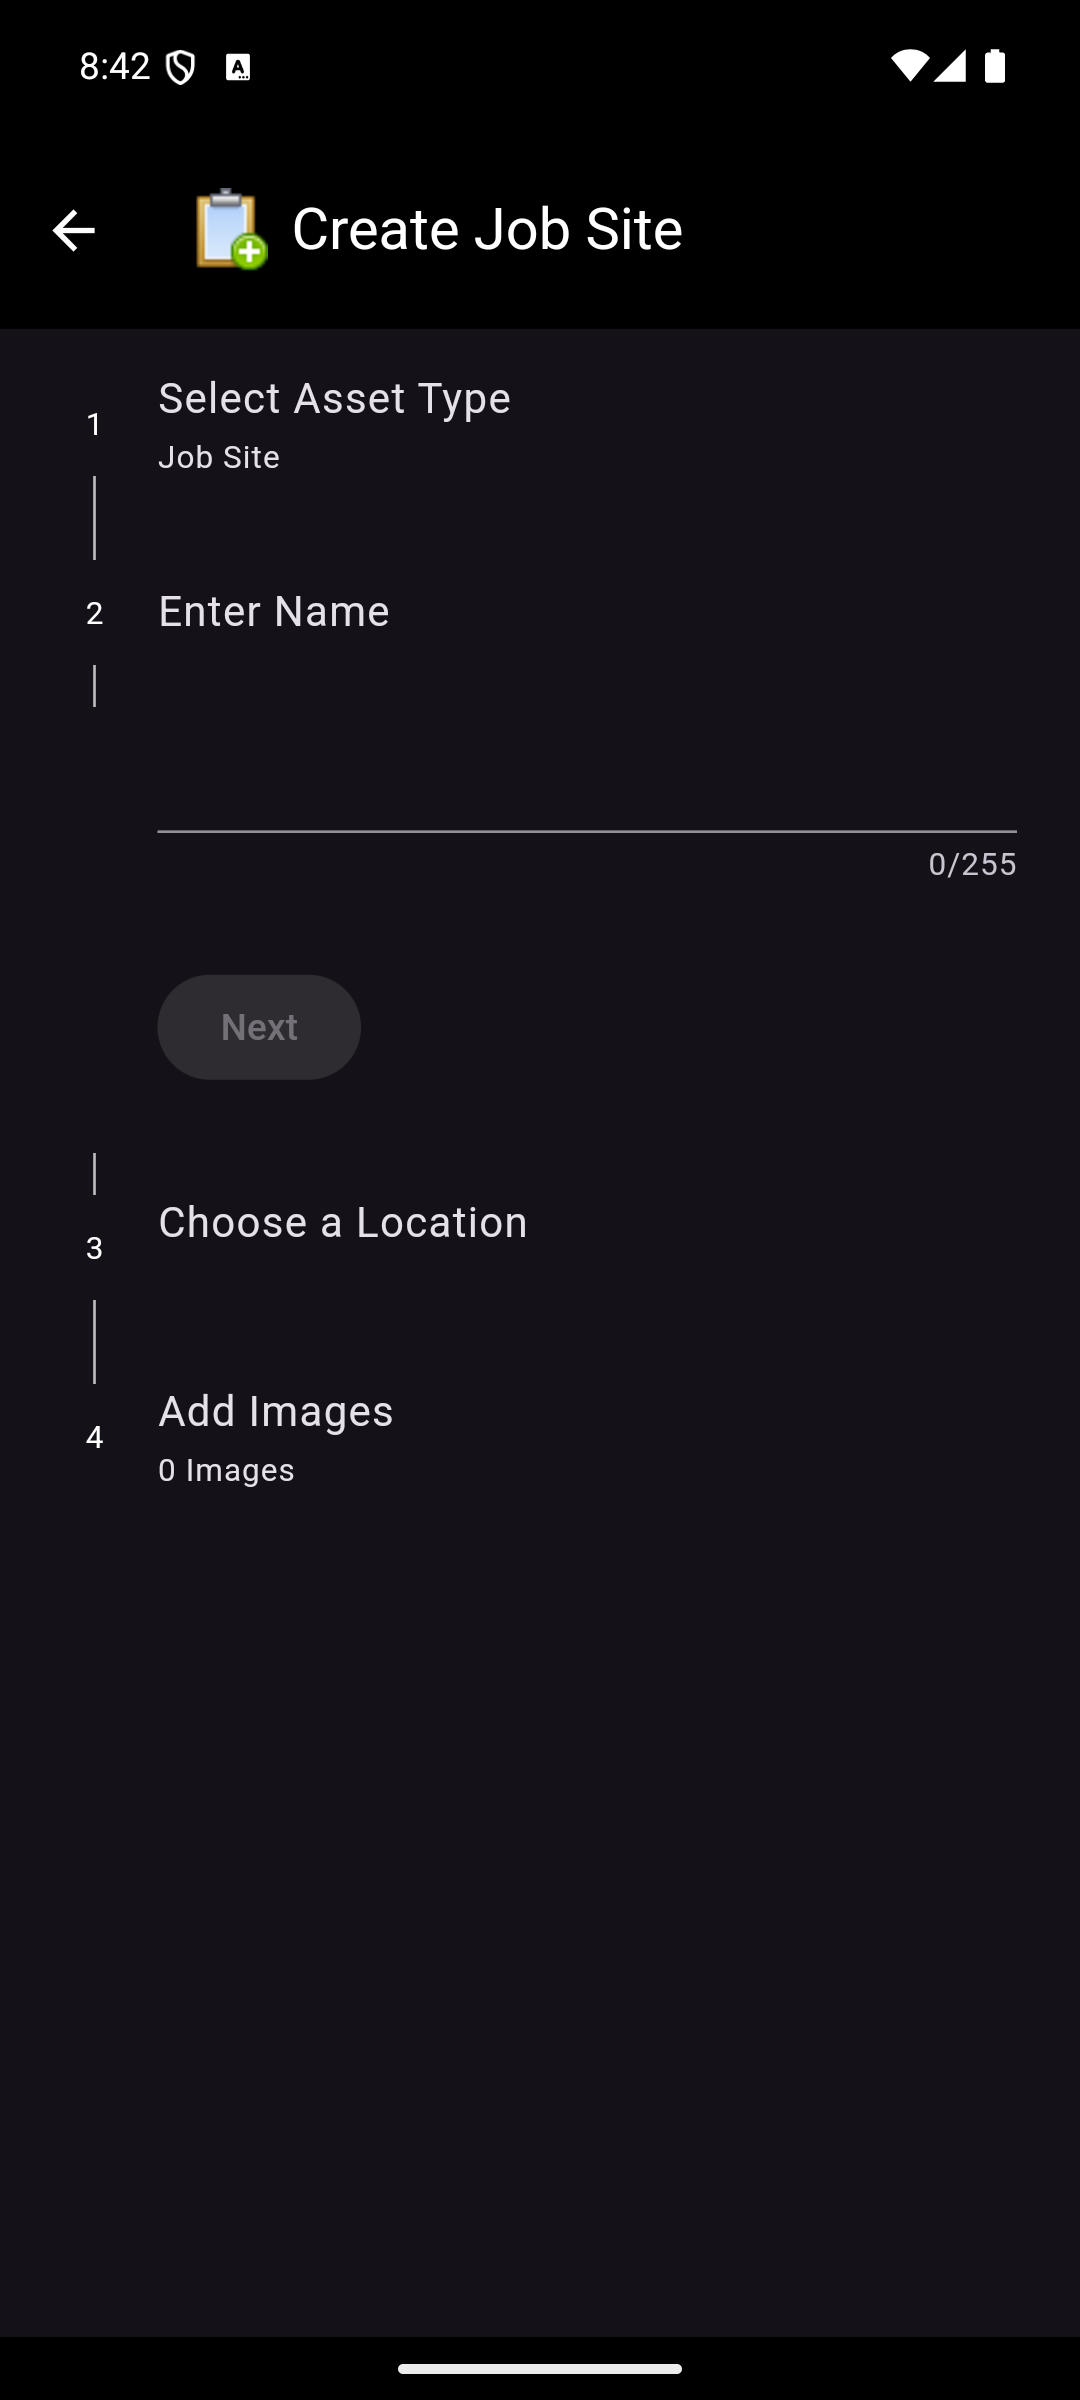
Create provides the ability to create assets for the current customer and group. Create is only available to users with the appropriate permissions. To start creating an asset, select the type of asset to create. From there, a more specific asset type can be selected, and a name can be specified. There are additional fields depending on what type of asset is being created.
- Asset has the option to add a serial number. This can be entered using the barcode scanner.
- Job Site has the required step of adding a location.
- Vehicle has the option to add a VIN number, make, model, and year. The VIN number can be entered using the barcode scanner.
- Warehouse has the required step of adding a location.
Lastly, images of the asset can be taken. Once all steps are complete, the asset can be created by tapping the Create button.
NOTE: The sub-sections below describe the two options on providing location.
Using Mobile Location
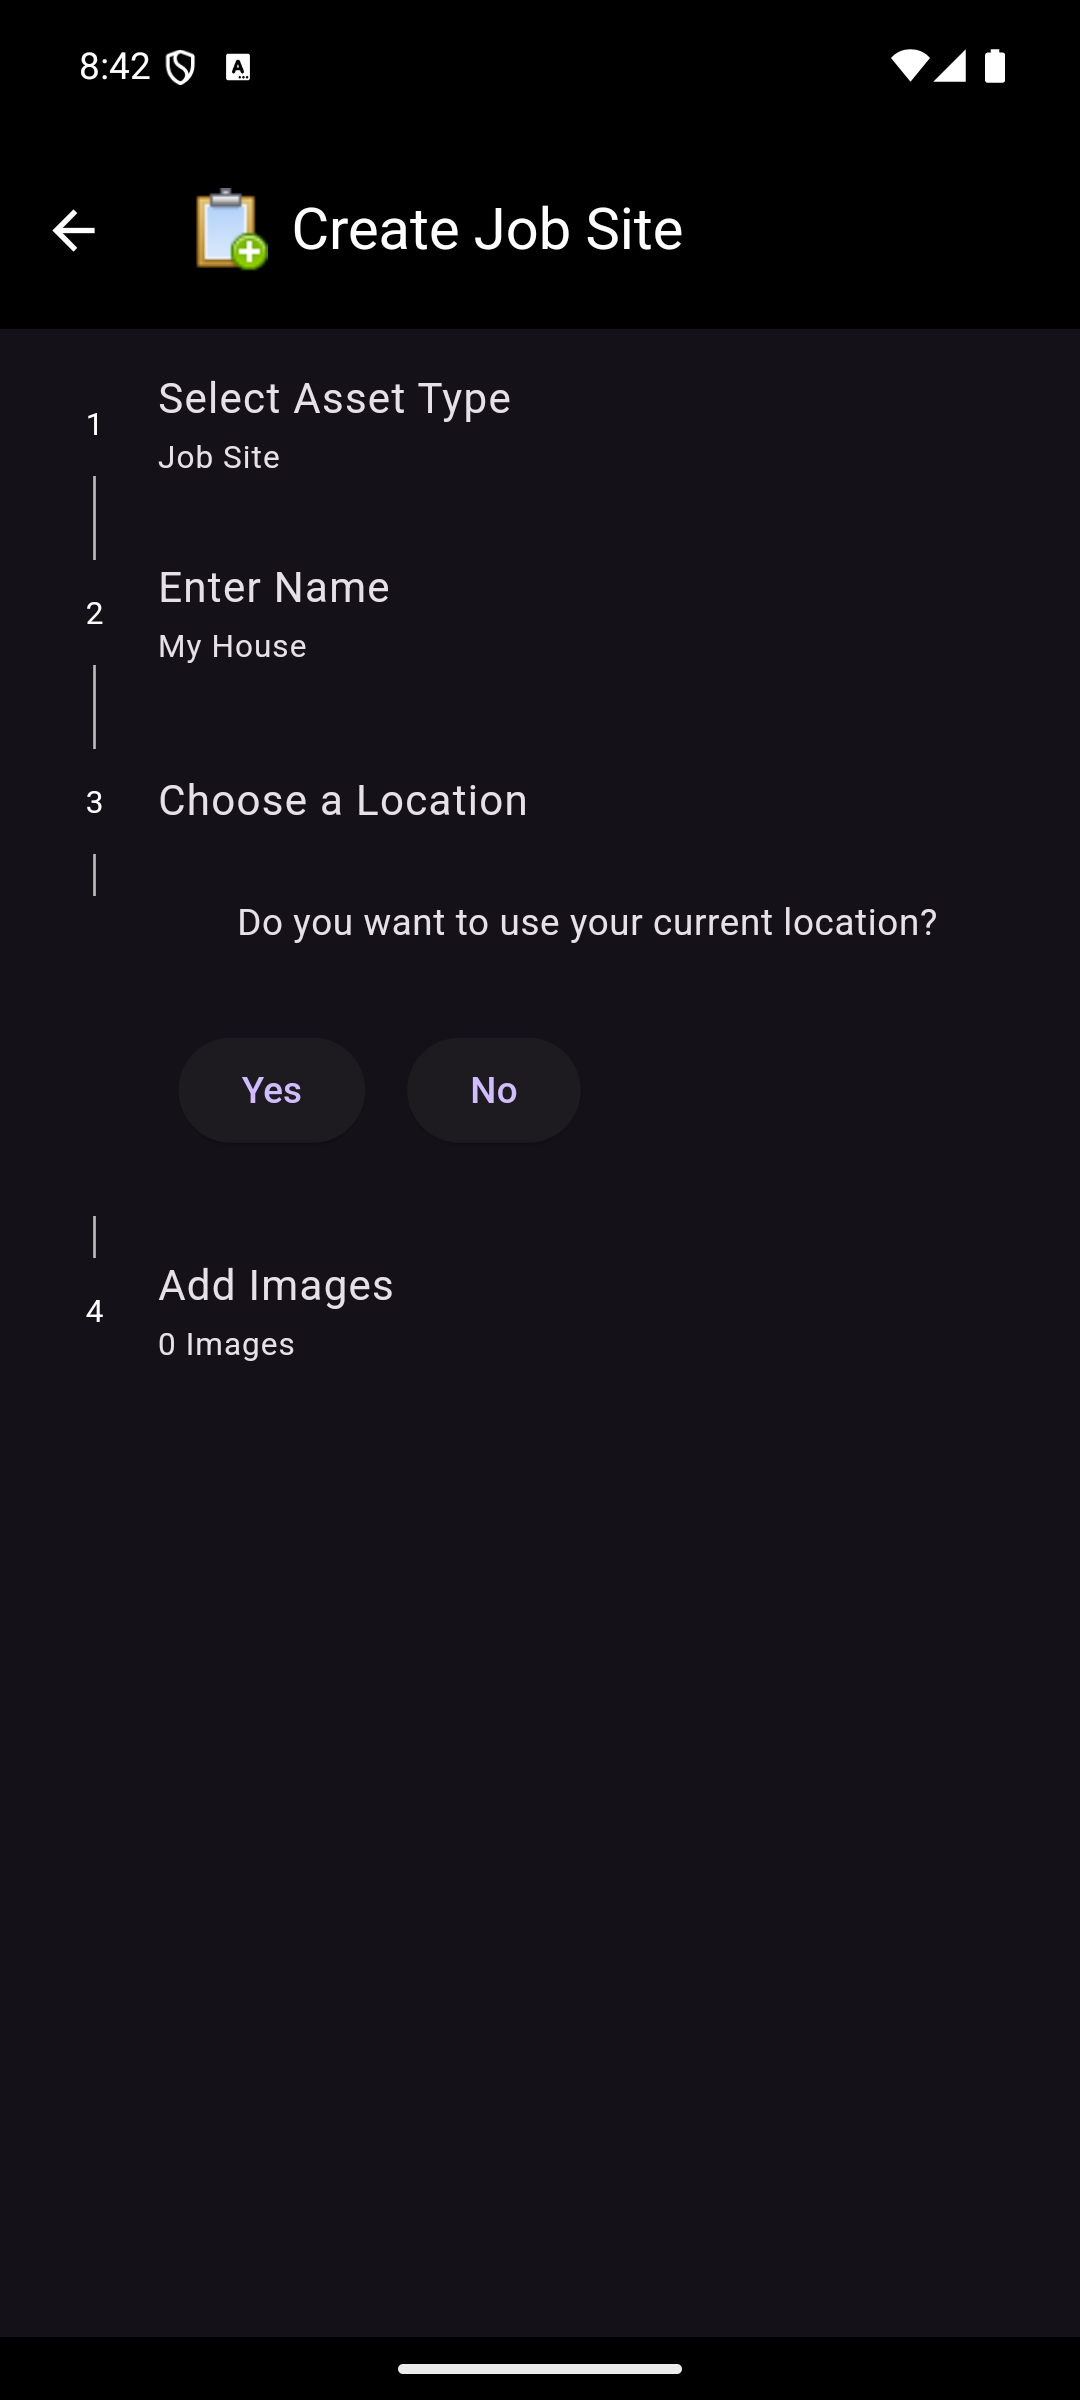
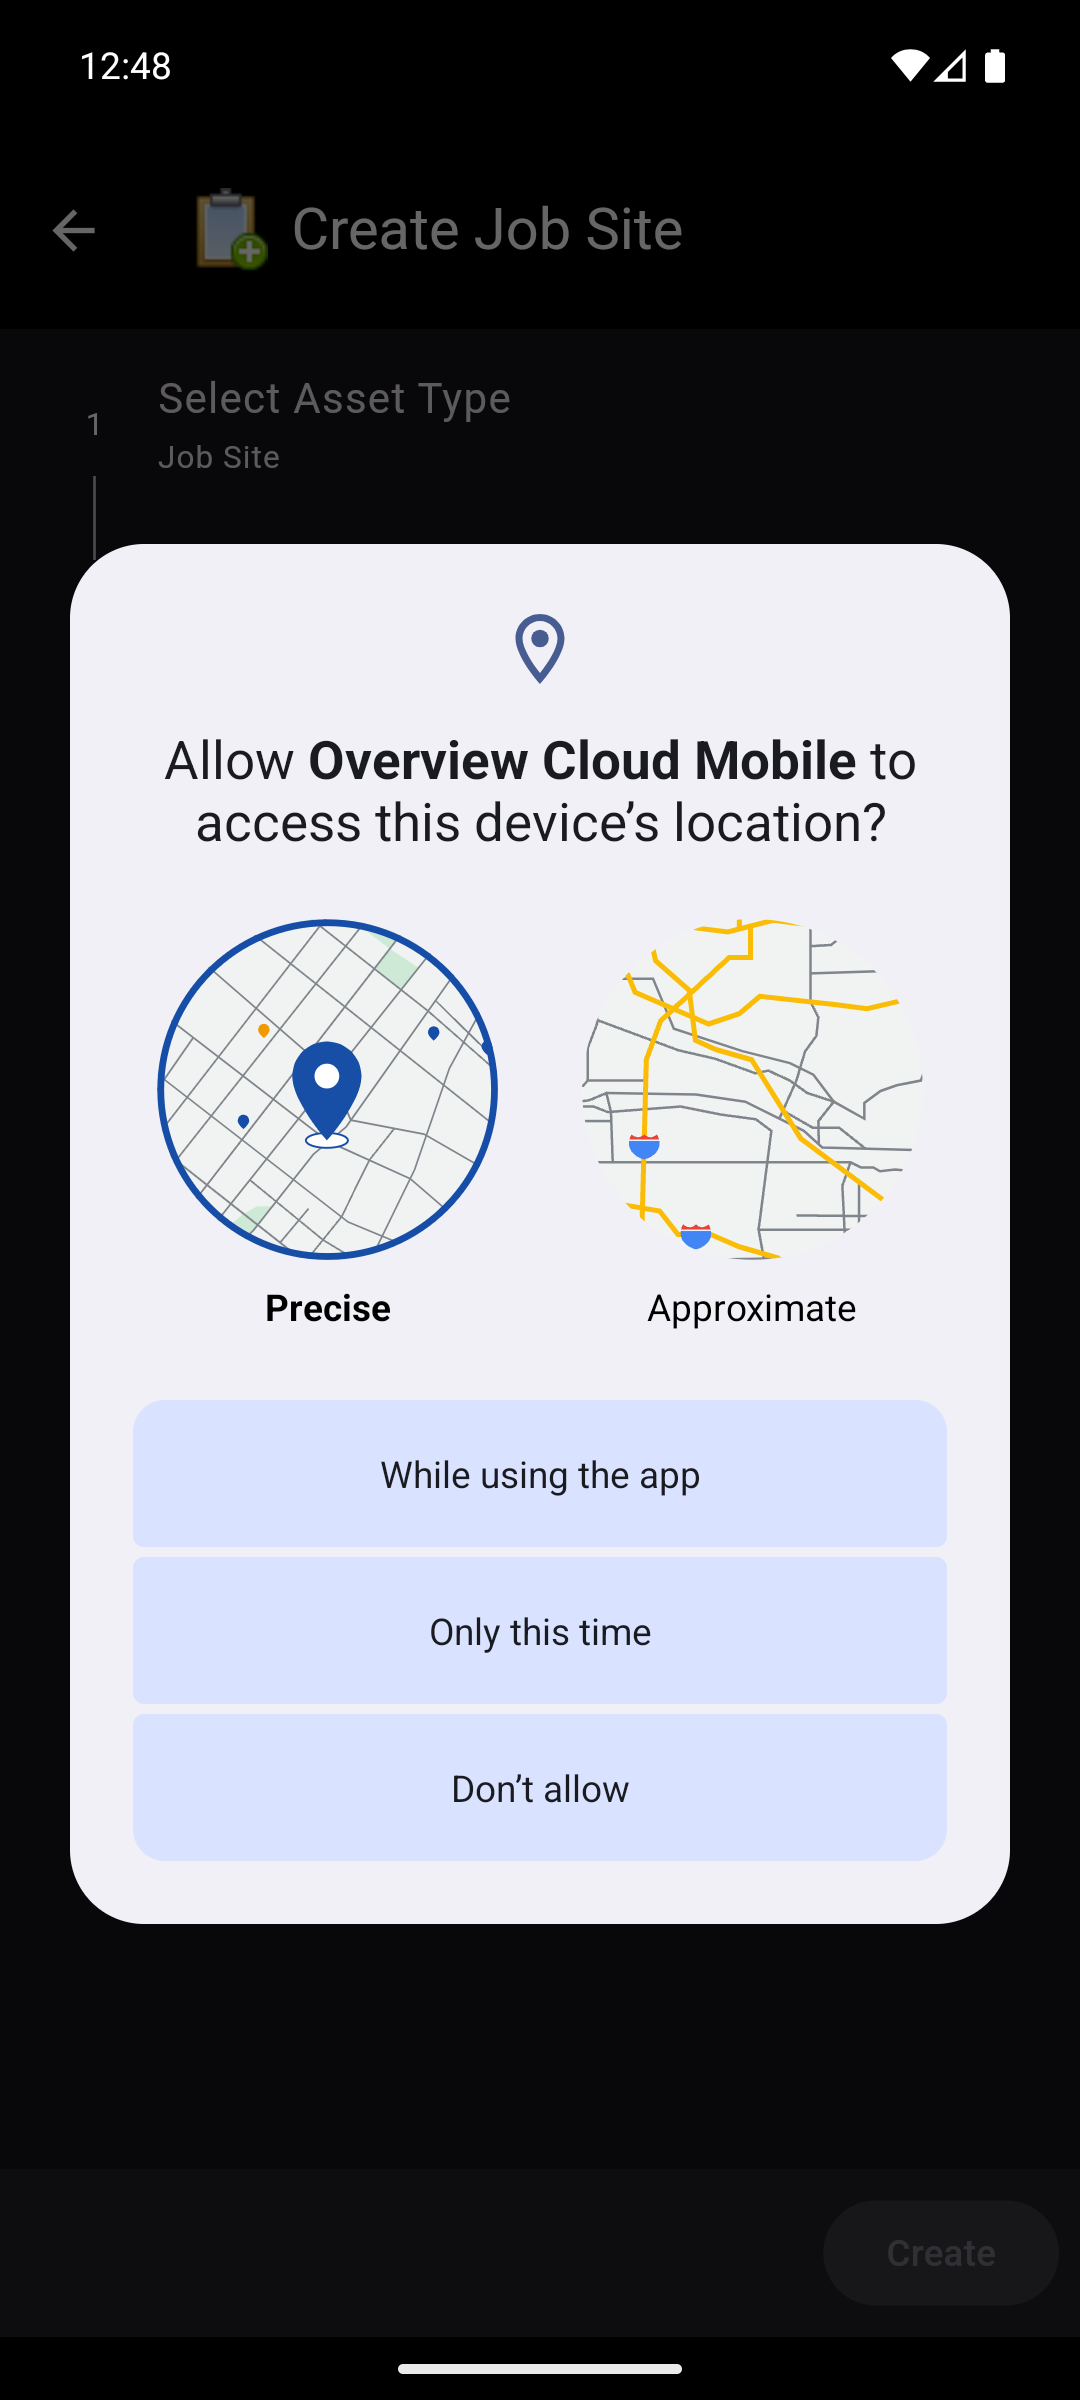
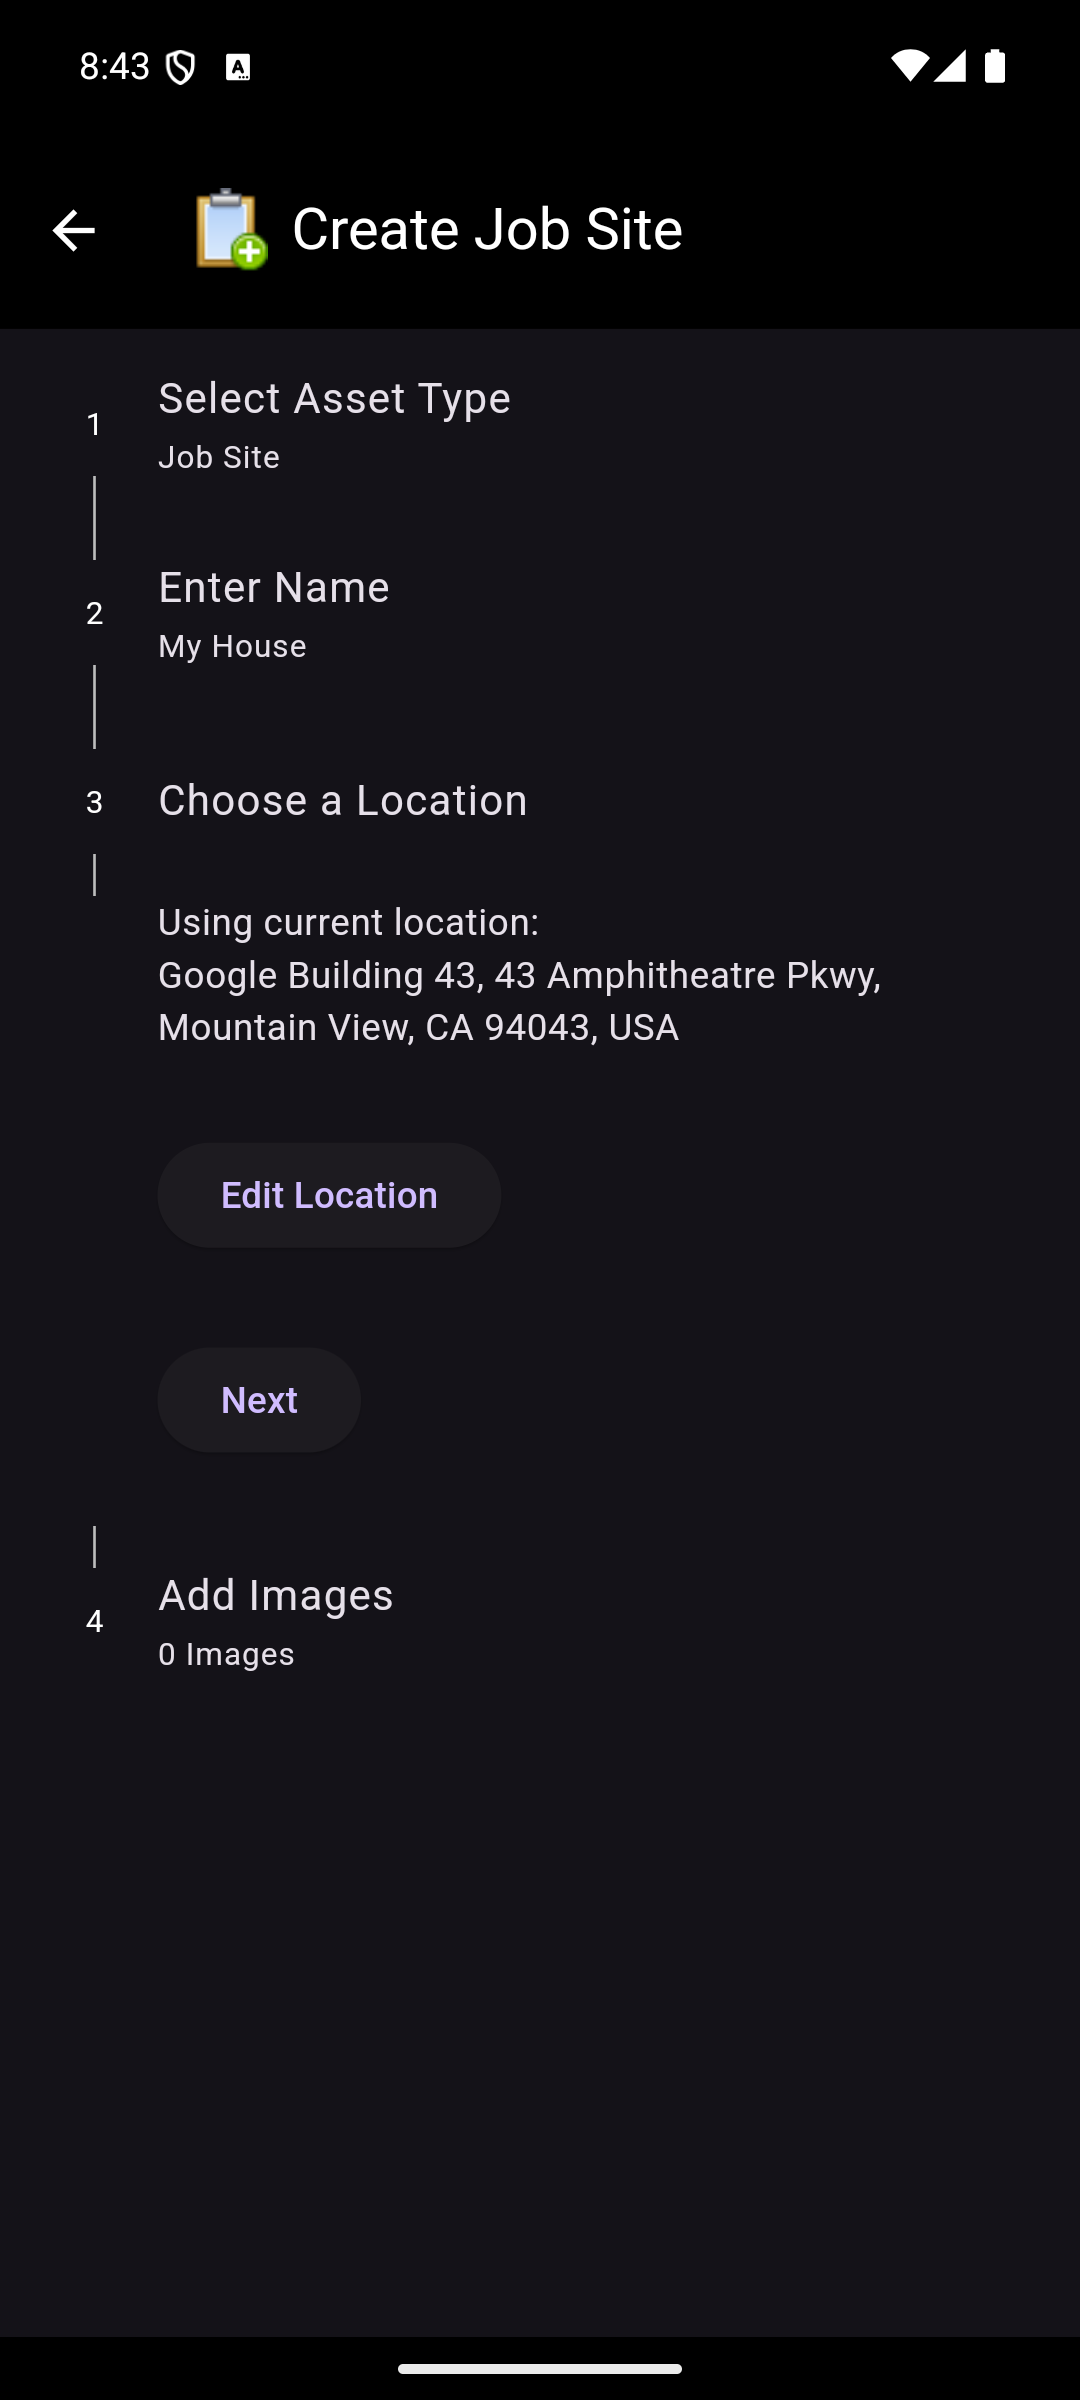
When choosing a location for the job site or warehouse, the device's location can be used. If this option is selected, the app will prompt for permission to use the device's location. If granted, the app will get the location and display the closest address, or the latitude and longitude if an address cannot be found. This location can then be used or edited.
Manually Entering Location
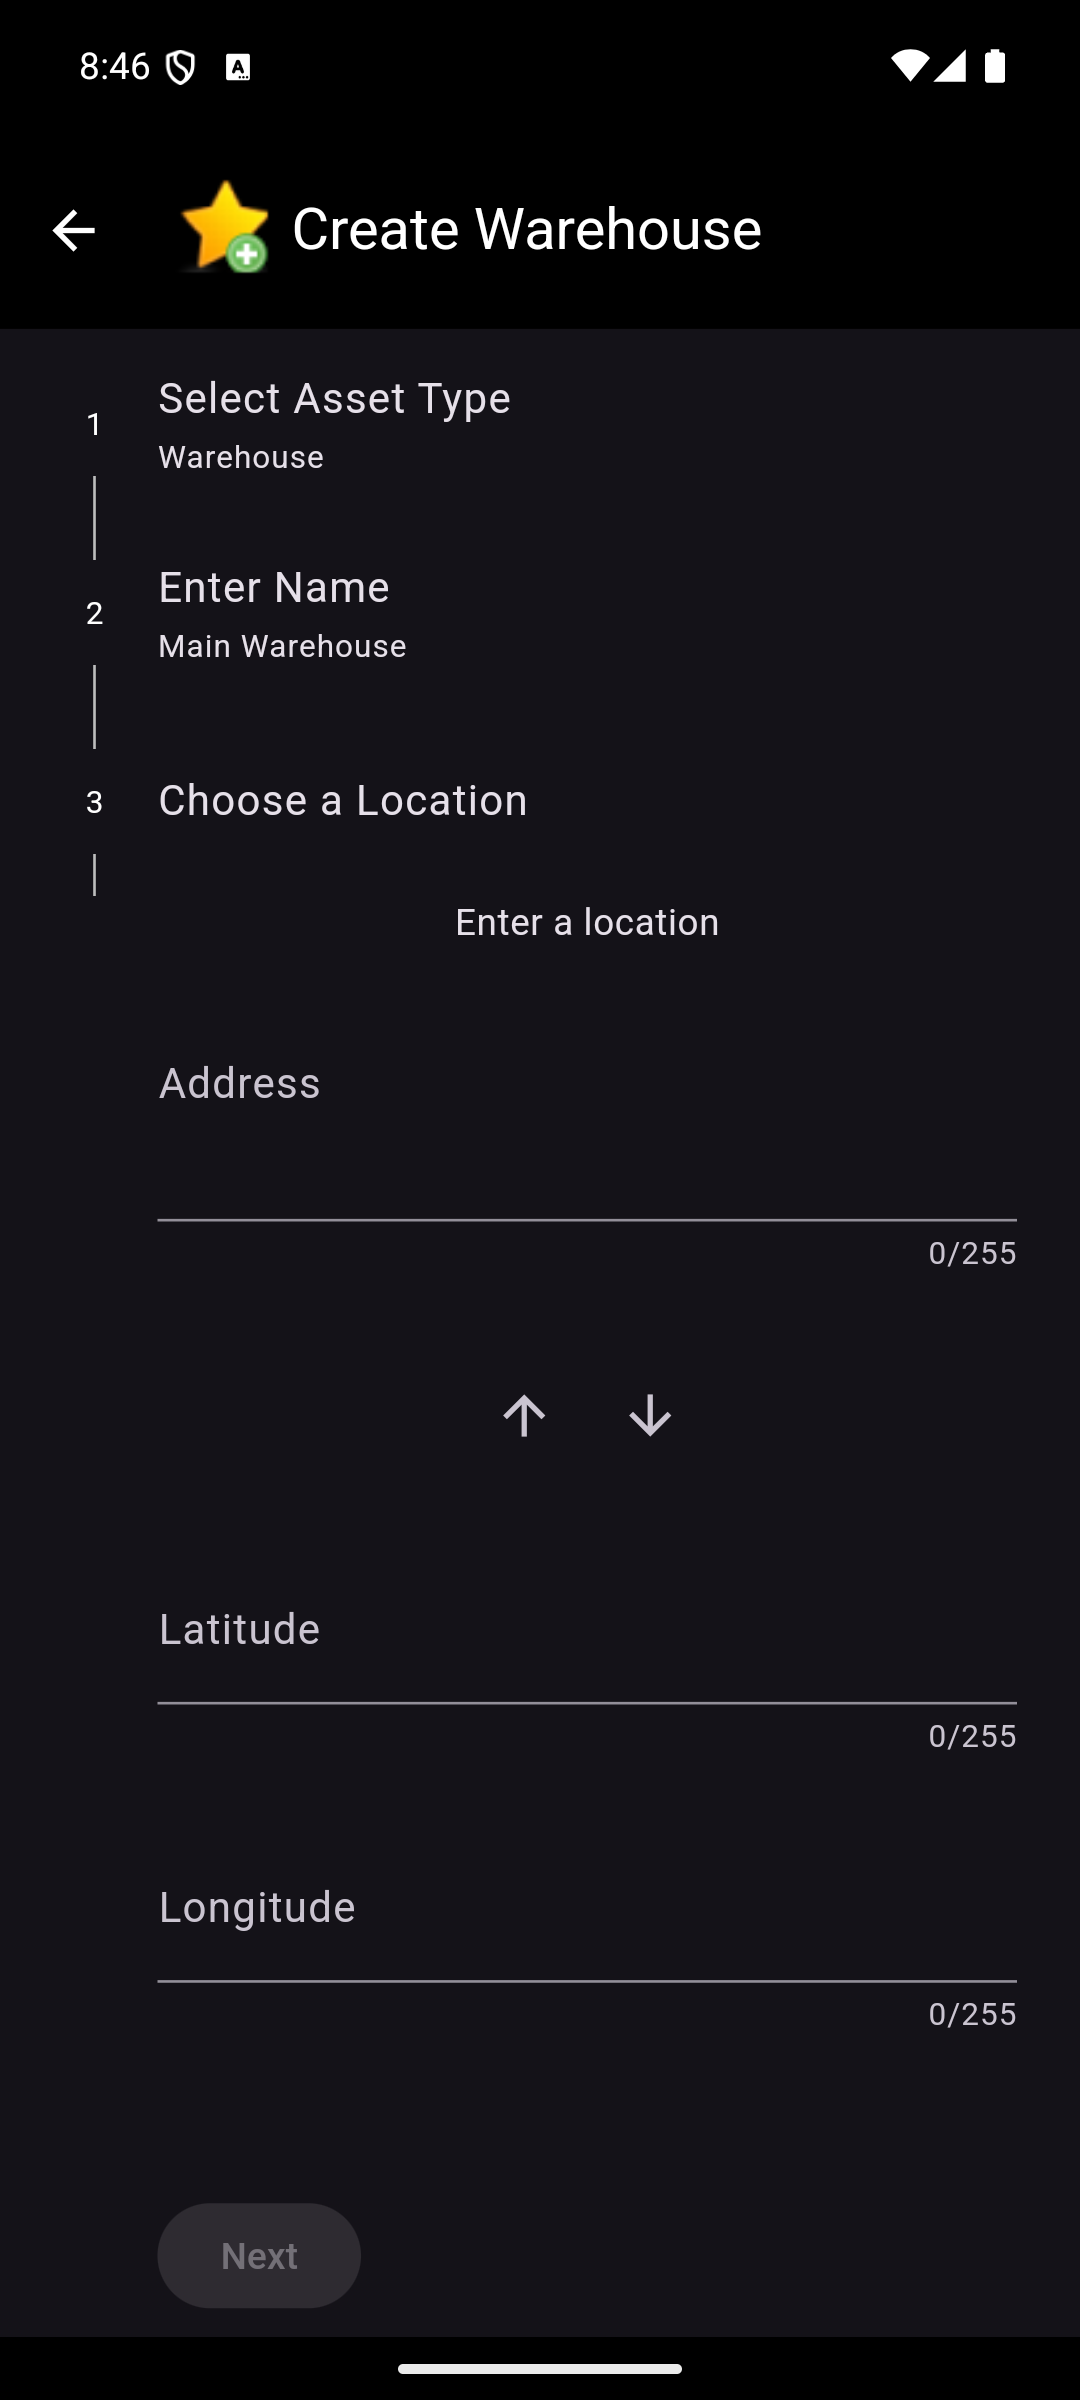
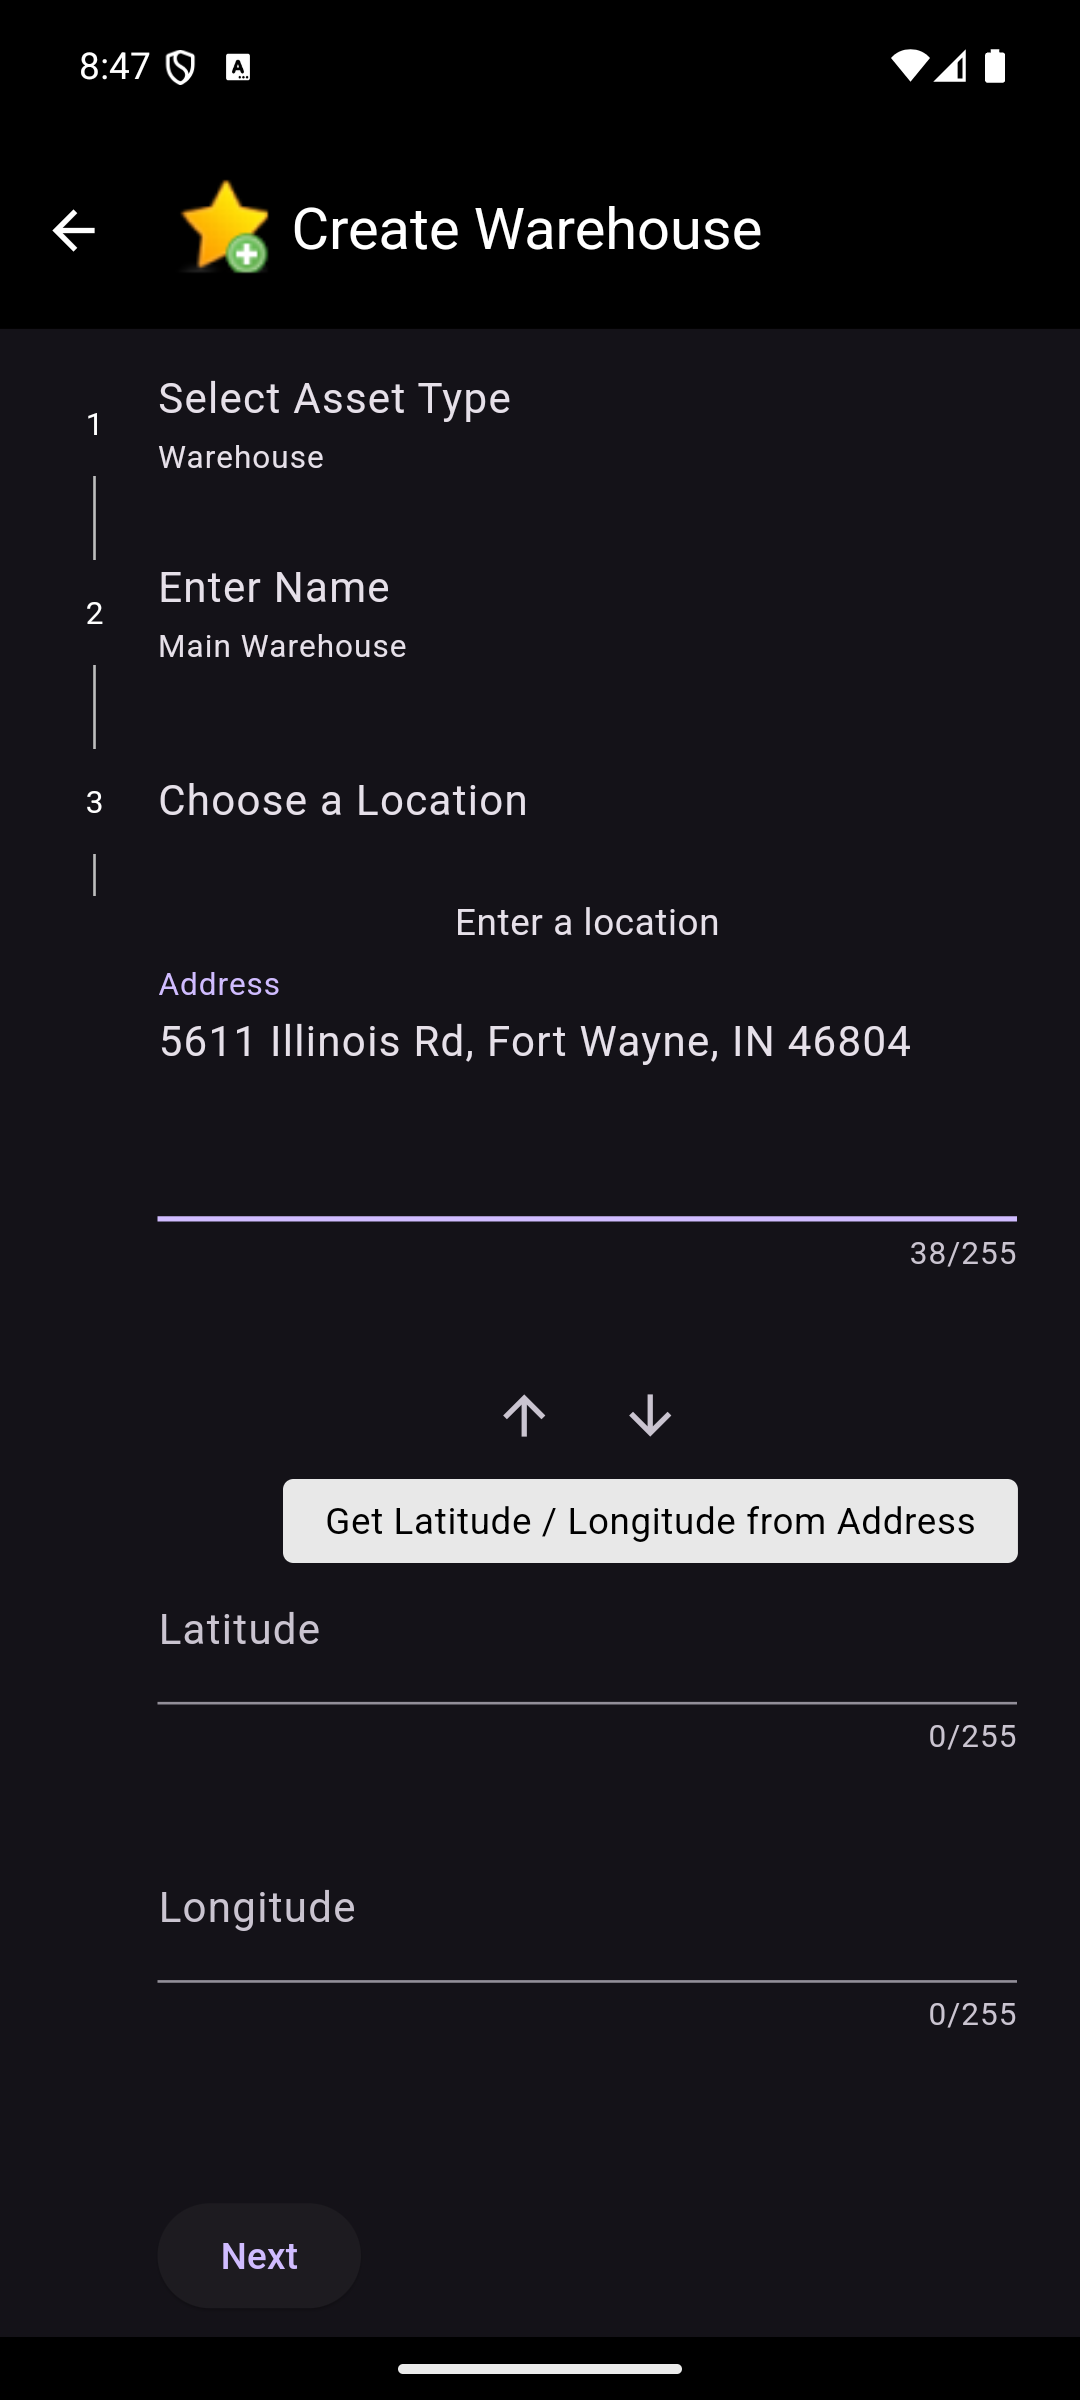

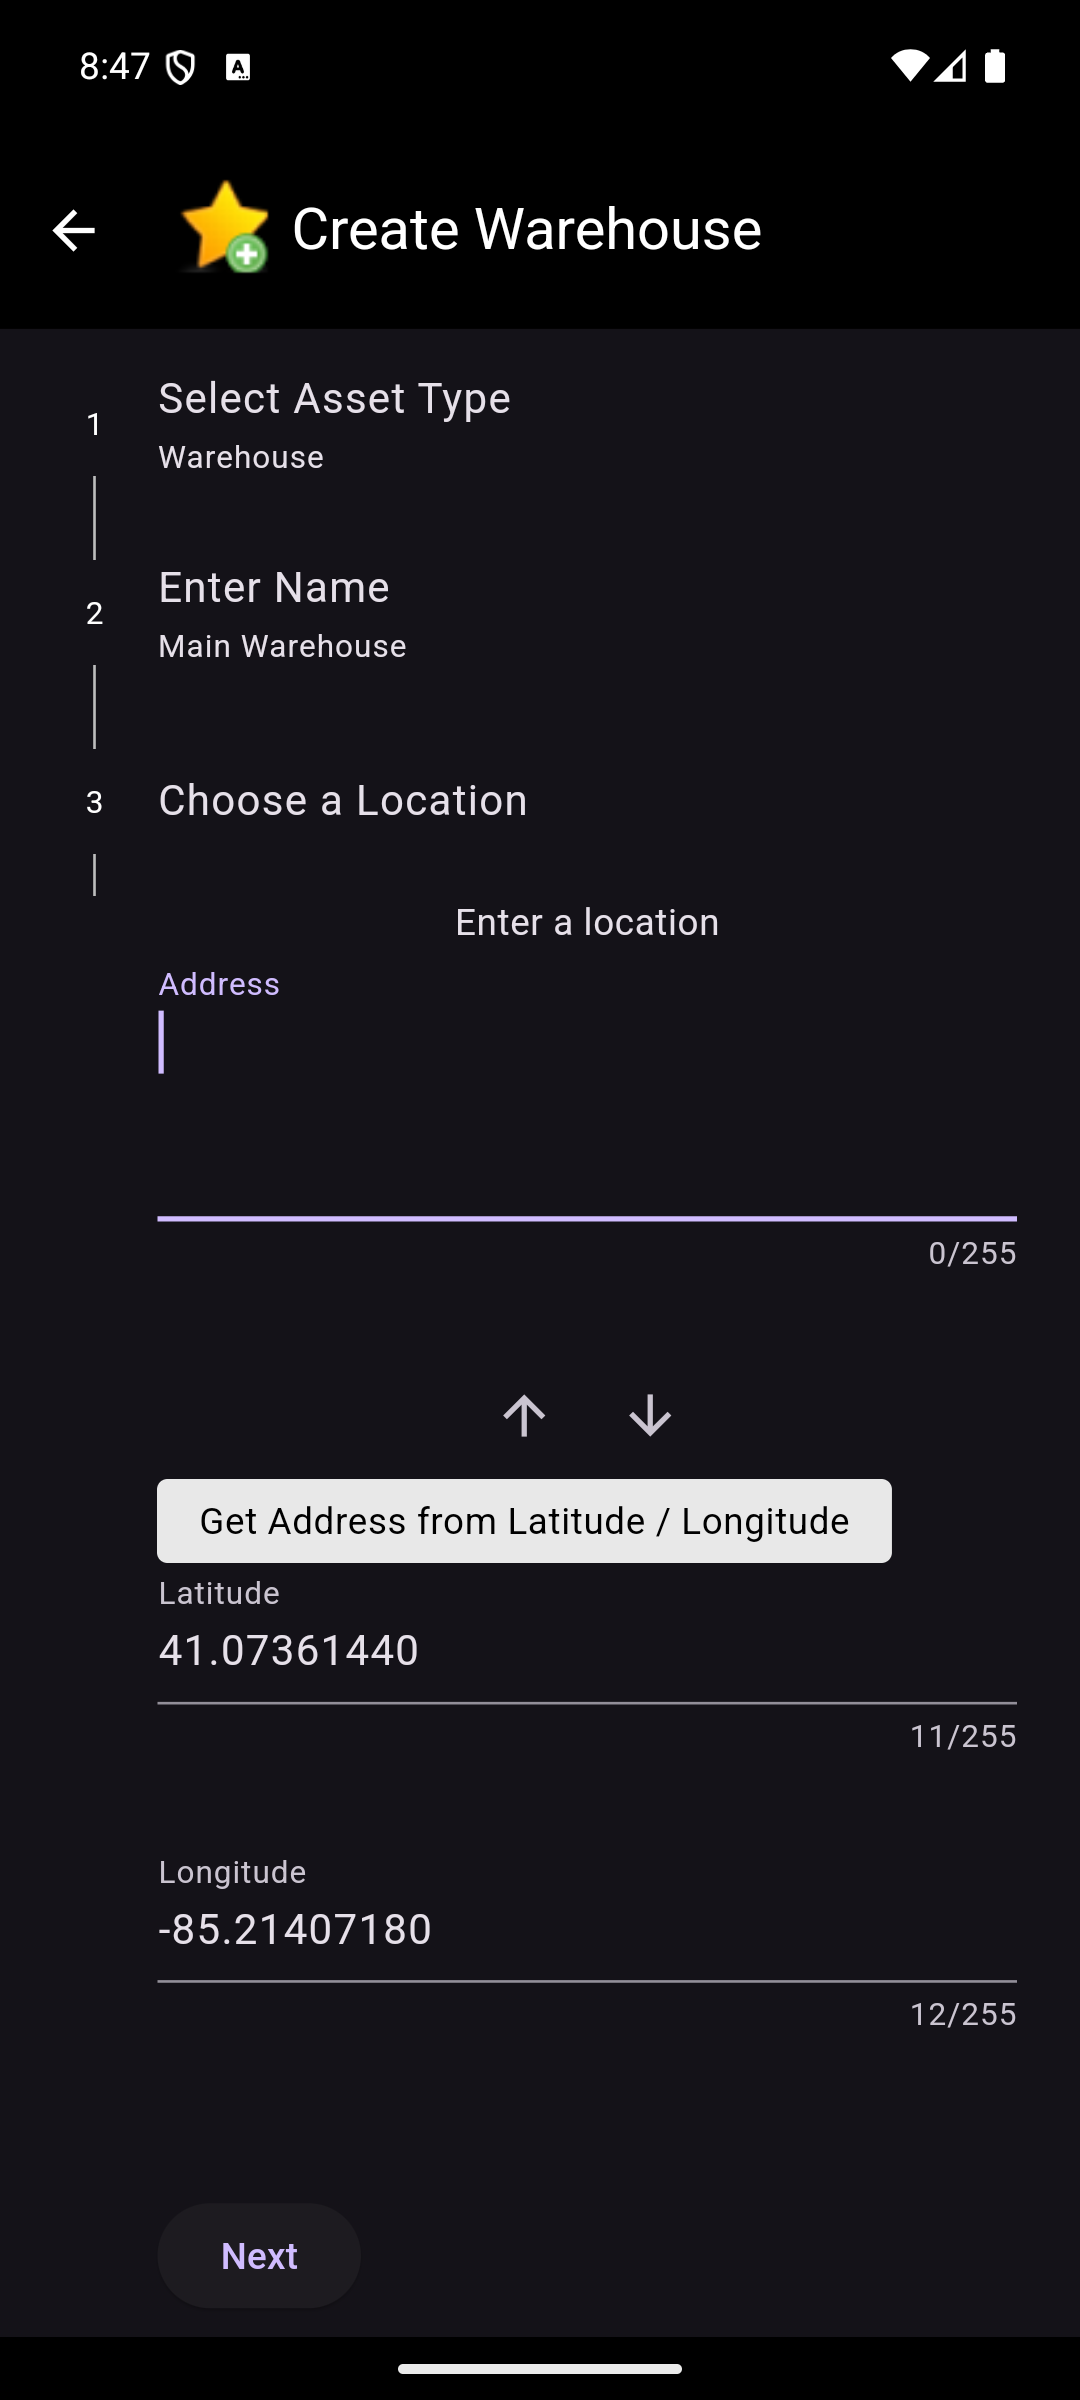
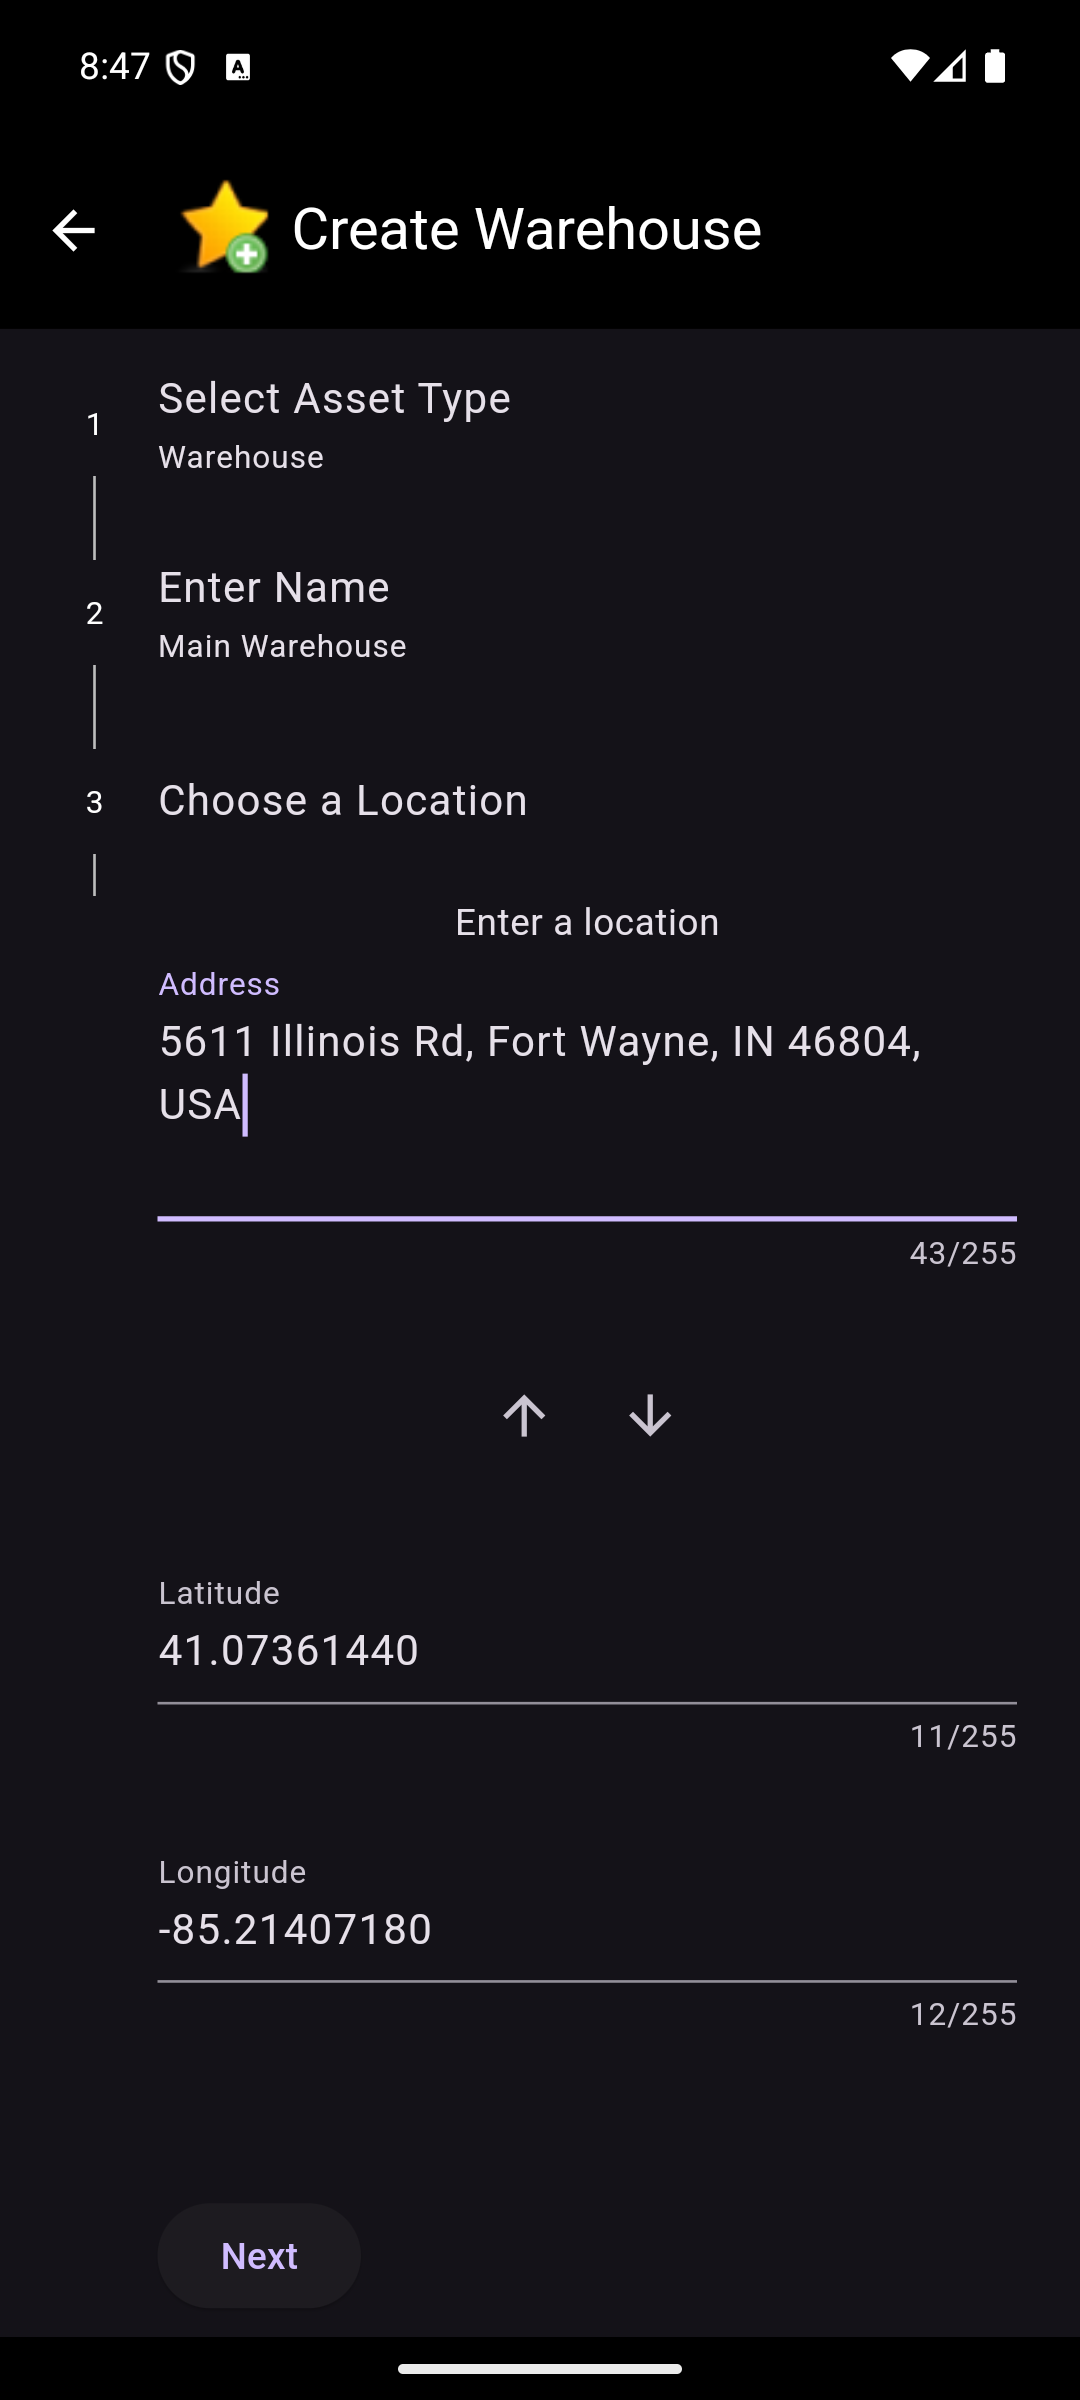
If current location is not used, the location can be entered by providing an address or a latitude and longitude. If an address is entered, the app will attempt to find the latitude and longitude. If a latitude and longitude is entered, the app will attempt to find the address. The address and latitude and longitude can be edited. There are also up and down arrows to manually trigger these lookups. The up arrow will take the longitude and latitude and attempt to find the address. The down arrow will take the address and attempt to find the latitude and longitude.
NOTE: There are tool tips on the arrows that display their functionality when long pressed.
Tag Maintenance
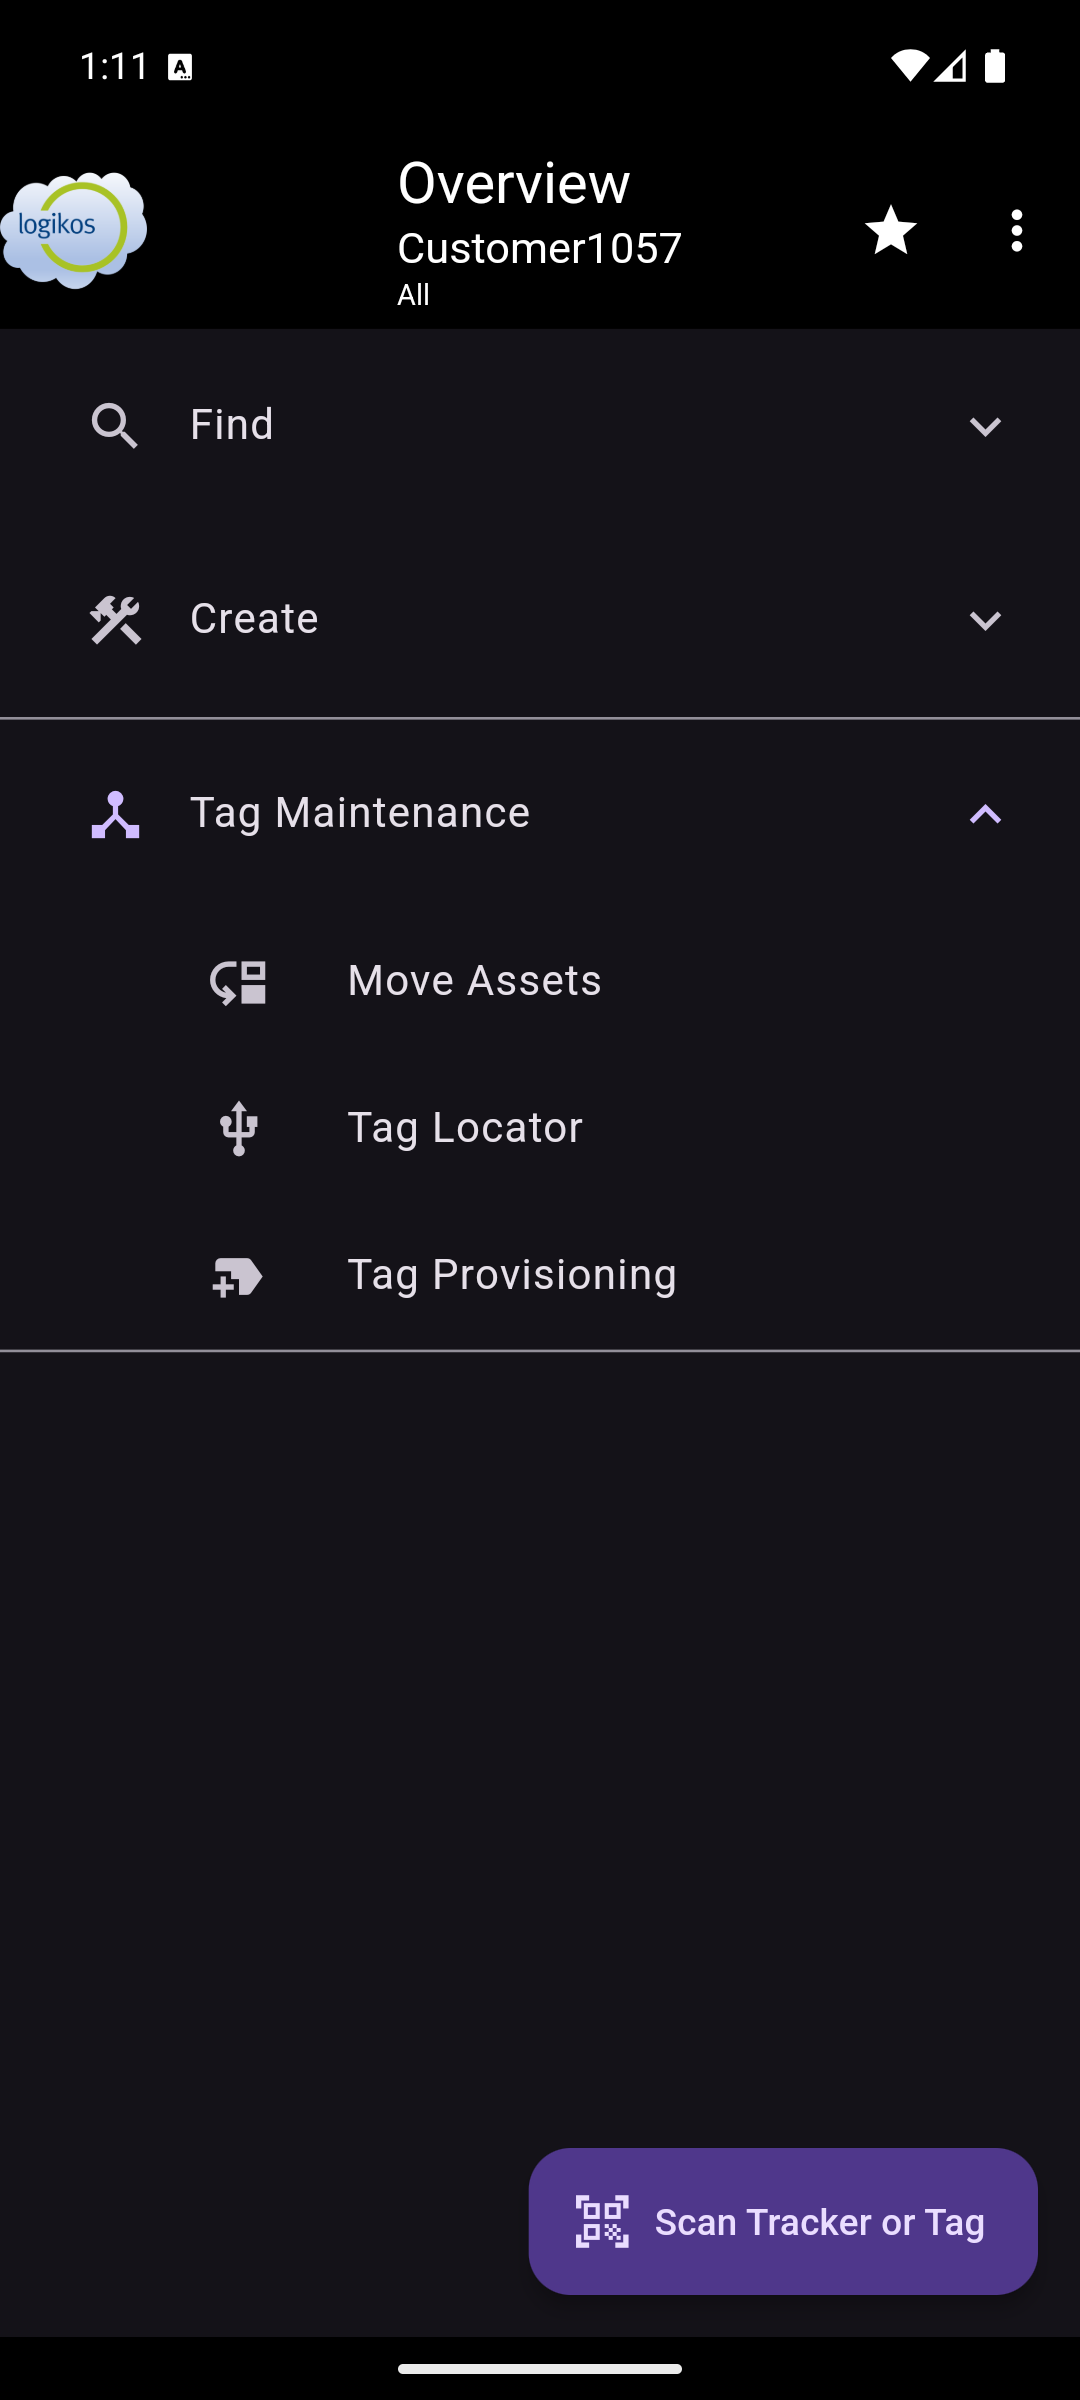
Tag Maintenance options provide the user the ability to quickly locate or provision tags. Tag Maintenance is only available to users with the appropriate permissions. The sub-sections below describe how to do this.
Move Assets
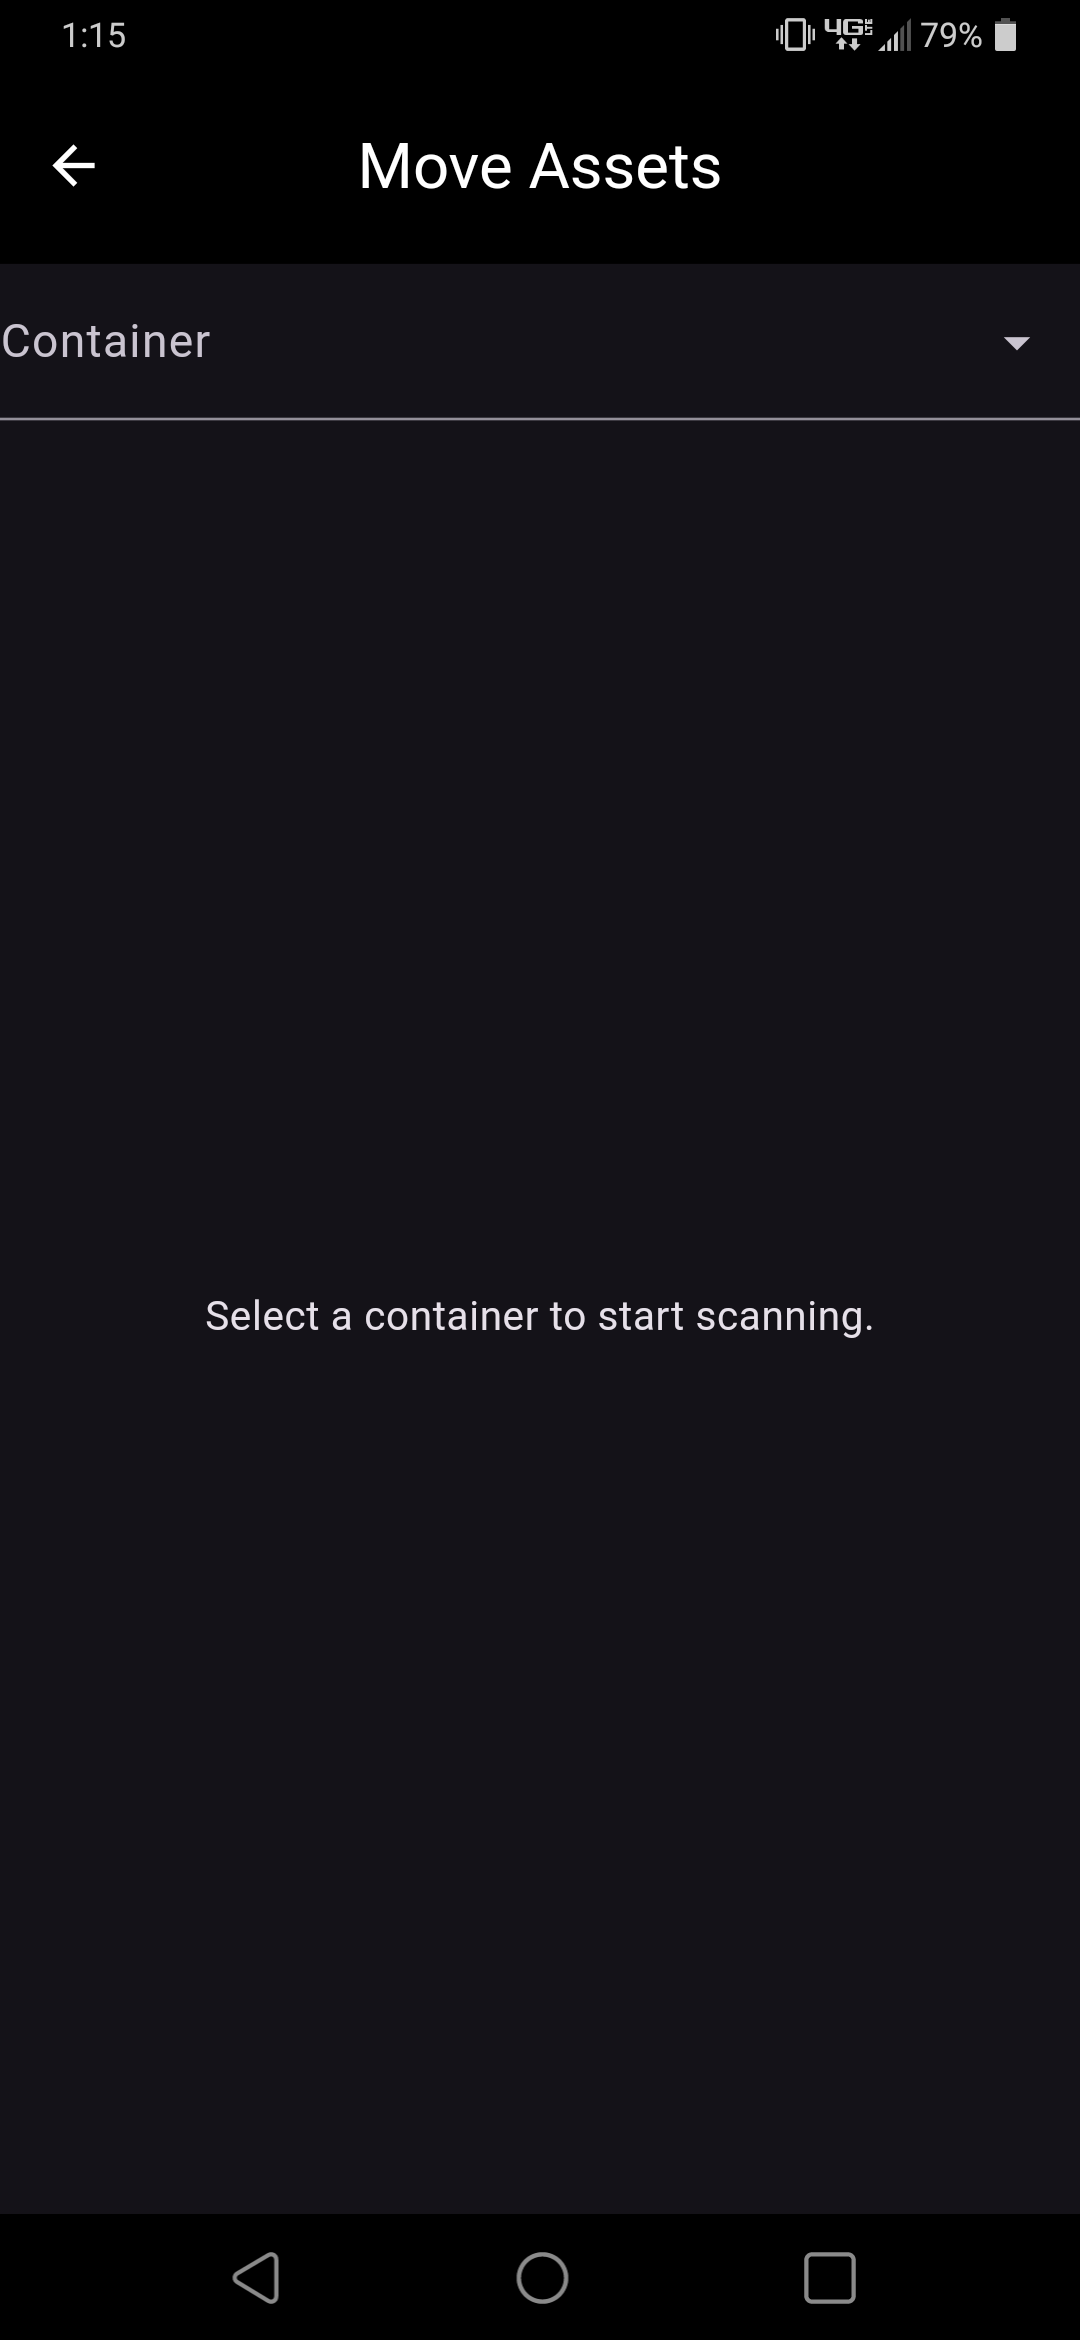
Move Assets provides the ability to scan tags move them to a specific container asset.
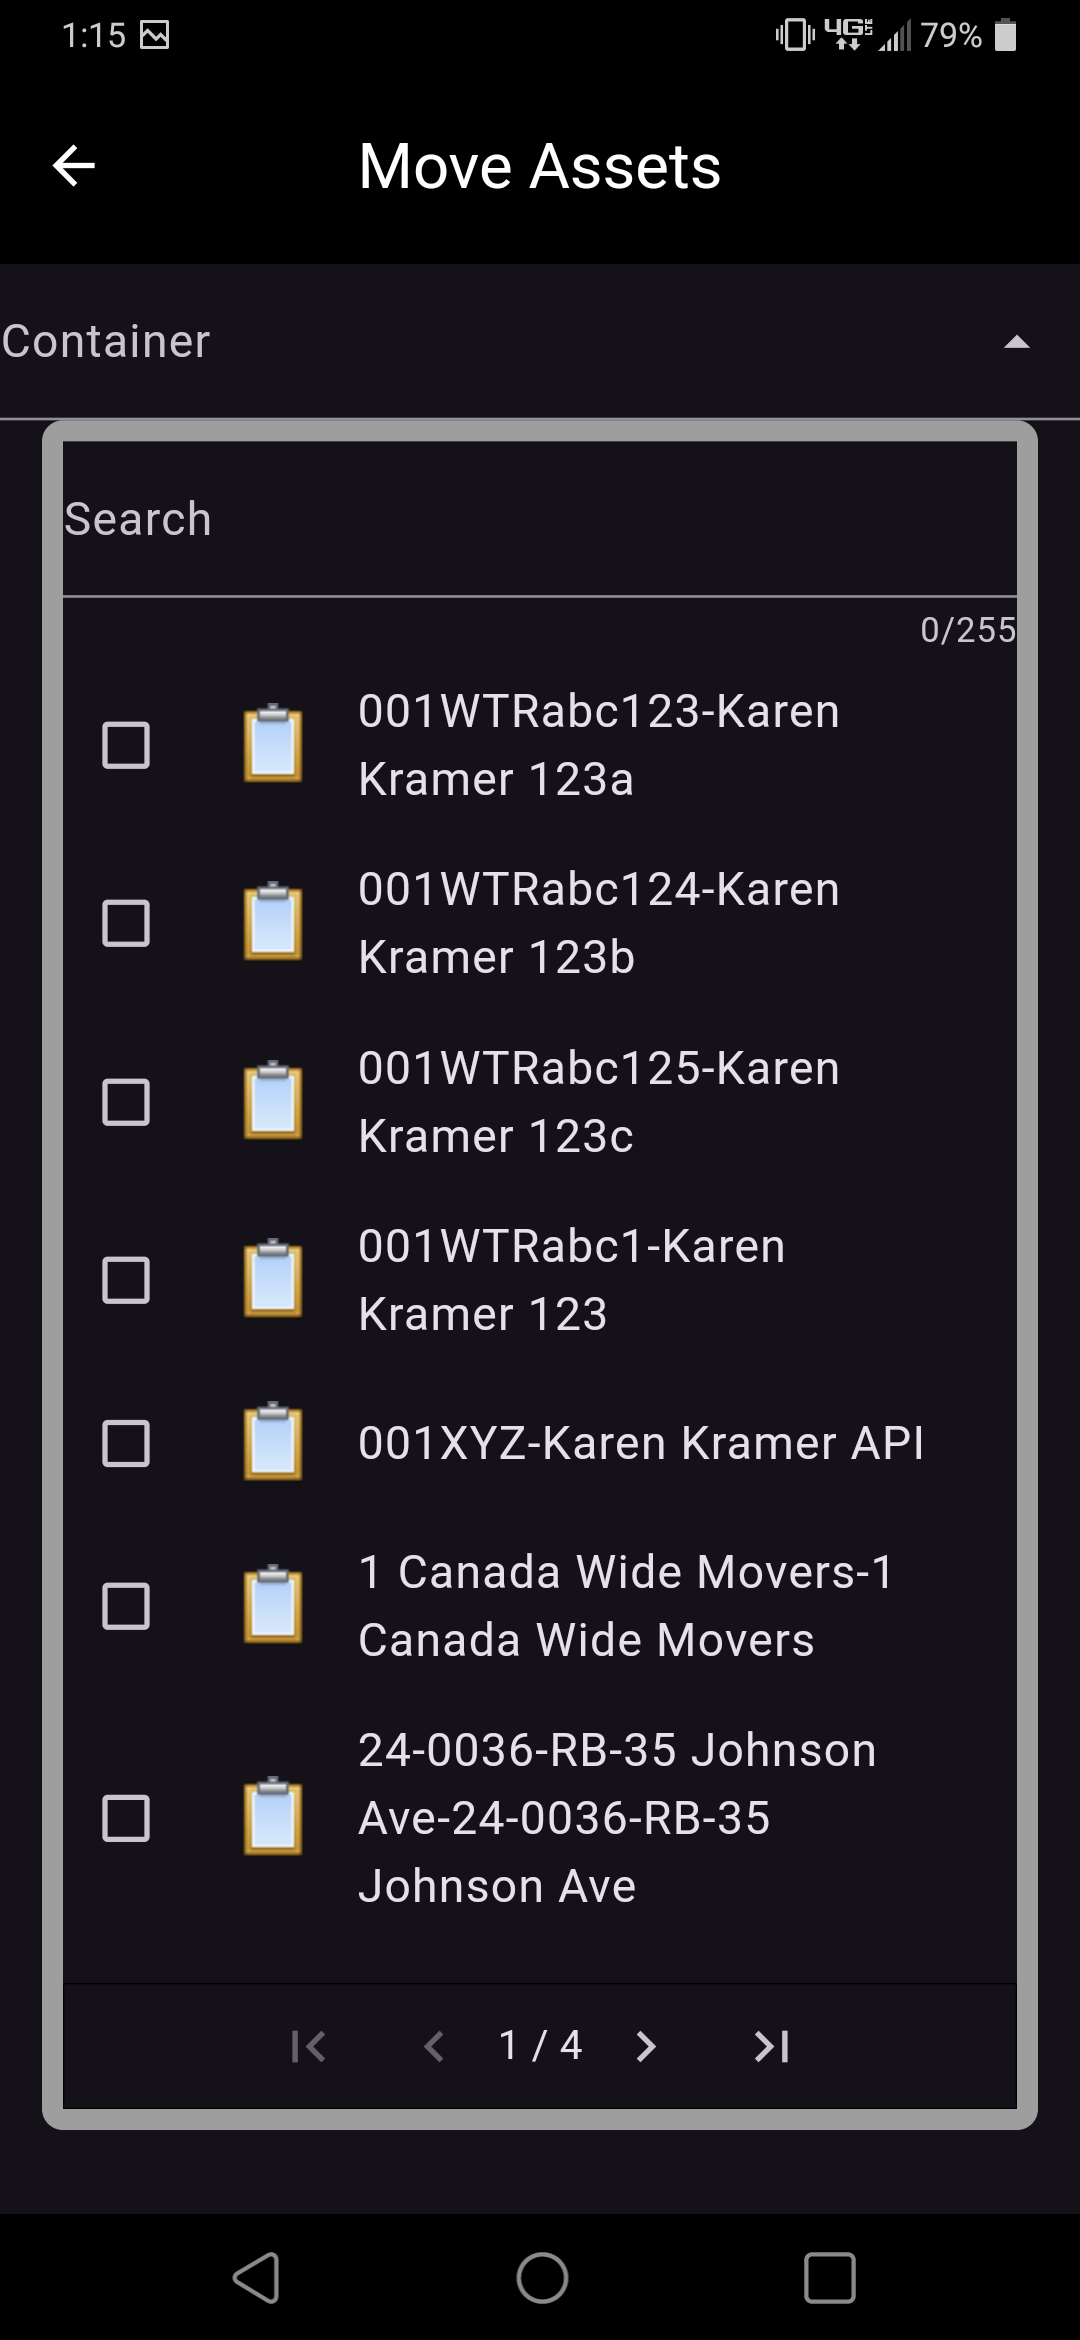
Selecting a Container Asset: A search must be performed to find a container asset. Once text has been entered into the search field, a list of container assets matching the text will be displayed.
Container assets will not be displayed until a search has started. Keep entering text to narrow down the container assets until the desired one is displayed.
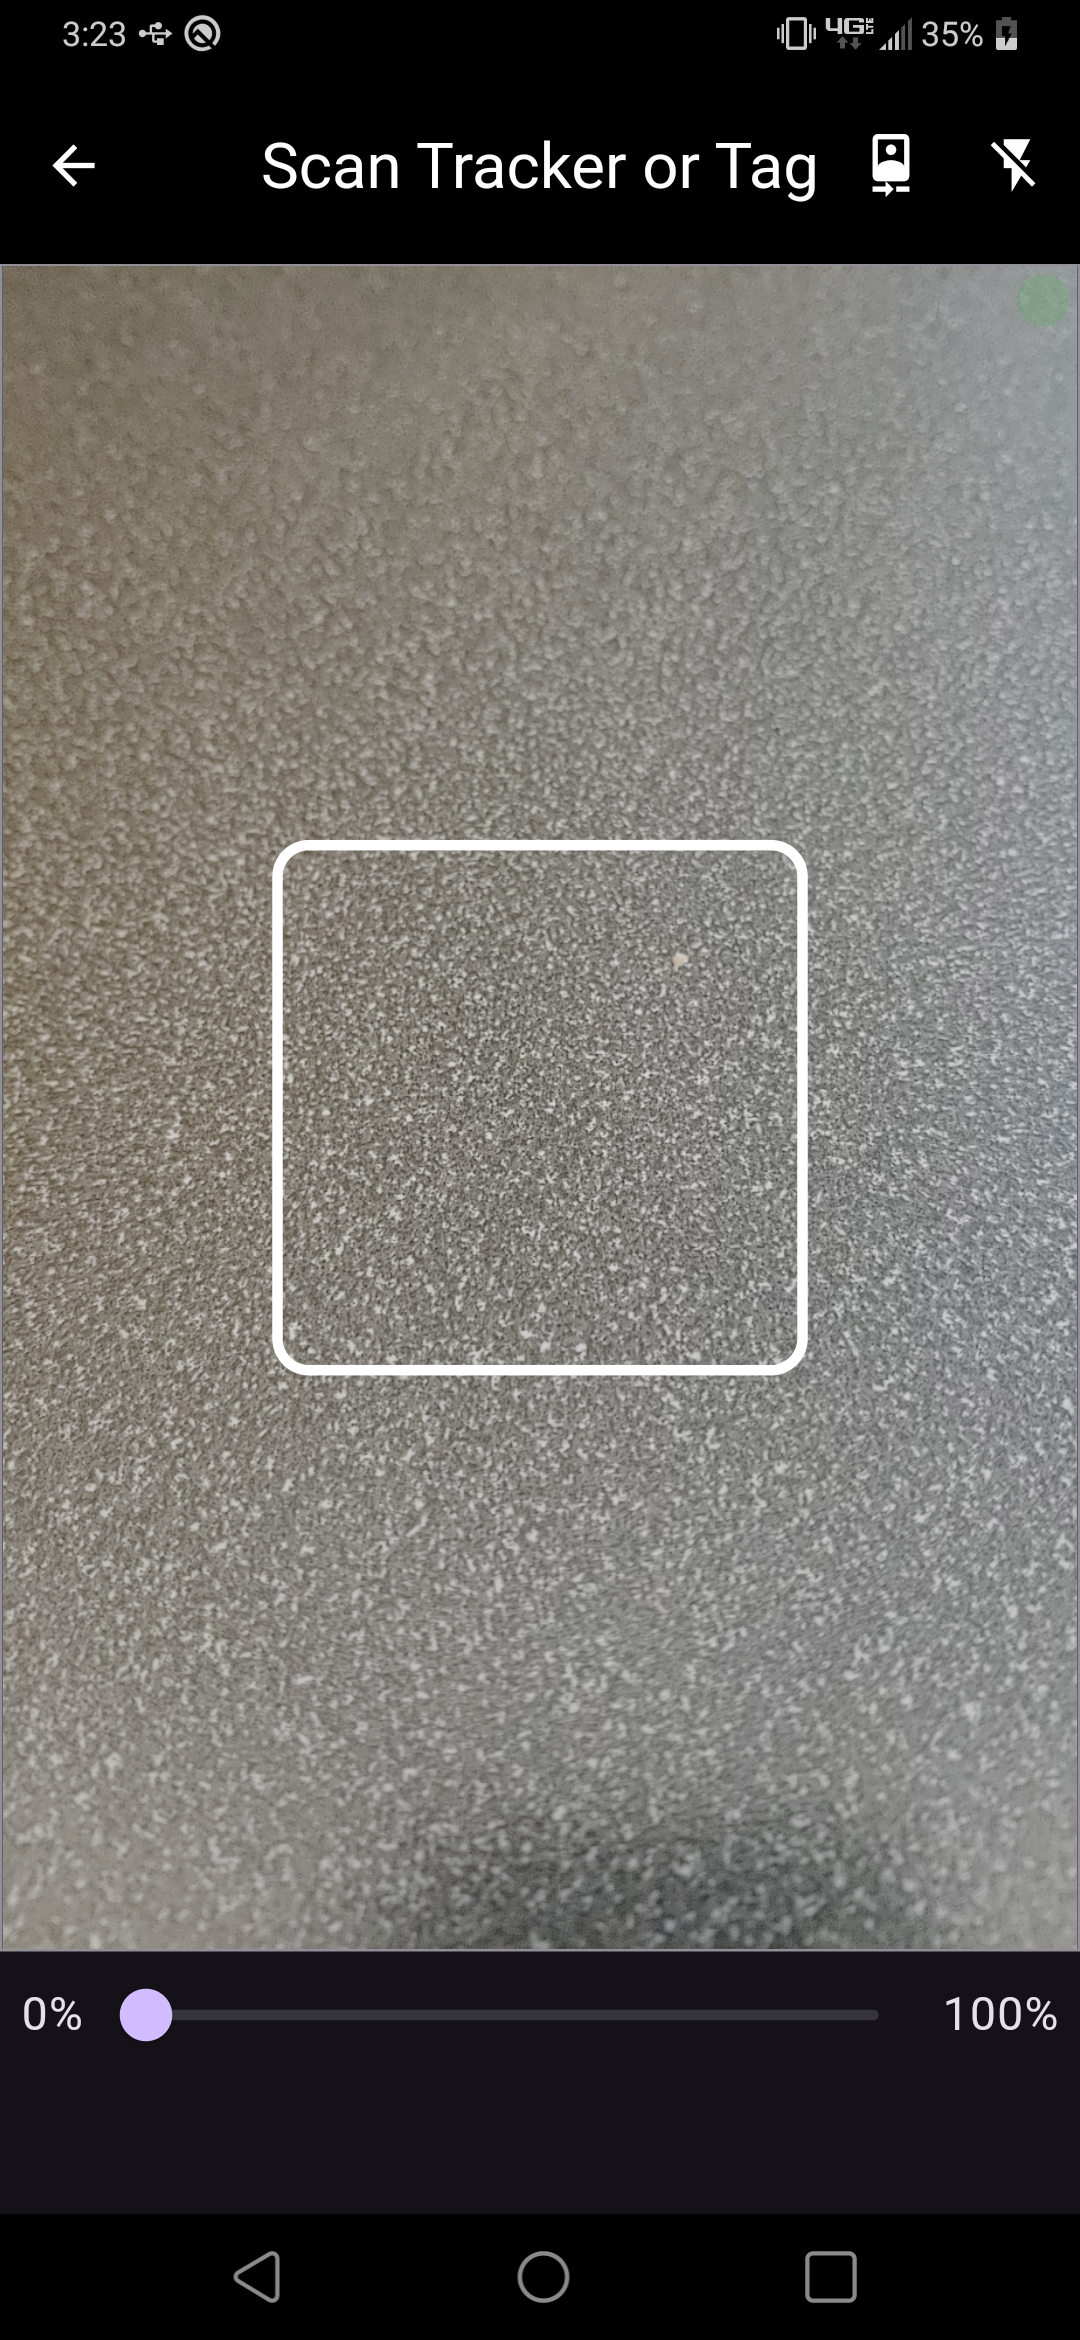
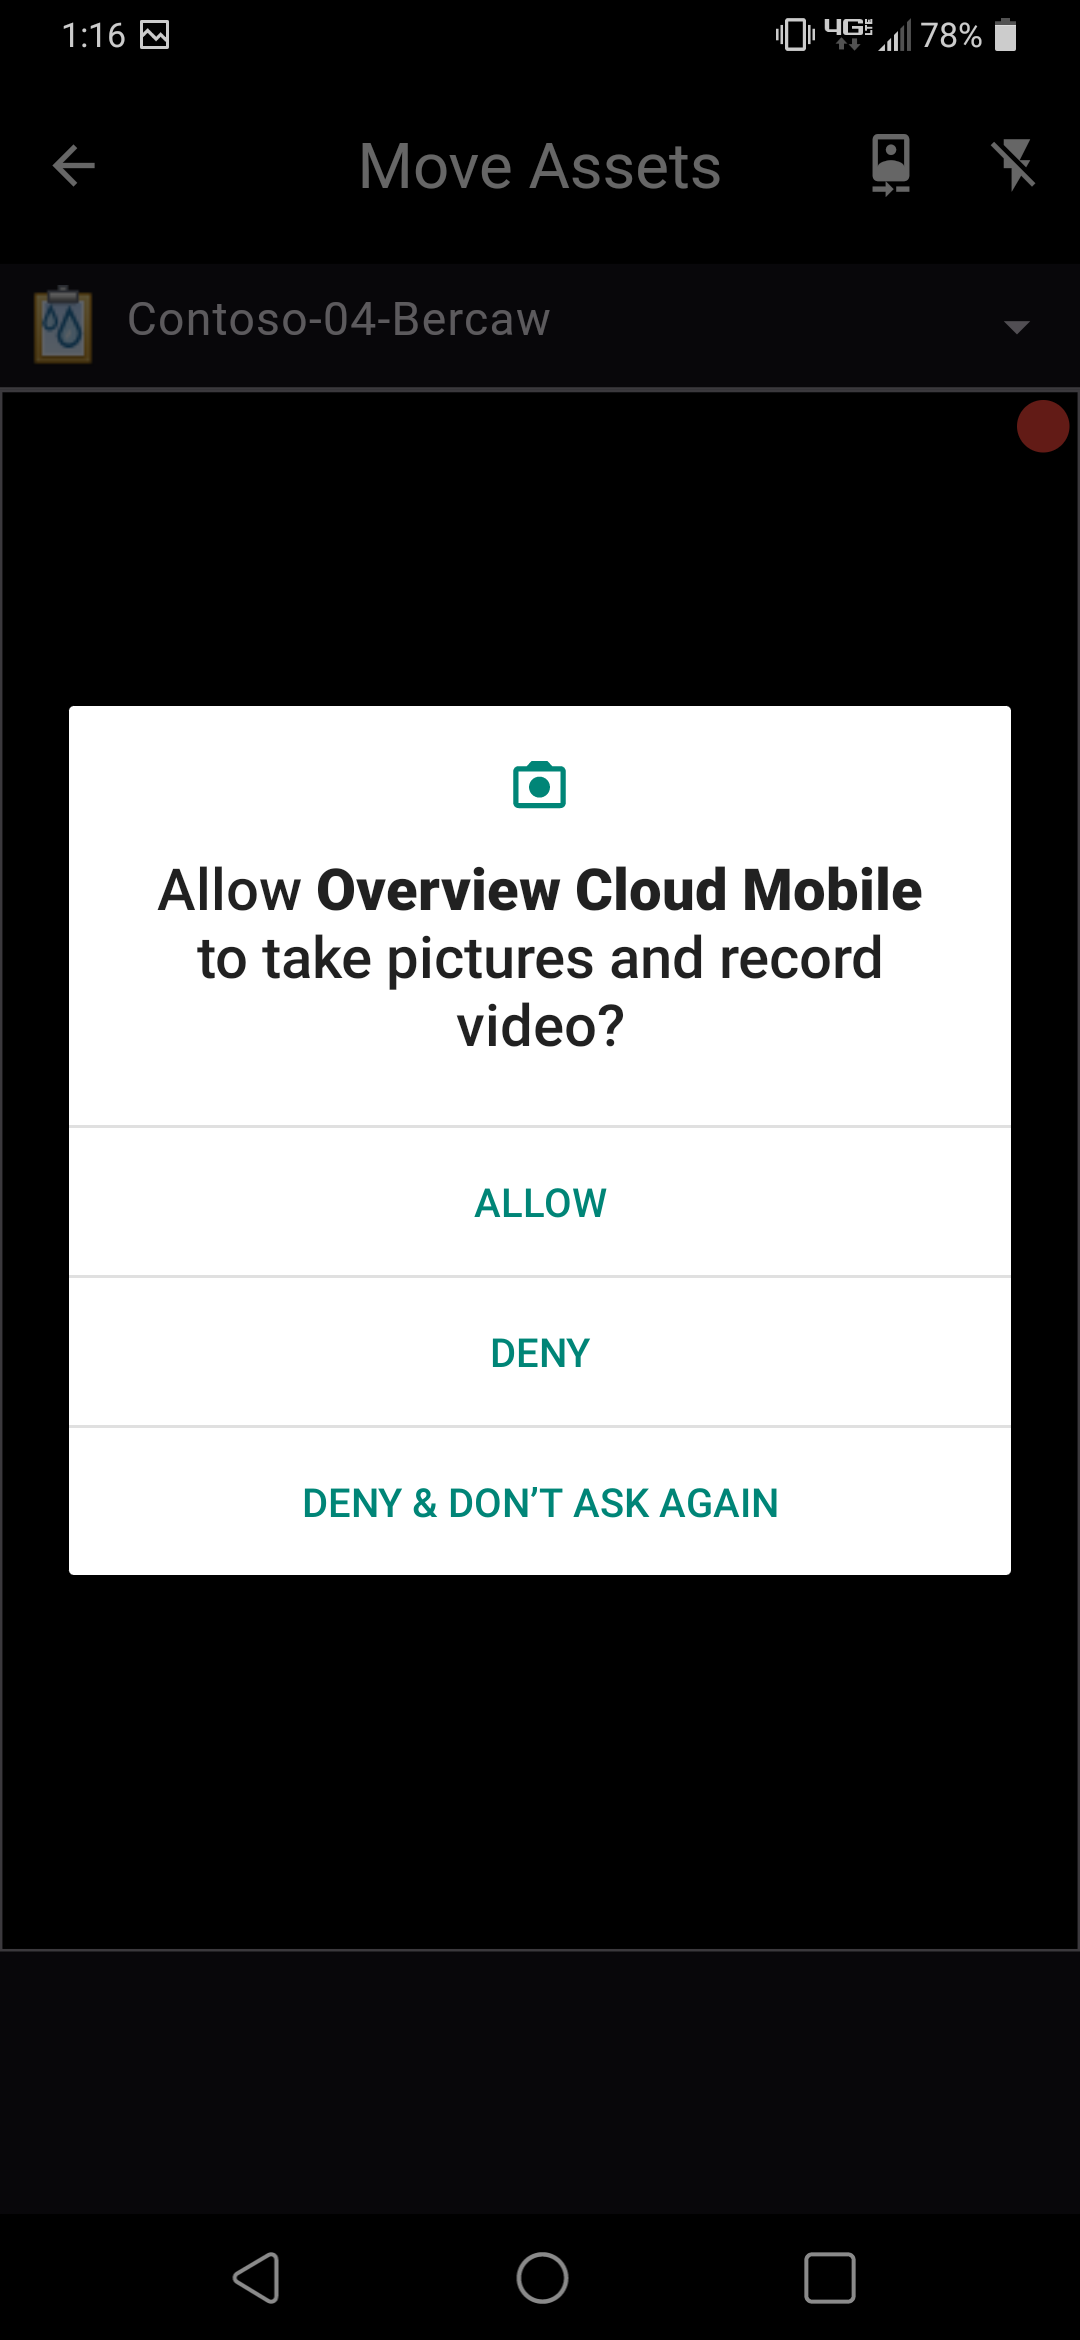
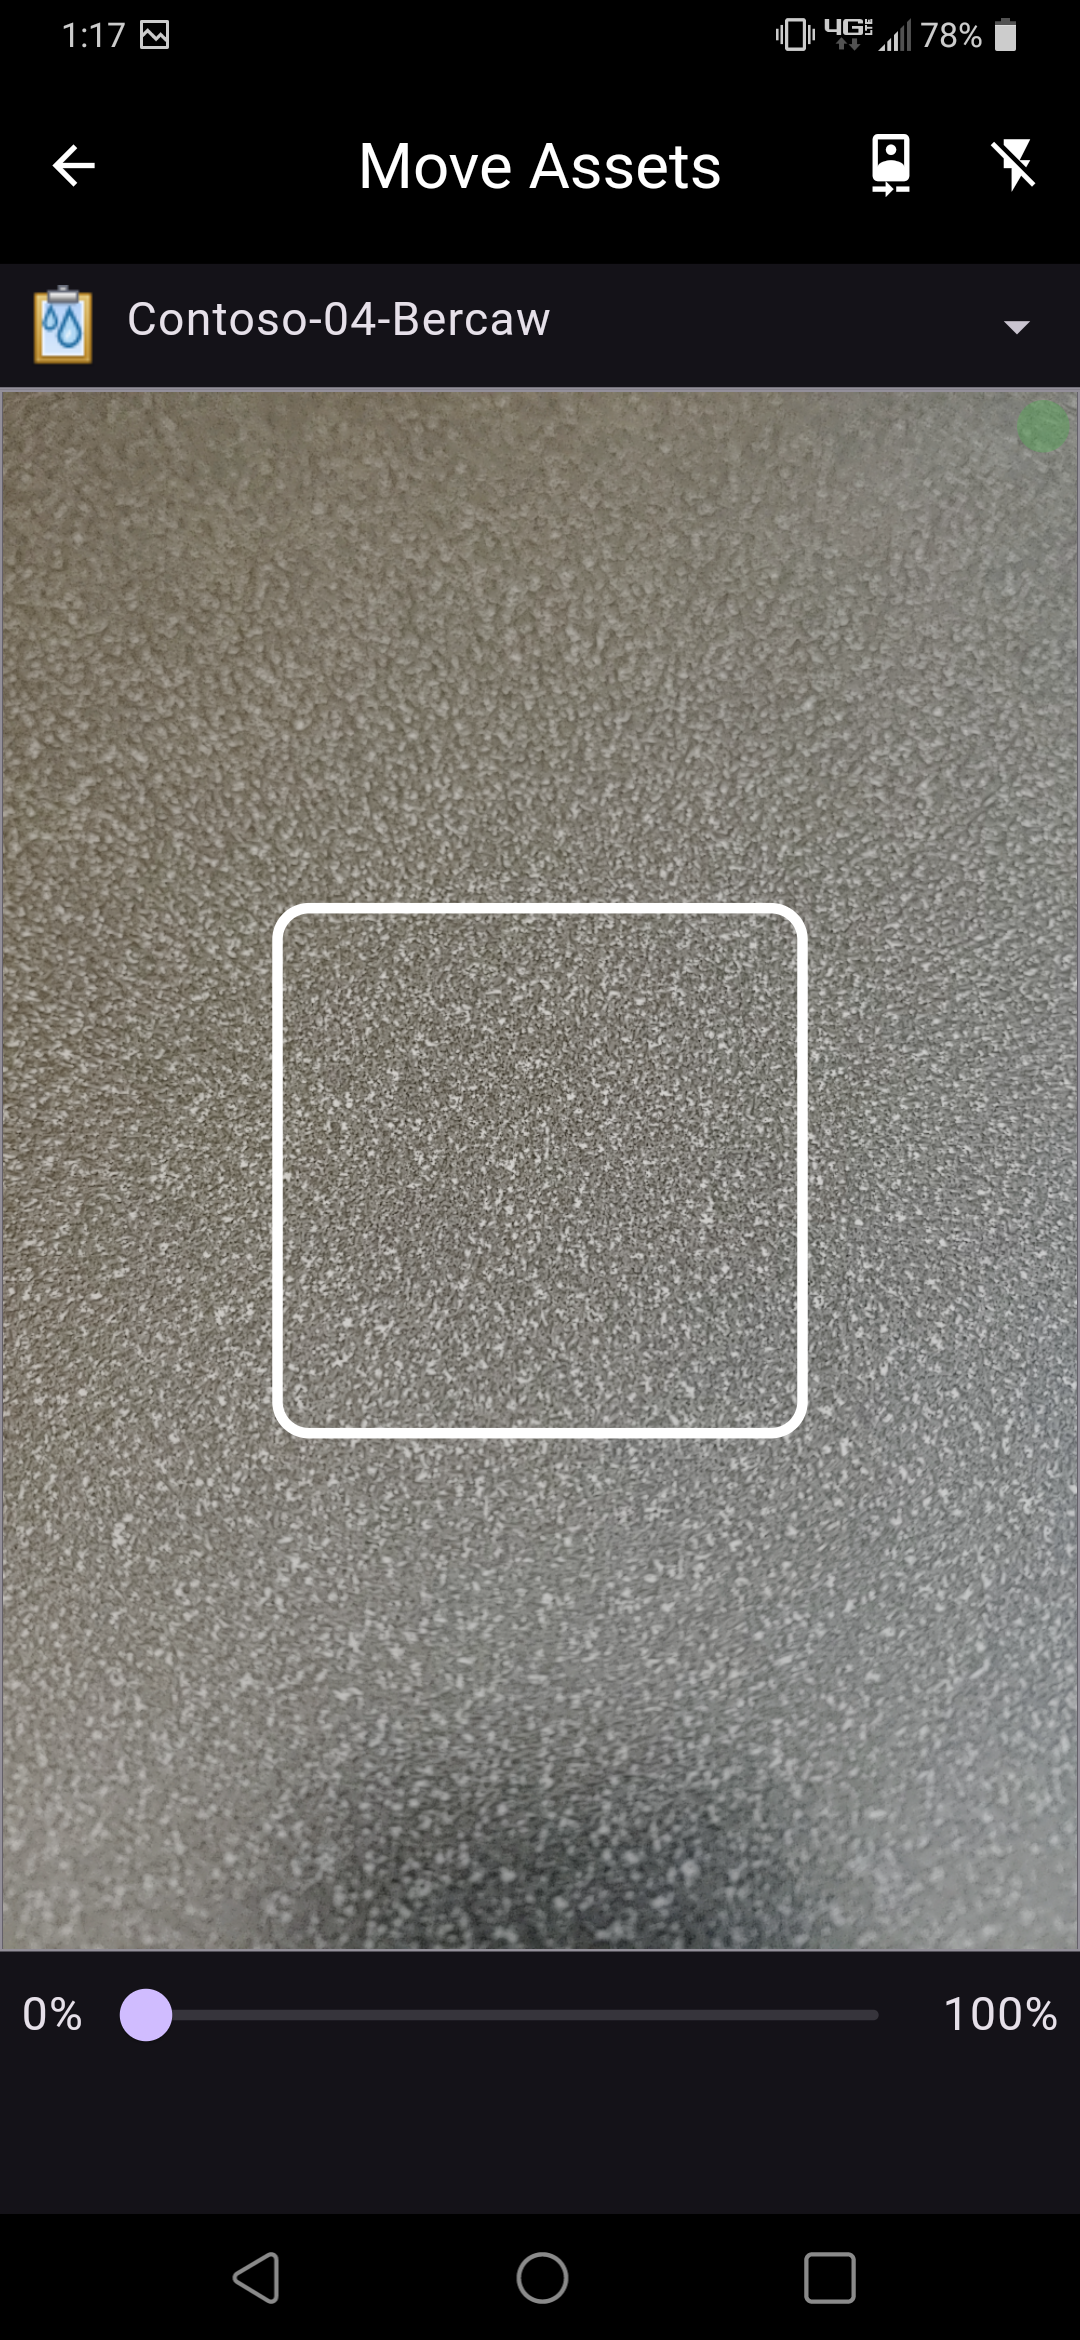
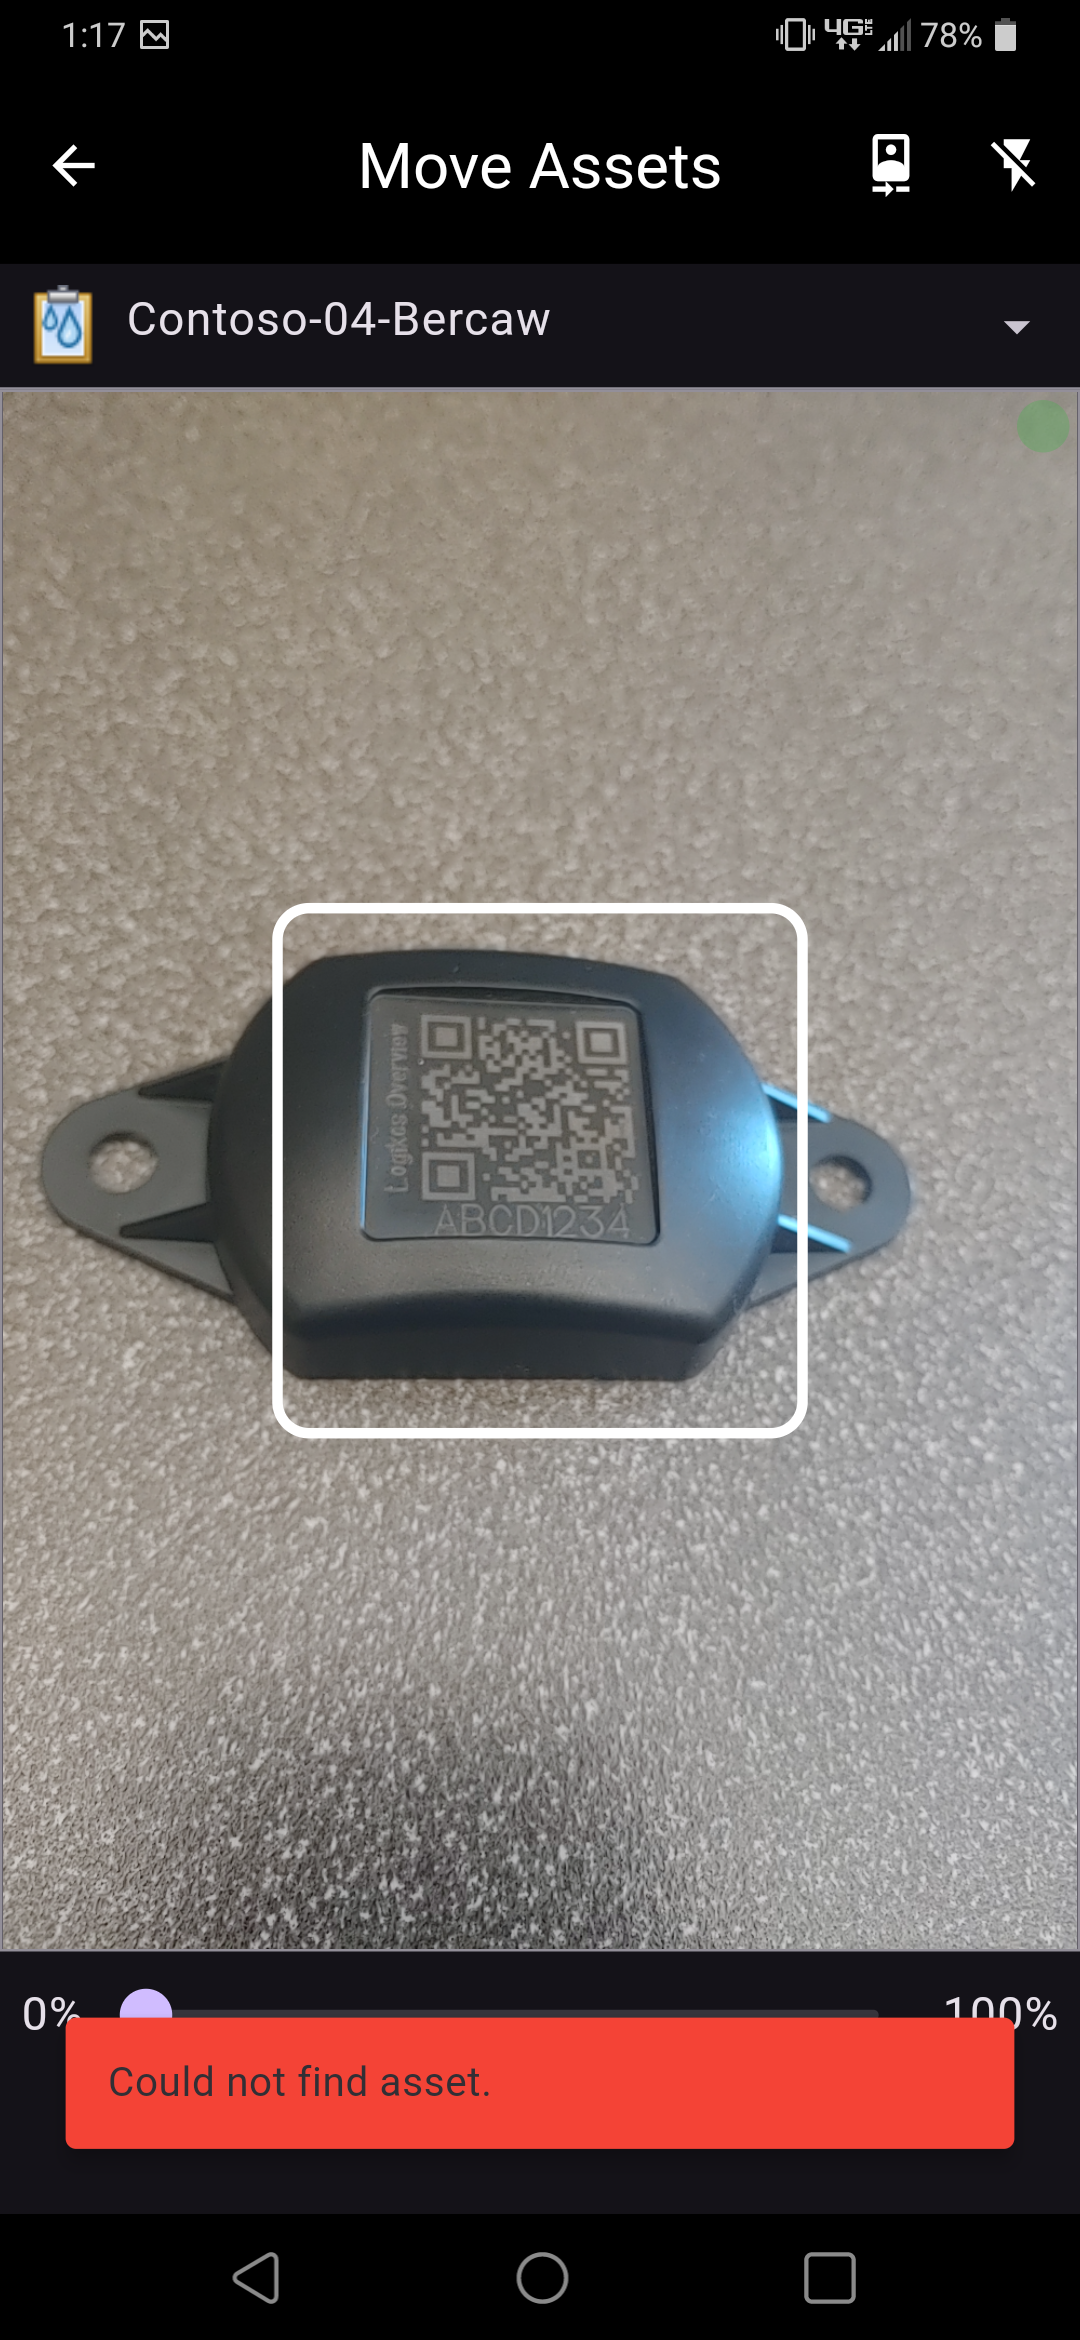
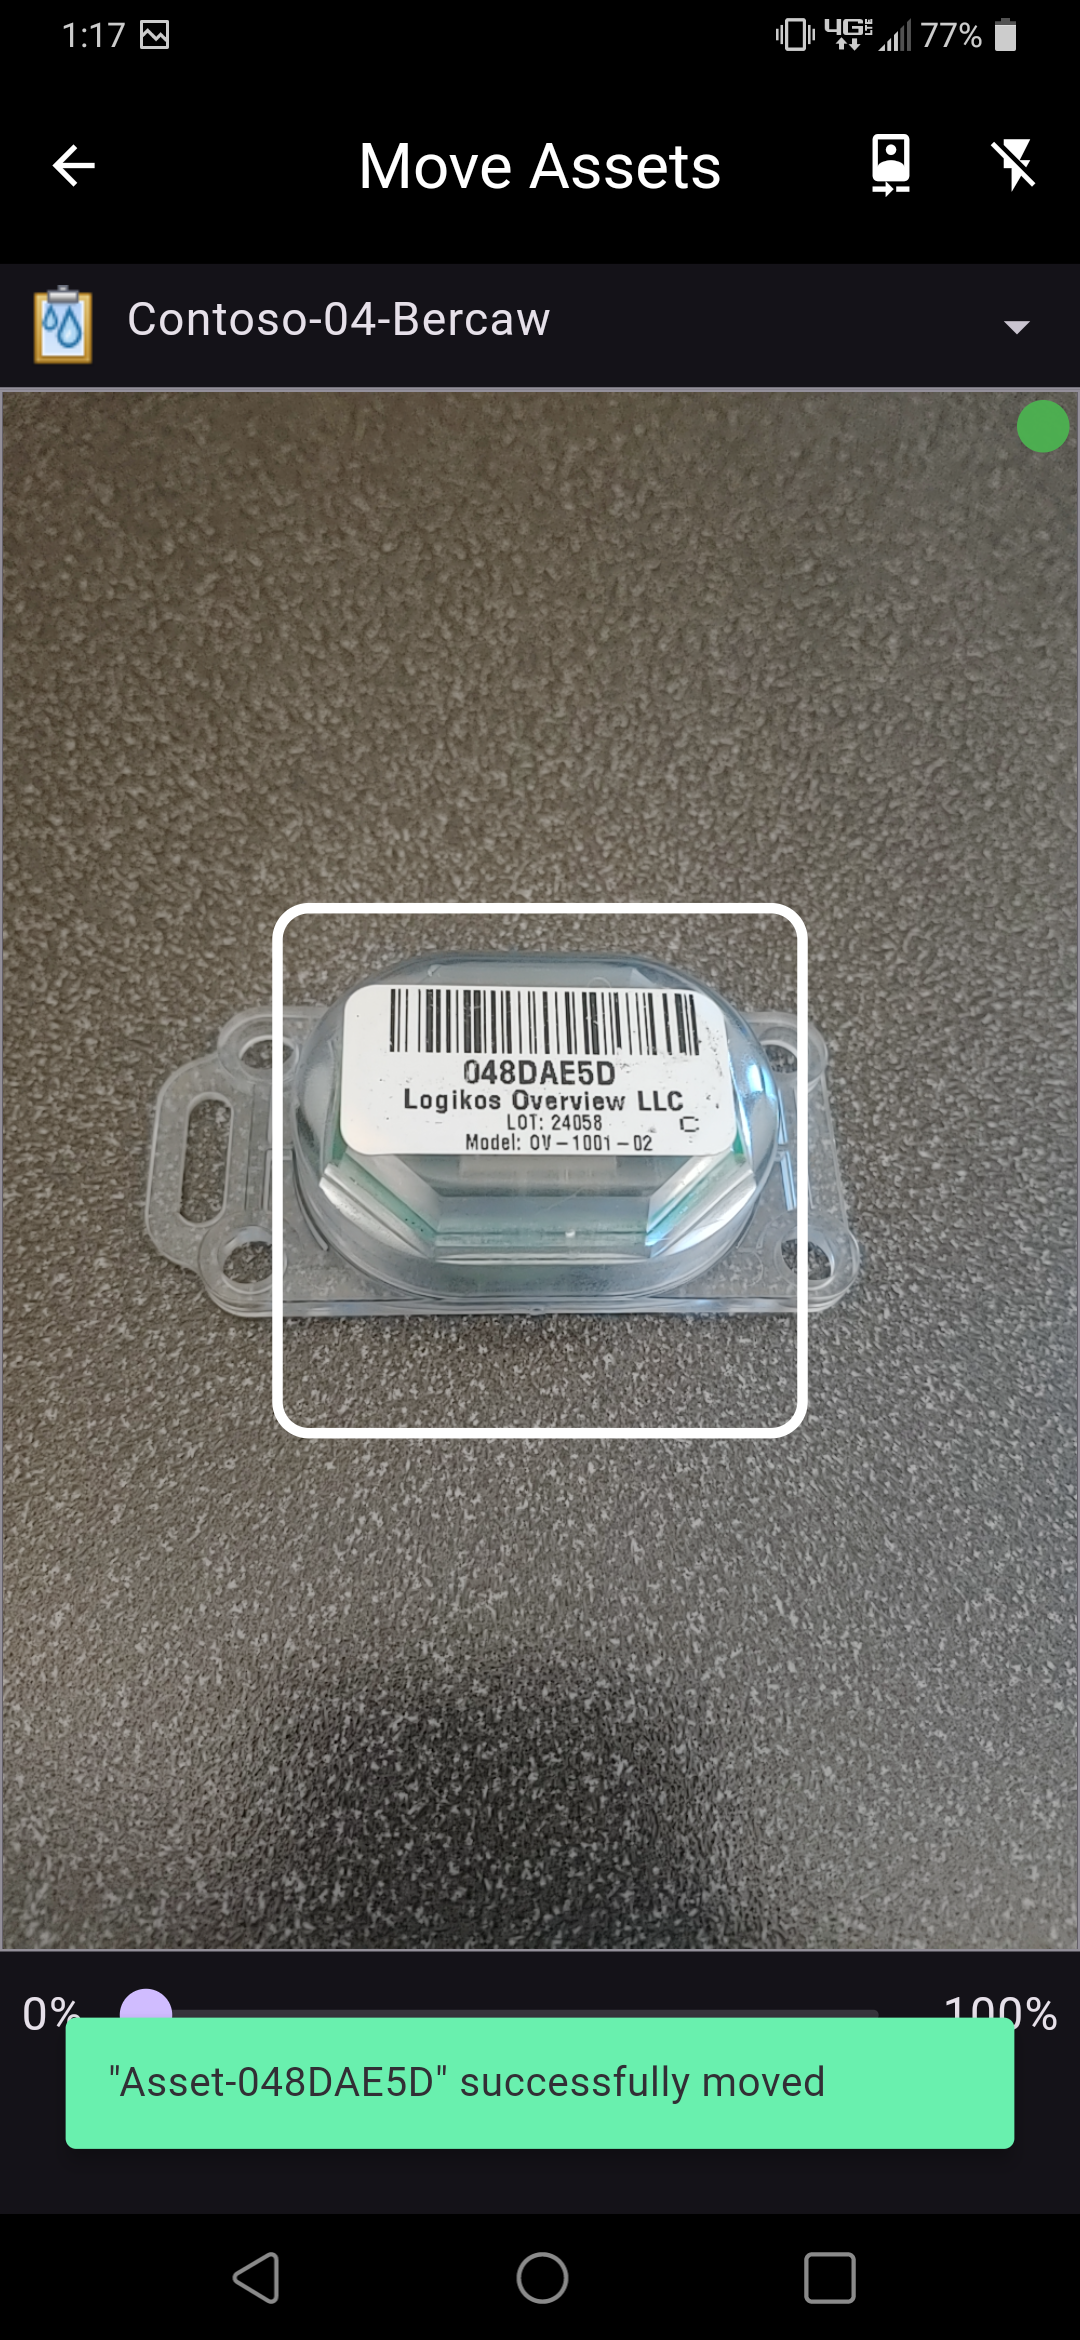
Scanning Tags: Scanning barcodes/QR codes requires the camera permission to be granted. Once the permission is granted, the camera will be displayed with a white box in the center. The scanned barcode/QR code value will be displayed at the bottom of the screen. If an asset is found with the scanned tag id, the asset's name will be displayed in a green pop up at the bottom of the screen, and the asset will be moved immediately. If an asset is not found, or the asset is a container asset, an error message will be displayed in a red pop up at the bottom of the screen.
Tag Locator
Tag Locator uses a custom hardware device to find tags in close proximity to the device. This is useful when multiple tags are in close proximity to each other and the precision offered by the map is no longer enough. It has a tabbed interface that is described below.
- NOTE 1: Tag Locator is only available on Android.
- NOTE 2: Tags will be detected while the app is running in the background.
Sniffer
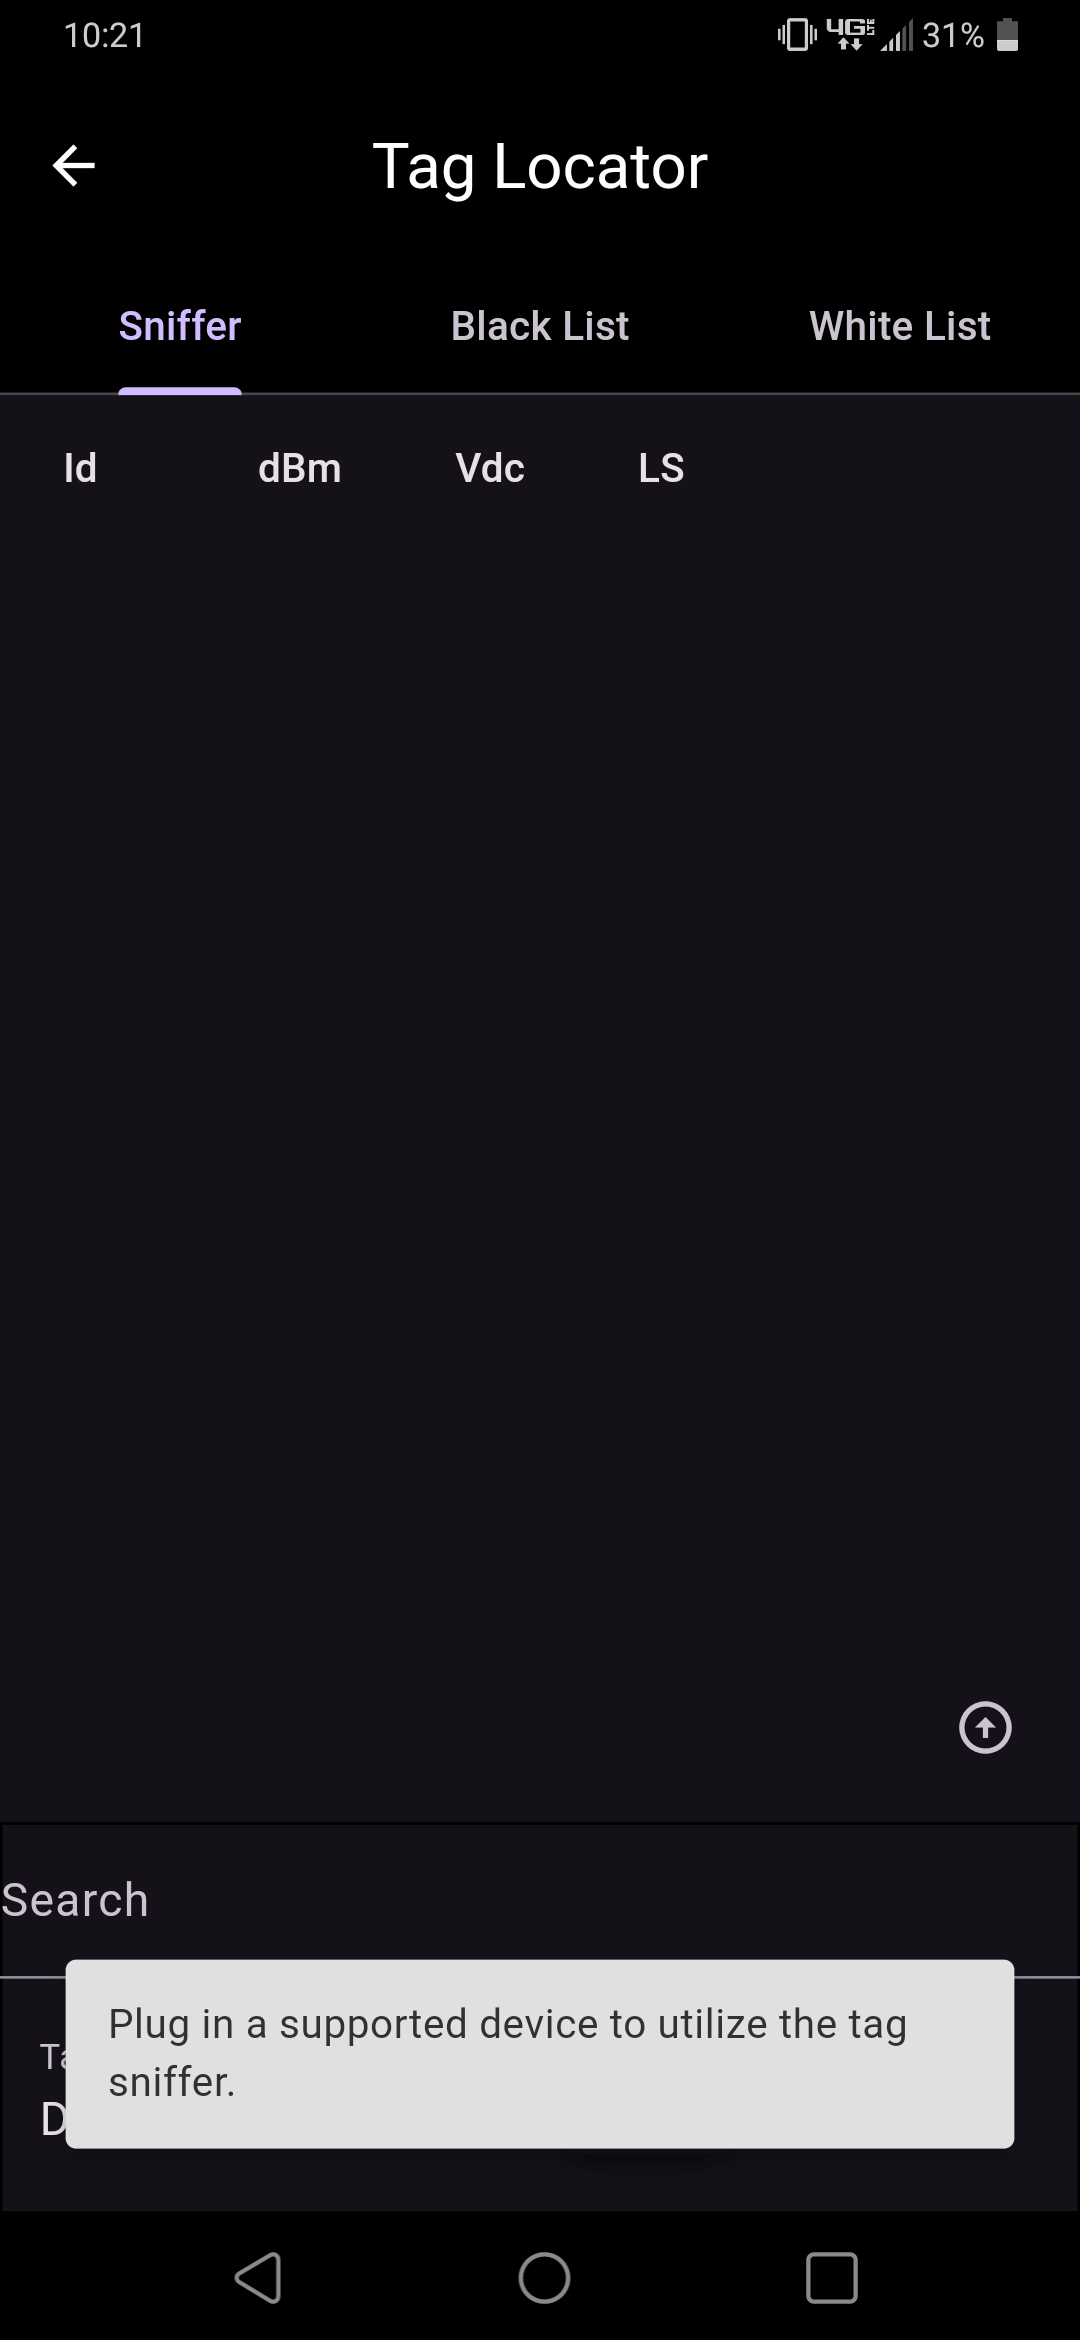
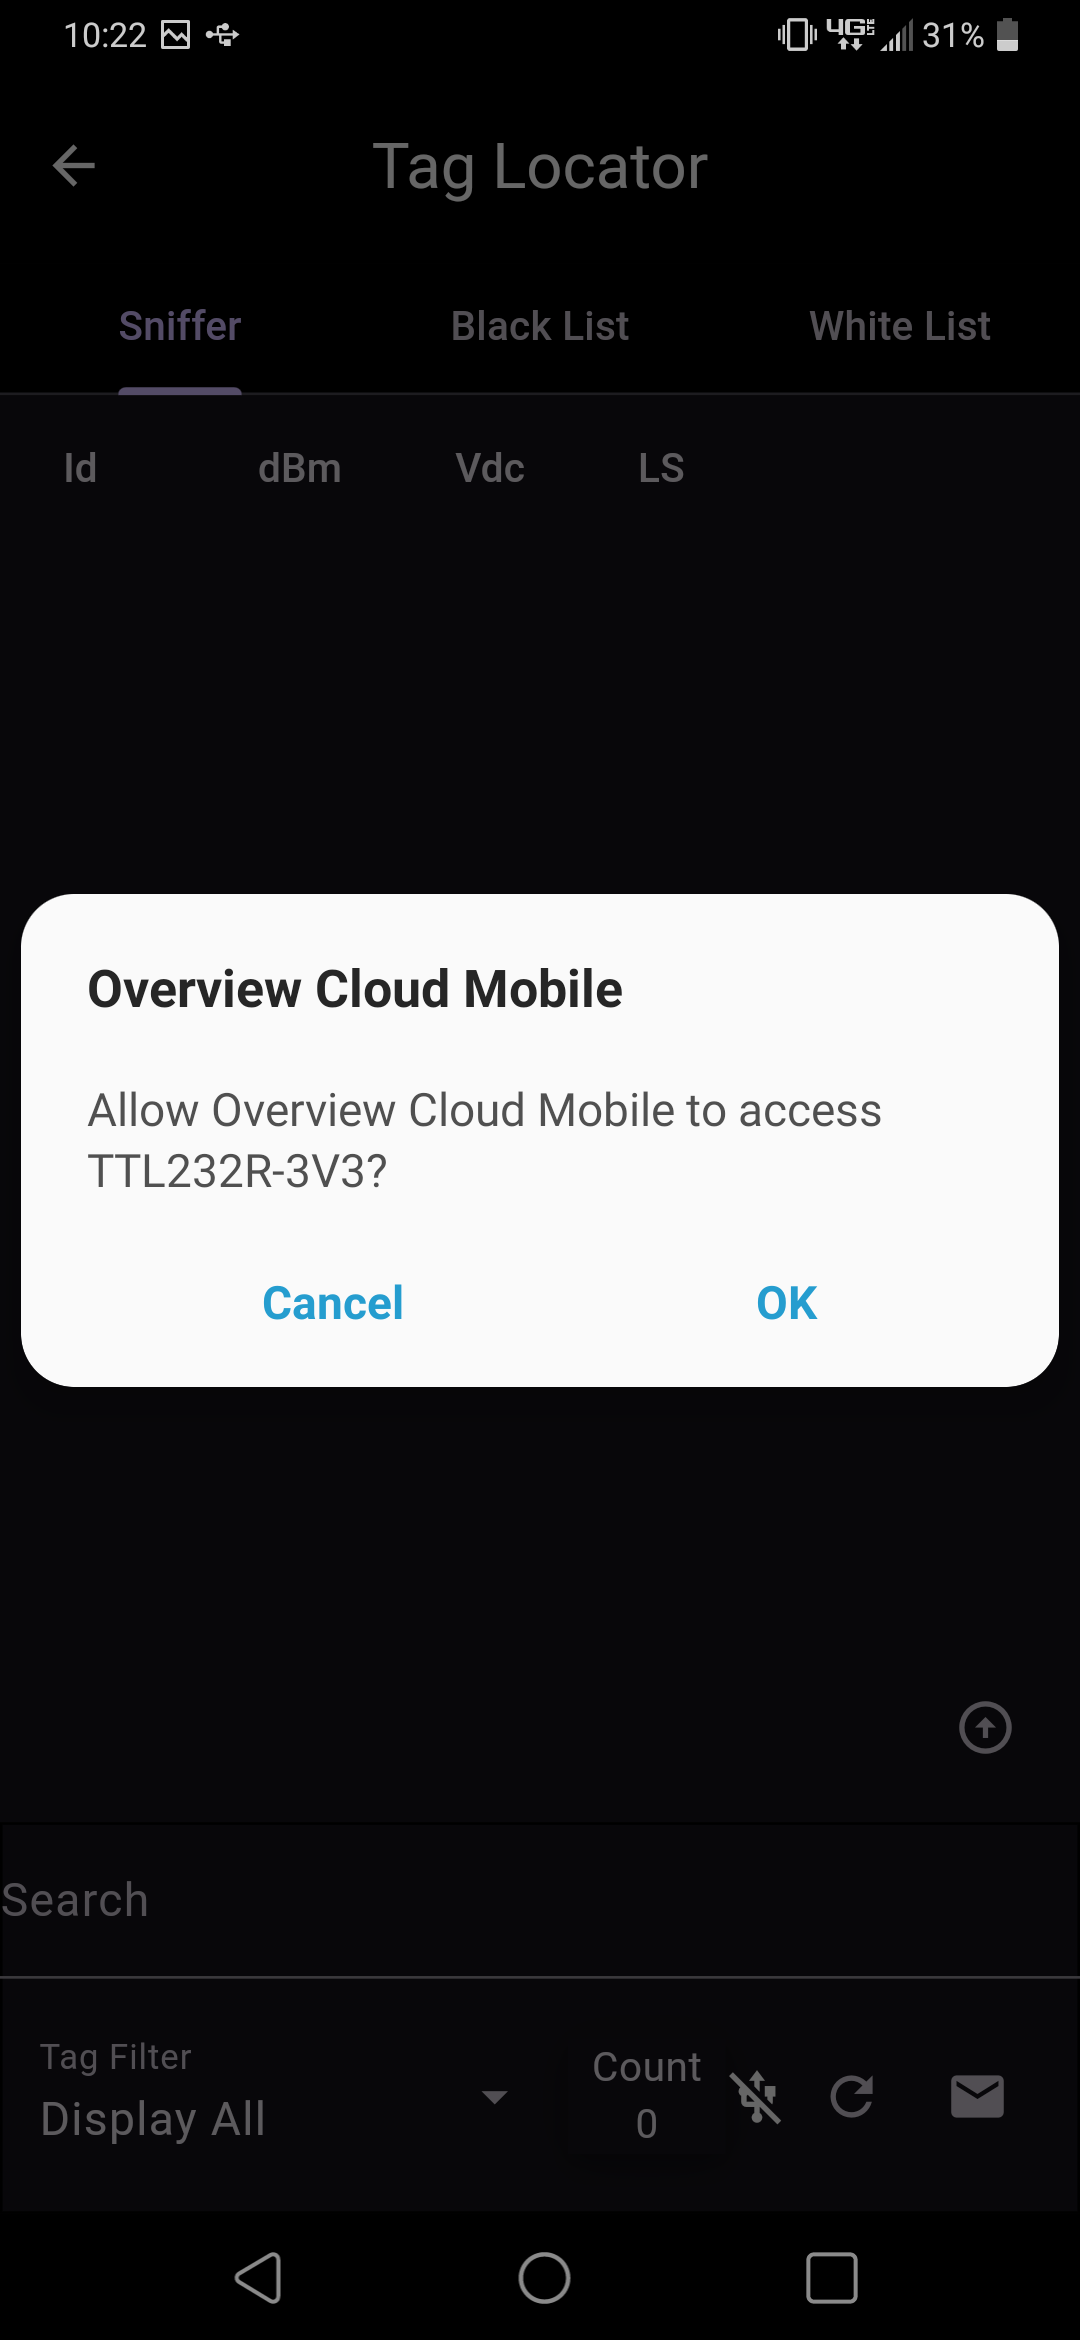
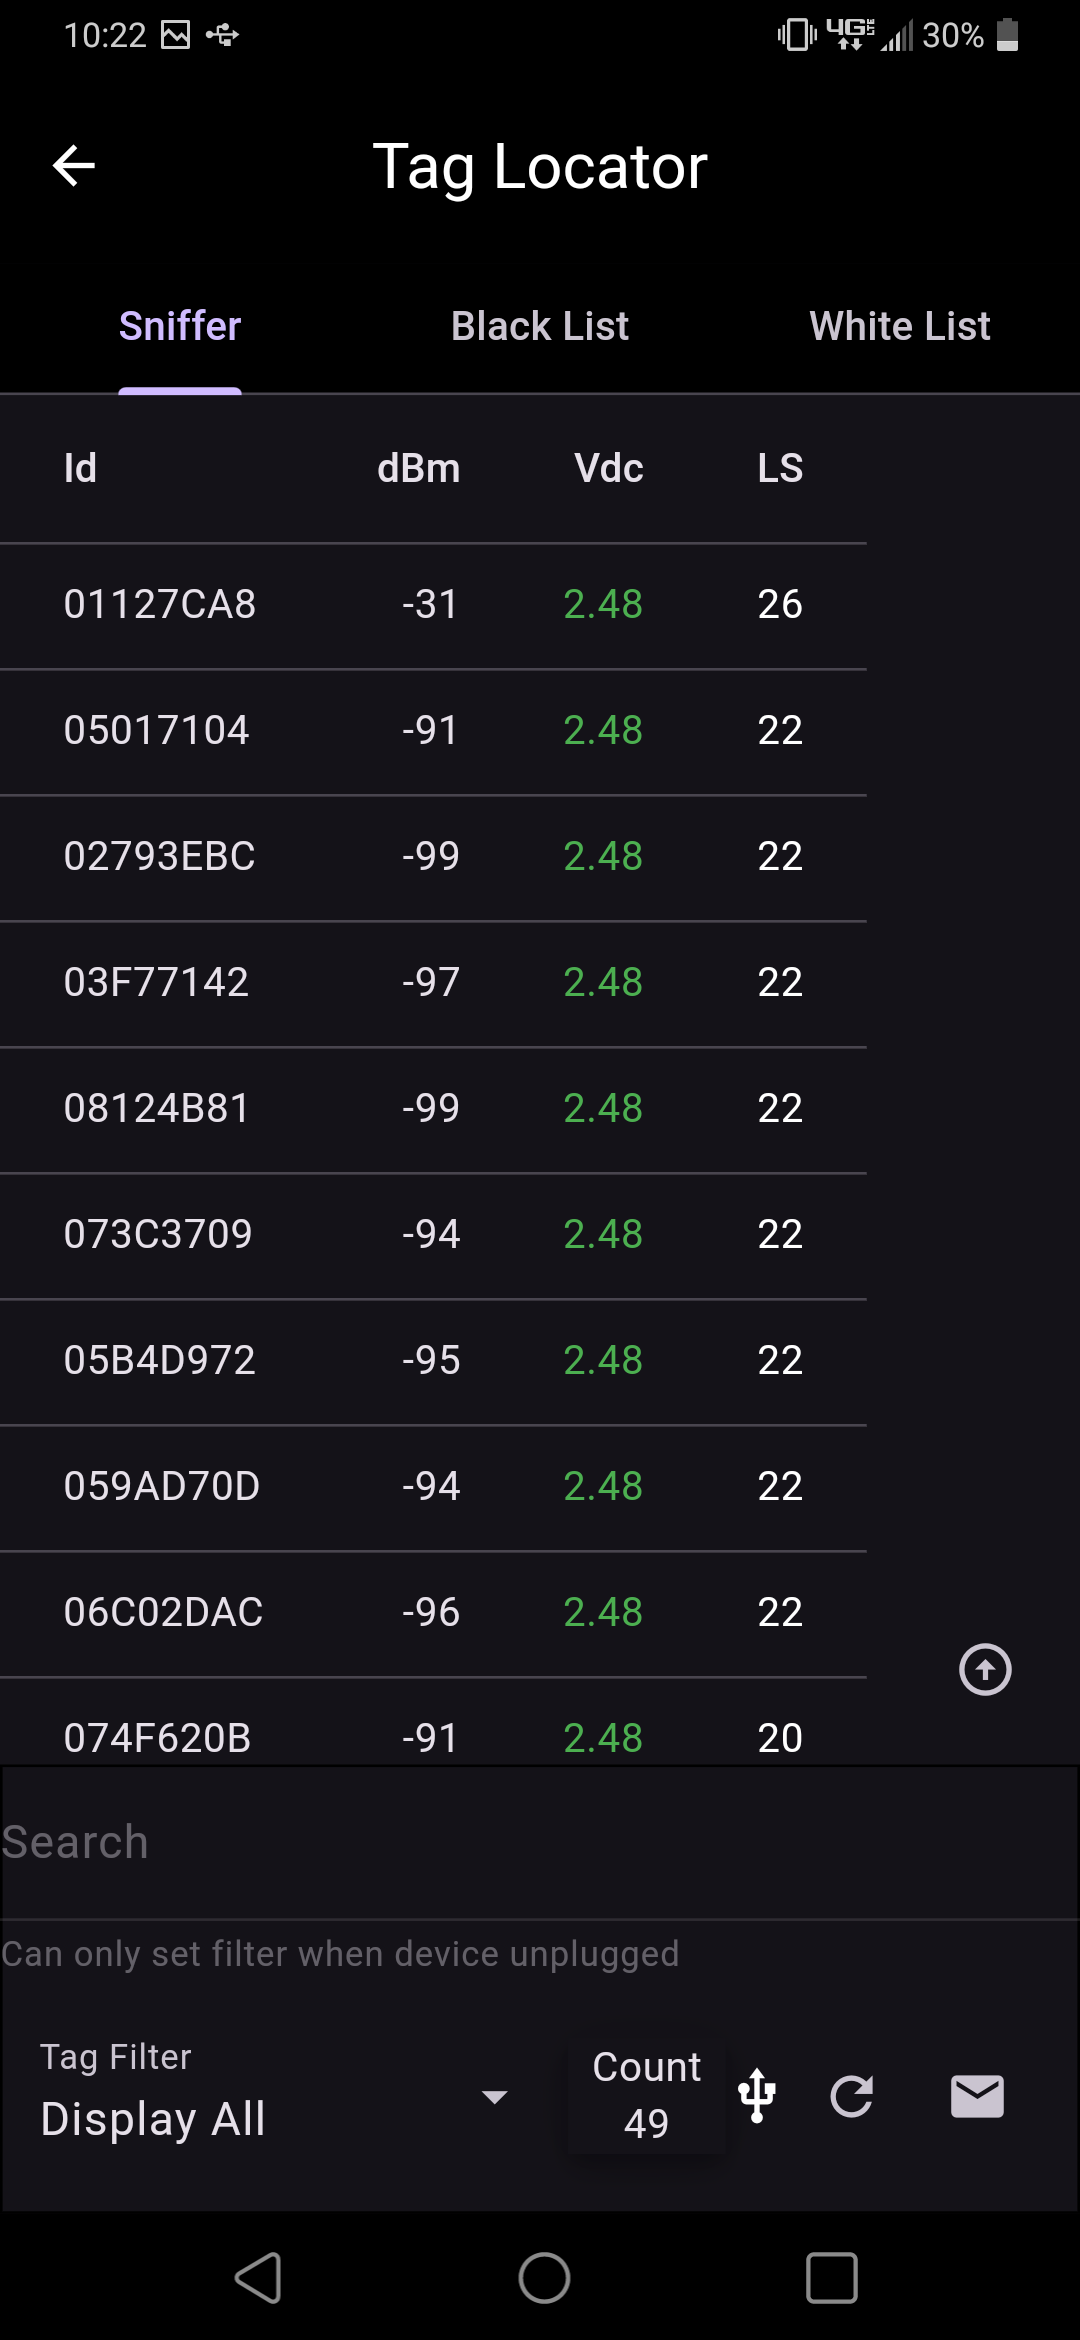
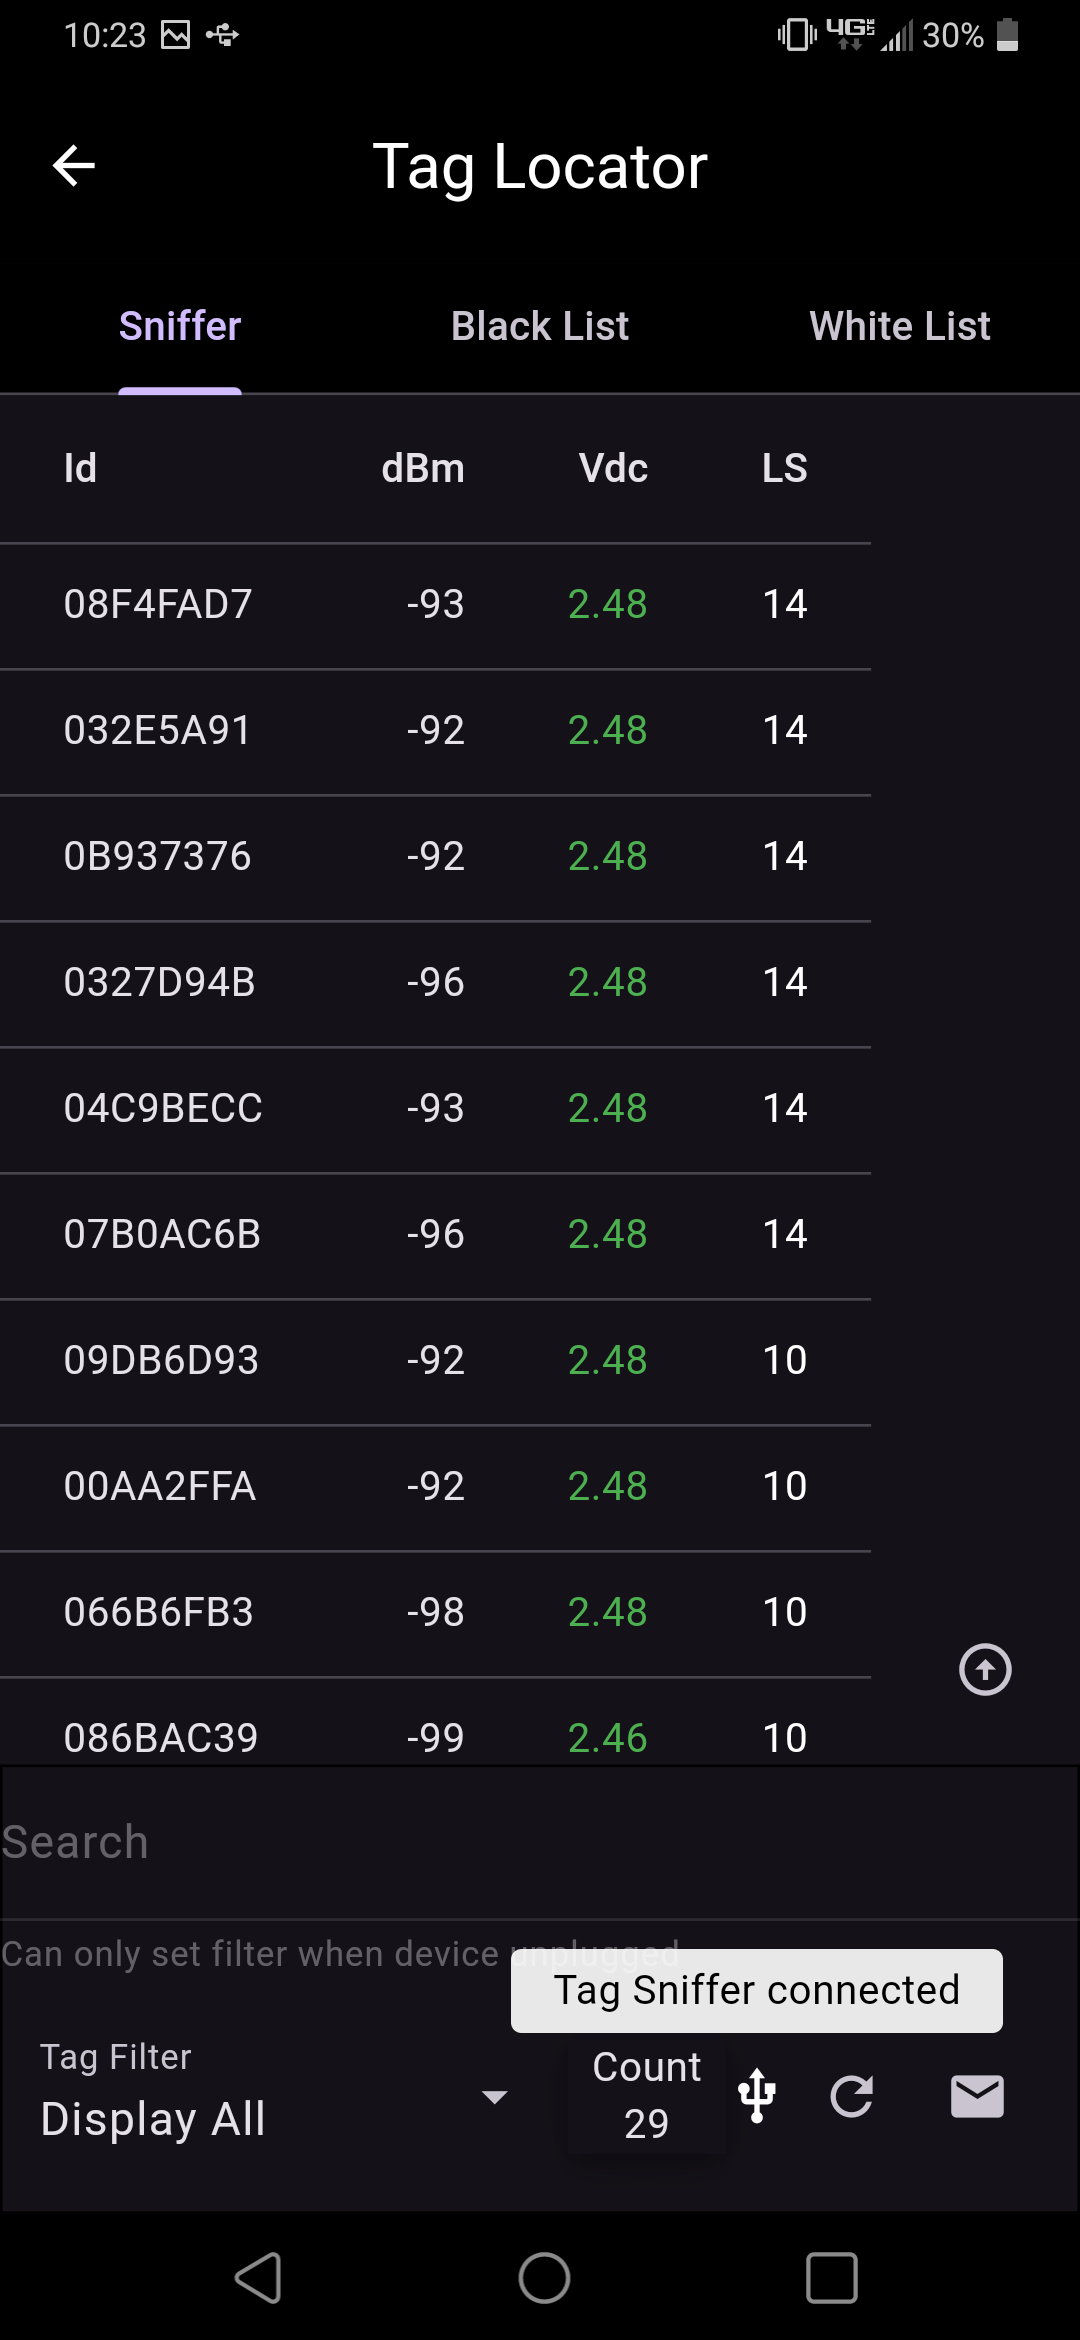
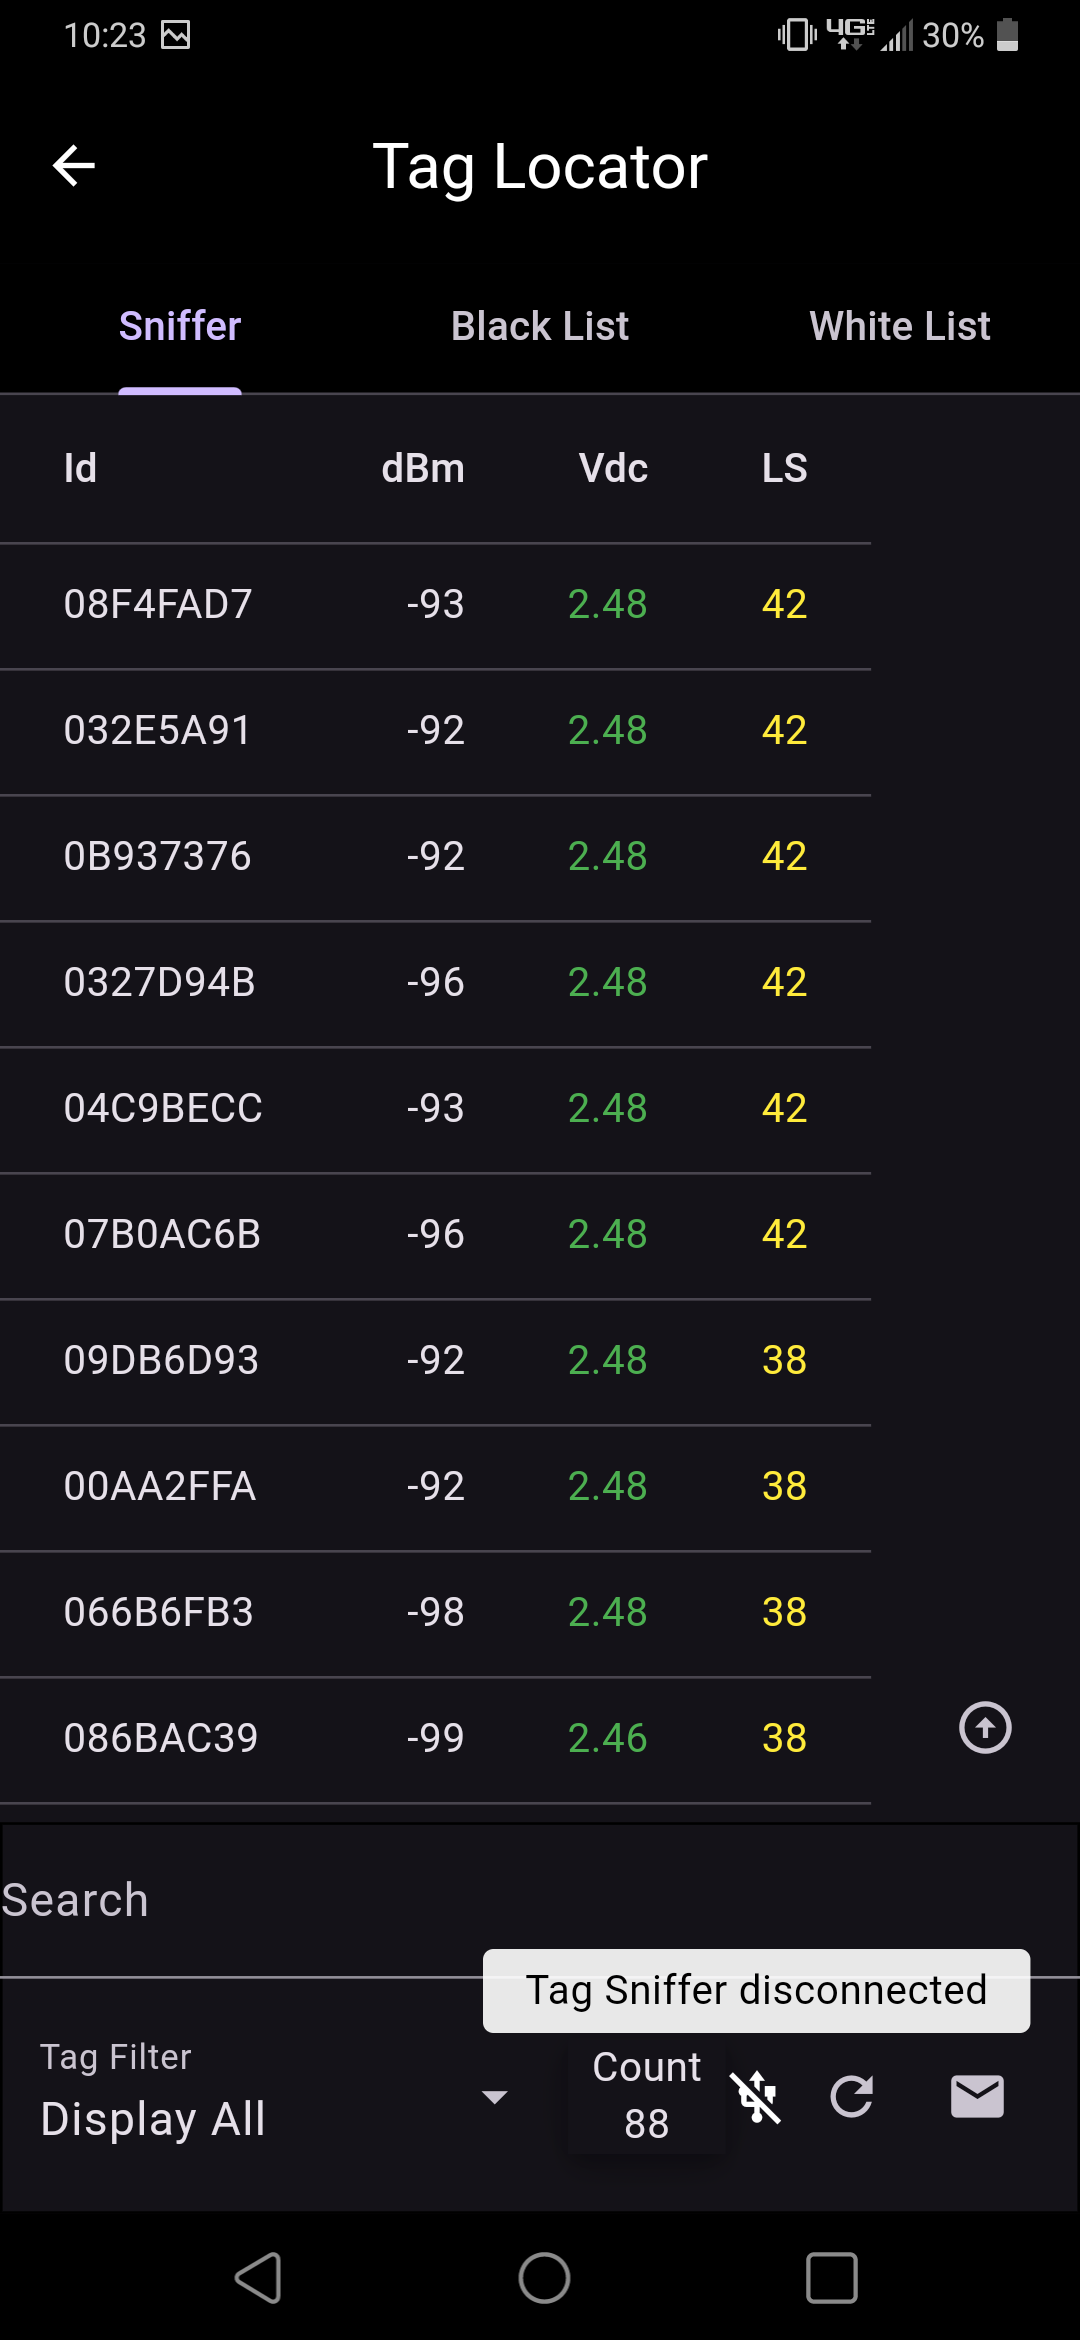
The Sniffer tab displays the tags that are found via the tag sniffer hardware. After plugging in the tag sniffer hardware and allowing access, the Sniffer tab will begin displaying tags detected by the sniffer hardware. The tags are listed as well as their Id, dBm, and Vdc values.
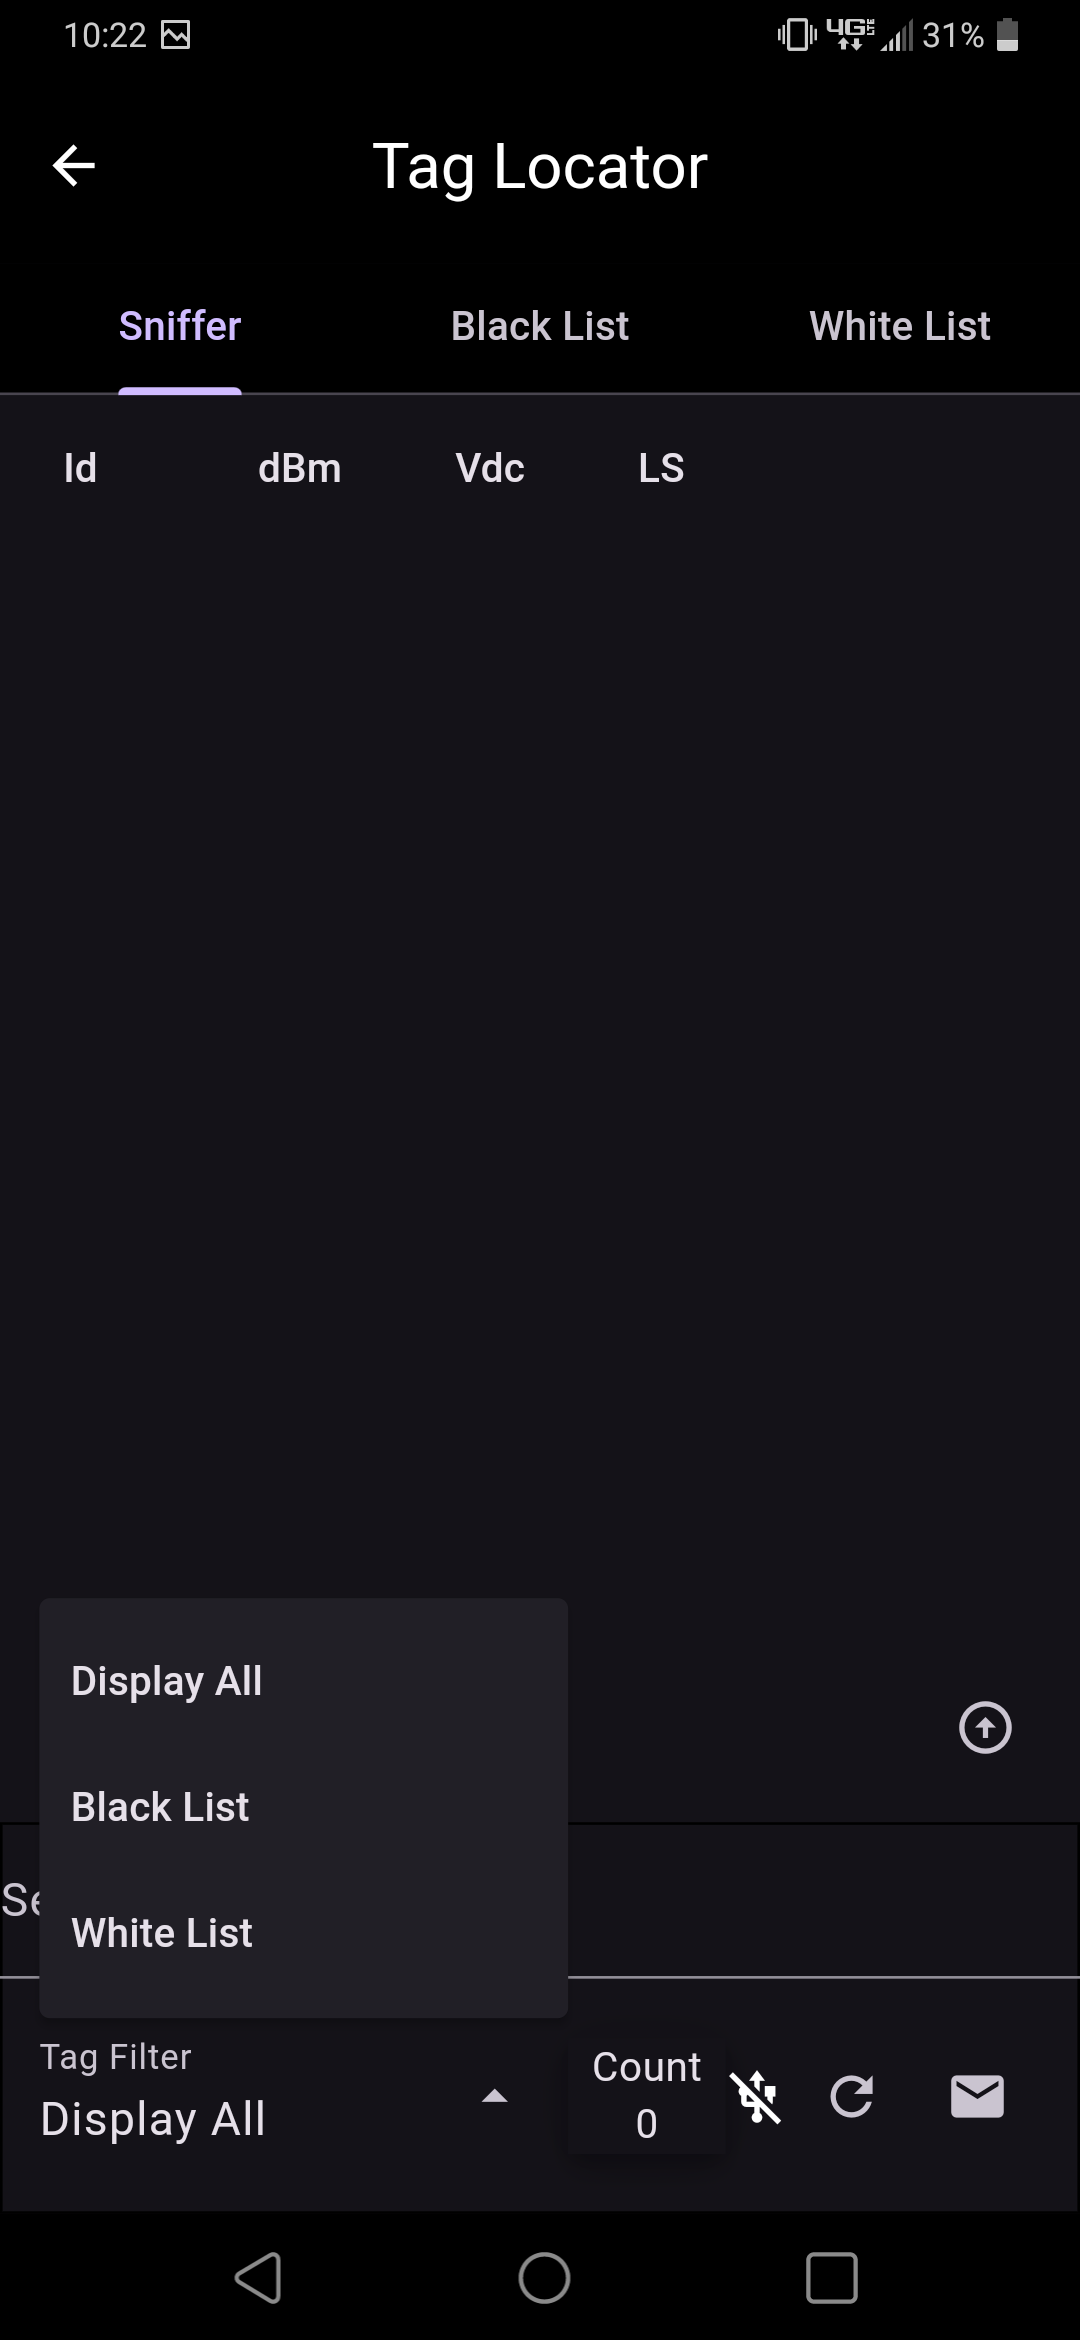
Data filtering options are available via the Tag Filter field. Entering text in the Search field will filter based on that text. Selecting one of the list filters will filter based on that list.
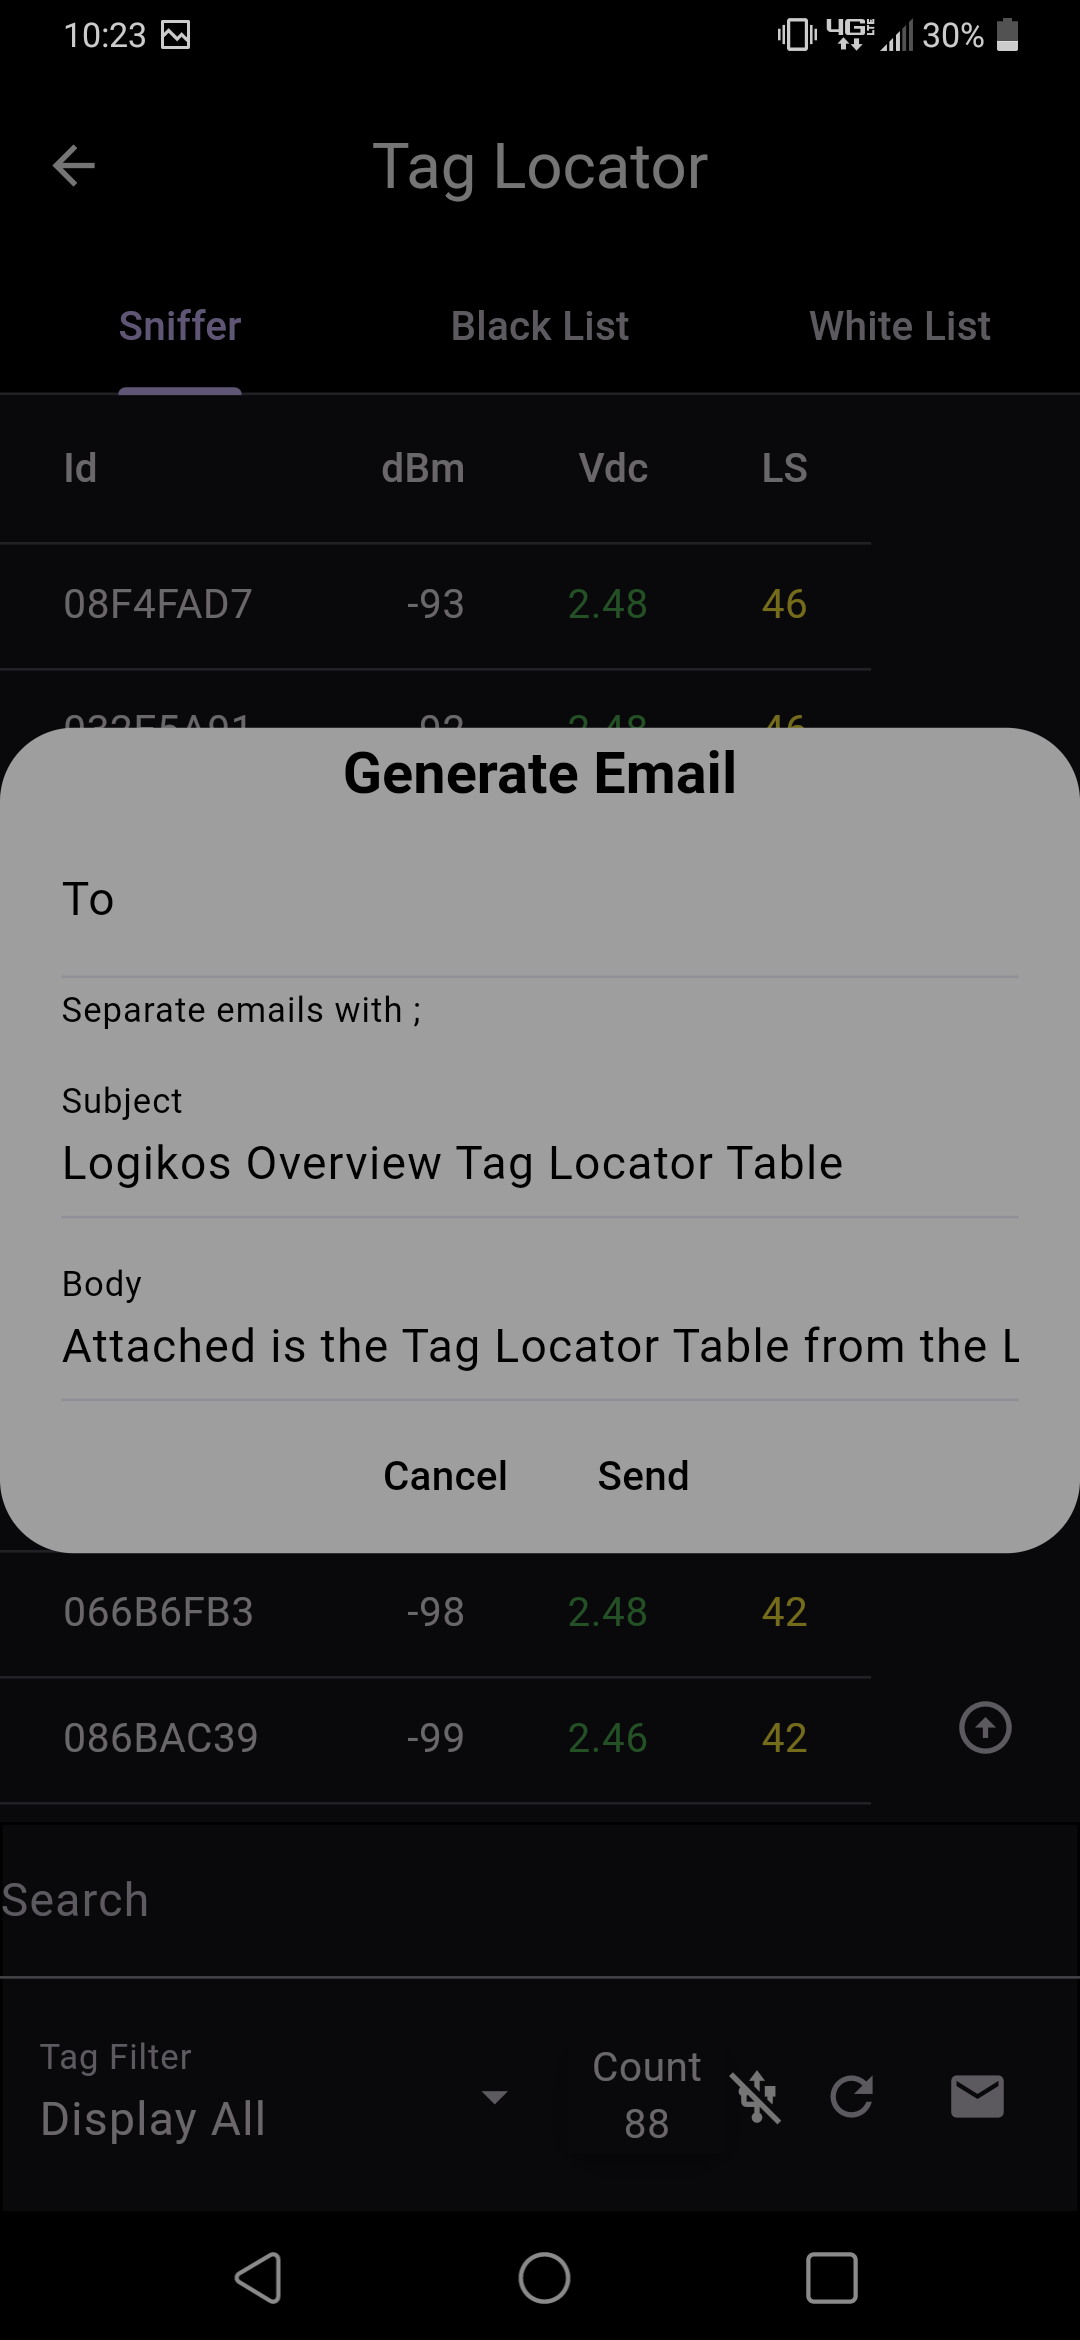
Select the Email button to send a report of the detected tags. The email identifies the filter utilized on the Sniffer tab along with a TabLocatorTable.csv file containing the discovered tags.
Filter Lists
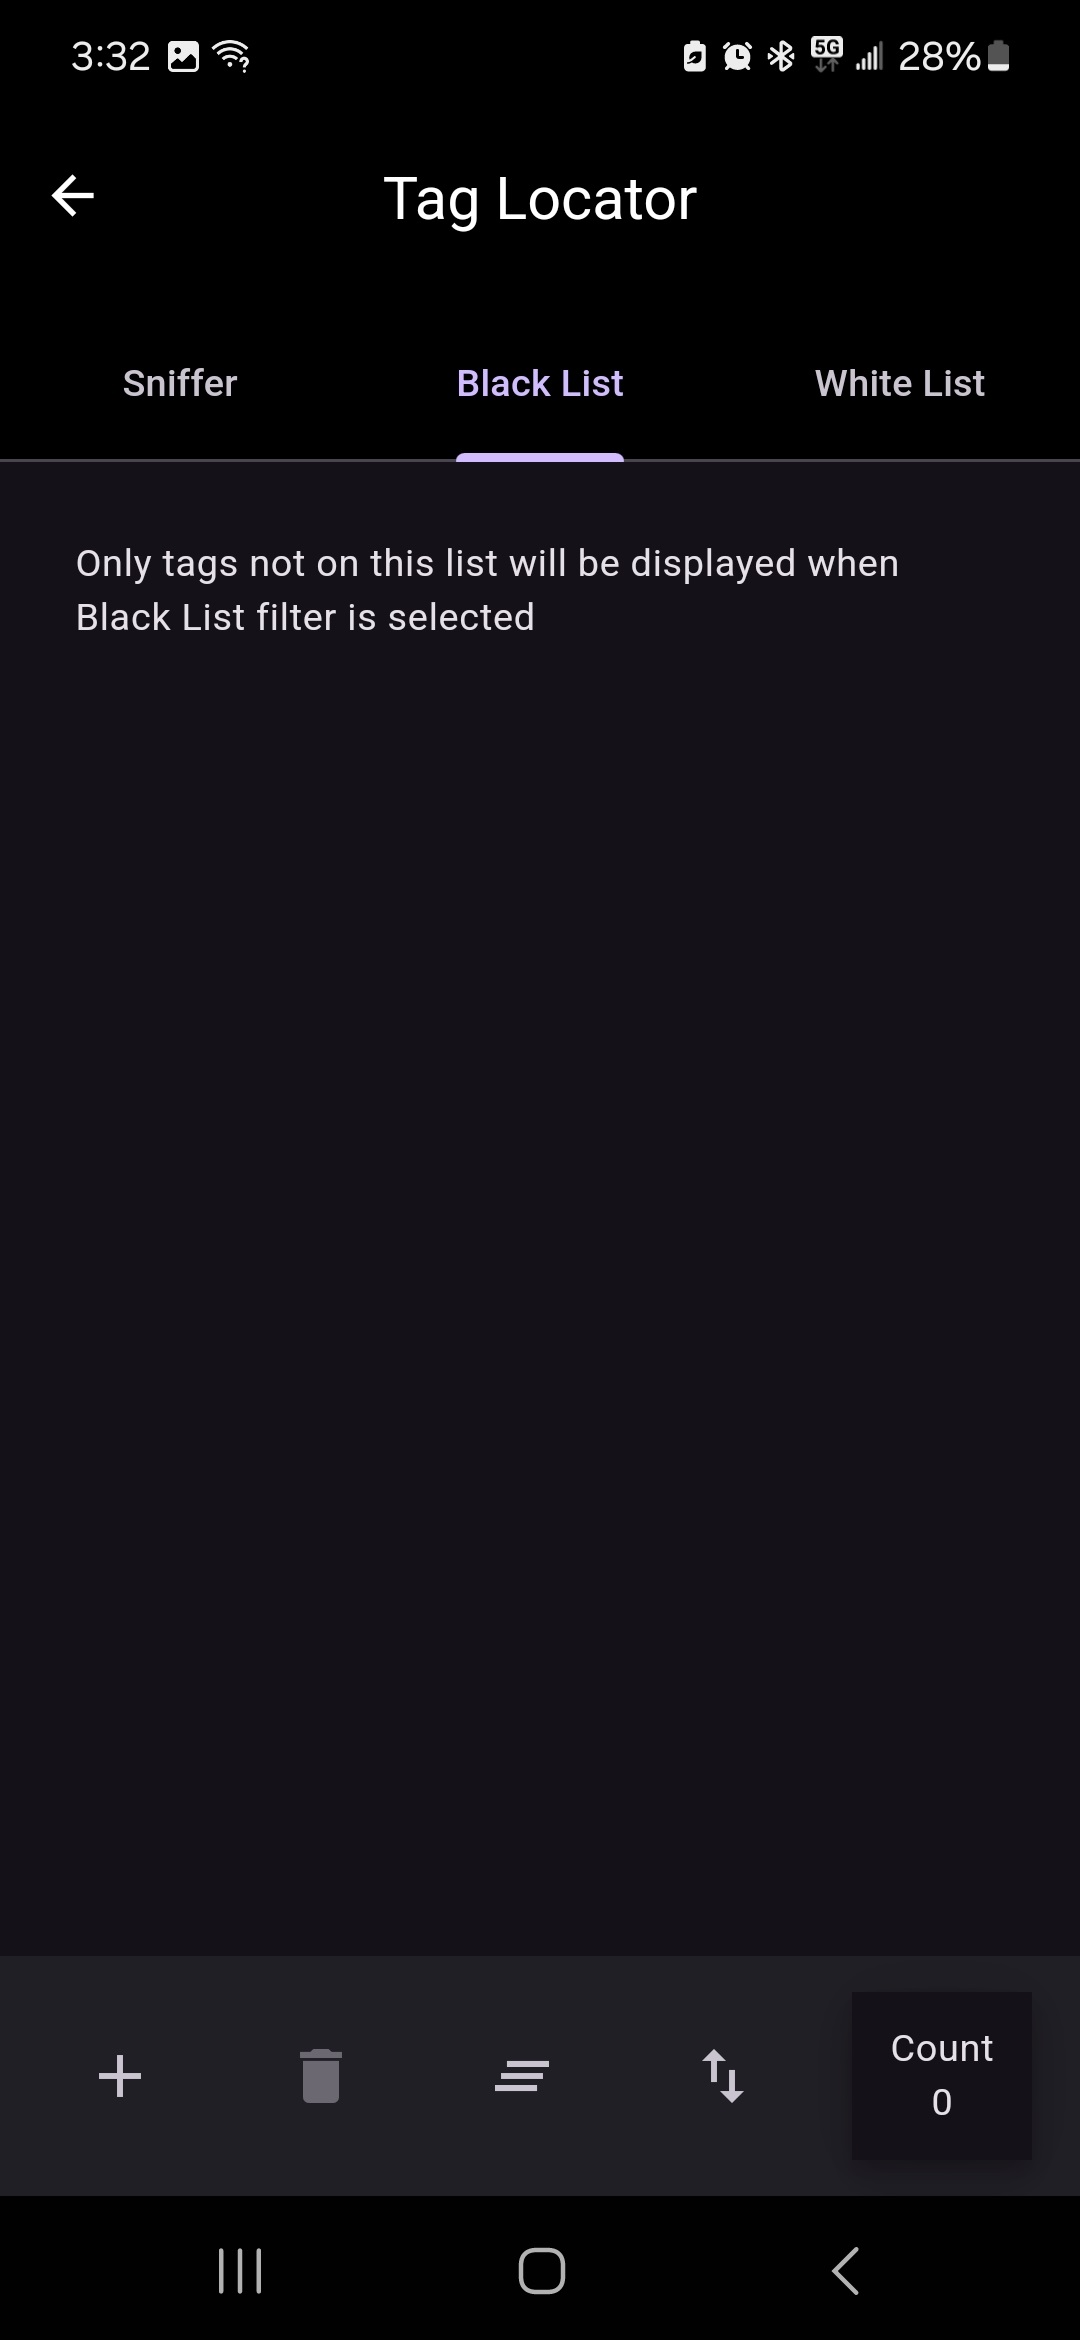
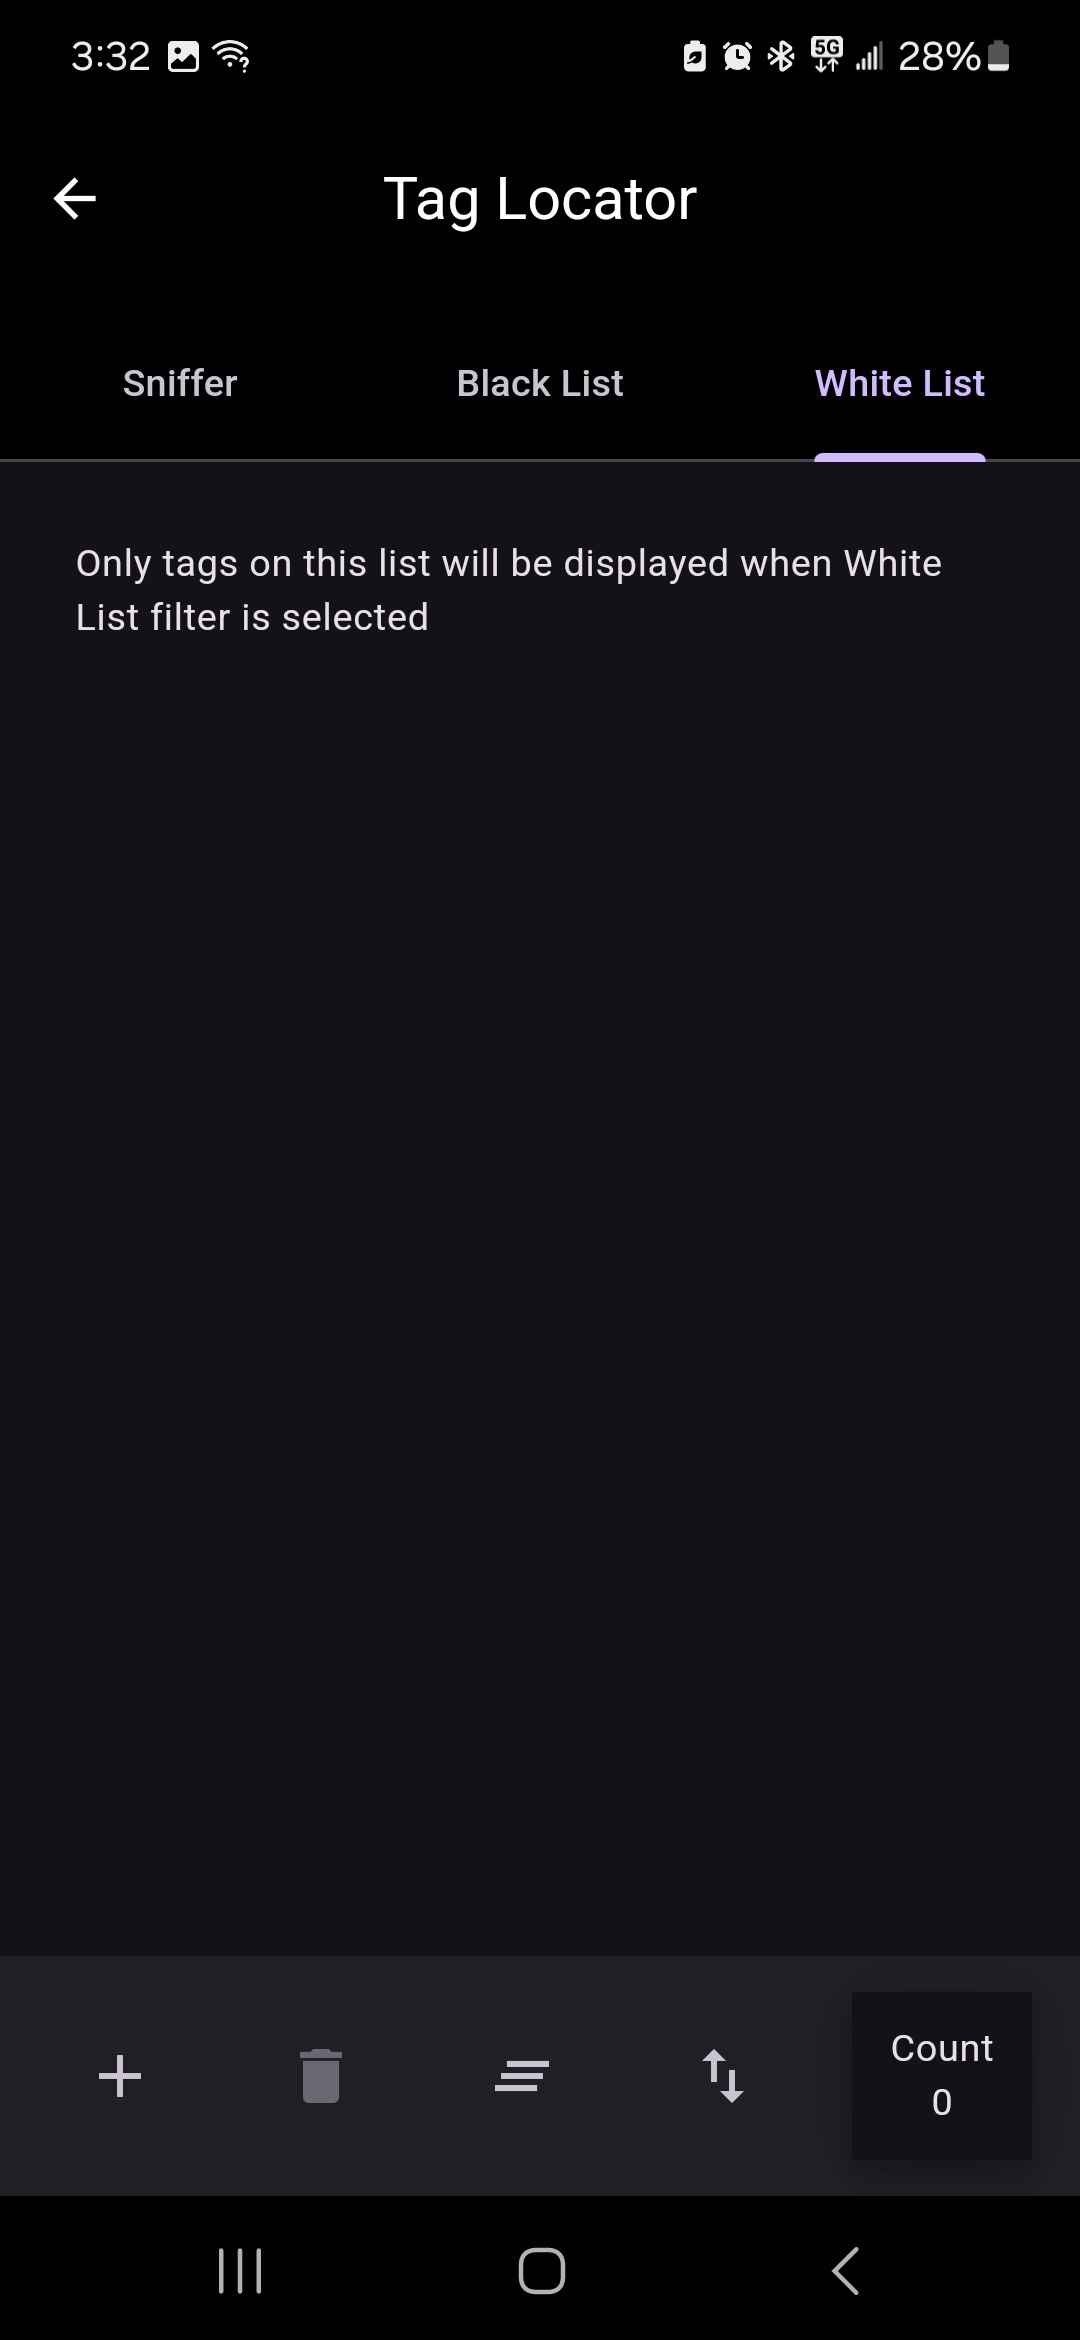
The Black List and White List tabs provide the ability to setup a list of tag ID filters. When these are selected with the Tag Filter on the Sniffer tab, only certain tags specified by the lists will be displayed:
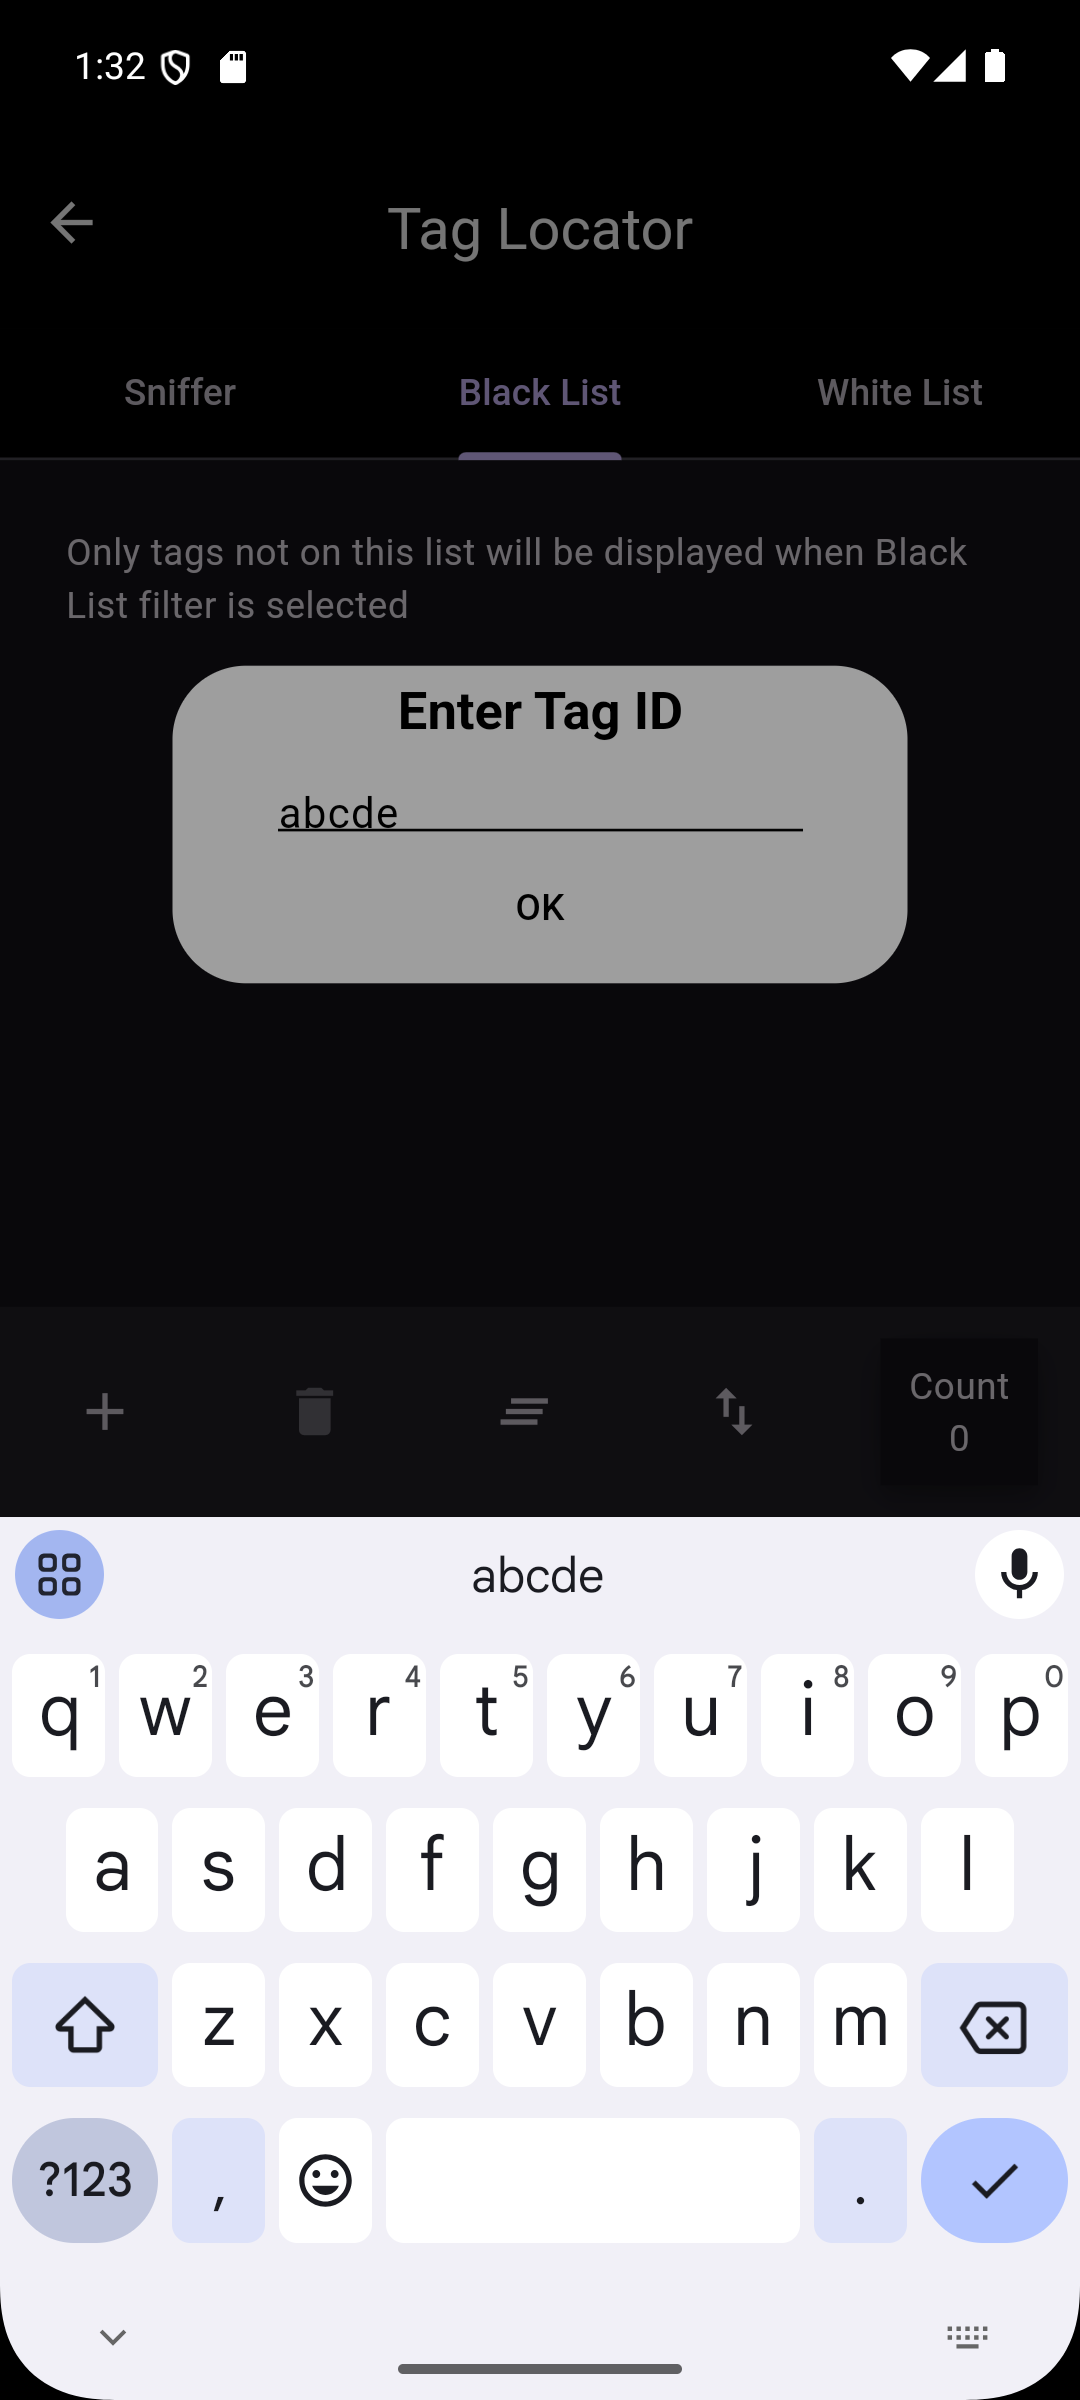
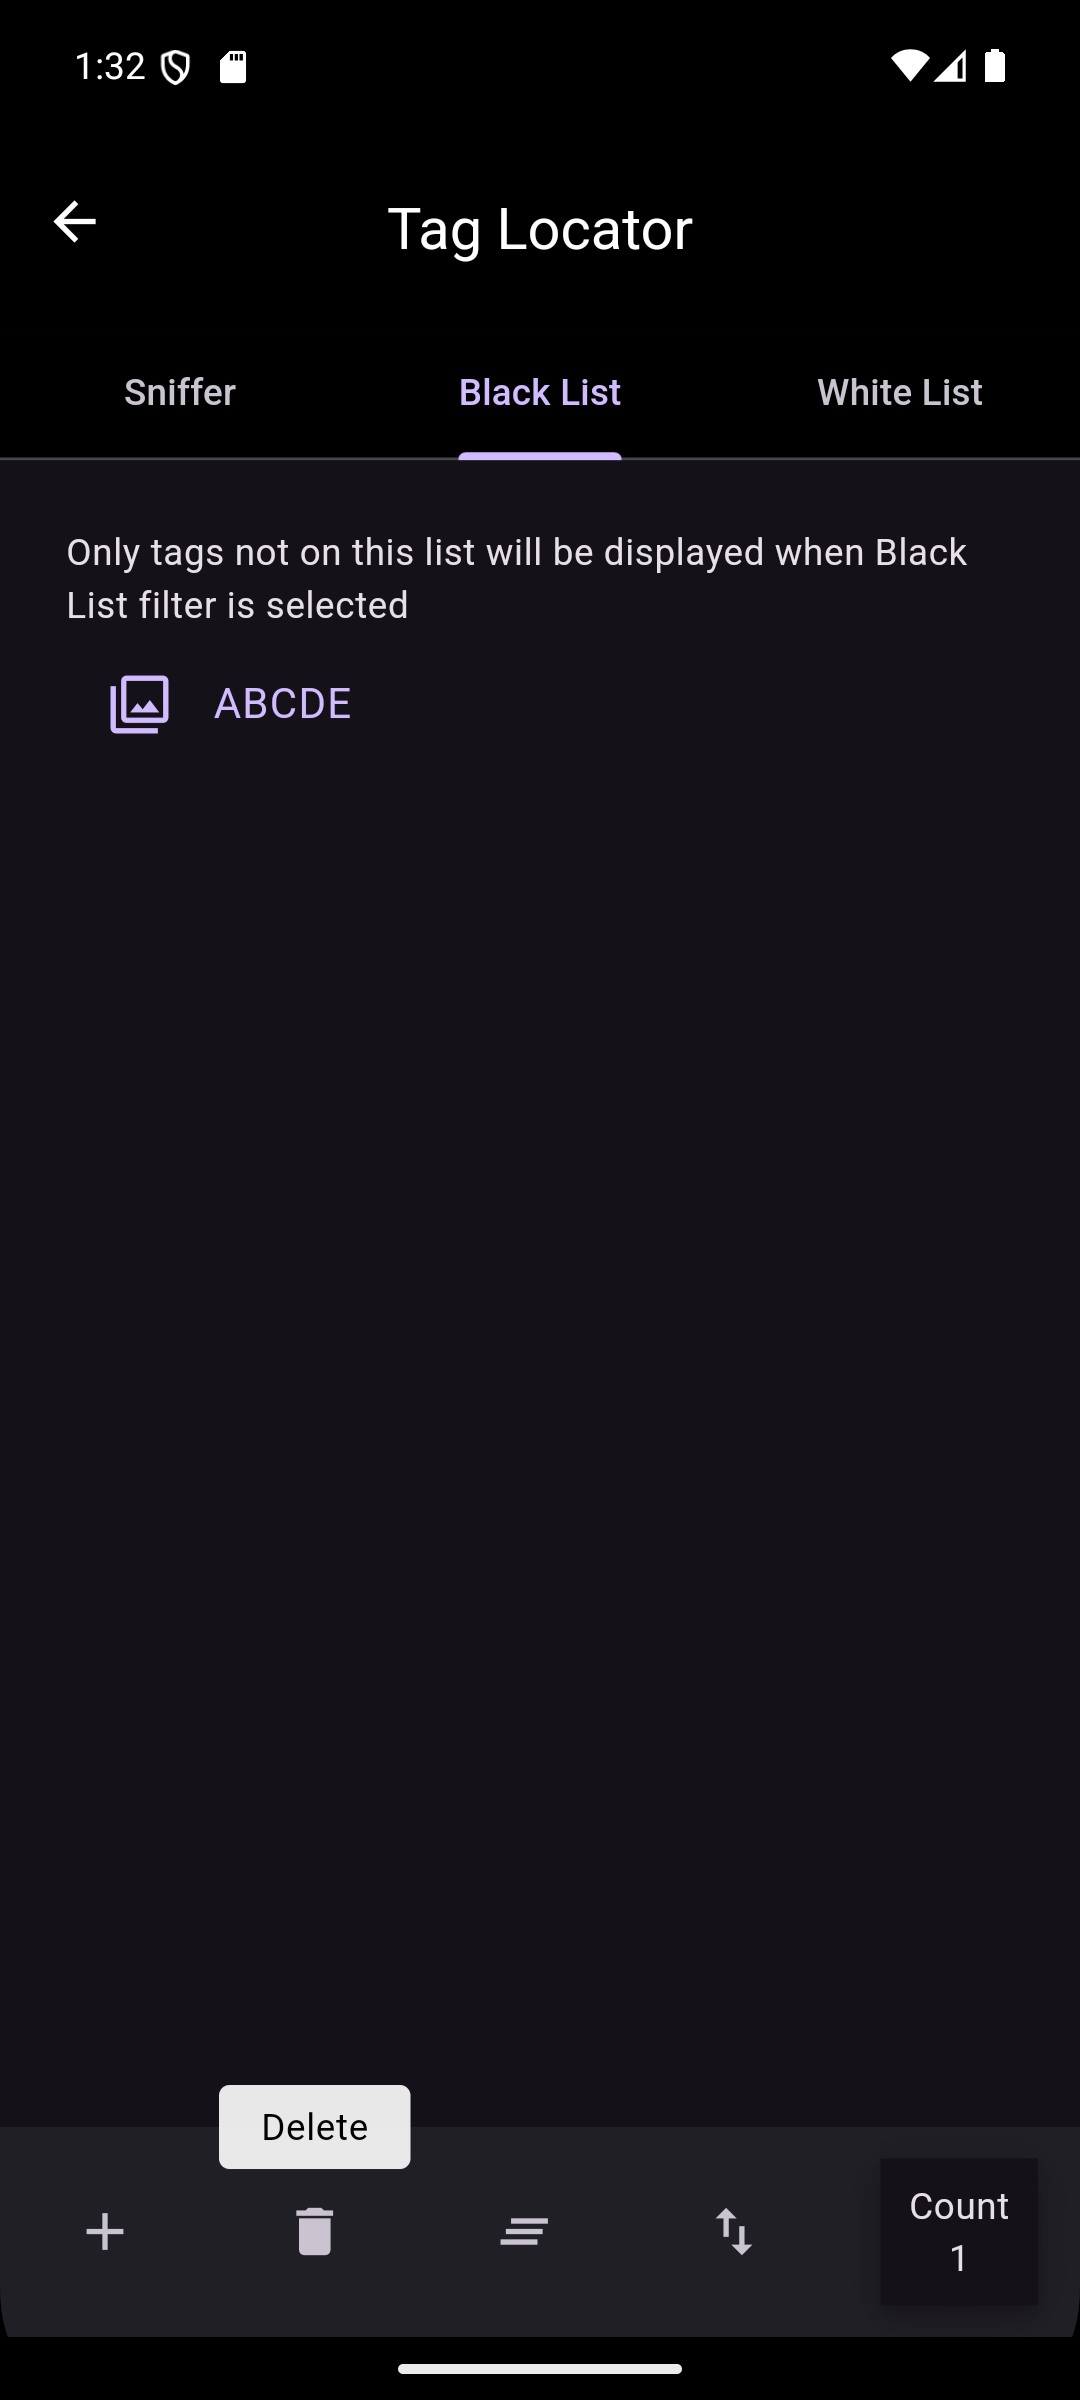
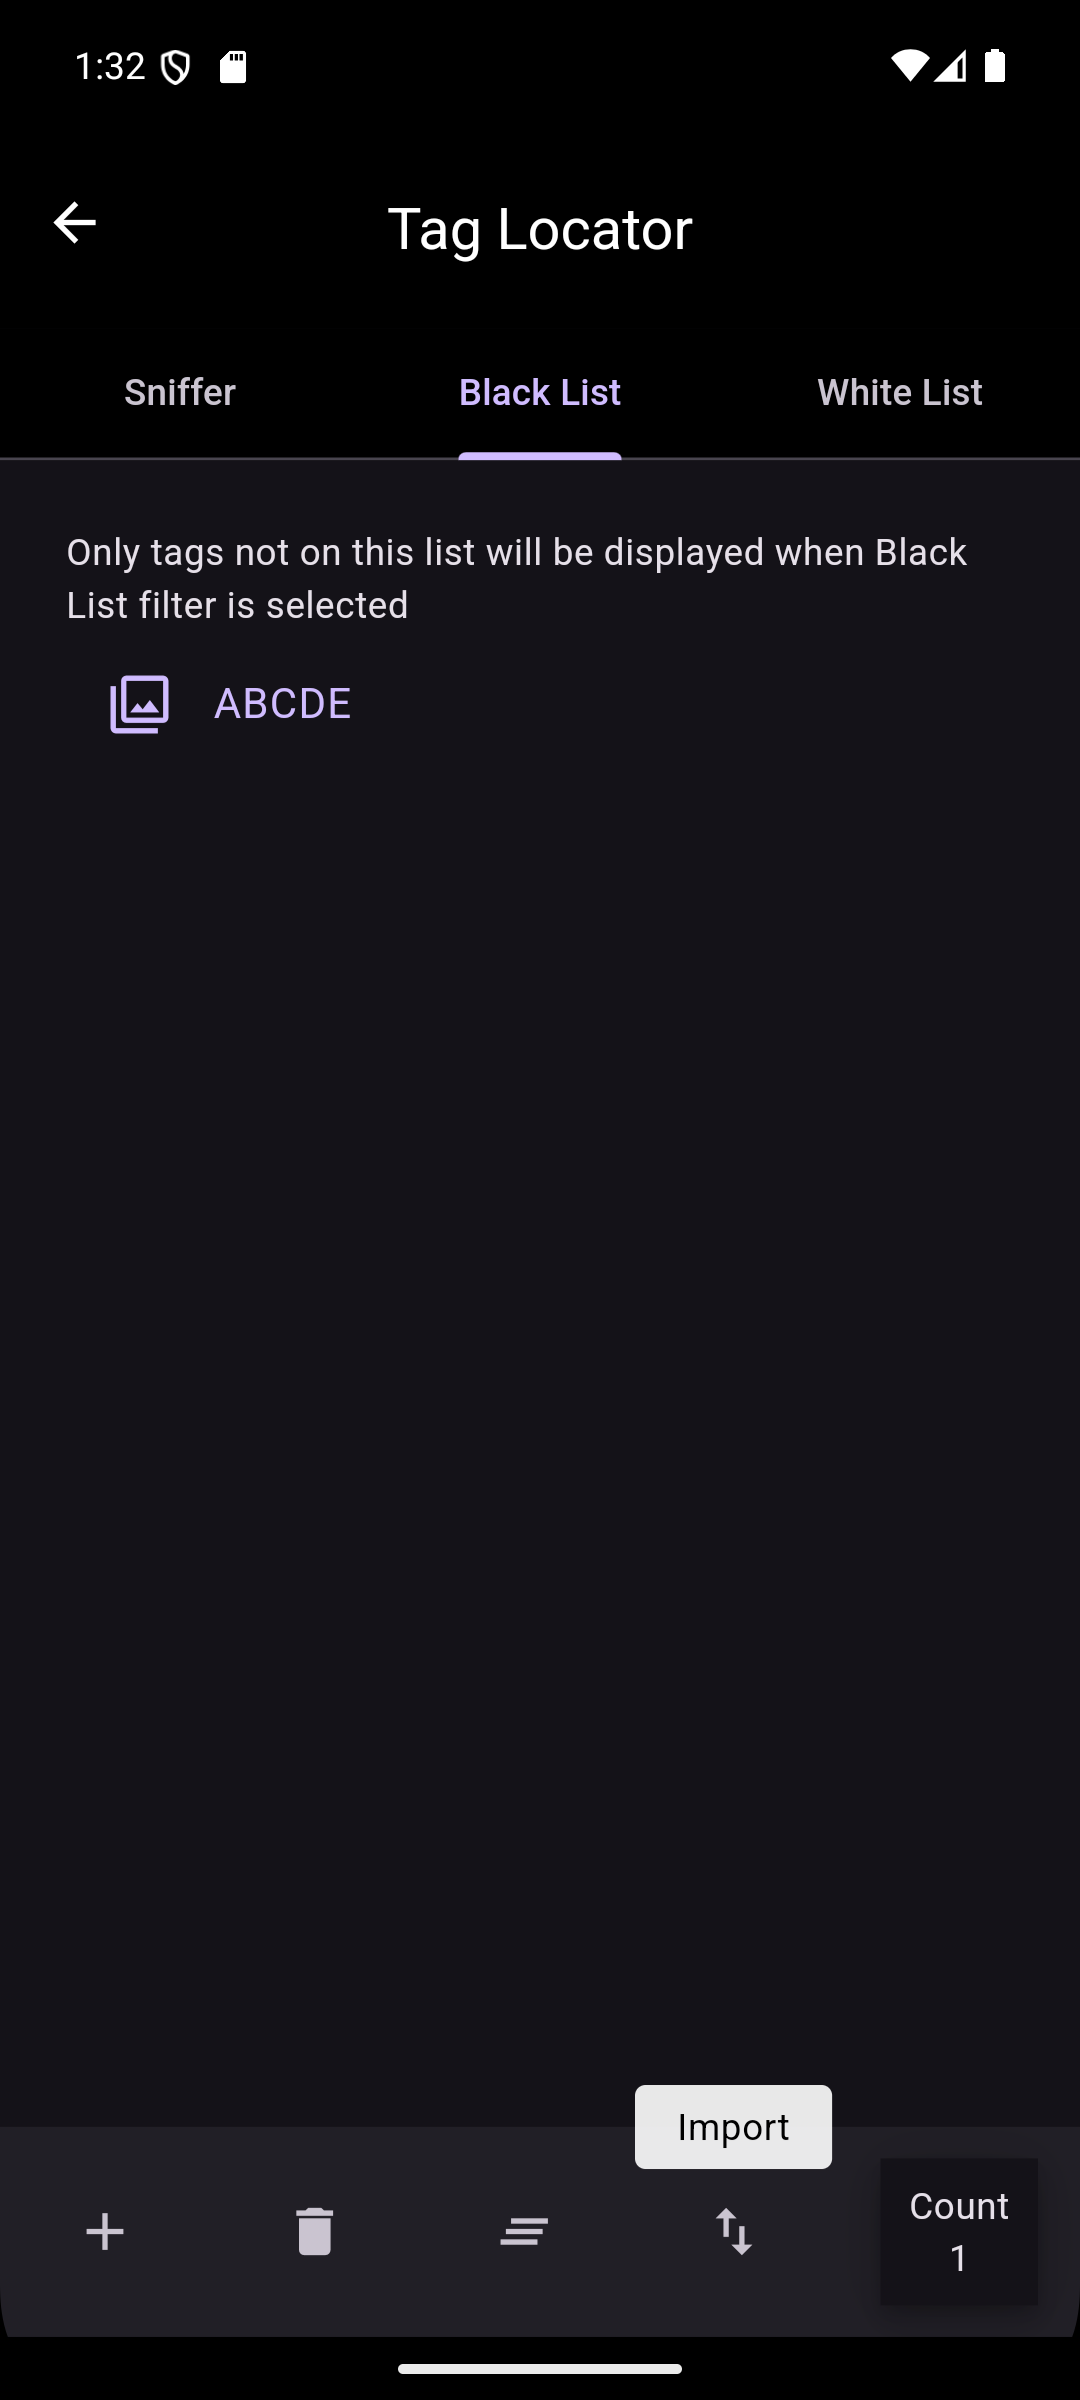
- Black List: Only tags not in this list will be displayed.
- White List: Only tags in this list will be displayed.
The four icons at the bottom of the list tabs provide the ability to manage the list. The first icon adds a single Tag ID to the list. The second icon removes a selected Tag ID from the list. The third icon clears all Tag IDs from the list. The last icon imports a list of Tag IDs from a *.txt file. Selecting the icon brings up a file chooser to select a *.txt file. This will populate the list with Tag IDs from the selected file.
- NOTE: Filters only apply to the display of detected tags. All tag information is detected while the app is running.
Tag Provisioning
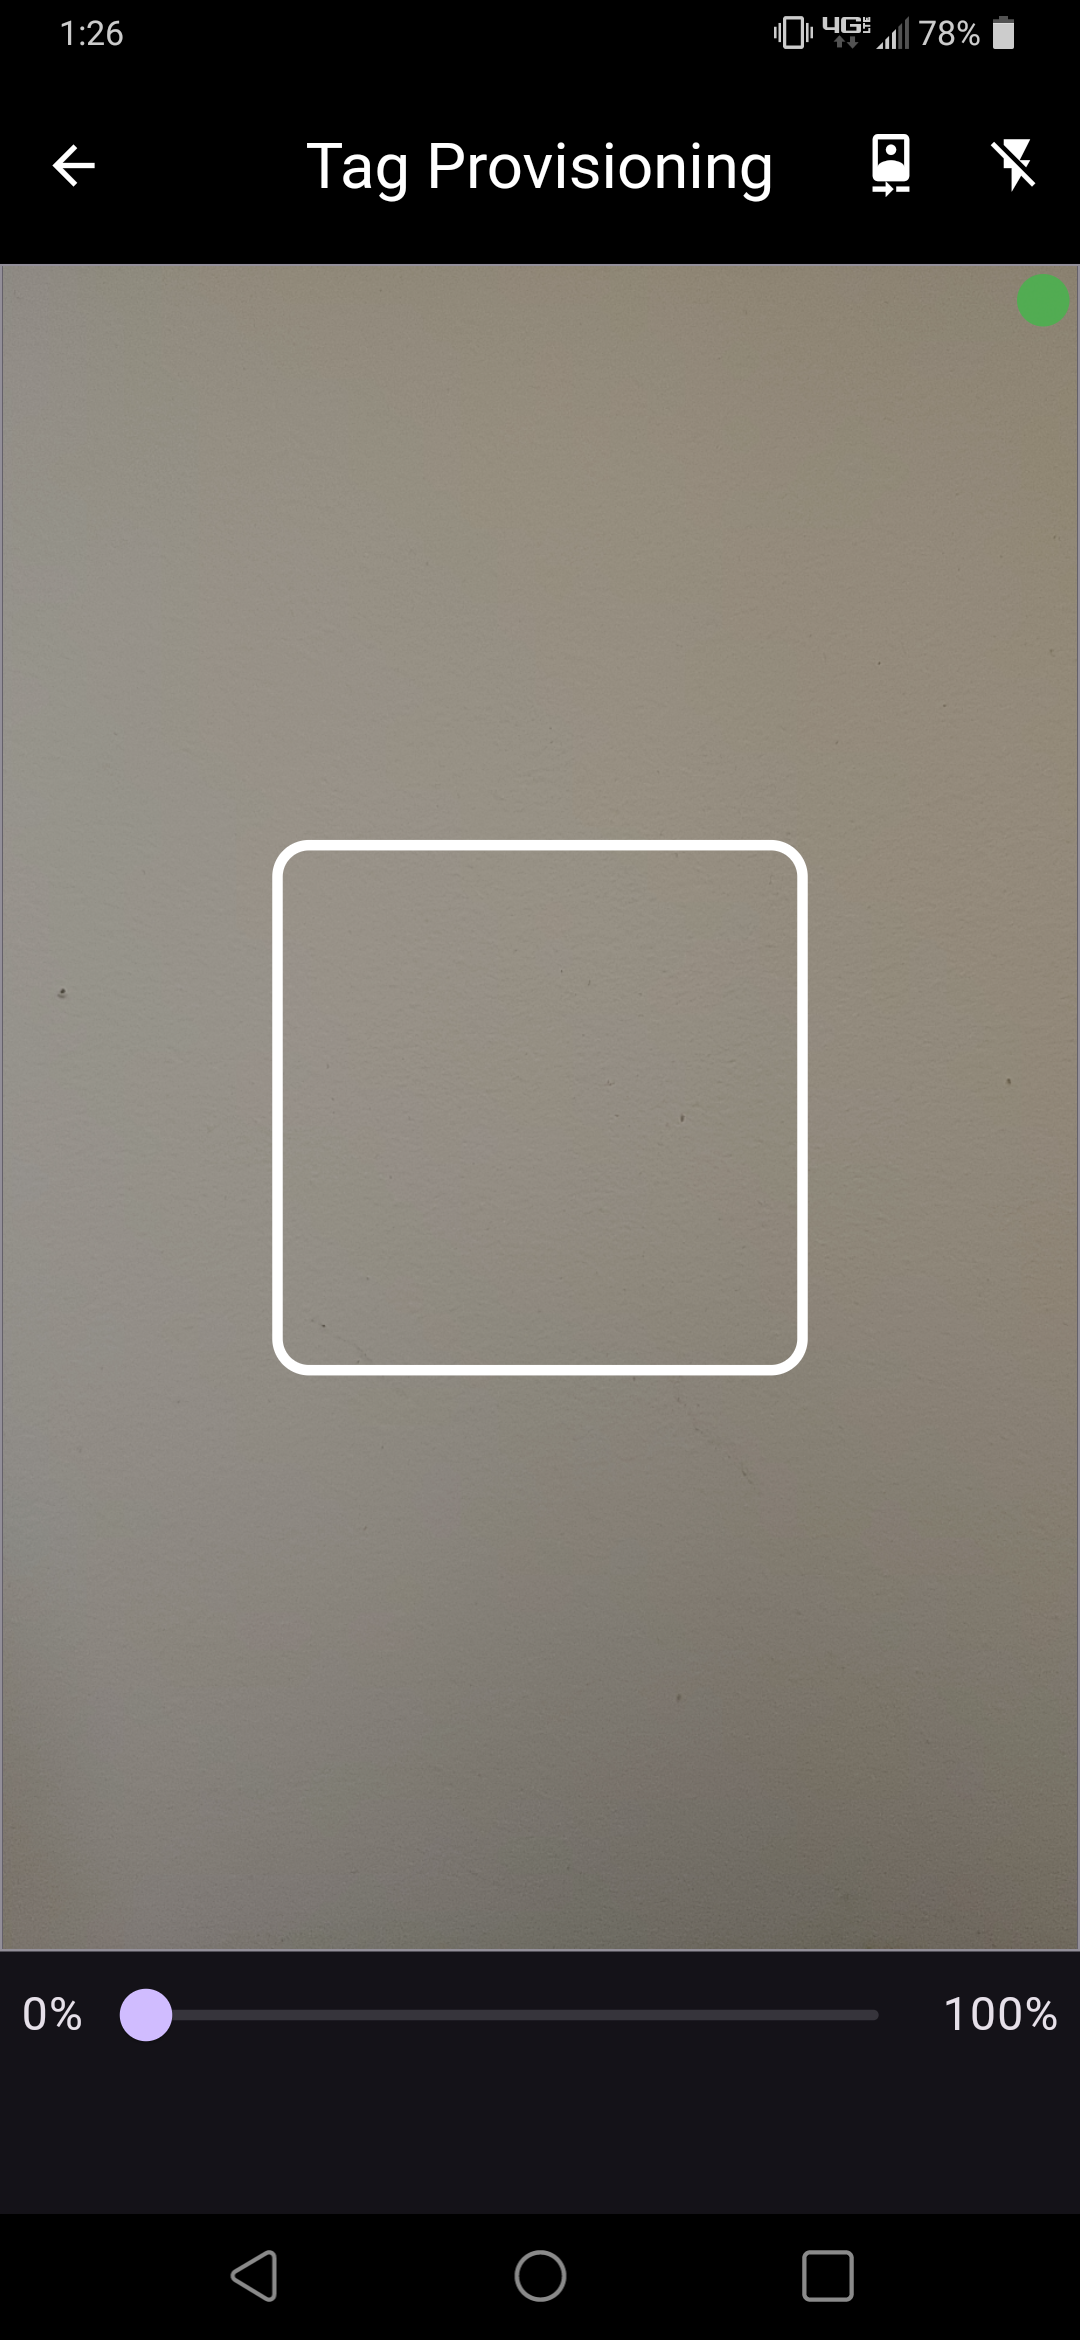
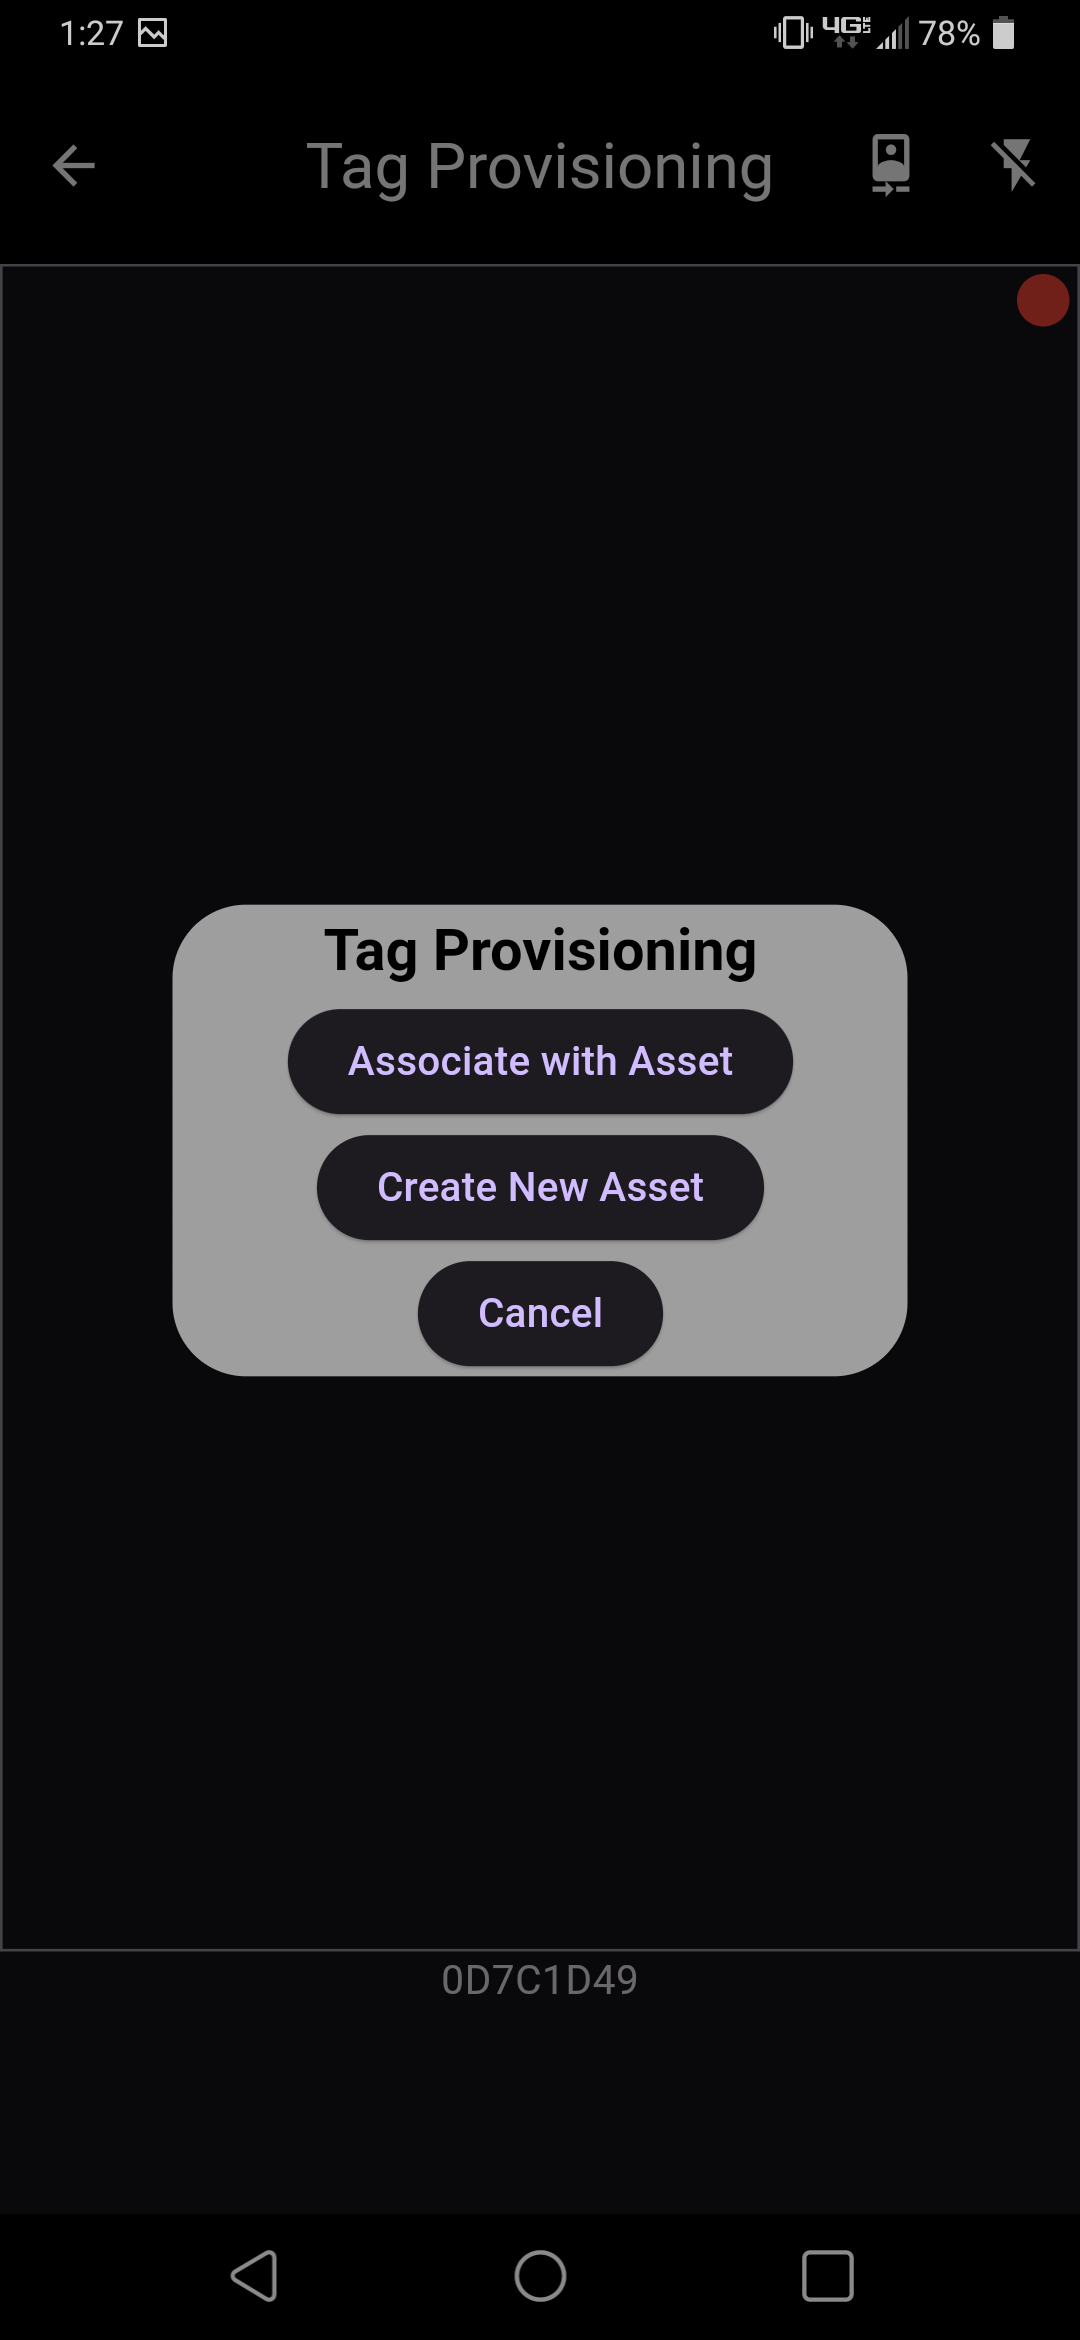
The Tag Provisioning option brings up the mobile device's bar code scanner. A permission dialog is shown the first time Tag Provisioning is used; this needs to be granted to continue. After scanning a tag, the associated asset can be edited. If a tag does not have an associated asset, the tag can be associated with an existing asset, or a new asset can be created.
- NOTE: If an error dialog appears after a scan, attempt the scan again. If the issue persists, contact customer support.